• TalkBass has been independent since 1998. Add your voice.
    Create a free account to reply to discussions, view embedded media, and browse with fewer display ads.
    Join freeLog in
    Want zero display ads or expanded classifieds tools? Compare plans.

CURRENT CATALDO

Dadagoboi

CATALDO BASSES
Commercial User
Jul 1, 2005
4,291
21,932
79
Florida Swamp
cataldobasses.com
Disclosures
CataldoBasses: Designer/Builder ThunderBuckerPickups:Consultant
I received an order for two basses from a customer, a Polaris white JAEbird and an Ebony black REV. These are essentially the same bass, a Thunderbird variant. The REV has a raised center, shaved heel and more contouring than a JAEbird.

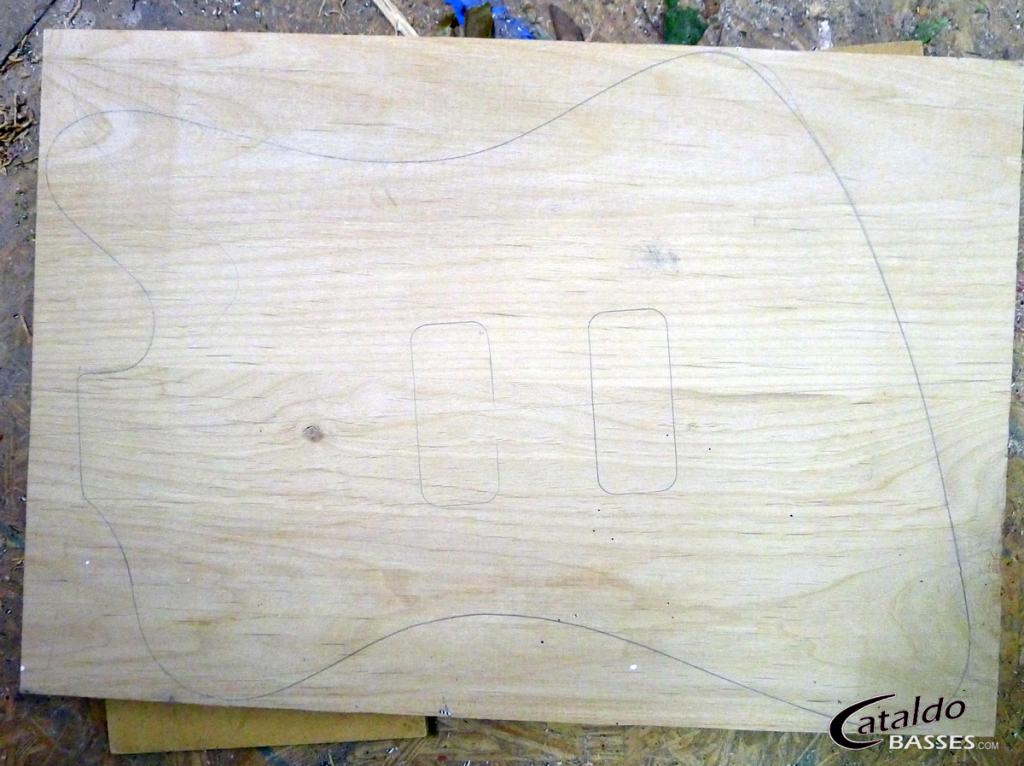
JAEbird blank. This started out as a 1.75" thick 2 piece Allparts Alder body blank. Cataldo basses are maximum 1.5 inches thick. My Belsaw Planer is only 8 inches wide. So I split the blank in half, planed it to 1.5", jointed the edges and glued it up. Knot will be dealt with later. Note that the body template is not on the centerline of the blank. This bass gets painted so it's not important IMO.
1050694_zpsfeab2209.jpg


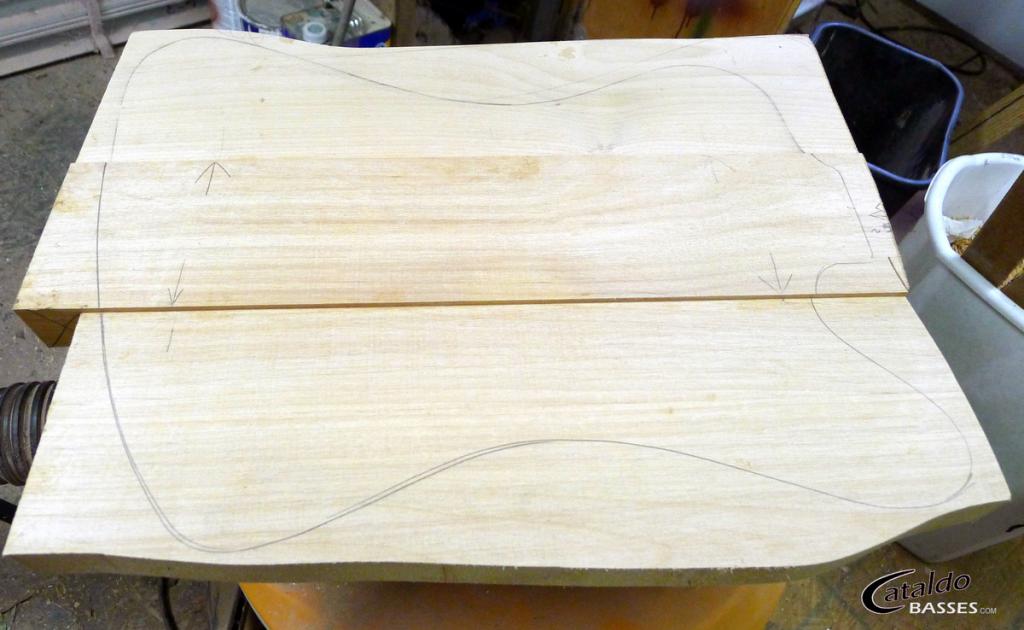
REV blank. Using another 2 piece blank I cut a 4.25" strip off an edge. Then I bandsawed the remaining part to allow the assymetrical wings to be cut without wasting any material.
I planed the center section to 1.5" and the wings to 1.375". Jointed the 3 pieces on a '70s Craftsman 6" jointer and glued up the blank.
1050700_zpsa3b2a84b.jpg


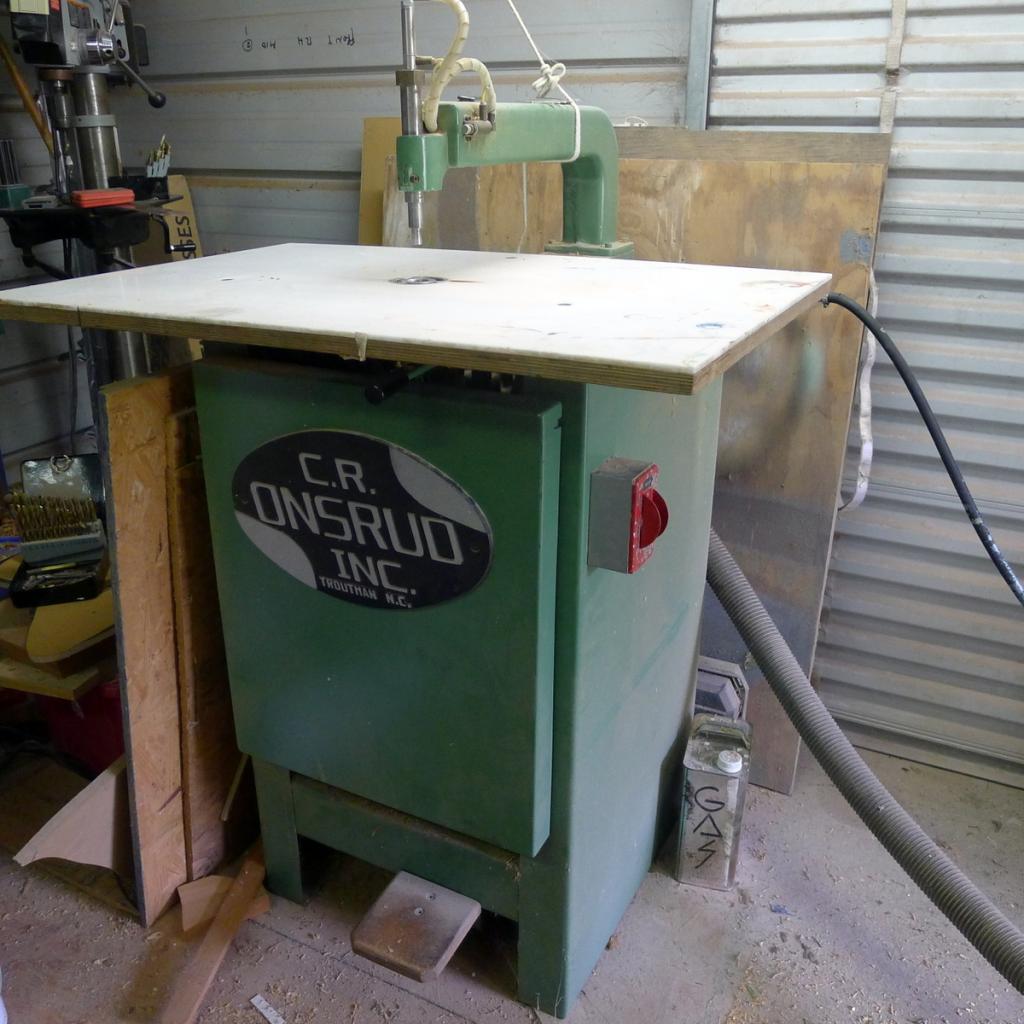
Next will be routing the neck and pickup pockets using this.
Onsrud_zps179c107a.jpg
 
  • Like
Reactions: Rev. Cornelius
The Onsrud inverted pin router has adjustable depth stops. I set the first one at .25" for the pickup cavities. ThunderBucker pickups, like the original Thunderbirds, are .5 inches thick. Pickup rings give a very tight route.
I also use that setting for the initial neck pocket cut which is cut undersize using .1" 'flaps' on masking tape hinges. This prevents the pocket from getting too large due to slop in my old equipment.
1050697_zpsc0812e05.jpg


After going to the final pocket depth with flaps in place, I fold back the flaps and finish off the perimeter of the pocket with the pin putting minimum pressure on the template.
1050698_zpsfd4f8b02.jpg


Neck is an interference fit.
1050699_zpsf868854d.jpg


I use .125" hardboard on each wing of the REV to get a flat surface for the router table. 2 pin nails on each piece are enough to keep it in place.
1050701_zps15d22d3f.jpg


The joint is tight enough to hold the neck in place with the template attached to the blank, about 20 lbs. total.
1050702_zps60e02814.jpg


1050703_zpsa3e0f5bf.jpg
 
Thanks for the encouragement, guys!

Here's my .5" mdf template. I line it up using the pickup routes on the blank and template. One screw into the neck pocket and one in the bridge area. The black areas on the template are from development of another model, the MAX.
1050704_zps219e6dda.jpg


I bandsaw to about .0625" to the edge of the template. 3TPI x .5 " Olson blade on a Delta 14" with cool blocks. Removing as much excess wood as possible will put the minimum strain on the 15 amp router motor and bit.
1050708_zpse478c5ef.jpg


I remove the template and slice off this area at the front of the neck pocket. Otherwise the router bit can make a mess of it.
1050714_zps8d0b592a.jpg


1050715_zps87b1e0fc.jpg


Template back in place, .5" upcut spiral router bit raised to its maximum 1.5" cutting height. I do perimeter shaping in one pass to utilize all of the cutting edge of the bit. Otherwise the top part of the bit will do all the work no matter how may incremental passes you make.
1050709_zps7bd10db9.jpg


90 seconds later...
1050710_zps03c30af1.jpg


1050711_zps0486f1aa.jpg


...take that CNC!
 
  • Like
Reactions: bound'n'blocked
Somebody who has more than a router and a WorkMate in the backyard. ;) Somebody with dust collection and climate control. ;)

Somebody other than me, in other words!

My intent here is not to hyjack this thread, but I just thought it an interesting comment. There are tons of people doing it the way you and I do, but I consider all of the people posting here "real" builders.
Just MHO.
 
  • Like
Reactions: WSquires
Somebody who has more than a router and a WorkMate in the backyard. ;) Somebody with dust collection and climate control. ;)

Somebody other than me, in other words!
I do some of my best work in the backyard...I have a shop vac but no WorkMate. A/C barely works in the house much less the shop in the summer.


My intent here is not to hyjack this thread, but I just thought it an interesting comment. There are tons of people doing it the way you and I do, but I consider all of the people posting here "real" builders.
Just MHO.

I agree, we're all real builders here. As far as 'luthiers' go I don't consider myself one. I buy my necks and I've only built one set neck bass.
 
I do some of my best work in the backyard...I have a shop vac but no WorkMate. A/C barely works in the house much less the shop in the summer.


I agree, we're all real builders here. As far as 'luthiers' go I don't consider myself one. I buy my necks and I've only built one set neck bass.

I don't really consider myself a lutheir either, as I only really build electric basses and guitars. In my mind a luthier is someone who can build or repair anything with strings.
 
This is my four and six bolt neck pocket template I use with Harbor Freight transfer punches.
P1050745_zpsaebfbf91.jpg


During the last month I've been finishing this. Cadillac Green acrylic lacquer.
G8R42_zpsfbf4c3d3.jpg


The customer wanted the headstock plate to match the tort guard. They don't make the stuff that thin. My solution was to photograph the sheet of tort, work it in photoshop and print a laser sticker
HeadstockPlatecopy_zps50804694.jpg


Then I cut an .020 lexan plate and applied the sticker
TortPlate_zpsbbcb2194.jpg


Here 'tis
headstocklogo_zpsf5682f10.jpg