

Project: Tone Dump
LOL...I like that name. I guess this is not much of an instructional, but here goes........
Ok,
heres the deal, I am swapping out my "tone pump" out of my Spector Euro 5-lx for an EMG BQC system.
Tools needed for this include:
1)A soldering iron (25watts or less with a "fine tip" preferably)
2)Electronics-grade solder (60/40, which is 60% tin and 40% lead, I prefer 63/47) If you plan on using "acid core" instead, I'm gonna slap you across the back of your head!
3)A set of jewelers Phillips and flat head screwdrivers
4)Painters tape
5)Newspaper and scissors
6)Small set of needle nose pliers
7)A cordless or corded power drill and a 3/8" drillbit
8)A small crescent wrench, unless you happen to have a socket set or collection of assorted wrenches
9)A steady-ass set of hands
Heres the suspects:
1- Euro 5 lx

1- EMG BQC System

So, it starts.I started by taking the knobs off and unpacking the EMG


Heres the "tone pump" in all it's glory. It's actually a good pre, but got me snagged on no midrange control, no boost/cut (boost only) and I really don't care for double volumes.On a side note, if you do like the double volume, you could order the BQC control instead, it's slightly cheaper than the "System" version, though it's a teeny bit more complicated than just adding the "system".


The battery has to go!!

Removed the Velcro battery holder and foam that it wraps in.

Time to tape her up and covered with newspaper, I suggest you do it too, if you decide to do this.

Time to take the pots loose too.

One more view of it before its removed.






Here it is removed.

This is the EMG blend pot (I prefer blends over double volumes), make sure that you add a little bead of solder (red circles) to the contacts for the pups.

Bridge pup and neck pup soldered in (In Red).

Red wires from the pups connect on this circuit board (In Red). Also the positive lead for the battery wire goes here too.

Gotta prep for making the holes bigger to accept the 2 "stacked pots, it is wise to tape before doing so.

Once done drilling, setting the pots in and securing them,putting the battery strap back in and the battery, this is what I have. Also I had to complete the wiring, by connecting (soldering) the green and black leads on the other circuit board to the input jack.



Finally, I put the supplied knobs on. I don't really care for them, but they function. I plan on getting some gold plated ones soon, since the rest of my hardware is gold.


That's about it folks. Did it leisurely in about an hour (From "prep" start to "in the case" finished), took my time for sure.
LOL...I like that name. I guess this is not much of an instructional, but here goes........
Ok,
heres the deal, I am swapping out my "tone pump" out of my Spector Euro 5-lx for an EMG BQC system.
Tools needed for this include:
1)A soldering iron (25watts or less with a "fine tip" preferably)
2)Electronics-grade solder (60/40, which is 60% tin and 40% lead, I prefer 63/47) If you plan on using "acid core" instead, I'm gonna slap you across the back of your head!
3)A set of jewelers Phillips and flat head screwdrivers
4)Painters tape
5)Newspaper and scissors
6)Small set of needle nose pliers
7)A cordless or corded power drill and a 3/8" drillbit
8)A small crescent wrench, unless you happen to have a socket set or collection of assorted wrenches
9)A steady-ass set of hands
Heres the suspects:
1- Euro 5 lx
1- EMG BQC System
So, it starts.I started by taking the knobs off and unpacking the EMG
Heres the "tone pump" in all it's glory. It's actually a good pre, but got me snagged on no midrange control, no boost/cut (boost only) and I really don't care for double volumes.On a side note, if you do like the double volume, you could order the BQC control instead, it's slightly cheaper than the "System" version, though it's a teeny bit more complicated than just adding the "system".
The battery has to go!!
Removed the Velcro battery holder and foam that it wraps in.
Time to tape her up and covered with newspaper, I suggest you do it too, if you decide to do this.
Time to take the pots loose too.
One more view of it before its removed.
Here it is removed.
This is the EMG blend pot (I prefer blends over double volumes), make sure that you add a little bead of solder (red circles) to the contacts for the pups.
Bridge pup and neck pup soldered in (In Red).
Red wires from the pups connect on this circuit board (In Red). Also the positive lead for the battery wire goes here too.
Gotta prep for making the holes bigger to accept the 2 "stacked pots, it is wise to tape before doing so.
Once done drilling, setting the pots in and securing them,putting the battery strap back in and the battery, this is what I have. Also I had to complete the wiring, by connecting (soldering) the green and black leads on the other circuit board to the input jack.
Finally, I put the supplied knobs on. I don't really care for them, but they function. I plan on getting some gold plated ones soon, since the rest of my hardware is gold.
That's about it folks. Did it leisurely in about an hour (From "prep" start to "in the case" finished), took my time for sure.








 Can anyone pass along the correct size (English or Metric) so I can swap them out?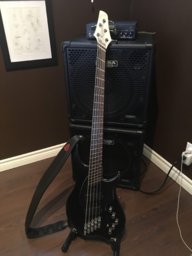
 .
.


