• TalkBass has been independent since 1998. Add your voice.
    Create a free account to reply to discussions, view embedded media, and browse with fewer display ads.
    Join freeLog in
    Want zero display ads or expanded classifieds tools? Compare plans.

Jazz bass building from parts - A Chronicle

First off, a few of things to set the stage.

As an arthritis sufferer I'm always on the lookout for a light weight bass. And I always loved the sound and playing a Jazz bass but all I could afford were too heavy. I want to try my hand at fretless.

So I've been looking around at various things, watching the classifieds, and usually my first question to a seller is how much does it weigh! :)

All the J basses I've ended up with were too heavy for me. (more on that later)
So I decided to assemble one from parts myself.

There in began my quest. It began when I found a good J Bass fretless neck that needed a little work for sale.

My initial work on the neck is listed here, but I'll recap just a bit.


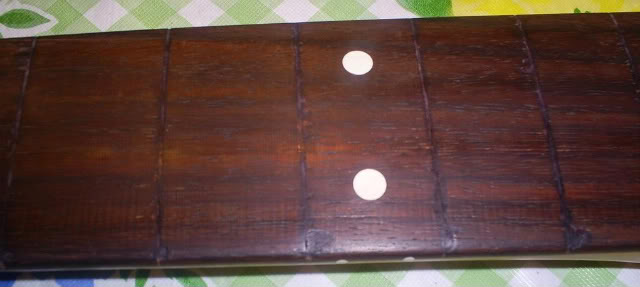
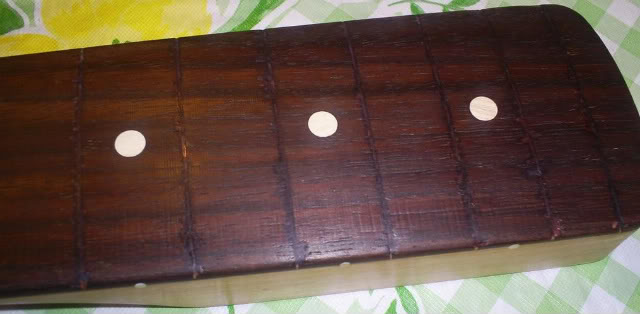
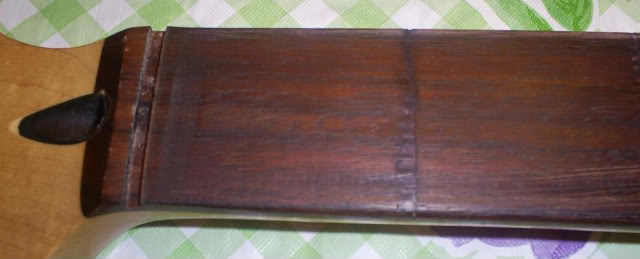
I buy the neck and here is the way it looked when I got it from the seller.
SFret1.jpg

SFret12.jpg

SUpperFrets.jpg
 
A close examination showed that the fingerboard wasn't quite level, with the area near the nut being thicker than the rest of the board. It looked like the person doing the defret didn't remove the nut before sanding. Also the fret tangs had removed quite a few chips, and some breakout areas, with the area near the heel of the neck being the most affected. I planned on re-radiusing it so I took some 120 grit sandpaper to get the dye off the neck and attempt to judge the fret slots and chips.

Most of the chips have been filled with wood filler and the filler had shrunk, leaving the chips with some indentations, AND after the dye was removed, a lot of big white spots!

1st things first, after removing the nut, (which I broke!) I took a 10" radius block with some 80 grit sandpaper and began my re-radiusing and leveling, carefully collecting the rosewood dust coming from it.
I wanted lines, but not the big white flags 'flying' off the lines where the chips were. So after I had the neck radius where I wanted it, I took an Xacto and carefully picked out the excess wood filler, leaving me with some chip depressions.

Next I took the rosewood sanding dust, mixed it with wood glue and carefully packed my homemade rosewood putty into the chips and breakouts on the fingerboard. Allowing it to dry then sanding it. It took several go 'rounds for this to be acceptable, not perfect, but very acceptable.

Now, switching to a variety of grits I've sanded using the block through 80, 120, 220, 400, and 600 grits, finally using some steel wool to buff it down even more.

Here's the After shots. As you can see, not perfect, but not bad.

1-3after.jpg

9-12After.jpg

UpperAfter.jpg
 
After I had the neck in that condition I bought a Squier Jazz and put this neck on it. But the bass came in well over 9 lbs. This was too heavy for me to play for any length of time. Not overly heavy but for my back I need lighter. This prompted me to start to look for lighter bodies. I was looking for a complete setup so I could just bolt up and play, but seemed like every time I found one I was too late to buy it!

I eventual found a raw body that the seller listed at 4.5 lbs. I thought that would result in a decent weight so I bought it. Planning on building my own collecting the parts etc as I went along.

BeforeRawBody.jpg


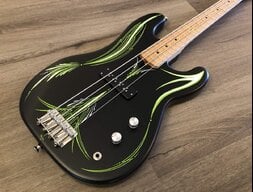
I had seen several pictures of of some nice natural basses so I started looking around to see how I wanted to finish it. I saw a very nice bass in Baird6869's avatar and liked the look, and after looking at others like that I decided that's what I wanted.
 
Having decided I wanted to go with a natural/black combination I started gathering my parts.

I wanted an all black fretboard, but I didn't think that replacing the fingerboard with ebony was up to my skill level, but looking back I think it would have been a good way to go, and I think I could have done it! (hindsight)

So what I decided to do... was "ebonize" my rosewood one, Also I didn't like the dot markers, both Inlay nor fretboard edge.

I started by drilling out the inlays and markers and filling them with the rosewood dust/glue combination.

DotsRemoved12th.jpg

DotsRemoved1stFret.jpg

Dotsremoved.jpg


Then taking the leather dye and "ebonizing" it.
Ebonized.jpg

Ebonized1.jpg
 
Knowing that this ebonized finish wouldn't last I picked up some superglue and following the instructions in the Erlewine article SuperGlue Savior I gave it a more durable finish.

Superglue1.jpg

Superglue2.jpg

Superglue3.jpg


Thing is, when the article says THIN layer it meant it!!! I put mine on pretty thick! So I lost the ability to see the lines. I thought I'd be able to still detect them. I was wrong! So NOW what.

Well I decided to put position markers in. I dl'd WFret and printed out a template. Drilled the marker holes and glued them in place. Drilling would have been much better if I had a drill press available, still, free hand didn't turn out too bad. I had to go into the maple, as there was so little rosewood left.

Position1.jpg

Position2.jpg

Position3.jpg
 
Searching around I found a stain I thought would look good. Minwax's Antique Maple gel stain. Lot's of sanding and a couple of tries I got it looking pretty good.

The Album is here if you want to see them, Lot's of pics but I'll only post a couple.
http://s317.photobucket.com/albums/mm396/heday60/Body/

Stained.jpg


Spayed on a good lacquer coating and working it to a nice buffed out finish results in this...
Lacquered1.jpg
LacqueredBack.jpg


Top is Maple, back is Poplar.
 
Here's a couple of mock up shots of what the bass will be like when it's finished.
Mockedup.gif

Mockedup1.gif


I've started the Shielding and wiring in the PU's and Pots, and when that is finished I should be very close to complete.

Patience is a virtue at this point, cause I want to rush it!
 
Knowing that this ebonized finish wouldn't last I picked up some superglue and following the instructions in the Erlewine article SuperGlue Savior I gave it a more durable finish.

Superglue1.jpg

Superglue2.jpg

Superglue3.jpg


Thing is, when the article says THIN layer it meant it!!! I put mine on pretty thick! So I lost the ability to see the lines. I thought I'd be able to still detect them. I was wrong! So NOW what.

Well I decided to put position markers in. I dl'd WFret and printed out a template. Drilled the marker holes and glued them in place. Drilling would have been much better if I had a drill press available, still, free hand didn't turn out too bad. I had to go into the maple, as there was so little rosewood left.

Position1.jpg

Position2.jpg

Position3.jpg

on a repair i used a thick layer of super glue and after buffing it with some mequires cleaner wax, it was transparent and glossy just like the poly in its surrounding areas.
 
Buffed the superglue some more, still can't see the lines, but the FB looks like glass now! :)

Started putting in the electronics and preparing to install the PU's and realized I don't have any PU screws! DOH!

Got the pots and jack soldered though.
 
Here's a couple of mock up shots of what the bass will be like when it's finished.
Mockedup.gif

Mockedup1.gif


I've started the Shielding and wiring in the PU's and Pots, and when that is finished I should be very close to complete.

Patience is a virtue at this point, cause I want to rush it!

Your bridge is on backwards.
 
Now that's beginning to look like a nice bass - a far cry from what you started with. Too bad the pickup routing is a little longer than the pickups. If you don't intend to add a pickguard, you might want to paint the inside of the routing black - it won't be so noticable.
 
Now that's beginning to look like a nice bass - a far cry from what you started with. Too bad the pickup routing is a little longer than the pickups. If you don't intend to add a pickguard, you might want to paint the inside of the routing black - it won't be so noticable.

and if you do get a pickguard, drill out a few holes to reduce the wieght, that will be hidden under the pick guard.
 
The pickup routing is a bit longer, but I stained the inside with ebony stain, it's really not too noticable now, my plan is to not put a pickguard on it, and for now I'm sticking with that idea.

Weight wise it's coming in around the same as my 5 string which tips the scale around 7.5 lbs. so not too bad. As finances improve I will likely replace the chrome Fender tuners with some Ultralights in black to further reduce the weight and add to the black and maple motif. Currently the only chrome is the tuners and straplock buttons.
 
I can't see the lines at all. Which wasn't my goal, but it is how it ended up.

I think the issue was in the way I did it. I 'ebonized' the lines pretty dark, going over them a few times. It's one of my personality "traits". Laying in a coat of color trying to make it 'even' so I didn't want the lines to be lighter than the rest of the board, cause I thought it would be too obvious. What I wanted was a subtle line, and before I added the super glue it was very subtle.

But adding the glue and putting it on thick like I did, then leveling it off and not buffing it clear before the next coat probably lead to it being so hard to see the lines. It was so well hidden that when I started to put the dots on the side I had to use wFret and print out a template to know where to drill the holes cause I can't see the lines.

I think it's more an issue with my technique and personality tendencies than anything else!
 
Finished.

Complete10.jpg

Complete2.jpg
Complete3.jpg

Complete9.jpg


I'm letting the neck settle in under tension for a few days then I'll do a setup. The rough go at it seems like it plays pretty good. Weight came in around 7.5 lbs about the same as my 5 string.

The pickup routes were a bit larger than my Pu's and you can see some of the copper shielding around them, but it's WORTH it. No hum what so ever.

Parts list..... all the big items purchased from forumites here at TB
DeFretted and superglued MIM Jazz neck, Tusq nut.
Mose Sparrow body, stained with Minwax Antique Maple Stain, and sealed with Rattle Can Lacquer spray.
Seymour Duncan AJJ-2 Basslines
knockoff Hipshot bridge (on further review... More like an ABM)
Fender Stainless ML Flats

Was it work, Yes,
Was it worth it, OH YES! :)