DIY Radiused Sanding Block
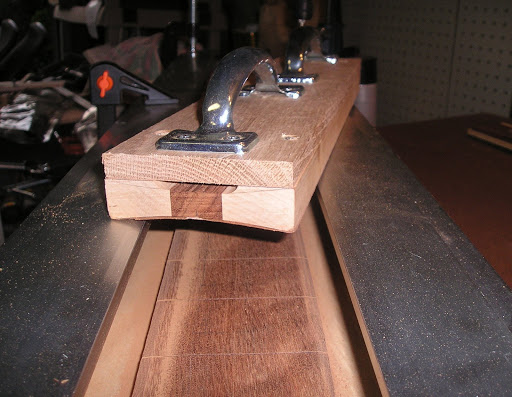
3 5/8" x 15" x 3/4" block w/ 9.5" radius
Recipe:
Take 1 appropriately sized, squared block of wood. Mine came from a scrap of a neck blank after profiling 3 5/8" w by 15" long by 3/4" thick.
Square it, plane it, and mark it with an arc on one end.
Set your router table fence and center on the center line of the block.
I used a 1/16" square bit and gradually routed a channel down the dead center up to the peak of the arc.
Turn the blank around and do it again from the other end.
The first time that is irrelevant, but in subsequent runs that's what give you a symmetrical arc.
Nudge the fence in slightly (about 1/2 a bit width) * - drop the bit a bit to match the arc and run it through up to the arc both directions.
As you nudge and drop, the arc gets carved.
* Thanks to beej for pointing out that I omitted some critical stuff...
Once you rout the center channel, dropping the bit to follow the curve while nudging the fence in small increments to carve shave the channel outward lets you rough out an arc.
Lather, rinse, repeat.
Clean up the stair stepping with a curved scraper. It goes pretty quickly too.
It goes faster than it sounds but taking your time is a good thing and remember, the smaller the increment, the smaller the stair-stepping.
I use 3M spray adhesive to stick on sandpaper. Works like a charm!
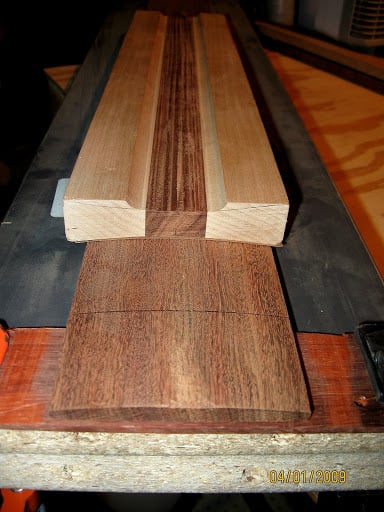

3 5/8" x 15" x 3/4" block w/ 9.5" radius
Recipe:
Take 1 appropriately sized, squared block of wood. Mine came from a scrap of a neck blank after profiling 3 5/8" w by 15" long by 3/4" thick.
Square it, plane it, and mark it with an arc on one end.
Set your router table fence and center on the center line of the block.
I used a 1/16" square bit and gradually routed a channel down the dead center up to the peak of the arc.
Turn the blank around and do it again from the other end.
The first time that is irrelevant, but in subsequent runs that's what give you a symmetrical arc.
Nudge the fence in slightly (about 1/2 a bit width) * - drop the bit a bit to match the arc and run it through up to the arc both directions.
As you nudge and drop, the arc gets carved.
* Thanks to beej for pointing out that I omitted some critical stuff...
Once you rout the center channel, dropping the bit to follow the curve while nudging the fence in small increments to carve shave the channel outward lets you rough out an arc.
Lather, rinse, repeat.
Clean up the stair stepping with a curved scraper. It goes pretty quickly too.
It goes faster than it sounds but taking your time is a good thing and remember, the smaller the increment, the smaller the stair-stepping.
I use 3M spray adhesive to stick on sandpaper. Works like a charm!


 , 1/16" bits break SUPER easy, so wear eye protection, use of softer woods would be advised, and taking your time, also...