• TalkBass has been independent since 1998. Add your voice.
    Create a free account to reply to discussions, view embedded media, and browse with fewer display ads.
    Join freeLog in
    Want zero display ads or expanded classifieds tools? Compare plans.

Custom 5-String for Steve

May 10, 2005
1,427
6
NH
www.thorbass.com
Disclosures
Builder: ThorBass
Ok guys. I haven't done a build thread before so I guess I'm due, right?

This is a bass I'm building for someone who found me due to someone posting a link to me on his forum. Isn't the internet wonderful? Anyways, after some discussion we came up with this basic plan for the bass. My customer's tone requirements go kind of like this: smooth bottom not dominating, strong punchy mids, very crisp well defined highs. And visually, he doesn't like fancy, in-your-face, figured wood. Just something with a nice grain, with wide grain pattern.

So without going into all the details of the decision making process, here's my design to accomplish this:

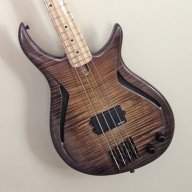
General: 5-string neck-thru EADGC
Neck: Maple and Ebony
Body: Alder core with Swamp Ash front and back
Pickups: Norstrand dual coil - parallel
Preamp: Bartolini - vol/pan/treb/mid/bass
Hardware: All black Hipshot w/drop D
Finish: KTM-9 with trans dye (color TBD)

Pics, on the way...
 
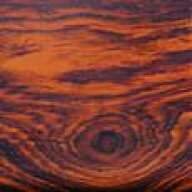
With my stencil templates Steve choose this for the front:

Link Removed

This is a fretless, and we are going with Macassar Ebony for the fingerboard. Steve liked the 3rd plank of these, sort of stripy but mostly dark wood.

Link Removed

After resawing and cutting the body parts out we have these actual choices:

Link Removed

Link Removed

Waiting for a decision on that but I'm going ahead and building up both bodies for now.
 
Thanks for the positive comments.

Here's some pics of the neck blank assembly. I don't seem to have any pics of the individual pieces. But they are all planed and sanded then the neck built up in my neck clamp. Maple, Macassar Ebony, and a Purpleheart veneer in the middle. The big piece of Purpleheart is part of my clamp. The other side of the clamp is 1/2 inch steel plate.

Link Removed

Link Removed

Link Removed
 
Very nice looking so far. I do have a question though. Why did you use so many clamps at the ends and not in the middle, or is it an optical illusion? I've never built my own bass bedore, but seeing these I've got the itch to, again.

Pete
 
Hey Alex, your bass is pretty much complete - in my head. Just need to get it on paper for you. I'm trying...

Very nice looking so far. I do have a question though. Why did you use so many clamps at the ends and not in the middle, or is it an optical illusion? I've never built my own bass bedore, but seeing these I've got the itch to, again.

Pete

Actually you can't really see some of the clamps along the bottom. They're pretty evenly spaced.

I glued the body wings in two stages. First lay down the veneer, apply glue to the body and set the body on the veneer. Then veneer on top of the body and clamp it down under my cauls and a board to distribute the pressure.

Link Removed

Link Removed

Stage 2: After that's set I glue on the front and back panels with my cauls on both sides.

Link Removed

Link Removed
 
Once again, you are one if not THE best builder on these forums. I love your work, but you really should come up with another body design at some point.

lowsound

Thanks LS, you may be my #1 fan :)

So here's how the bodies are coming...

Out of the clamps and after some work on the belt/spindle sander:
Link Removed

Link Removed

Link Removed
 
I like to double check the template with the actual body that's going on the neck. That way if there's any difference in body thickness I'll know now before I cut out the neck on the bandsaw. Marking out the neck angle and headstock tilt along with setting the position of the nut, fingerboard, and bridge. That all determines where to route for the trussrod.

Link Removed

Link Removed

Link Removed

So on to the mill to do the trussrod slot...

Link Removed