
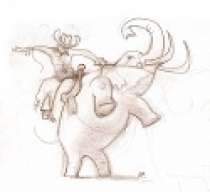
After lurking for 8 months, planning for 4 months, I finally have my plans, the wood, and I have begun! I tried to come up with a design that incorporates my favorite things and my favorite builders. In the end it may not be the most original design, but it's mine, and I like it. Since it's my first build I chose not to do a fancy top and to keep it basic.
Specs are:
5 string 37 to 34 scale
5 piece neck - Flame Maple / Walnut / Flame Maple / Walnut / Flame Maple
Finger Board - Birdseye Maple
Body Wings - Walnut
I got the wood from Larry at Gallery Hardwoods..........There's a pretty cool "from order to shipment" thread about preparing the wood Link Removed
I have Bart Soapbars and a Bart NTBT 2band. Not sure exactly how I'll wire it yet (I actually have no clue how to, so I need to keep reading )
)
I printed out the drawing I did in Corel Draw to scale and taped it together, I'll use this to make a template on MDF or 1/4" plywood. I have since changed things a bit to bring that B string bridge up a little.
Link Removed
Link Removed
Here's the body wings, end pieces for the headstock (since it's wider), Cap for the headstock, wood for the control cavity, and the birdseye board (man is it nice up close, can't wait to see it pop when it gets finished)
Link Removed
I also glued the neck up last night (The flame is nice dont you think?)............I added more clamps after the photos.....every one is right, you can't have to many....from what I've read having the excess glue is good, means I covered it all! I'll be sanding of excess glue tonight!..........This weekend may be the scarf joint!
Link Removed
Link Removed
I'll try and keep a good progress report as I fumble my way through this build. I figure if it ends up playable I'll be pretty happy!
Specs are:
5 string 37 to 34 scale
5 piece neck - Flame Maple / Walnut / Flame Maple / Walnut / Flame Maple
Finger Board - Birdseye Maple
Body Wings - Walnut
I got the wood from Larry at Gallery Hardwoods..........There's a pretty cool "from order to shipment" thread about preparing the wood Link Removed
I have Bart Soapbars and a Bart NTBT 2band. Not sure exactly how I'll wire it yet (I actually have no clue how to, so I need to keep reading
)I printed out the drawing I did in Corel Draw to scale and taped it together, I'll use this to make a template on MDF or 1/4" plywood. I have since changed things a bit to bring that B string bridge up a little.
Link Removed
Link Removed
Here's the body wings, end pieces for the headstock (since it's wider), Cap for the headstock, wood for the control cavity, and the birdseye board (man is it nice up close, can't wait to see it pop when it gets finished)
Link Removed
I also glued the neck up last night (The flame is nice dont you think?)............I added more clamps after the photos.....every one is right, you can't have to many....from what I've read having the excess glue is good, means I covered it all! I'll be sanding of excess glue tonight!..........This weekend may be the scarf joint!
Link Removed
Link Removed
I'll try and keep a good progress report as I fumble my way through this build. I figure if it ends up playable I'll be pretty happy!

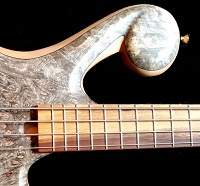



 mojo, me thinks.


