• TalkBass has been independent since 1998. Add your voice.
    Create a free account to reply to discussions, view embedded media, and browse with fewer display ads.
    Join freeLog in
    Want zero display ads or expanded classifieds tools? Compare plans.

My Fanned Fret Slotting Jig

Mar 25, 2005
1,172
10
Brisbane, Australia
www.maillouxbasses.com
Disclosures
Builder: Mailloux Basses
I recently got a comission for a fanned fret 6'er. I figured I'd build a jig or template to help the fret slotting part and keep it for future use.

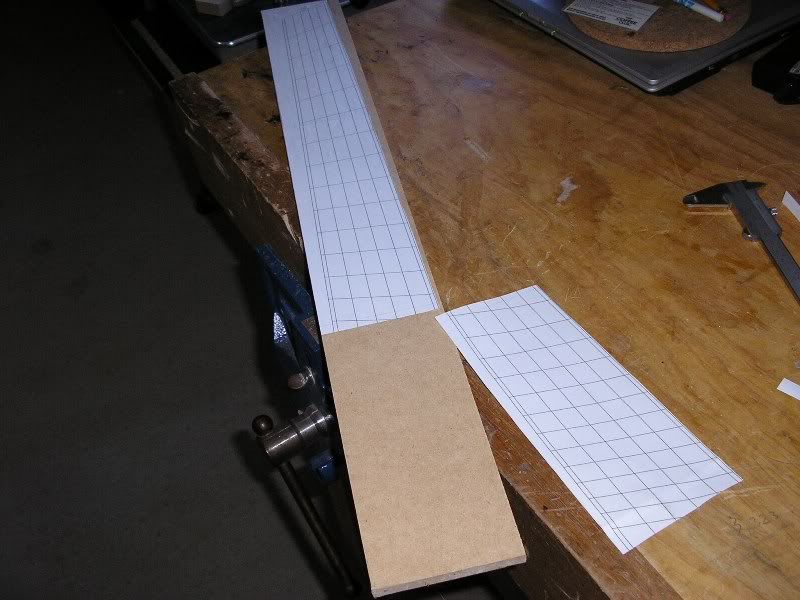
I used fretfind to draw up the fan fret spacing and printed it out as a mirror-image (i.e. lefty)
005011.jpg


I glued that to a blank sized piece of MDF and used an adjustable square to help guide the saw as I was slotting it by hand

005013.jpg


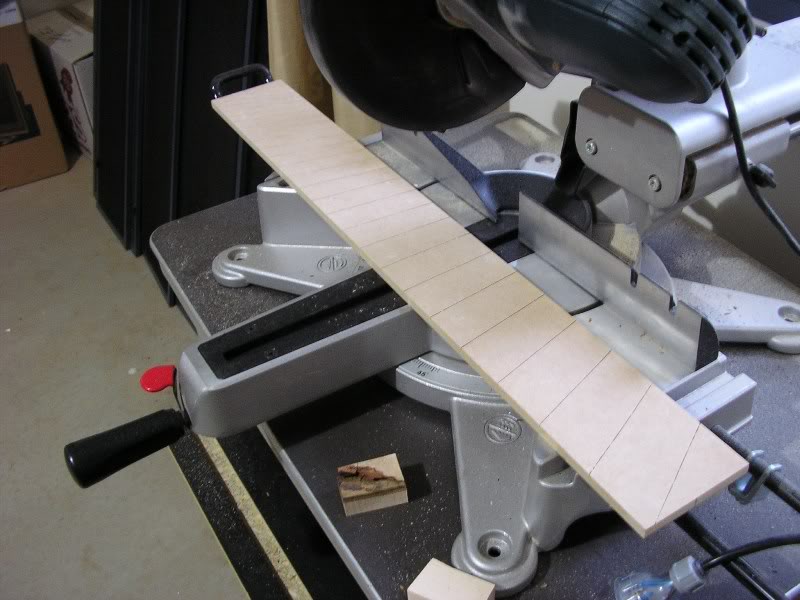
The result once the paper is ripped off and the MDF is sanded clean.
005016.jpg


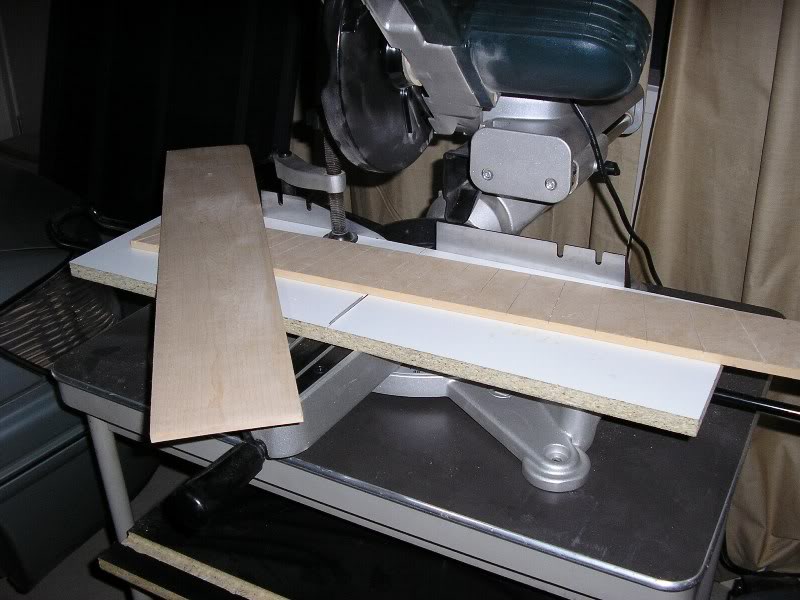
I made a makeshift table out of particle board. Using the saw I cut a small slice that's the same kerf as the slotting blade and squeezed a thin piece of metal in it. That piece of metal is the indexer of the jig.
005018.jpg


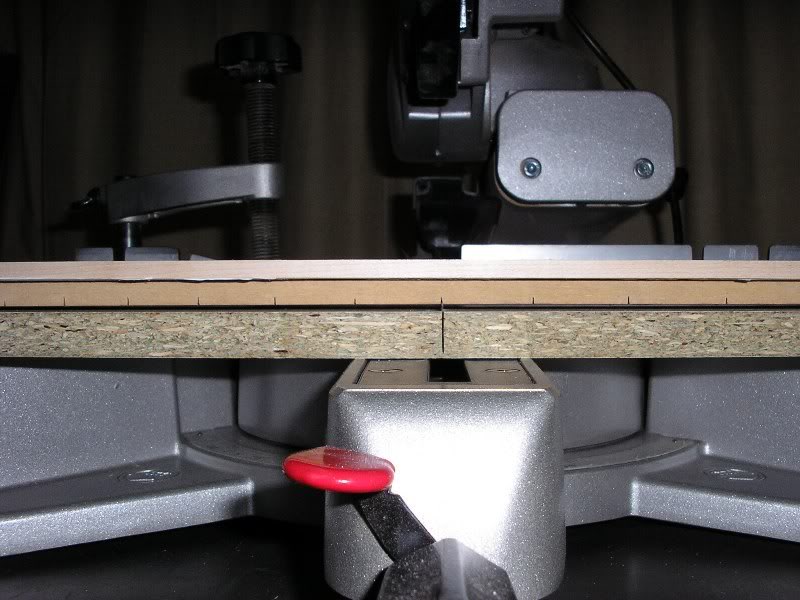
The jig works by taping the fingerboard blank onto the back of the MDF tempalte. The template locks into place in each fret slots on the metal bar inlayed in the table. That bar is aligned with the saw blade.
005020.jpg


Push the template in the metal bar, slice the fret with the saw, lift off the template, move to the next position and start again until you're done. This Maple blank took less than 5 minutes to cut.

005021.jpg


All in all, cutting the MDF template all the way to finishing the cuts on the sliding compound mitre saw took less time than it would have taken me to cut the Ebony board for this build by hand. The obvious big advantage is that its re-usable for future builds.
 
Wow... that's a great idea. So now your left handed jig will actually be making right handed fret boards. Is that correct?


That's right.


Eleonn, yeah I'll post it up but it should take another month or so before I do that, I'm waiting to be a little bit further on the build, right now all I have is a neck blank. Just stumbled on a problem yesterday too when I noticed the Mac Ebony board I got from LMII was 3/4" shorter than advertised and therefore too short for my 37" scale :rolleyes: The nice folks have offered to replace it free of charge though so that's cool.
 
For regular basses I can just use the stewmac templates by switching the particle board table I made for another one with a fence. The stewmac templates hook on an indexer nailed in the fence.

Asad, I would assume they would wear out at some point but I don't think I'll be making tons of those fretboards anyway. at worst I can easily make a new template if the slots end up widening too much.
 
I'm not sure I understand your question. If you mean how do I align the particle board table to the blade, it's simply a particle board with the metal insert in it. It's clamped onto the body of the saw. I just tilt the head of the saw down and move the p'board table into place then clamp it down.

I based my idea on this jig when I saw the picture of Sheldon Dingwall's setup. Someone here posted it a few months ago and I can't find it anymore. If anyone knows where it is, please post it in this thread. Sheldon's version looked like some huge heavy-duty thing that has got the whole neck clamped into the indexer/template part. That was an awesome piece of equipment but obviously pretty expensive to build. I just busted my head to find a way of doing the same thing on a cheaper scale :)
 
I'm not sure I understand your question. If you mean how do I align the particle board table to the blade, it's simply a particle board with the metal insert in it. It's clamped onto the body of the saw. I just tilt the head of the saw down and move the p'board table into place then clamp it down.
Yes, I was wondering whether you line the metal insert up to the blade by eye or if you had some kind of dowel registration of the whole board to the saw table.
 
Right, I realise I didn't show exactly how the saw works. Since not everyone has one or knows how to use it I might as well show this at the same time.

So what we've got here is a Sliding Compound Mitre Saw, often shortened by SCMS, not to be confused with a normal mitre saw. The difference with the regular one and the SCMS is in the length of the cross-cut that you can do. A normal Mitre saw only has a tilting head that tilts down (obviously) and cuts a board in cross length. The sliding compound mitre saw also has a linear bearing assembly that let's the saw slide up and down a rail to make a longer cut.

A normal mitre saw is not suitable for this application, the more expensive SCMS is the one that should be used for this.

I've mentioned before in other threads that a cheap SCMS wouldn't be any good for this and you had to pay more than $500 for something suitable. The reason being the tolerances built into the saw. The better the sliding assembly the more the cut will be as it should be (right kerf). If you use a cheap one, the sliding assembly will likely wobble and screw up your fret slots.

So here's the pics now :)

The first one shows the saw in it's off position, the head is tilted up. Second one shows the head tilted down to start the cut and the third shows the sliding assembly being pulled to finish the cut. The saw has a set screw on top of it to adjust the depth that the saw will cut.

005036.jpg

005038.jpg

005037.jpg
 
I just scored a dewalt 8" radial arm saw for free! It needs a little cleen-up, and I wouldnt have even thought about taking it except for the fact that I had just read this thread. It will make the perfect fret slot saw. It has a lot more travel than most 12" mitre saws, so all Ill have to do (once I make the template-thank you Phil) is set my depth and cut. Well, that and score a fret slot cutting blade.