• TalkBass has been independent since 1998. Add your voice.
    Create a free account to reply to discussions, view embedded media, and browse with fewer display ads.
    Join freeLog in
    Want zero display ads or expanded classifieds tools? Compare plans.

Parts P Assembly

It's my first "build"! I wanted to do something a little over the top for my new over the top band, so I'm going with a dual split p Precision build. I know I'm not in time for the contest, but I was directly inspired to get my ass in gear by christw's mangled funk machine.

Parts list:
- Re labeled Squier precision neck with tuners from TB. Reliced by Dark Horse but purchased from Quadzilla.
- NOT (*GRUMBLE*) Fender body from thebay
- Pickguard from ebay? Can't remember
- Dimarzio Split P and Mexi Fender Pickups from TB'er etherealme
- 500k linear taper volume pots and 500k audio taper tone pot from Parts Express
- Bridge, and other misc from Warmoth

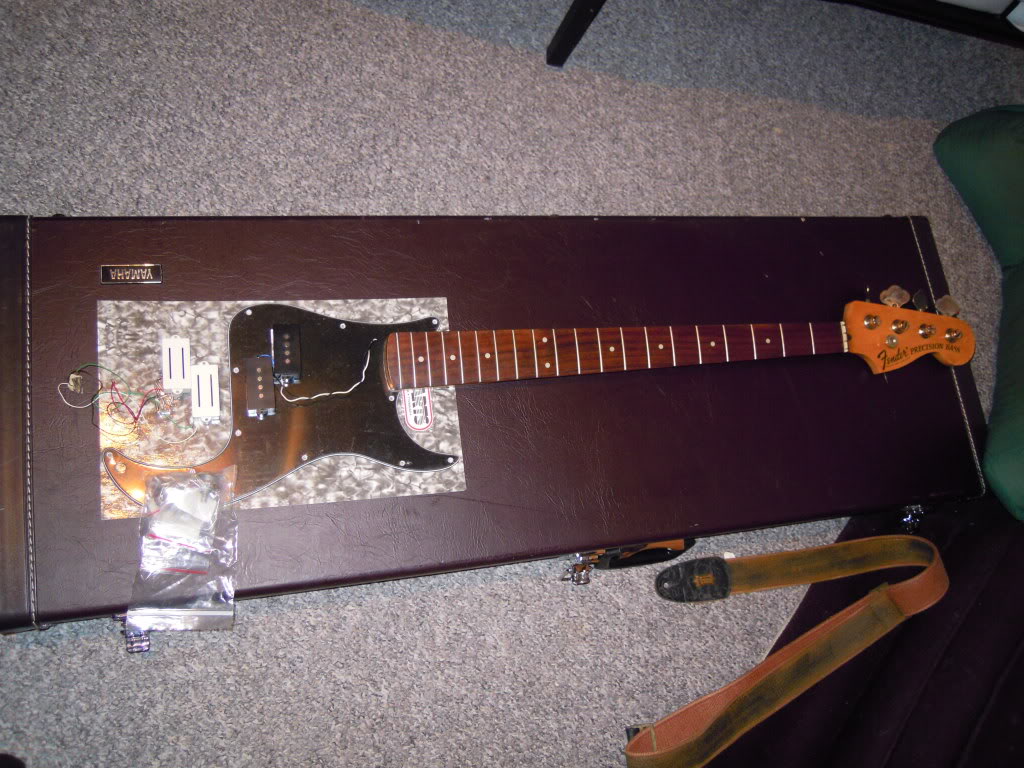
Received the neck, pg, pots and pickups first. Looking good so far!
DSCN0416.jpg

I'm not going with that pickup config anymore though. I think I'm going to arrange them in a reverse stagger (E/A closer to the bridge than D/G), and in the equivalent Rickenbacker positions.

The body came in next. Good thing I only paid $40 for it, because I definitely didn't look close enough at the ebay ad to see if it was a genuine fender/squier or not. Well, it was not. It already had two sets of pickguard screw holes that didn't fit my pg properly, and none of my Fender necks fit the pocket properly. So off to the tech it went to have the neck fitted.

Not doing too well in the hair department, so.... Mustache check!

IMG_0220-1.jpg

Good enough.

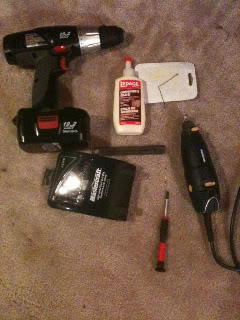
The obligatory tool shot:
IMG_0237.jpg


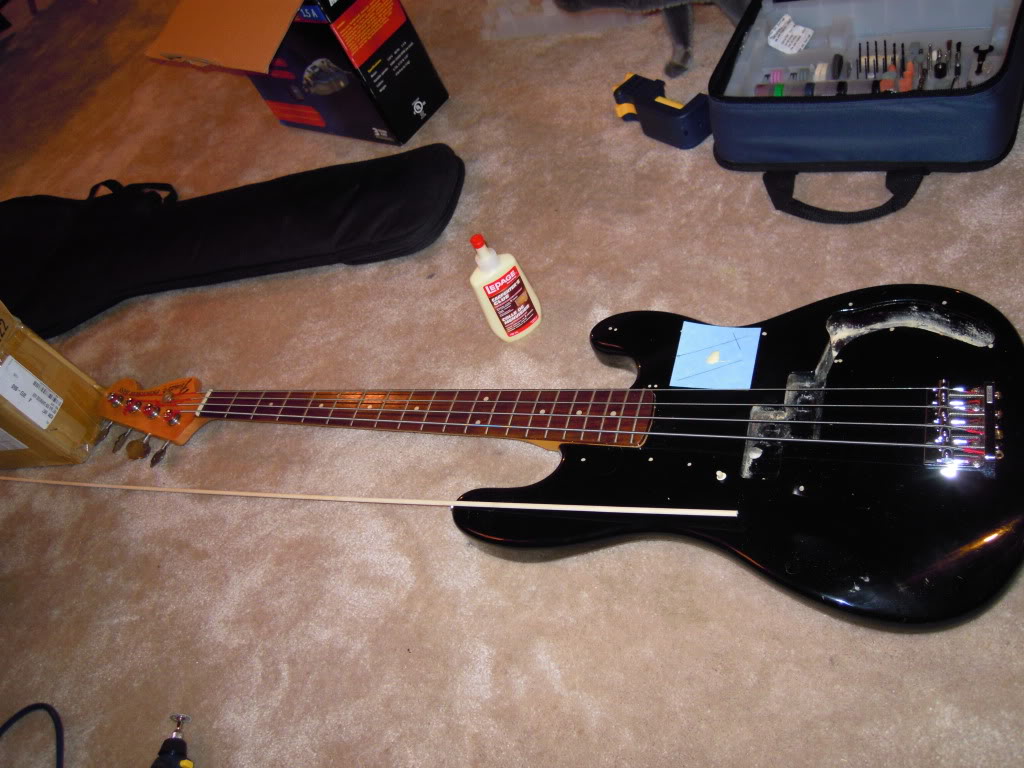
Finally, here are the pg holes, drilled out and filled with 3/16" maple dowel.
0006.jpg

IMG_0230.jpg


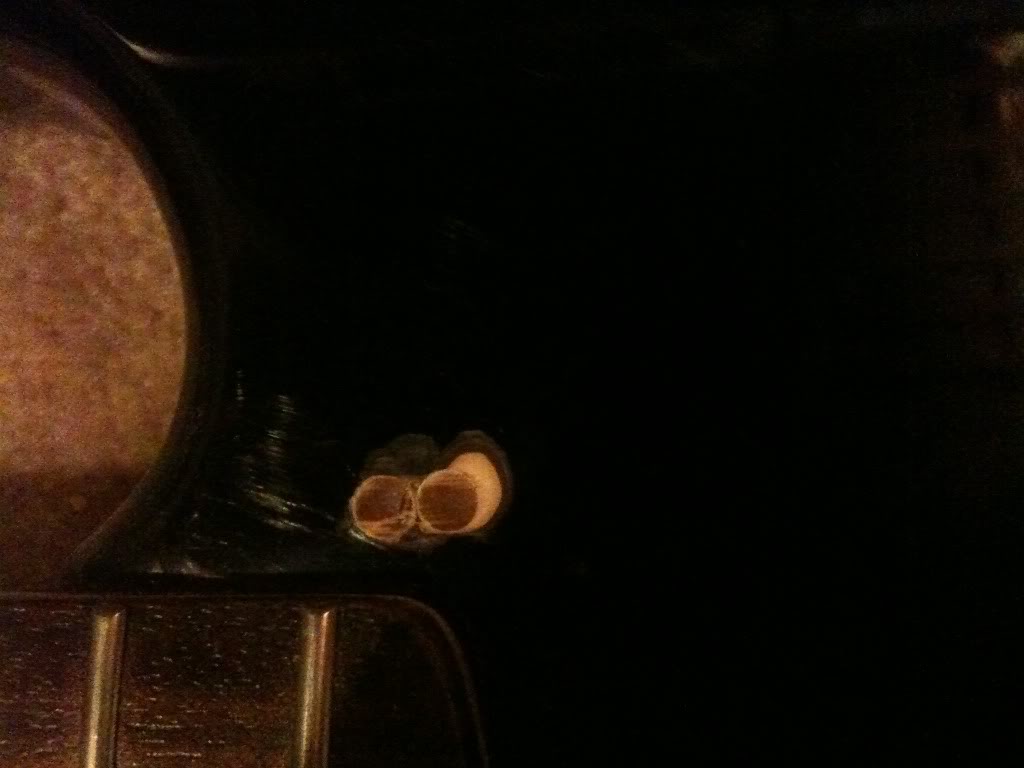
The good thing about finding a cheap body is you don't need to be too careful with the dremel. Oops:
IMG_0232.jpg


My helper:
ce87d395-1.jpg


Hint: Do not leave pickups around with lots of tasty wires for cats to chew on. I averted a few near disasters after turning my back for a second!

 
PG installed! A small victory in a build that has so far been nothing but problems. With my Fender P Lyte Deluxe in the background and a fishy cat toy on the right.
57cbe8ac-1.jpg


Next I tried to test fit the Mexican P pickup. *tried* to test fit it... it didn't fit the hole in the Allparts pickguard! What the eff? It's ok though, because I've decided it's going in the alternate position anyway.

So I test fit the Dimarzio instead, which worked out a bit better, except the screw holes didn't even remotely line up! What kind of stinkin body did I buy? At least it's real wood and not plywood! Anyhow, forgot to take a picture of the Split P in the pg, but it looked sweet. I love the white pickup cover on the black guard. I filled the existing pickup mounting holes with more dowel and redrilled some new mounting holes. I think I'll eventually reverse the stagger on the pickup, requiring a new pickguard anyway, but for now I'm going to try wiring it up with just the Dimarzio to make sure everything works.

On that note, I tried fitting the pots I bought to the pickguard, and low and behold, another problem! What is this little tab sticking up on the side of the pot? It doesn't allow me to mount it flush with the guard! Anybody?
IMG_0236.jpg


That's all for now! Any and all advice/commentary/criticism greatly appreciated.
 
Those are really useful if you have a slot so that the pot will not turn. I bend them flush and use a top and bottom nut to lock the pot to the pg.

That's kinda what I figured they were for. Not really interested in punching holes in the pg though.

I do have the nuts that came with the pots though, so I'll probably just break the tabs off or something and go from there.
 
Well, the project is finished, but I haven't had time to do updates until now.

After trimming the tabs off the pots, I fitted them to the pickguard, only to find out that the knobs I ordered were meant for split shaft pots. I decided to wire it up anyway, so I busted out the Dimarzio split P and wired it up standard P bass style.

Wiring closeup. Notice the huge blobs of solder. I was nervous that it wouldn't stick to the back of the pots...
Nathanspics009.jpg


Looks good!
Nathanspics012.jpg
 
After finishing up the wiring, I got bored and decided to go ahead and start on the neck pickup. I went out and picked up a 1" forstner bit and a chisel and got to work.

I kind of wanted this bass to be a cross between a Precision and a Rickenbacker, so I decided to put the neck position pickup in approximately the same spot as a Ric neck pickup. Not having room to center one coil or the other over the 24th fret location, I opted for the centerline of the pickup, and layed it out with a reverse stagger.

I just scribed the marks right into the finish, using the pickguard as the "template".
Nathanspics022.jpg


After drilling out as much as possible with the forstner bit, I "cleaned up" the edges with a chisel. I also dug out a cable trench to help the wiring reach the control cavity.
Nathanspics024.jpg


After I had the pickup cavity done, I set the pickup and got to work on the pickguard. All freehand with a dremel.
Nathanspics026.jpg


I ended up having to make lots of "fine tune" adjustments to the pickguard holes, so I decided to cut off the control cavity cover to make it easier. This was pretty much the best idea I've ever had. Also noticed I placed the side jack plate, but I'm still waiting for my deep panel jack to arrive from Warmoth, along with some new split-shaft 500k pots.
Nathanspics028.jpg


After widening the pickguard holes in all the wrong places, I finally got it set in place. I think it looks great, as long as you don't look too carefully.
Nathanspics031.jpg


Nathanspics034.jpg


I made a few soundclips at this point, but haven't uploaded them yet. I'll try to get to that next week.
 
After playing around with the bass as it was, I decided that the two pickups didn't sound different enough the way they were positioned. So I decided to move the E/A side of the rear pickup to the back side instead. Again, going by Ric pickup placement, this just about put the centerline of the rear p bass pickup at the "36" fret location, roughly the same as the ric bridge pickup.

I was going to let my tech do this part, since the route for the pickup cavity would actually be visible outside the pickguard, but after finding out my dad had a router, and in the spirit of a "first build", I decided to go for it myself.

I forgot ear plugs, so some noise cancelling headphones will have to do.
pickupproject001.jpg


I decided to free-hand it, but having never handled a router before in my life, I opted to test myself first on a piece of plywood.
pickupproject028.jpg


It turned out about as good as everything else on this project, so I decided to go ahead. Who needs routing templates anyway? :D
pickupproject002.jpg


After the first few passes I sheared off the router blade I was using and had to switch to a bigger one. Then I buggered up the corners good and proper. haha
pickupproject010.jpg
 
My dad shows his skills.
pickupproject011.jpg


After cleaning up my butchering of the neck pickup cavity with the router, I test fit the bridge pickup in it's own newly butchered cavity.
pickupproject015.jpg


Looking "good"!
pickupproject018.jpg


A few minor adjustments to the pickguard...
pickupproject019.jpg


And a bit of filler...
pickupproject024.jpg


And I now have a fancy-pants new bass...
pickupproject035.jpg


pickupproject034.jpg


The block of ash filling the old pickup cavity still needs a bit more paint I think, but for now it's done. Sound bytes coming next week some time.
 
*Quiet day at the office bump*

Questions? Comments? Soundclip Requests? Hateful rants?
All are welcome!

I'm still waiting on some different pots, and a deep panel output jack so that I can side mount it and go with a VVT setup, but for now it's making sound and I have my first band practice with it tonight. I also need to get some springs for the neck pickup. Right now it's just mounted on those little rubber spacer dealies, but it's just a tad too low.

After playing with it for a few days, I gotta say, I quite like the pickup arrangement. Obviously, it doesn't actually sound too much like what a Ric sounds like to me (Think "Push Push Lady Lightning" by Bang Camaro), but it has a bit of that vibe.

I'd like to get that nasty, almost-farty-but-in-a-good-way neck pickup tone. Could it be that the Dimarzio Split P just has too much treble? Having never played a Ric, I really don't know what the neck pickup is supposed to sound like.

What would it take to put a high cut mini toggle switch on the neck pickup? Come to think of it, I suppose I could just copy the wiring from my Yamaha attitude bass...

Also, I am assuming the Split P pickup comes wired in series as standard, both between each individual side coil, and between the two pickup halves themselves? The dimarzio website doesn't have much for wiring diagrams in their bass pickups section...

Also on a Ric, I believe the "Vintage Tone" toggle is a low cut on the bridge pickup? Correct me if I'm wrong. How much of this is involved in that Ric "clank"?
 
Dude... I waited a couple hours to see if anyone else had any comments. Sorry to say this, but I beleive you did'nt think this one out too well. It looked fine with one split pickup. You did way too much carving on the body with your various p'up placement ideas. The abandoned p'up cavity looks awful. The pickguard is ruined, you'll need a new one to cover up that block of wood you plugged into it. The bridge p'ups look funny extending beyond the pickguard area. I hope it sounds good,and that your happy, cuz it looks a mess. Next time, draw it all out beforehand, its easier to ruin a few sheets of paper....
 
Dude... I waited a couple hours to see if anyone else had any comments. Sorry to say this, but I beleive you did'nt think this one out too well. It looked fine with one split pickup. You did way too much carving on the body with your various p'up placement ideas. The abandoned p'up cavity looks awful. The pickguard is ruined, you'll need a new one to cover up that block of wood you plugged into it. The bridge p'ups look funny extending beyond the pickguard area. I hope it sounds good,and that your happy, cuz it looks a mess. Next time, draw it all out beforehand, its easier to ruin a few sheets of paper....

Yep, that's pretty much all true. The new pickguard will happen eventually, just not right away. Ordering a custom one from Pickguardian was more expensive than I thought.

I never intended this to look pretty, nor did I expect it to turn out looking nice in any way. I laughed as I routed. This was more of a learning opportunity for me, and a chance to take a $40 ebay body and turn it into something it wasn't meant to be, and something I could experiment with. If you look at the reference link I posted in my first post, you'll see where I was coming from.

Also, this picture was niggling the back of my mind the entire time...
instr_34body.jpg

If that's my goal, I'd say I'm on par.
 
If you like it, don't be bothered by what anyone else thinks.

Also, I would look into redoing the pickguard. Either find some quality pearloid or go down to the local hobby store (or order online) and get a piece of plastic and make your own pickguard. This will cover that up without show there was ever a hole there.
 
Yeah, I will make a new pickguard eventually.

Just got home from band practice, and it sounded very badass. I'm 100% satisfied.

I honestly couldn't give two ***** about how it looks, which is why I decided to do almost all the work myself in the first place. IMO it blends in perfectly with the bars it's destined to be played at.
 
Don't worry what anybody else thinks, without pioneers like yourself we would have no penicillin, no space travel and indeed no P-bass.

I can't see how you'd get a Ric sound out of it - Rickenbackers have straight single coil pickups so I'd imagine yours sounds way punchier, especially with the Dimarzio. Looking forward to you getting some sound clips up! :)