• TalkBass has been independent since 1998. Add your voice.
    Create a free account to reply to discussions, view embedded media, and browse with fewer display ads.
    Join freeLog in
    Want zero display ads or expanded classifieds tools? Compare plans.

1st build: fretless 4 string

Greetings!

I attempted my 1st bass build a while back, and seeing as I've been lurking around here so much lately (gotta say that some of the ideas, designs and builds going on here are really top class!!) I thought I may as well put up some pictures of my own. Sorry about the poor quality, mostly taken with my phone...

Specs:

Fretless 4 string, passive, 34'' scale
Body: mahogany
Body top: ziricote
3 piece neck: maple, wenge, maple
Fingerboard: ebony, 16'' radius
Hipshot hardware, bartolini jazz pickups
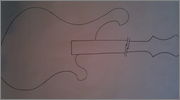


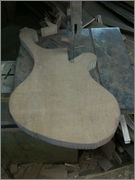
IMG_0072.jpg


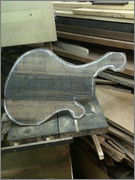
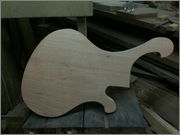
Cutting out the body shape

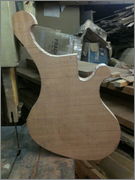
IMG_0079.jpg

IMG_0080.jpg


After a little sanding and smoothing
IMG_0081.jpg


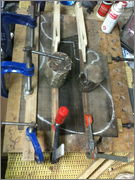
Glueing up the top; made from 3 pieces of ziricote
IMG_0084.jpg

IMG_0086.jpg


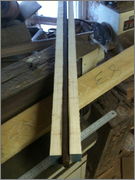
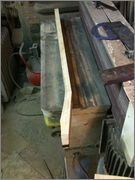
Onto the neck...

IMG_0085.jpg

IMG_0087.jpg

(chickened out of doing a scarf joint, next time!)
IMG_0090.jpg


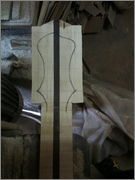
Next, added some wings on for the headstock
IMG_0092.jpg


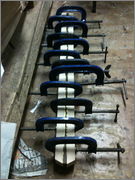
Then glued the ziricote top to the body. Clamp city!!
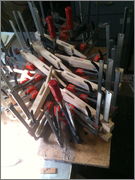
IMG_0093.jpg


More pics to come (I'll figure out how to make them a little bigger, what size is best for this forum?).... Thanks for looking.
 
More pics...

Here's the body with the top glued in place.

IMG_0097.jpg


Some more sanding and shaping..

IMG_0104.jpg


IMG_0105.jpg


Onto the neck: trussrod, shaping and fingerboard.

IMG_0094.jpg


IMG_0095.jpg


Dont know if it was the ebony or poor quality sandpaper, but the radiusing took forever, probably the hardest part of the build for me. I made a number of mistakes during this attempt at building, probably one of them was radiusing the fingerboard before gluing it to the neck. More mistakes to come!

IMG_0078.jpg


IMG_0098.jpg


IMG_0099.jpg


IMG_0108.jpg


IMG_0109.jpg


IMG_0111.jpg


A little on the chunky side, but was worried to go any thinner with the neck as the trussrod I used was quiet deep. Pretty happy to of made it to this stage

IMG_0113.jpg
 
Thanks!

Sorry, my pictures are probably a bit too small... I needed to add a bit of width to the top of the neck in order to have a headstock that would accommodate the tuners, so I glued 2 pieces of maple on each side. Easier to see now?..

IMG_0092.jpg
 
Made up a ziricote laminate for the front of the headstock and glued it up

IMG_0116.jpg


Cut out the neck pocket too. Used a plunge router 1st then finished it with a chisel. Did a small roundover on the edges of the bass too. Would of preferred to go bigger but it was the only size bit I had at the time

IMG_0115.jpg


IMG_0118.jpg


Attached the neck to see how it looks all fitted together..

IMG_0120.jpg


IMG_0122.jpg


IMG_0124.jpg


IMG_0128_2.jpg


I should point out that I am in someone else's workshop for most of this, I don't just happen to have all these tools and stuff just hanging around in my shed!


Onto the control cavity and the pick-up routes. I made up a router template for the pick-ups 1st then tidied up with a chisel. Should of made a template for the control cavity but I just did it free hand, was hard to control the router and ended up a little messy. Lesson learned!

IMG_0137.jpg


IMG_0139.jpg


IMG_0141.jpg


IMG_0142.jpg


IMG_0144.jpg


IMG_0152.jpg


Drilled the headstock for the tuners and added side markers to the neck too. Realised I should of waited until I actually had the tuners delivered to me before I had shaped the headstock, because I found myself extremely tight for space now, they turned out to be much bigger than I imagined..

IMG_0136.jpg


IMG_0145.jpg


IMG_0147.jpg


Also broke a screw taking the neck back off (used crappy screws and didn't use a wide enough bit when I pre-drilled the neck), which turned out to be a complete nightmare for me. It snapped just at the point where it entered the neck, so I ended up having to drill it out (you can kinda see the big hole in the pic above at the back of the neck between the 21st and 24th markers!) and then drill a couple of more holes in the neck plate and body so I could still have a fairly secure neck joint.
Anyhow, getting there now...

IMG_0148.jpg
 
Decided to go with an oil finish on this. Made up a cover from ziricote for the control cavity and then put the bass together and sanded it down.

IMG_0153.jpg


IMG_0154.jpg


Couldn't resist laying out the hardware of course!

IMG_0166.jpg


Did about 4 coats of boiled linseed oil, pretty slow process, took about a week and a half overall.

IMG_0171.jpg


Onto the electronics (vtvt), hardware and slotting and shaping the nut..

IMG_0183.jpg


IMG_0188.jpg


IMG_0190.jpg


IMG_0192.jpg


A couple of applications of Howard's feed'n'wax and we're good to go. Apologies again for the poor quality of the snaps, found the colour of the bass pretty hard to capture properly. Don't think I'll be getting hired as a photographer anytime soon! Anyhow..

Voilà!


IMG_1027.jpg


IMG_1028.jpg


IMG_1029.jpg


IMG_1038.jpg


IMG_1036.jpg


IMG_1037.jpg


IMG_1034.jpg


IMG_1042.jpg
 
Thanks for the kind words guys!

It sounds good to my ears, much deeper and darker tone than my friend's fretless jazz, which is the only fretless I can compare it to, as I have never played another. Takes a bit of getting used to, not having frets or even fretlines, just the neck markers, especially as you get further up the fingerboard, but I'll get there eventually. :) Not overjoyed with my choice of controls, the volume tone volume tone works ok, but doesn't work as well as I imagined, so I will probably change that out at some stage, was thinking maybe a vvt and a series/parallel switch. I welcome any other suggestions that anyone else might have or could recommend.