• TalkBass has been independent since 1998. Add your voice.
    Create a free account to reply to discussions, view embedded media, and browse with fewer display ads.
    Join freeLog in
    Want zero display ads or expanded classifieds tools? Compare plans.

1st Time Bass Build

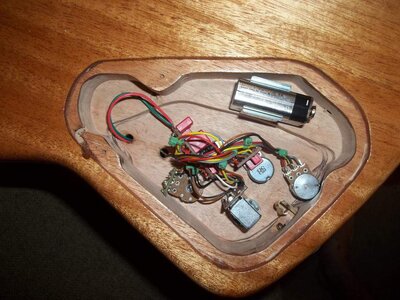
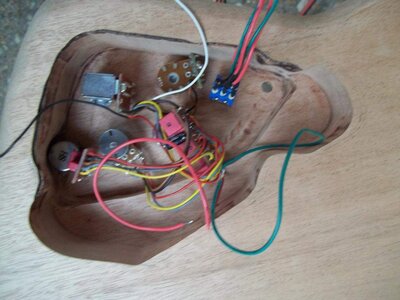
Controls test fitted. Wiring will absolutely not look like that when its done, and if necessary I may just clip the lead wiring on the controls and move it to fit and keep it clean. Just a test fit to see how the controls fit and what room I have to work with.

Next on the list:

*Finish rear control route, and fabricate cover.
*Drill wiring channels for bridge, and pickup's.
*Sand, Sand, Sand...then grain fill...Followed by more and more sanding progressively stepping up to 400.
*Start the Tru-Oil Process.
 

Attachments

  • 100_1064_zps7d5b4df8.jpg
    100_1064_zps7d5b4df8.jpg
    80 KB · Views: 102
Thanks.

Haven't decided if the control plate will be a mahogany plate made from the scrap wood I have, or black shiny or matte acrylic. I have acrylic on the way, but I may test the wood control plate out and see if I can get a grain pattern and look that matches, if not black shiny or matte acrylic it is.
 
That looks very good !

How much the neck costs ? Here in Poland those parts are quite expensive - cheapest one costs about 130 bucks (and is of course made in china). Now I can buy two used ones for occasional price (first one for approx 30, with tuners, frets etc. and headstock shaped more like Jackson, and the second one for about 23.5 Tele style, but without frets and tuners), but for now I'm planning to buy a car, so I'm not up to buy anything.
 
Thanks for the compliments. I got the neck at cost from Allparts. Perks of the job where I work. New they are in the ball park of $300 ish I believe depending on the options. Didn't really pay much attention to price on the neck. Set me back $153.00. Most of the other supplies cost more than that alone.

Finished the rear control route and built the plate out of wood. I only had a few nice scrap sections of Mahogany so I had to bite the bullet and use a piece that didn't have the same grain pattern. No big deal as the rear of the instrument is not the focus point for me personally. Have to do some more hand sanding get it level or slightly recessed with the body. Also gotta sand the inside edge and get the reveal of 1-2mm between the plate and the edge line because I am a bit of a perfectionist.

Next on tap for work is:

*Drill for Wiring Channels for Bridge Ground, & Pickup Lead wiring.
*Sand the whole body down with 80, 100, 150, 220.
*Grain fill the wood. Then sand with 220, 320, & end at 400.
* Tru-Oil the whole body. Then polish, and buff.
* Finally Re-assembly and wiring.
 

Attachments

  • ControlCover_zpsb8830580.jpg
    ControlCover_zpsb8830580.jpg
    80.9 KB · Views: 87
Made some more progress today.

*Wiring Channels for lead wiring on pickups, and bridge ground handled.
*Sanding is coming along. On Grain fill stage now.

Will post pics tomorrow or the following day.

Cheers!
 
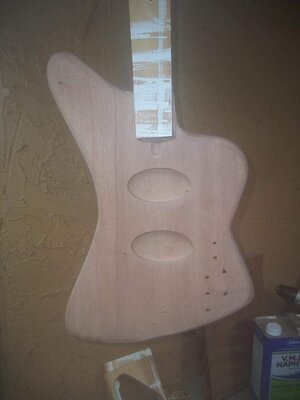
Completely sanded and spent all last night working up from 100 - 220- Grain Fill - 220 some more - 320 - Green Scotchbrite - 400 - Followed by Grey Scotchbrite ended at a full wipe down till the towels had no dust on them with Naptha.
 

Attachments

  • SandedampBatt_zpsf123065a.jpg
    SandedampBatt_zpsf123065a.jpg
    37.7 KB · Views: 60
  • Napthacoat_zpscbd718bc.jpg
    Napthacoat_zpscbd718bc.jpg
    97.4 KB · Views: 88
After the Naptha had dried and vaporized off (approximate wait time 2 16oz. PBR's & 1 Camel Light for safe measure). I started with the first coat of Tru-Oil.

I will be taking my sweet a*$ time rubbing the oil in very fine layers and letting it dry near overnight.
 

Attachments

  • TruOilTopCoat_zps17dc9b90.jpg
    TruOilTopCoat_zps17dc9b90.jpg
    95.8 KB · Views: 82
Thanks all for the follows and posts on the build. Progress at this point will be slow and steady. Had just enough time after 1pm this afternoon to lay a 2nd coat of Tru-Oil. After this last coat for the evening it will be sitting indoors and drying for 24hrs-48hrs.4 hrs wait time between very light initial coats before I hit it up again because the grain really sucked it up, and yes that is a PBR 24oz now in the background.What can I say I am on a budget.Champagne taste and beer wallet. Temperature in the past 8 hrs in Tampa,FL has been rather humid so 4hrs between light coats and 48hrs indoors with A/C is what it is looking like.

Picture doesn't do it justice. Flash is on and it is hard to capture what the finish is looking like outdoors with a S#$% camera.

Tomorrow the body will get a nice light buff in 3M 00 White Scour Pad before more Tru-Oil goodness. Stay tuned!
 

Attachments

  • 2ndLightCoatTruOil_zpsa9bf9489.jpg
    2ndLightCoatTruOil_zpsa9bf9489.jpg
    40.8 KB · Views: 91
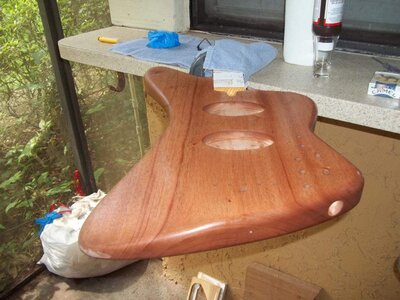
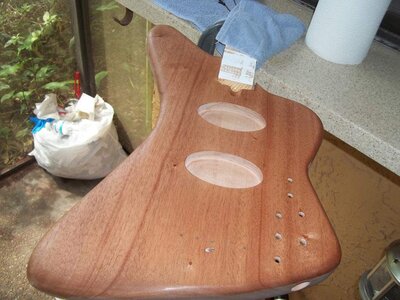
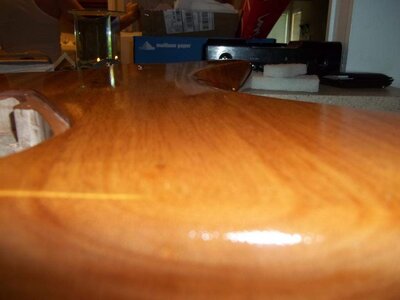
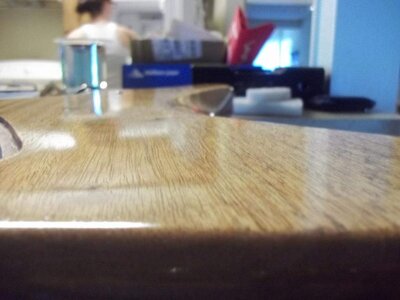
Made some more progress. On the 5th coat of Tru Oil now. After the first 3 coats, I smoothed it down with some 00 3m White Pads followed by a wipe down with Naptha to remove any dust & debris. Surface is building nice and level with no high spots or runs on the body or edges.

A few stray drips found there way in the control cavity, but that will get covered with shielding tape so no biggie.

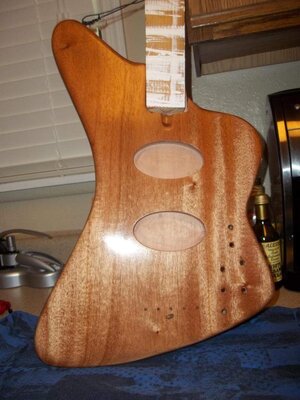
So far the build is getting near mirror like, not too shabby for a wipe on finish.
 

Attachments

  • 5thcoatTruoil_zps3002880c.jpg
    5thcoatTruoil_zps3002880c.jpg
    82.4 KB · Views: 95
  • 5thcoatTruoil1_zps8d67f8bf.jpg
    5thcoatTruoil1_zps8d67f8bf.jpg
    89.9 KB · Views: 77
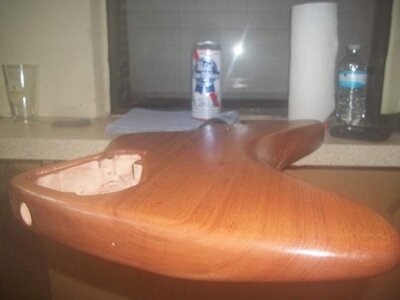
Thanks! Made a little more progress. On the 14th coat of Tru-Oil now. Smoothing with 3m White pads in between every 4 or so coats. Build is extremely nice. Don't know if cutting it back with 1500 -2000 is going to do it justice. I'll test the idea on the control plate since it is small.

Photos with and without flash on the 14th coat post dry.
I'm pretty happy so far with the results of just TruOil and some elbow grease. Will end up letting the final coats dry for days before finishing up.

I'll update as more progress happens.
 

Attachments

  • 14thCoatFlash_zps98bb8d73.jpg
    14thCoatFlash_zps98bb8d73.jpg
    40.8 KB · Views: 63
  • 14thCoatNoFlash_zps834d891f.jpg
    14thCoatNoFlash_zps834d891f.jpg
    53.6 KB · Views: 67
In between 48hr dry time between the last few coats I decided to test mount the controls and a 9v with holder to see how it all felt. Zip ties on the wires help some but I will end up cutting and resoldering to clean it up futher. 9v fits nicely.

2nd Pic.
From the side with the electrostatic jack. Not a bad fit with 5 controls and a 9v.

Electrostatic is a perfect fit. Making progress on the build up of Oil coats day by day, and sometime days. Hopefully I will have at least 40-50 coats built up before the pickups show up. At least I have something to do until the rest of the parts show up.
 

Attachments

  • ControlTest1_zpsd8d26ff1.jpg
    ControlTest1_zpsd8d26ff1.jpg
    121.2 KB · Views: 51
  • ControlTest2_zps06abcb8a.jpg
    ControlTest2_zps06abcb8a.jpg
    89.9 KB · Views: 50
Tru-Oil Finish done. Neck Bolted up, strung, and setup. This is where the problems begin.

The neck is getting shipped back and replaced. Too far backbowed to correct. Truss rod nut is so loose it could fall out and under string tension the neck is still back bowed, and near flat.

At least this gives me some time to tidy up wiring and wax the body till I am happy. Pics to come!
 
Thanks for the compliments. I have learned quite a bit from my first build. Many of the mistakes that I have made have been experience on what not to do on the next build I am planning. Thought I would share some of the work from today.

-Finished installing the Glockenklang preamp. Tested it with both input stages for the blend control. Seems to work fine, treble frequency is hard to hear. I am even suspecting that the control may be toast as it was a used preamp. Got a back up treble control should that be the case.

-Finished installing output jack and electrostatic jack plate.

-Mounted a battery holder. Decided to scrap the idea as even milling it down still causes issues with the control plate, mainly the connector and battery itself. Going to use Velcro instead to hold the battery, or make a ribbon holder. Velcro seems cleaner and easier.

-Installed bridge ground, and then re-installed bridge. Soldered the wire to a small piece of copper shielding tape, and then jammed that between the bridge. Figured it wouldn't have a chance of ever not fully grounding there.

-Test fitted some EMG knobs on the controls for the look. May end up using them in the long run.
 

Attachments

  • ShieldedInstall_zpsbf719ef8.jpg
    ShieldedInstall_zpsbf719ef8.jpg
    135.3 KB · Views: 39
  • ControlPlate_zps31c04537.jpg
    ControlPlate_zps31c04537.jpg
    86.3 KB · Views: 34