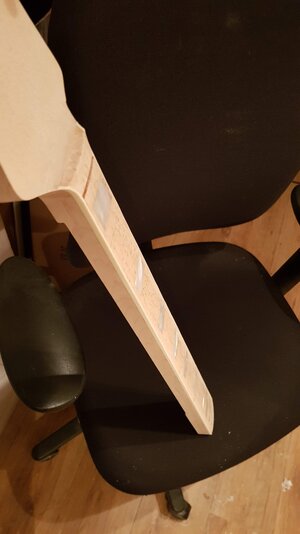
Tearing my hair out over on my Hossenfeffer II build on headstock binding, but I don't recall much discussion of body and headstock binding on any recent thread, so I thought I'd start a new one. If any of the Pros would care to toss the amateur contingent a few tips, much appreciated:
Material:
Seems to come down to real celluloid (rare and expensive to ship, because it's extremely flammable), PVC, or ABS. It's not always specified as either PVC or ABS, just "plastic". I've bought all three, the only common denominator I've found is that all three seem to be dissolvable in acetone.
Glue:
I've tried the Big Three, CA Glue, Stewmac Binding Cement, and Acetone. Of the three, I found acetone the most user-friendly. It can be wicked into gaps, evaporates quickly, and leaves no residue. Any loose spots can be re-glued in place by wicking in more acetone, it's so thin that the joint draws it in by capillary action. The only downside I found is that it will dissolve the glue on some tapes used to hold the binding. It also has the advantage of being dissolved in acetone into a "paste" that can be troweled into gaps or miters for a "welded" joint. I found CA glue a mess, and it can discolor the wood or prevent later finishes from absorbing evenly. The Stewmac glue works fine, but does leave some residue, I didn't see any big advantage over acetone.
Tools:
I'm generally sticker-shocked by Stewmac's "creative" pricing and outrageous "shipping and handling" charges, but this tool is worth it IMO, also offered by LMI. The shear-cut blades and precision machined bearings cut very clean, precise "ledges". There may be another rabbeting bit sets out there that would work, if so, by all means post a link, but these are optimized for common binding thickness. In practice, I've only needed the bearings for .040, .060, and .070". The Stewmac .060" binding actually mikes to around .065, and tends to expand a little when glued, so the .070" bit has come in handy.
[Invalid or Expired Link Removed]
http://www.lmii.com/products/tools-services/rout/shape/drill/binding-cutter-bearings
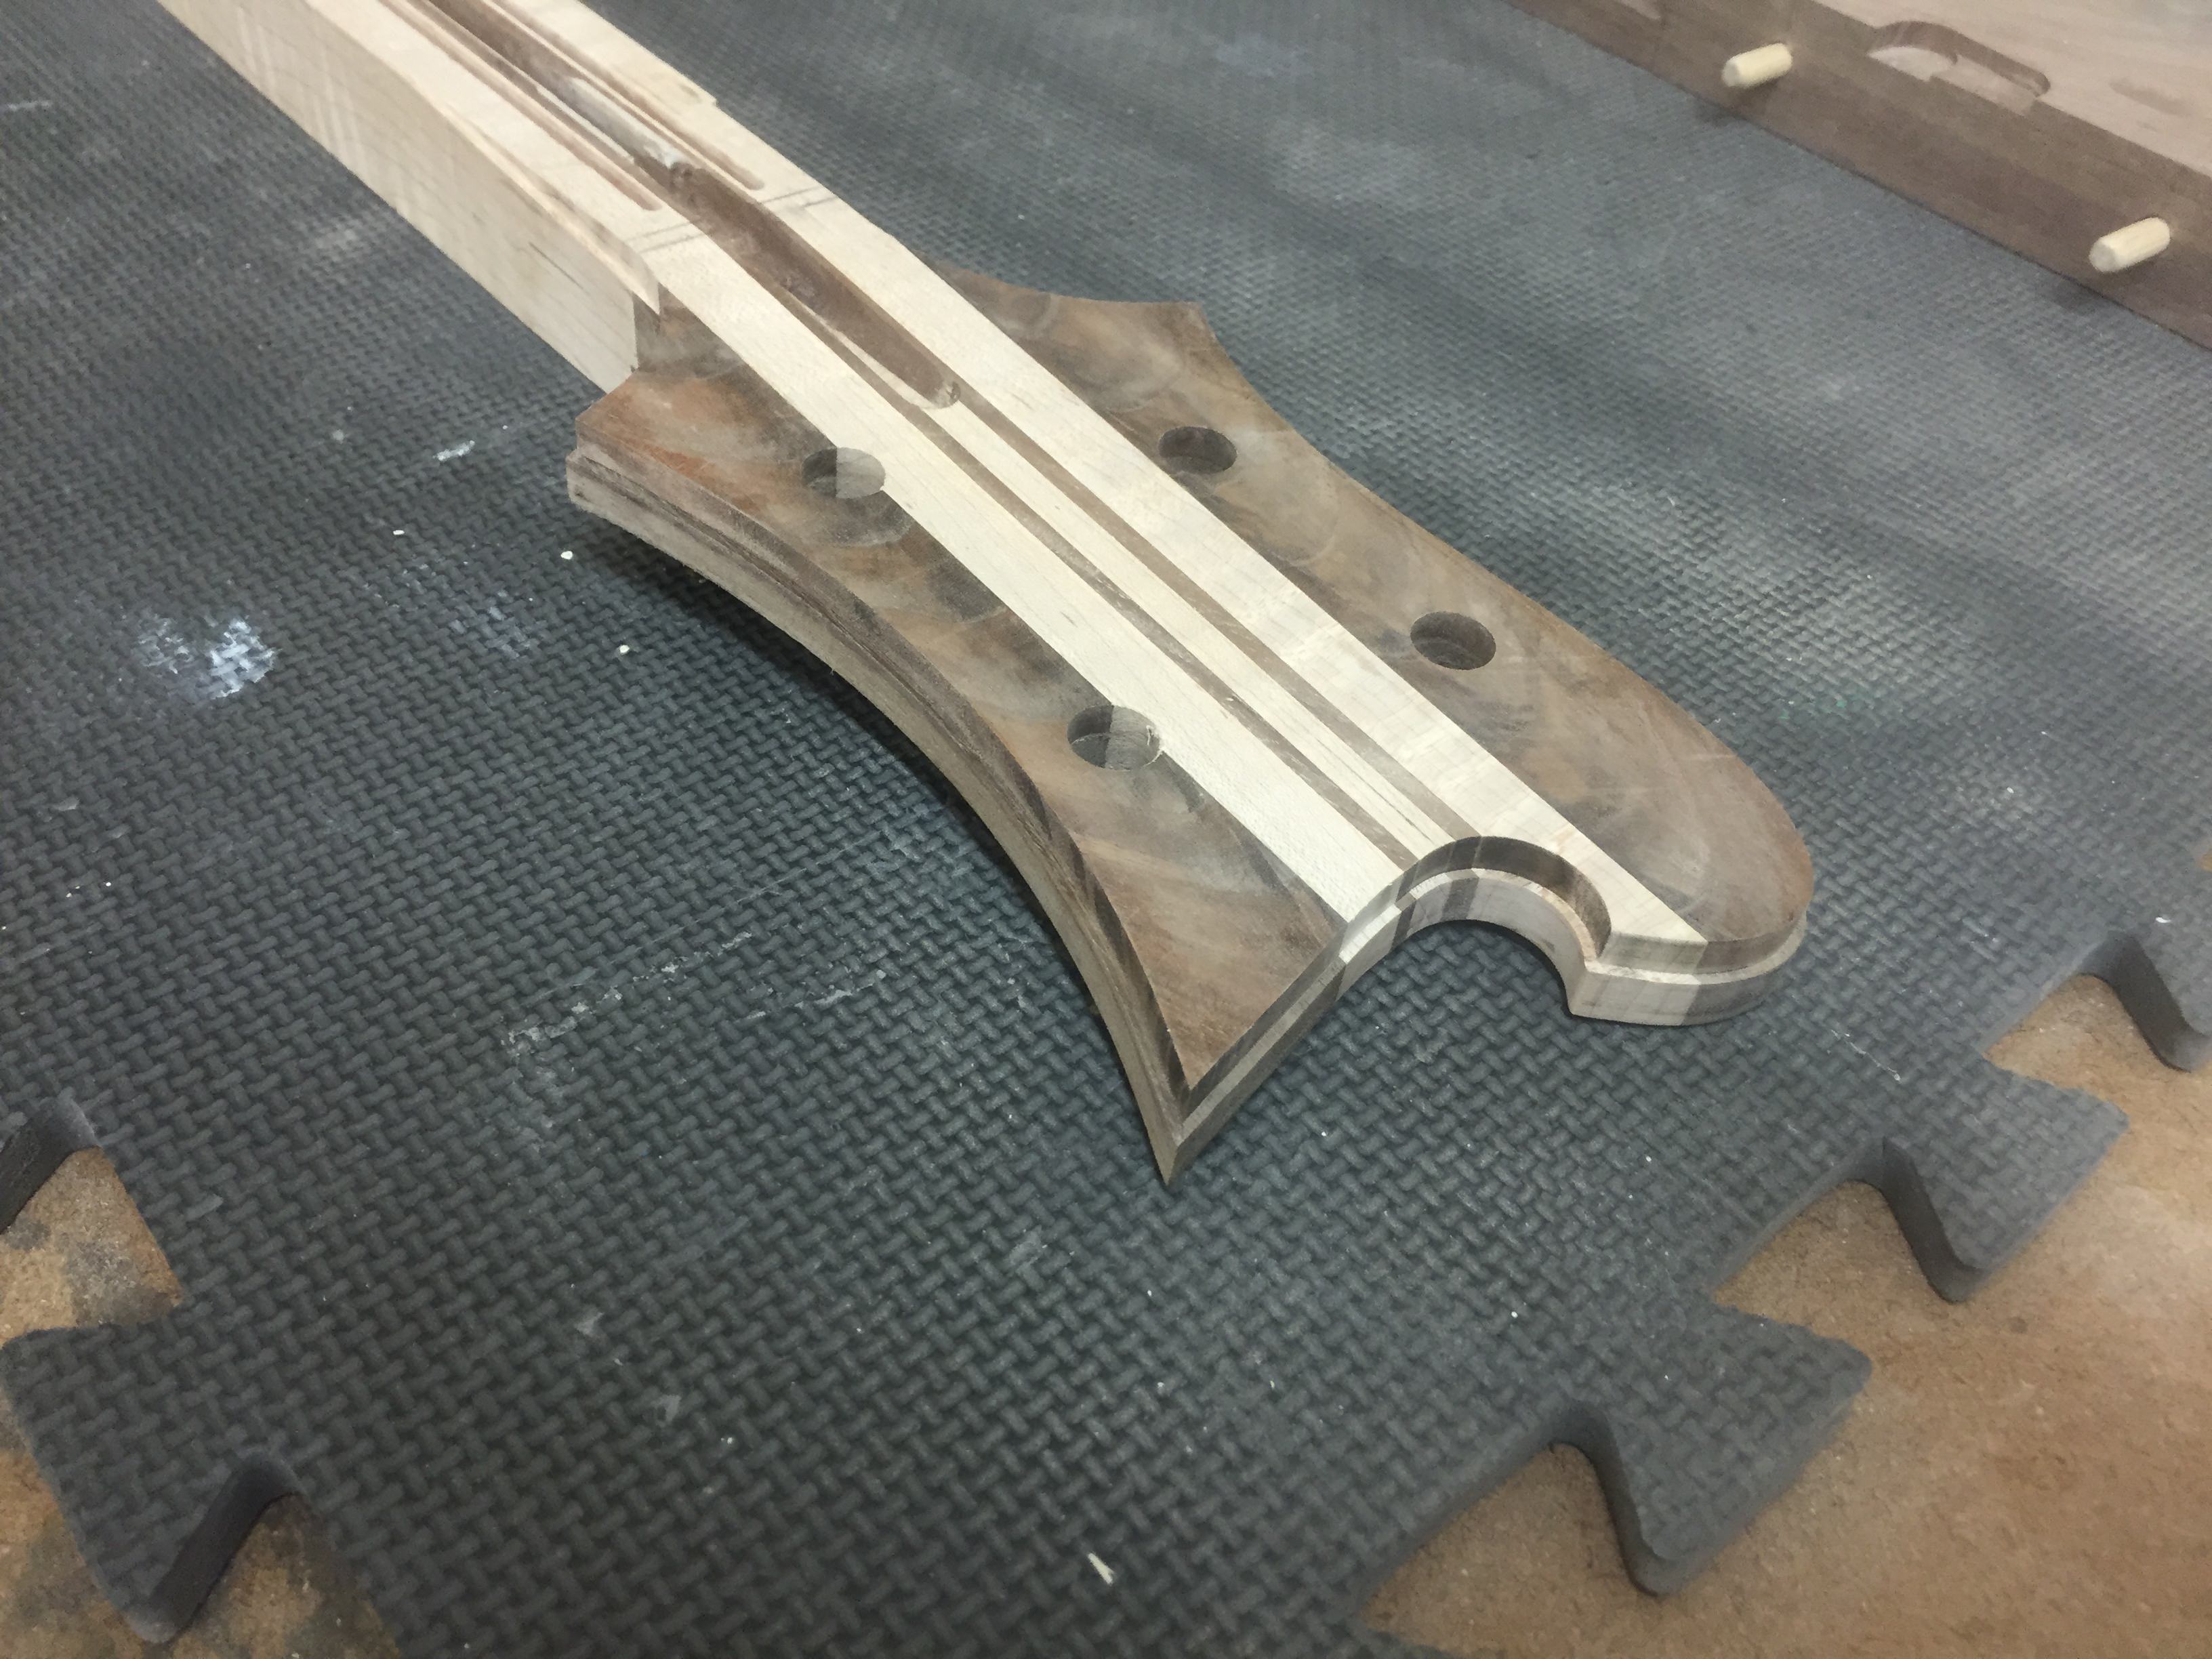
Here's and example of a single-ply ledge cut in a headstock for .060" binding with the Stewmac cutters:
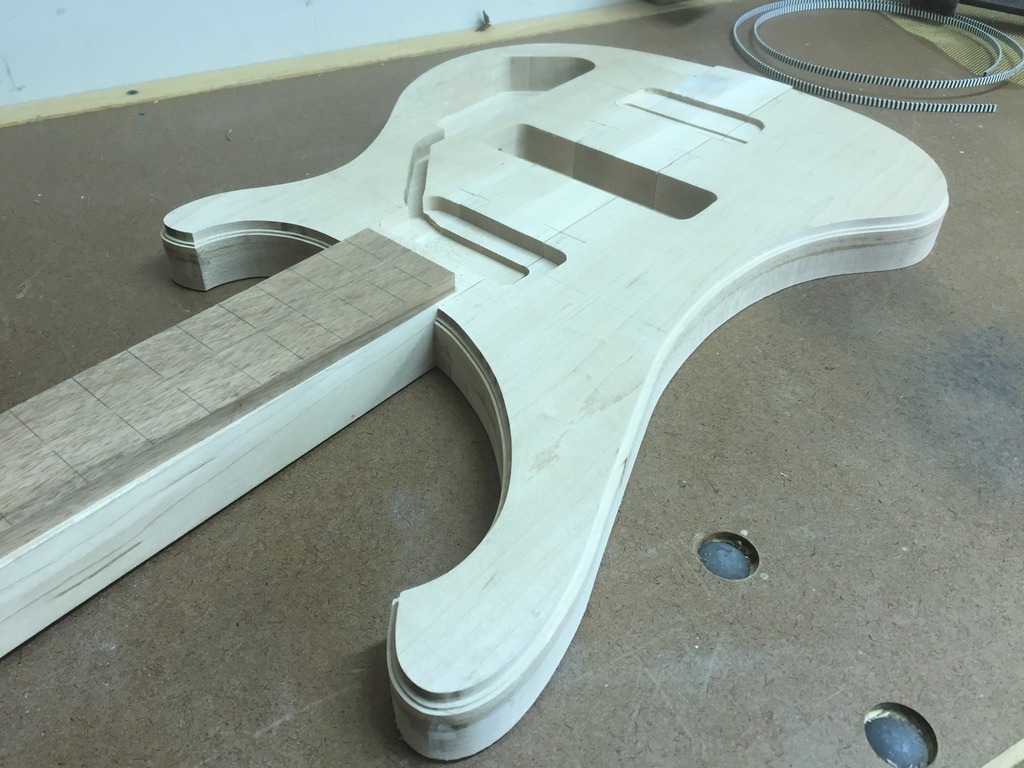
And here's a double ledge for two-ply binding, also with Stemac cutters:
With either a "Binding Machine" that rides around the body contour on a vertical rail system, or one of the many ingenious home-built rigs serving the same purpose, it's possible to bind body contours, albeit only to a shallow depth, the Aerodyne Jazz a prime example:
This one is a pretty good tutorial on headstock binding, using a purpose-built jig to pre-bend multi-ply laminates into the required shape prior to gluing. One advantage of multi-ply binding is that each of the thinner layers will take a bend that thicker material will not.
This video shows an alternate method for bending plastic binding without a heat gun, using only acetone fumes. A spectacular failure in this case, as he reduces the binding to a sticky mush, but I wonder if a shorter exposure would yield better results:
Scraping and Finishing:
Gibson, Rickenbacker, and other old-school builders still have teams of highly-skilled people who scrape binding by hand with razor blades or a piece of sharpened spring-steel. An admirable skill, no doubt, but with a big learning curve! This guy makes it look easy, it isn't.
I tried this myself, and quickly realized I didn't have the time or patience to get good at it, and found I could get damn nearly as good results using a modern plastic film masking tape, this stuff is absolutely amazing:
https://www.amazon.com/3M-Indigo-PN...sr=8-2-fkmr0&keywords=3m+finsline+indigo+1/8"
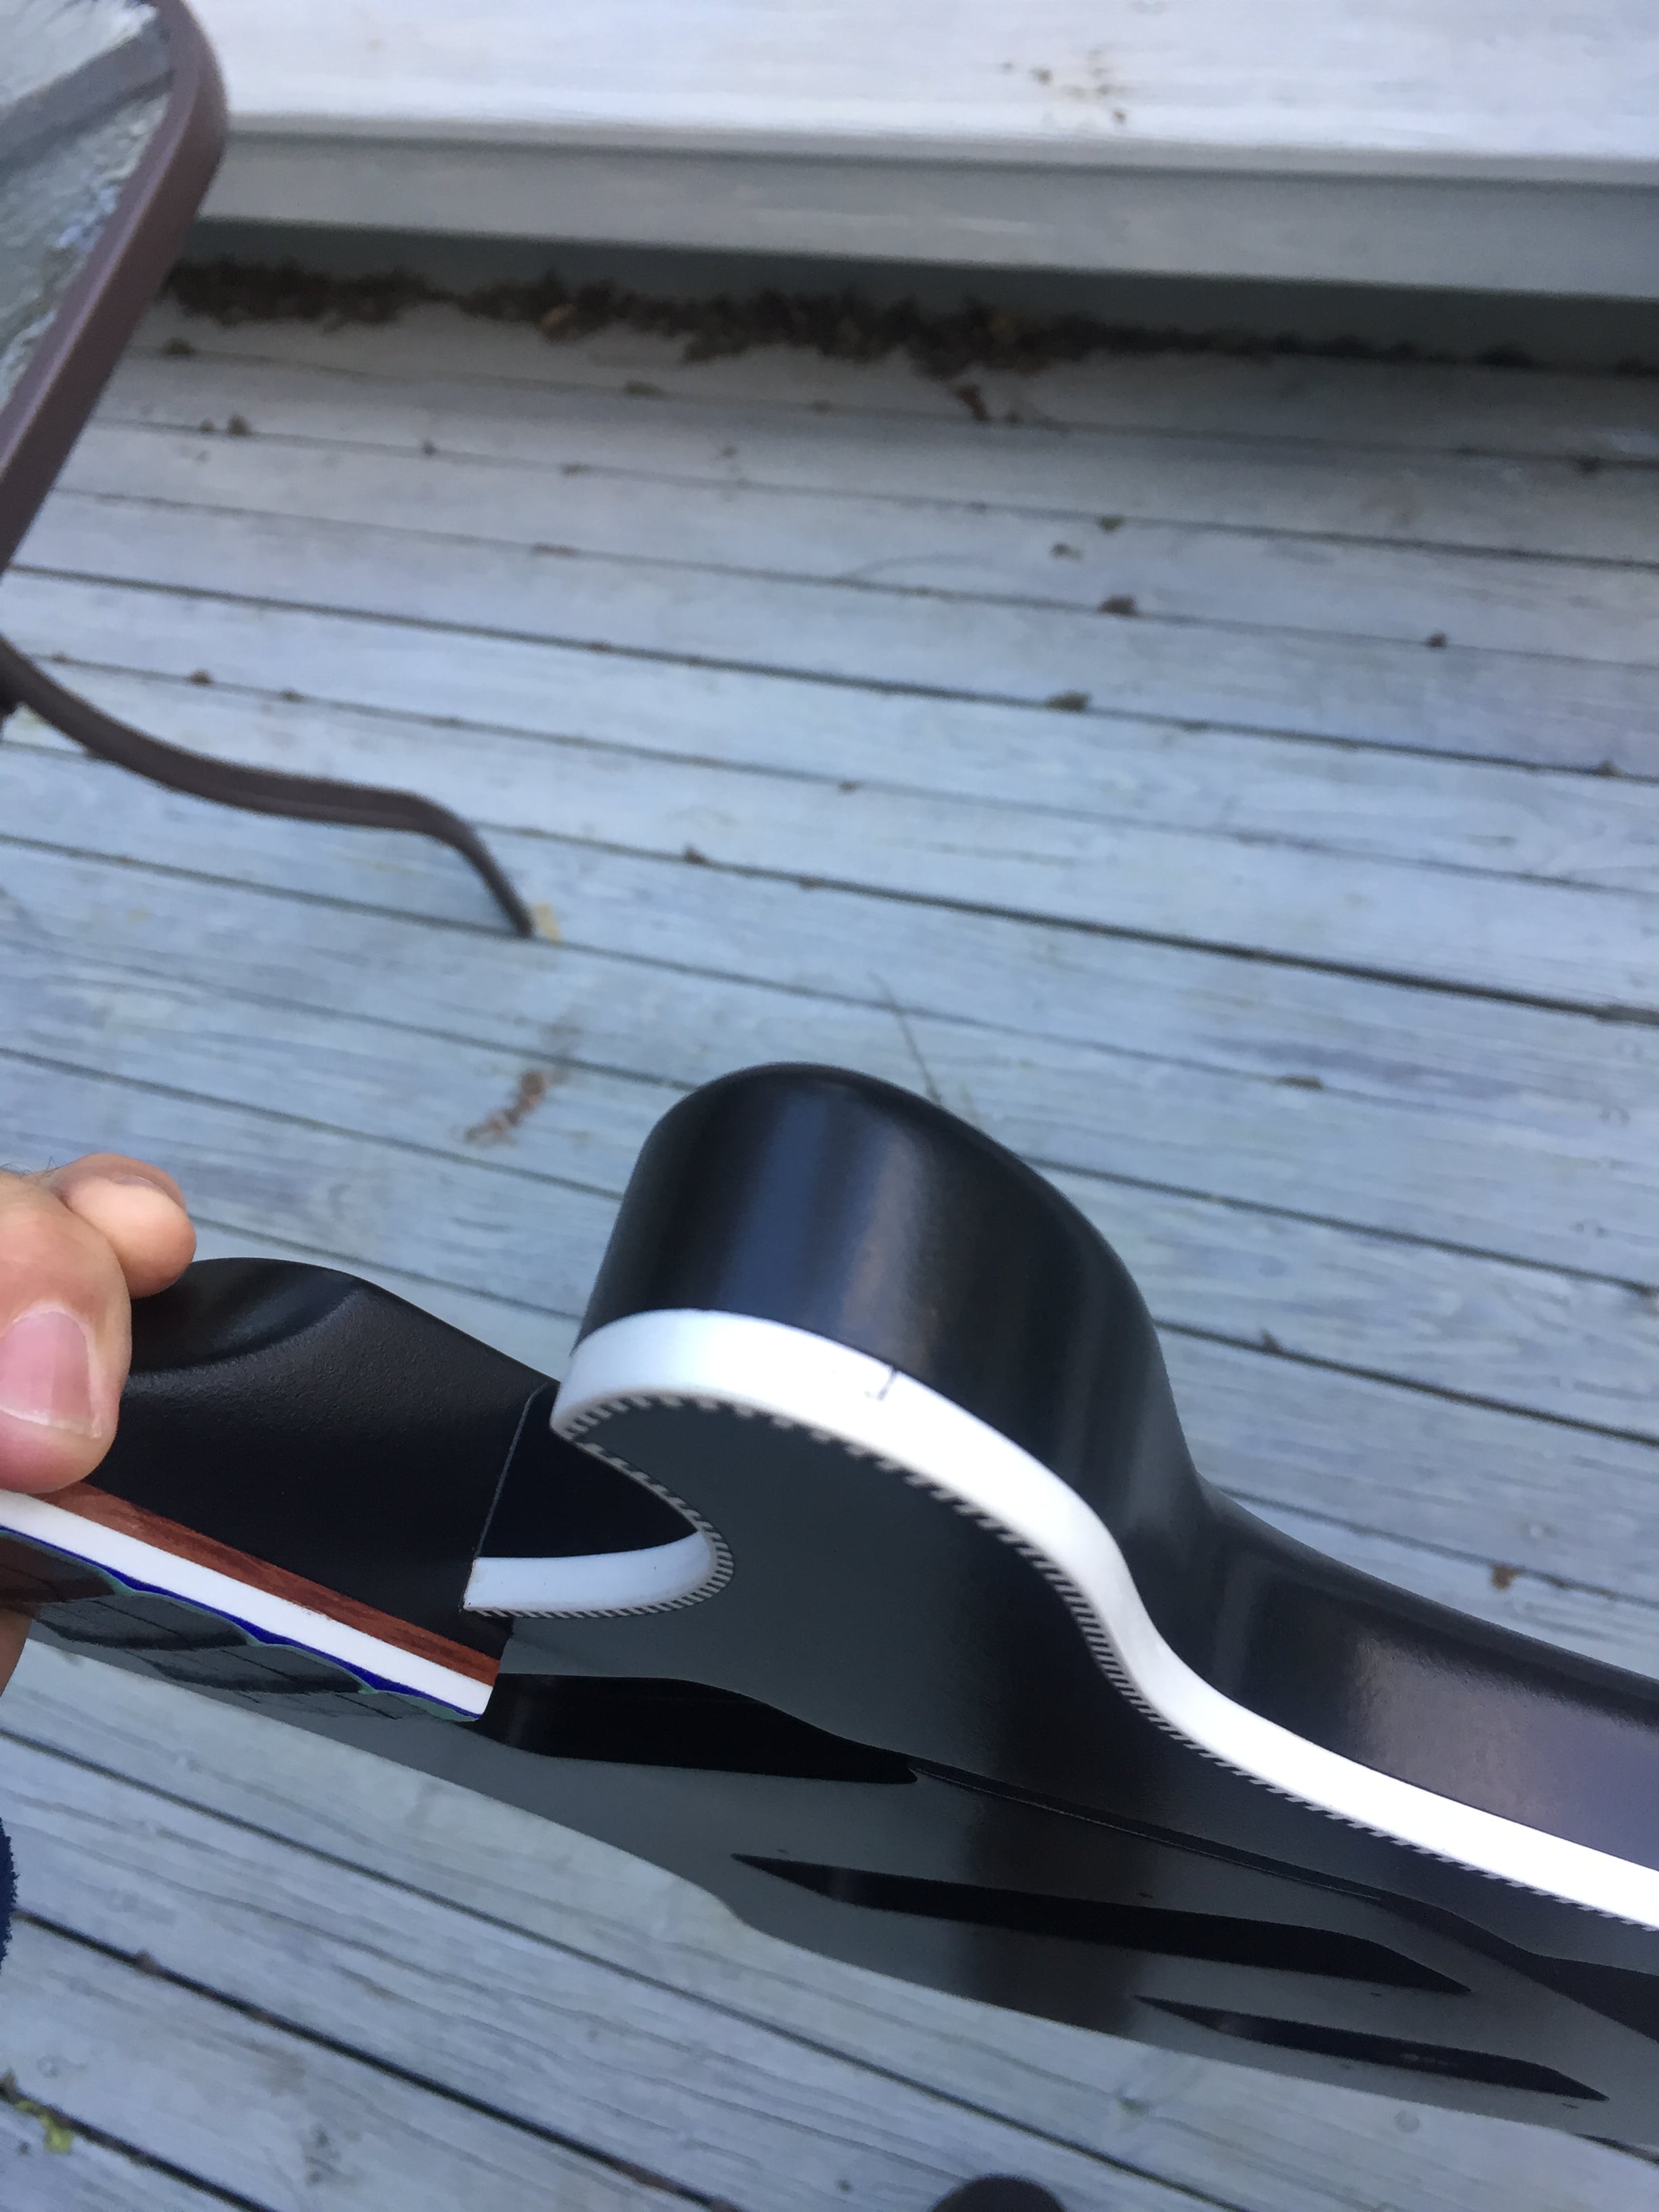
Here's an example of white binding and black paint, about as unforgiving as it gets, and done with the Indigo tape. Look Ma, no scraping! The tiny hair-fine bleed-through you see in the photo came off with a razor in about 5 seconds.
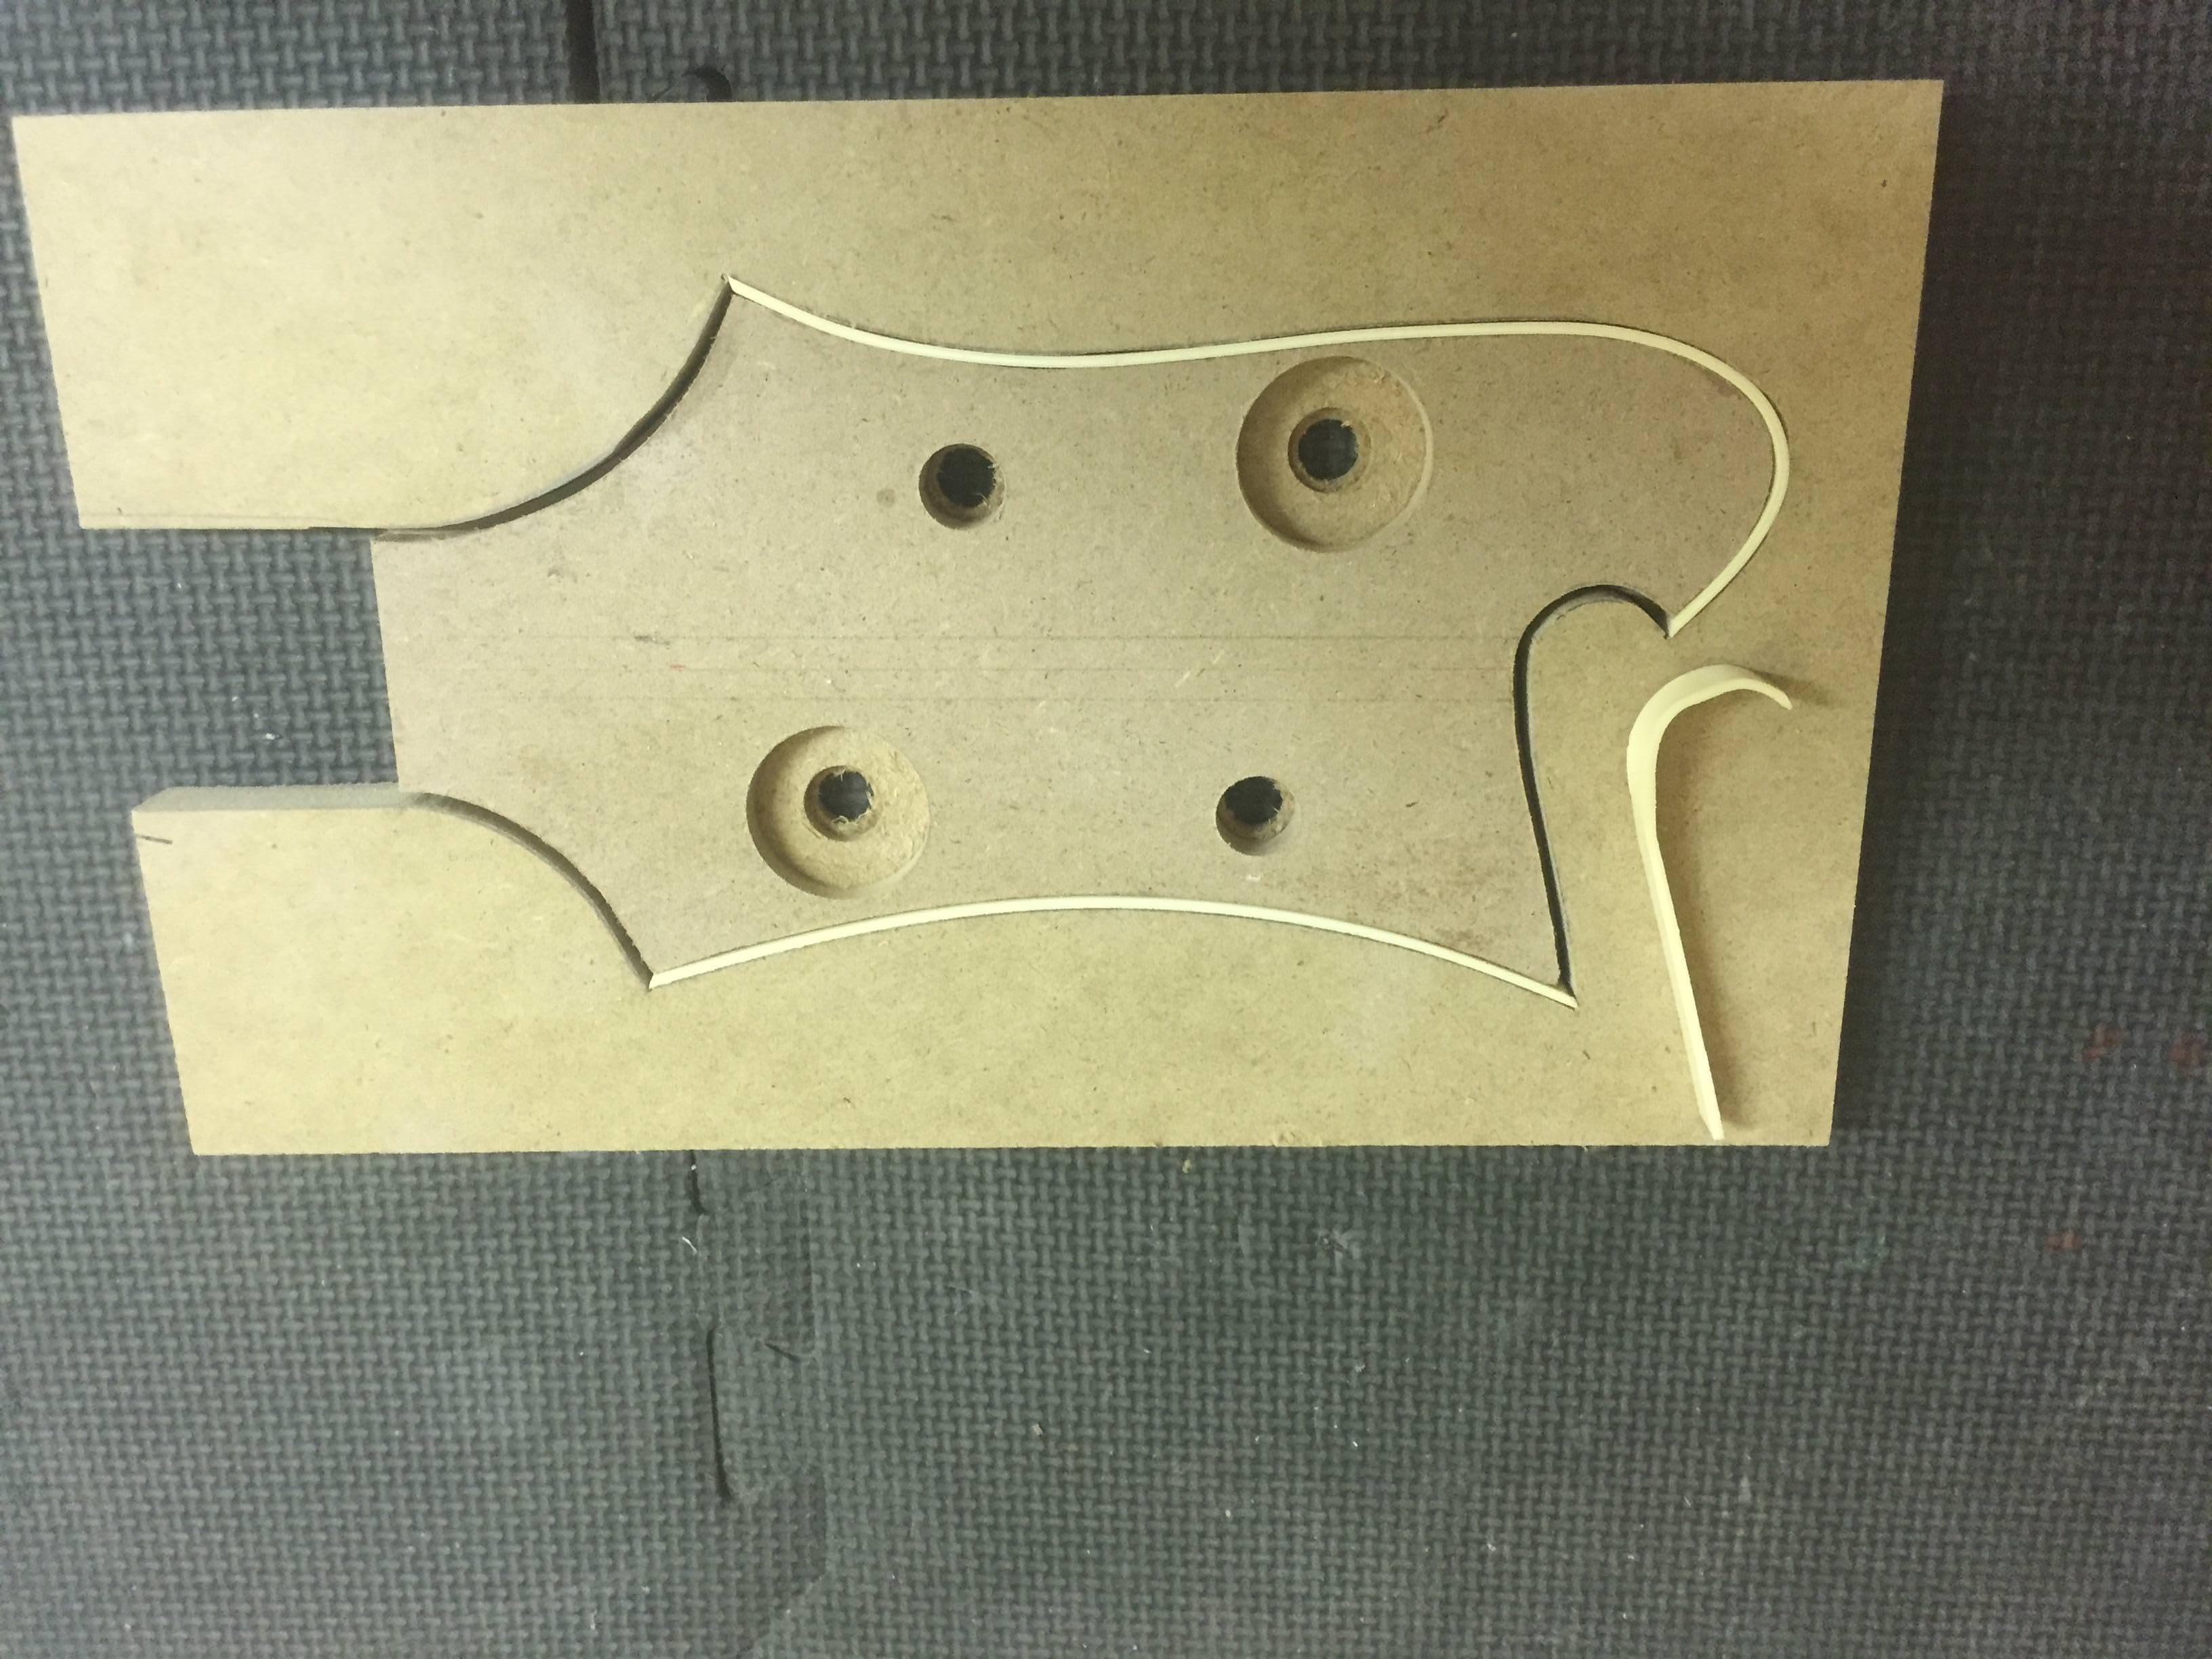
Body contours, even the horns, are usually a gentle enough radius that you can bend binding around them without much fuss, headstocks are a different story, which may have something to do with relative rarity of bound headstocks! Ric headstocks are notoriously pointy, but not alone in that. here's a bending jig for headstock binding. The "positive" headstock template has a binding ledge of the appropriate size cut into it, the "negative" is cut for a reasonably tight fit, allowing the binding strips to be heated and pre-bent, mitered, etc. and allowed to take a "set" in the jig. It might work better to have an exaggerated over-bend on some tight radius, as the plastic tends to spring back some out of the jig.
Using a heat gun to bend plastic binding is the tried and true method, but the line between "warm enough to bend" and "toast" is vanishingly small. Looking for suggestions and Pro tips on bending very tight radii. One might be to laminate two or three thinner strips of the same in a jig with acetone, per the video above, which would theoretically allow them to collectively bend to a finer radius. Another would be bending around a heated piece of pipe of appropriate diameter, similar to the bending irons used for wood binding and purfling.
Material:
Seems to come down to real celluloid (rare and expensive to ship, because it's extremely flammable), PVC, or ABS. It's not always specified as either PVC or ABS, just "plastic". I've bought all three, the only common denominator I've found is that all three seem to be dissolvable in acetone.
Glue:
I've tried the Big Three, CA Glue, Stewmac Binding Cement, and Acetone. Of the three, I found acetone the most user-friendly. It can be wicked into gaps, evaporates quickly, and leaves no residue. Any loose spots can be re-glued in place by wicking in more acetone, it's so thin that the joint draws it in by capillary action. The only downside I found is that it will dissolve the glue on some tapes used to hold the binding. It also has the advantage of being dissolved in acetone into a "paste" that can be troweled into gaps or miters for a "welded" joint. I found CA glue a mess, and it can discolor the wood or prevent later finishes from absorbing evenly. The Stewmac glue works fine, but does leave some residue, I didn't see any big advantage over acetone.
Tools:
I'm generally sticker-shocked by Stewmac's "creative" pricing and outrageous "shipping and handling" charges, but this tool is worth it IMO, also offered by LMI. The shear-cut blades and precision machined bearings cut very clean, precise "ledges". There may be another rabbeting bit sets out there that would work, if so, by all means post a link, but these are optimized for common binding thickness. In practice, I've only needed the bearings for .040, .060, and .070". The Stewmac .060" binding actually mikes to around .065, and tends to expand a little when glued, so the .070" bit has come in handy.
[Invalid or Expired Link Removed]
http://www.lmii.com/products/tools-services/rout/shape/drill/binding-cutter-bearings
Here's and example of a single-ply ledge cut in a headstock for .060" binding with the Stewmac cutters:
And here's a double ledge for two-ply binding, also with Stemac cutters:
With either a "Binding Machine" that rides around the body contour on a vertical rail system, or one of the many ingenious home-built rigs serving the same purpose, it's possible to bind body contours, albeit only to a shallow depth, the Aerodyne Jazz a prime example:
This one is a pretty good tutorial on headstock binding, using a purpose-built jig to pre-bend multi-ply laminates into the required shape prior to gluing. One advantage of multi-ply binding is that each of the thinner layers will take a bend that thicker material will not.
This video shows an alternate method for bending plastic binding without a heat gun, using only acetone fumes. A spectacular failure in this case, as he reduces the binding to a sticky mush, but I wonder if a shorter exposure would yield better results:
Scraping and Finishing:
Gibson, Rickenbacker, and other old-school builders still have teams of highly-skilled people who scrape binding by hand with razor blades or a piece of sharpened spring-steel. An admirable skill, no doubt, but with a big learning curve! This guy makes it look easy, it isn't.
I tried this myself, and quickly realized I didn't have the time or patience to get good at it, and found I could get damn nearly as good results using a modern plastic film masking tape, this stuff is absolutely amazing:
https://www.amazon.com/3M-Indigo-PN...sr=8-2-fkmr0&keywords=3m+finsline+indigo+1/8"
Here's an example of white binding and black paint, about as unforgiving as it gets, and done with the Indigo tape. Look Ma, no scraping! The tiny hair-fine bleed-through you see in the photo came off with a razor in about 5 seconds.
Body contours, even the horns, are usually a gentle enough radius that you can bend binding around them without much fuss, headstocks are a different story, which may have something to do with relative rarity of bound headstocks! Ric headstocks are notoriously pointy, but not alone in that. here's a bending jig for headstock binding. The "positive" headstock template has a binding ledge of the appropriate size cut into it, the "negative" is cut for a reasonably tight fit, allowing the binding strips to be heated and pre-bent, mitered, etc. and allowed to take a "set" in the jig. It might work better to have an exaggerated over-bend on some tight radius, as the plastic tends to spring back some out of the jig.
Using a heat gun to bend plastic binding is the tried and true method, but the line between "warm enough to bend" and "toast" is vanishingly small. Looking for suggestions and Pro tips on bending very tight radii. One might be to laminate two or three thinner strips of the same in a jig with acetone, per the video above, which would theoretically allow them to collectively bend to a finer radius. Another would be bending around a heated piece of pipe of appropriate diameter, similar to the bending irons used for wood binding and purfling.
As an Amazon Associate, TalkBass may receive commissions from qualifying purchases made via links on this site.




 ..Not fun.