Hello.
I'd like to present the way I like to do the fretwork (leveling and crowning). This is compilation of many ideas and techniques. I'm just trying to put it together in one place and be as simple as possible. As well as my "tools"
I'm not pretending this is the only right way of doing the task. As well as I advice to let the professionals do that work. But if you have no such service available or your instrument worth less than the fretwork, or you just want to do it you may follow the bellow info.
So here we go:
1. Leveling. Credits for the idea go to TB'er JLS. So we take straight U-channel like this:
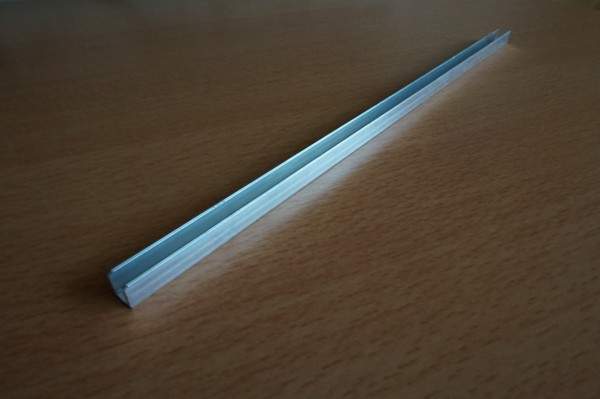
And tightly warp the 500 grit sand paper around it. Length of the U-channel is equal to the length of the paper A4 sheet We get "sanding beam" in that way. If you want to be more precise use finer grit sandpaper like 600, 800 or 1000.
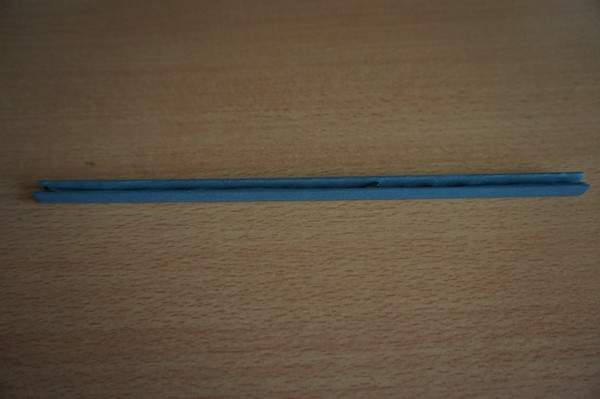
With the strings tuned to the pitch we tight the truss rod until the neck is dead-straight. Alternatively we can de-tune guitar to achieve straight neck. With the strings still on we take our sanding beam put it under the string. Now drag it alongside the string back and forth taking ALL the frets. You need to apply very little pressure towards the frets and do it very EVENLY along the beam. Our target is to get MINIMALISTIC flat tops on all the frets to get the STRAIGT as possible line. Several strokes are enough. This will ensure ALL frets are in level under real-life conditions. I've used syringe needles to block sanding paper on edges, use whatever that fits or even nothing at all. Inspect the frets closely and repeat the operation if some frets are not getting touched. If you've got a little bit wider flat tops then drag the beam BETWEEN the strings to even out the fret radius. Wipe the strings afterwards: they will collect dust and become dirty.

My U-channel is 8mm wide which is a little bit too narrow. 10 or 12 mm would be nicer.
At the end we should get something like that. Note the flat fret tops under the strings. In my case I had to take a little bit more in the 12'th fret area because of neck s-curve and back-buzz issue. Little scratches are left by dirty strings Also, I see I should have taken a little bit more in-between the strings...
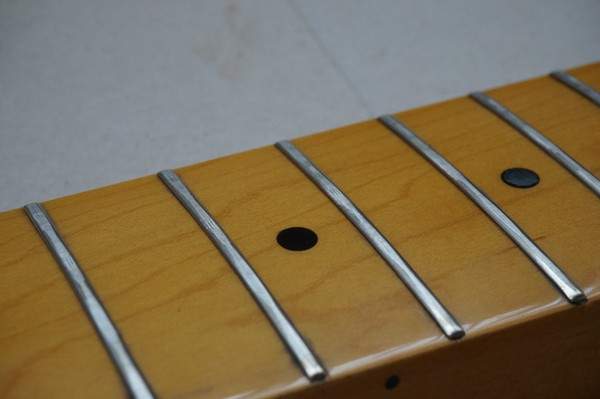
Set the neck back to normal relief/tune and play it to check if there is no fret-buzz or back-buzz (string part between the nut and fret is buzzing when you hammer-on it). Repeat operation if necessary. STOP TRYING if you getting-off too much fret material (very wide flat tops) with no positive results.
After the frets have been leveled you need to crown them. The main idea here is to make fret tops round again. OR at least get rid of sharp flat-tops edges. Crowning files are very good tools for that, but they are expensive for a single-run purpose and somewhere around the globe not available for a reasonable price at all. In that case we are left with triangle files or some sort other files to round the fret tops.
I had mixed experiences with needle files or larger ones: they tend to leave deep scratches, harder to control them and protect the fingerboard. So I've taken little (1") piece of the same U-channel, warped a piece of 500 grit sandpaper around and block it with the syringe needle

This will be my instrument for crowning. It is easy to control. It doesn't do deep scratches. It has 3 working surfaces and very easy to refresh
But before the crowning process you need to properly protect the fingerboard. I use narrow masking tape for the entire fretboard. You need to be as close as possible to frets. Less cleaning in that way too.

For even more protection of the fret being worked with I use the cooper tape (pieces left after the shielding):

Actually, one piece is enough because you work only one side of the fret at a time It you've got no cooper tape use whatever else: razorblade, insulation tape anything harder than a masking tape Re-glue the same piece from fret to fret. Replace when it wears out. For the tiny frets you'll want as thin layer as possible.
One thing about the masking tape: DON'T LEAVE it on the neck for longer time(lets say 3 hours). The glue MIGHT stick to the fingerboard or/and neck and become major PIA to remove!!!! For the same reason try a small piece of tape on neck if it doesn't leave its glue on it then you remove it.
When ready take a little "crowning tool put it at an angle to the fret and drag along the fret back and forth. You'll see the shining line in the place of flat top edge. Adjust the angle towards the fret to make wide frets round.

Our target here is to get rid of sharp edges and make fret top as round as possible. In fact you need to do the flat top line of the leveled fret as narrow and straight as possible. Also it should run through the center line of the fret: please to be equal with both sides of the every fret you work on. Also, don't forget to smooth the fret edges!!!
When all the frets are done I do this trick: warp the piece of sand paper around my middle finger

...and slide back and forth along entire neck several times. Finger should follow the neck radius. Do very long and fast moves. Start with 800, go through finer papers ( at least 1500) up to 2500 grit. Finer grit requires more moves. Target with every run - to sand out previous grits marks but not more.

That way you'll smooth the fret rounding further and make them semi-shine. If you like perfection - polish t with steel wool (protect electronics!!!!) or any other polishing materials/techniques.
If you've done proper masking you'll have almost nothing to do with the cleaning I used a toothpick to wipe frets edges where they contact fretboard and commonly available cleaning fluids/oils. In my case GHS's FastFret stick worked well.

Please comment and share your thoughts if you feel you need to. Critics are accepted too
I'd like to present the way I like to do the fretwork (leveling and crowning). This is compilation of many ideas and techniques. I'm just trying to put it together in one place and be as simple as possible. As well as my "tools"
I'm not pretending this is the only right way of doing the task. As well as I advice to let the professionals do that work. But if you have no such service available or your instrument worth less than the fretwork, or you just want to do it you may follow the bellow info.
So here we go:
1. Leveling. Credits for the idea go to TB'er JLS. So we take straight U-channel like this:
And tightly warp the 500 grit sand paper around it. Length of the U-channel is equal to the length of the paper A4 sheet
We get "sanding beam" in that way. If you want to be more precise use finer grit sandpaper like 600, 800 or 1000.With the strings tuned to the pitch we tight the truss rod until the neck is dead-straight. Alternatively we can de-tune guitar to achieve straight neck. With the strings still on we take our sanding beam put it under the string. Now drag it alongside the string back and forth taking ALL the frets. You need to apply very little pressure towards the frets and do it very EVENLY along the beam. Our target is to get MINIMALISTIC flat tops on all the frets to get the STRAIGT as possible line. Several strokes are enough. This will ensure ALL frets are in level under real-life conditions. I've used syringe needles to block sanding paper on edges, use whatever that fits or even nothing at all. Inspect the frets closely and repeat the operation if some frets are not getting touched. If you've got a little bit wider flat tops then drag the beam BETWEEN the strings to even out the fret radius. Wipe the strings afterwards: they will collect dust and become dirty.
My U-channel is 8mm wide which is a little bit too narrow. 10 or 12 mm would be nicer.
At the end we should get something like that. Note the flat fret tops under the strings. In my case I had to take a little bit more in the 12'th fret area because of neck s-curve and back-buzz issue. Little scratches are left by dirty strings
Also, I see I should have taken a little bit more in-between the strings...Set the neck back to normal relief/tune and play it to check if there is no fret-buzz or back-buzz (string part between the nut and fret is buzzing when you hammer-on it). Repeat operation if necessary. STOP TRYING if you getting-off too much fret material (very wide flat tops) with no positive results.
After the frets have been leveled you need to crown them. The main idea here is to make fret tops round again. OR at least get rid of sharp flat-tops edges. Crowning files are very good tools for that, but they are expensive for a single-run purpose and somewhere around the globe not available for a reasonable price at all. In that case we are left with triangle files or some sort other files to round the fret tops.
I had mixed experiences with needle files or larger ones: they tend to leave deep scratches, harder to control them and protect the fingerboard. So I've taken little (1") piece of the same U-channel, warped a piece of 500 grit sandpaper around and block it with the syringe needle
This will be my instrument for crowning. It is easy to control. It doesn't do deep scratches. It has 3 working surfaces and very easy to refresh
But before the crowning process you need to properly protect the fingerboard. I use narrow masking tape for the entire fretboard. You need to be as close as possible to frets. Less cleaning in that way too.
For even more protection of the fret being worked with I use the cooper tape (pieces left after the shielding):
Actually, one piece is enough because you work only one side of the fret at a time
It you've got no cooper tape use whatever else: razorblade, insulation tape anything harder than a masking tape Re-glue the same piece from fret to fret. Replace when it wears out. For the tiny frets you'll want as thin layer as possible.One thing about the masking tape: DON'T LEAVE it on the neck for longer time(lets say 3 hours). The glue MIGHT stick to the fingerboard or/and neck and become major PIA to remove!!!! For the same reason try a small piece of tape on neck if it doesn't leave its glue on it then you remove it.
When ready take a little "crowning tool put it at an angle to the fret and drag along the fret back and forth. You'll see the shining line in the place of flat top edge. Adjust the angle towards the fret to make wide frets round.
Our target here is to get rid of sharp edges and make fret top as round as possible. In fact you need to do the flat top line of the leveled fret as narrow and straight as possible. Also it should run through the center line of the fret: please to be equal with both sides of the every fret you work on. Also, don't forget to smooth the fret edges!!!
When all the frets are done I do this trick: warp the piece of sand paper around my middle finger
...and slide back and forth along entire neck several times. Finger should follow the neck radius. Do very long and fast moves. Start with 800, go through finer papers ( at least 1500) up to 2500 grit. Finer grit requires more moves. Target with every run - to sand out previous grits marks but not more.
That way you'll smooth the fret rounding further and make them semi-shine. If you like perfection - polish t with steel wool (protect electronics!!!!) or any other polishing materials/techniques.
If you've done proper masking you'll have almost nothing to do with the cleaning
I used a toothpick to wipe frets edges where they contact fretboard and commonly available cleaning fluids/oils. In my case GHS's FastFret stick worked well.Please comment and share your thoughts if you feel you need to. Critics are accepted too
Last edited: