
• TalkBass has been independent since 1998. Add your voice.
    Create a free account to reply to discussions, view embedded media, and browse with fewer display ads.
    Join freeLog in
    Want zero display ads or expanded classifieds tools? Compare plans.

For anyone who has tried to visualize a string path along a fingerboard...

I did some CAD modeling to show what happens when a string doesn't follow a ruled surface. A ruled surface is any surface that a edge can be laid flat on. In the context of guitars there are two ruled surface fingerboards in common use: cylindrical (conventional or single radius) and conical (or compound radius). There is a good image on wikipedia to help picture this:

1920px-Regelfl-zk.svg.png


Think of the black lines along the surfaces as strings. When the strings follow those lines they will be parallel to the fingerboard.

But when the strings follow a different path then the distance between the string and the fingerboard stops being equal. This is the case on a constant, but not flat, radius board where the nut and bridge spacing are not equal -- like almost all basses ever made. It is also the case for a compound radius board where the bridge radius doesn't follow a mathematically prescribed value for the given nut radius and nut and bridge spacing.

I remembered reading a great post by @Bruce Johnson a while back that got me thinking about how compound radius fingerboards work. In that post he explained the effect, but the shape is difficult to describe so I decided to make my own 3D model to help visualize it:
compound_radius_example.png


The fingerboard in the picture above is modeled as the dark curved surface, and the string is modeled as a yellow plane. The perspective is a bit hard to explain, but the view here is roughly from the bottom corner of a typical bass (where the jack is) looking towards the headstock. The bridge is on the left and the nut is on the right.

The top of the yellow plane can be though of as the string path and the height of the yellow part of the plane above the fingerboard is the gap between the string and the fingerboard. You can see that the string contacts the fingerboard in the middle but there is an increasing gap towards the two ends.

The fingerboard here is an exaggerated compound radius where the bridge has twice the radius of the nut. The string path is parallel to the centerline (i.e.: the same nut and bridge string spacing). This is basically the opposite of what happens on a single radius board when the nut and bridge are different spacing, but the idea is analogous.

If anyone wants to experiment with this for themselves the FreeCAD file can be downloaded here.

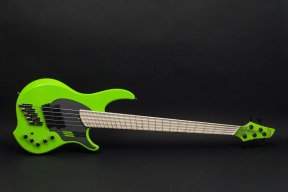
Given that there is an ideal compound radius for a given nut and string spacing, I checked some real basses, such as this one, and discovered they don't actually use the ideal conical shape. Specifically, their bridge radius is much flatter (bigger) than would be required for the nut and bridge spacing. Any ideas why? Flatter feel for the plucking hand? More even string-string levels over the pickups? Bridge height constraints?

Given the complexities, I can understand why most basses don't have a compound radius board, but if the manufacturer is already making one I am kinda surprised they don't actually make it the ideal shape.
 
It's particularly odd given that most necks are cut by CNC now, so it's achievable. The answer is probably simple: they don't have to. The standard designs work well enough for most people. Seeing a guitar with true temper frets was an eye opener as to just how approximate intonation is with standard frets, yet I've never seen a true temper guitar or bass in real life. I suspect the little oddities required when setting up a bass, like having to add fallaway to upper frets, are symptoms of the problems you describe, but it's hard to imagine how i'd achieve an "ideal" profile by hand.
 
I wonder if a contributing factor is just the fact that arriving at the ideal radius for the compound board has to be calculated vs. going by feel when developing a compound radius for comfort reasons? The fact that truing up the board along the string paths is done anyway, might have precluded the idea that figuring out and using the ideal mathematically derived radii was even a thing. :D Might be speaking from my own personal experience here. :roflmao:
 
Also there’s a limit to how accurate you can be before you are having to worry about which way gravity is pulling the string, fret wear, the tolerances on the string diameter, the movement of the wood etc etc.

just build it somewhere near and then level the frets in line with the string path - done
 
Seeing a guitar with true temper frets was an eye opener as to just how approximate intonation is with standard frets, yet I've never seen a true temper guitar or bass in real life.
I've been fortunate to go to 20 NAMM shows between 1984 and 2006. Every year there is always someone touting a new way to improve tuning and those wiggly frets are a common re-invention. When talking to the inventors I like to ask if they can give a specific example of a note relationship that has improved. I'll get an answer something like on an A chord this 3rd is now in better tune. So I always ask what happens if you transpose a half step up or down, doesn't that make other relationships more out of tune? This is often met with anger :( and I never get to ask if you are now in a different tuning won't you clash with the rest of the band that isn't?

I now believe we just aren't that finely tuned and a little vibrato will make a note cover many tuning points. Henrik Linder from Dirty Loops used a tempered bass and I certainly can't tell when he's using it compared to another bass.

 
Also there’s a limit to how accurate you can be before you are having to worry about which way gravity is pulling the string, fret wear, the tolerances on the string diameter, the movement of the wood etc etc.
A few decades back I got to see Marcus Miller in a tiny club, I actually rested my feet on the stage and could have turned his pedals on and off. He had the same tuner I did (boss TU12) and when I watched him tune I was shocked to see how roughly he tuned. I would focus all obsessively trying to get it as perfect as possible and here's this legend just killing it with a quick and dirty tune.

Here's what the interwebs tells me about this:

"In acoustics, 1 cent is equal to 1/100 of a semitone (the interval from C to C#). People with good hearing can tell apart pitches that are around 5 cents different, so 1/20 of a semitone*. There are 12 semitones to an octave, giving us 1/12 * 1/20 = 1/240 for the answer."
 
  • Like
Reactions: Jeff Siddall
I did some CAD modeling to show what happens when a string doesn't follow a ruled surface. A ruled surface is any surface that a edge can be laid flat on. In the context of guitars there are two ruled surface fingerboards in common use: cylindrical (conventional or single radius) and conical (or compound radius). There is a good image on wikipedia to help picture this:

View attachment 3690263


Think of the black lines along the surfaces as strings. When the strings follow those lines they will be parallel to the fingerboard.

But when the strings follow a different path then the distance between the string and the fingerboard stops being equal. This is the case on a constant, but not flat, radius board where the nut and bridge spacing are not equal -- like almost all basses ever made. It is also the case for a compound radius board where the bridge radius doesn't follow a mathematically prescribed value for the given nut radius and nut and bridge spacing.

I remembered reading a great post by @Bruce Johnson a while back that got me thinking about how compound radius fingerboards work. In that post he explained the effect, but the shape is difficult to describe so I decided to make my own 3D model to help visualize it:
View attachment 3689962

The fingerboard in the picture above is modeled as the dark curved surface, and the string is modeled as a yellow plane. The perspective is a bit hard to explain, but the view here is roughly from the bottom corner of a typical bass (where the jack is) looking towards the headstock. The bridge is on the left and the nut is on the right.

The top of the yellow plane can be though of as the string path and the height of the yellow part of the plane above the fingerboard is the gap between the string and the fingerboard. You can see that the string contacts the fingerboard in the middle but there is an increasing gap towards the two ends.

The fingerboard here is an exaggerated compound radius where the bridge has twice the radius of the nut. The string path is parallel to the centerline (i.e.: the same nut and bridge string spacing). This is basically the opposite of what happens on a single radius board when the nut and bridge are different spacing, but the idea is analogous.

If anyone wants to experiment with this for themselves the FreeCAD file can be downloaded here.

Given that there is an ideal compound radius for a given nut and string spacing, I checked some real basses, such as this one, and discovered they don't actually use the ideal conical shape. Specifically, their bridge radius is much flatter (bigger) than would be required for the nut and bridge spacing. Any ideas why? Flatter feel for the plucking hand? More even string-string levels over the pickups? Bridge height constraints?

Given the complexities, I can understand why most basses don't have a compound radius board, but if the manufacturer is already making one I am kinda surprised they don't actually make it the ideal shape.


Dingwall lists the two reasons why they use a flatter radius at the bridge in their "specifications" section.
 
  • Like
Reactions: Jeff Siddall
So I'll sneak in a question here I've never quite gotten an answer to elsewhere: I always toyed with the idea of an electric bass fingerboard 'ala classic guitar. Zero/flat fingerboard radius, no width taper from high end to nut. Of course, I'd think the action would be higher to accommodate the vibrating string arc. Bad idea ?
 
  • Like
Reactions: Beej
I've been fortunate to go to 20 NAMM shows between 1984 and 2006. Every year there is always someone touting a new way to improve tuning and those wiggly frets are a common re-invention. When talking to the inventors I like to ask if they can give a specific example of a note relationship that has improved. I'll get an answer something like on an A chord this 3rd is now in better tune. So I always ask what happens if you transpose a half step up or down, doesn't that make other relationships more out of tune? This is often met with anger :( and I never get to ask if you are now in a different tuning won't you clash with the rest of the band that isn't?

I now believe we just aren't that finely tuned and a little vibrato will make a note cover many tuning points. Henrik Linder from Dirty Loops used a tempered bass and I certainly can't tell when he's using it compared to another bass.


Excellent post!

The "wiggly frets" thing is simply a way to get an instrument to produce pitches that are closer to the "ideal" notes that equal temperament predicts and lays out for us. All these contrivances to correct minor inconsistencies in actual produced notes can actually do what they predict, but what they don't tell you is that doesn't translate to purer harmonic intervals.

The note relationships in equal temperament and how the human brain perceives those relationships is a whole study in itself, but the bottom line is the harmonic relationships are as much as 14 cents deviant from "pure" Pythagorean harmonic relationships, particularly the third interval of a tritone.

Wiggly frets? You can get even closer to being a more accurate and true 14 cents off pitch if you really want that, plus it all changes the moment we move to a different key or scale value.

Luckily, as bass players, most of us aren't all that interested in tritones, settling for occasional double stops sprinkled among a lot of single note work. I'm pretty happy with that situation! :)
 
So I'll sneak in a question here I've never quite gotten an answer to elsewhere: I always toyed with the idea of an electric bass fingerboard 'ala classic guitar. Zero/flat fingerboard radius, no width taper from high end to nut. Of course, I'd think the action would be higher to accommodate the vibrating string arc. Bad idea ?
Just play a Chapman stick instead? :)
 
A few decades back I got to see Marcus Miller in a tiny club, I actually rested my feet on the stage and could have turned his pedals on and off. He had the same tuner I did (boss TU12) and when I watched him tune I was shocked to see how roughly he tuned. I would focus all obsessively trying to get it as perfect as possible and here's this legend just killing it with a quick and dirty tune.

Here's what the interwebs tells me about this:

"In acoustics, 1 cent is equal to 1/100 of a semitone (the interval from C to C#). People with good hearing can tell apart pitches that are around 5 cents different, so 1/20 of a semitone*. There are 12 semitones to an octave, giving us 1/12 * 1/20 = 1/240 for the answer."

Yes, that is correct. Bass fretwork is generally done to 0.5 mm (0.025") accuracy or better because at the 24th fret of a 34" scale instrument that is about 5 cents.

Regarding pros and tuning, keep in mind they generally have good ears and hands and can adjust intonation of a slightly flat string to be correct pitch just with fretting hand pressure. Not saying this is what MM was doing, only that it is possible.

Dingwall lists the two reasons why they use a flatter radius at the bridge in their "specifications" section.

Well... technically they list two reasons for compound radius boards. But you have a valid point that you could extend those arguments to going beyond the ideal ratios.

So I'll sneak in a question here I've never quite gotten an answer to elsewhere: I always toyed with the idea of an electric bass fingerboard 'ala classic guitar. Zero/flat fingerboard radius, no width taper from high end to nut. Of course, I'd think the action would be higher to accommodate the vibrating string arc. Bad idea ?

Theoretically, a classical fingerboard can have the lowest possible action. If either your strings are parallel (equal spacing) OR there is no radius on the fingerboard (you don't need to have both), then you have sting paths that follow a ruled surface and you should be able to get the lowest possible action for a given playing style. Of course, as others have pointed out, a fret level that flattens the string paths will also allow for the lowest possible action so there is no particular benefit either way.

I have encountered several builders here who use flat fretboards and I am working on a fretless board currently that will be flat. When it is done I will let you know how it plays!
 
Last edited:
Thanks, Jeff.

When I played Alembic fives, they both had what they call their 'classic taper', which on a five was a 2" nut and 2.5" width at the 24th fret, so the strings splayed only marginally, and I really liked that. That led me to wonder about the same width at each end (so the strings literally paralleled each other), and then why not, a flat radius. I could get the action plenty low enough on them (.010 relief), but the idea of the strings having no flare from one end to the other would seem even better, it just felt right to my hands. Oh well . . . . .

Thanks for the education,

JW
 
Dingwall lists the two reasons why they use a flatter radius at the bridge in their "specifications" section.
Can you link this? I searched but could not find mention on their website other than just that they use a compound radius. Curious to read the rationale... :)

So I'll sneak in a question here I've never quite gotten an answer to elsewhere: I always toyed with the idea of an electric bass fingerboard 'ala classic guitar. Zero/flat fingerboard radius, no width taper from high end to nut. Of course, I'd think the action would be higher to accommodate the vibrating string arc. Bad idea ?
I've built a few basses with flat fingerboards, and I'm a convert. :D I'm used to 20" radius anyway, so I didn't really even notice anything different with a flat board, plus I play classical, so was already familiar, aside from the scale difference. :)
 
Ignore the radius at the bridge for now. The point of a compound radius is so that the tops of the frets under each string form a straight line along the string path. The simplest way to do this is to use 3 point arcs between the outside string paths and the centerline. Determine how thick you want the fretboard to be along the path of the two outside strings and how thick you want it down the center. In our case we want the the thickness of the fretboard under the outside strings to be 3 mm on a FB that's 6 mm thick down the centerline - you can choose any thickness you like. The method doesn't change.

The 3 point arcs run perpendicular to the centerline and include - 1. the intersection of the outside bass string path and the target thickness of the fretboard along the path, 2. the centerline at the top surface of the fretboard, 3. the intersection of the outside treble string path and the target thickness of the fretboard along the string path. In CAD, draw an arc between these three points at each end of the fretboard. You will have a compound radius that perfectly matches the taper of your strings. It will match the middle strings as well as long as your strings are spaced equally from center to center at the nut and bridge.
 
... I always toyed with the idea of an electric bass fingerboard 'ala classic guitar. Zero/flat fingerboard radius, no width taper from high end to nut. ...

I made a fretless bass like that. https://www.talkbass.com/threads/build-3-this-time-it-is-actually-a-bass-5-string-fretless-still-mostly-hand-tools.1290896/page-2#post-20188322 The thing to consider is that with regular string spacing that you would find at the bridge being the same as up by the nut (due to parallel strings,) things are going to feel strange at the nut. I minimized that issue with an very tight string spacing of about 1/2". That may be too tight for many players. Also, with that spacing you probably wont find a commercially available bridge that will accommodate that. Being fretless, it was easy to make my own bridge. The string (action) is very low. I don't see anything in that design that prevents them from being low.
 
Thanks, RWK.

I agree the bridge would be a hill to climb, but to me idea of the strings being parallel just rings as right for me. Of course, it's a pipe dream, but I appreciate what you found in your build.

Thanks again,

JW
 
  • Like
Reactions: rwkeating
John Entwistle's last basses (STATUS Buzzards I and II) had almost flat fretboards, 44mm at the nut and 16mm string spacing bridge. Here's one I did a restorationon on. Zero relief, no trussrod, CF, 26 (plus zero) fret neck. Even with really worn frets it played like a dream, no buzzes with extremely low action. I have a feeling modeling wasn't involved, just lots of experience.

oKfxdmb.jpg
 
  • Like
Reactions: 5tring and Beej
Ignore the radius at the bridge for now. The point of a compound radius is so that the tops of the frets under each string form a straight line along the string path. The simplest way to do this is to use 3 point arcs between the outside string paths and the centerline. Determine how thick you want the fretboard to be along the path of the two outside strings and how thick you want it down the center. In our case we want the the thickness of the fretboard under the outside strings to be 3 mm on a FB that's 6 mm thick down the centerline - you can choose any thickness you like. The method doesn't change.

The 3 point arcs run perpendicular to the centerline and include - 1. the intersection of the outside bass string path and the target thickness of the fretboard along the path, 2. the centerline at the top surface of the fretboard, 3. the intersection of the outside treble string path and the target thickness of the fretboard along the string path. In CAD, draw an arc between these three points at each end of the fretboard. You will have a compound radius that perfectly matches the taper of your strings. It will match the middle strings as well as long as your strings are spaced equally from center to center at the nut and bridge.

Thanks Sheldon, it's great to hear straight from the designer (and fellow Saskatonian -- I lived there for about 10 years growing up)!

I understand what you are saying about matching the string height with the fingerboard surface. Given that is your design goal then the proportions of your compound radius board make sense.

[Now, before I go on, for most people this next bit will be TL;DR. If so you can skip to the last paragraph.]

But if I do the math (including a bit of guessing on the string spacing at the nut and assume it is 9.4 mm) to make the height of the outside string paths half of the center, then I get a nut radius of just 93 mm (or 3.7") -- and that is assuming a wide 6 string board. For narrower necks the radius gets even smaller. Here is what that looks like in CAD:
compound_radius_example2.png


That would be interesting to play for sure, but I don't think necessarily realistic!

If I go with the published nut radius (7.5") and solve for the change in height of the outside strings using this formula:

dz = r - (r^2 - dz^2)^0.5

...where dz is the change in string height at the outside strings and dy is the distance between the center of the fingerboard and the outside strings (for a 5 string that is double the string-to-string spacing or 18.8 mm) I get 0.92 mm.

0.92 mm thinner near the edge of the board compared to the middle seems more realistic. Now, extending that all the way down the board to the bridge, and refactoring the equation above to solve for r:

r = (dz/2)+(dy^2/(2*dz))

...with the same dz of 0.92 mm but with dy of double string-string spacing at the bridge (36 mm) gives an r of 27.6". Close enough to the published 25" specification.

Thinking about it again in the context of your explanation, I can see one other benefit to the your design: a consistent fretboard edge thickness down the length of the board. By going with the ideal "conical" compound radius board, the board actually gets thinner on the outsides towards the bridge. Not by much mind you, about 0.6 mm at the 24th fret, but something to consider.
 
So I'll sneak in a question here I've never quite gotten an answer to elsewhere: I always toyed with the idea of an electric bass fingerboard 'ala classic guitar. Zero/flat fingerboard radius, no width taper from high end to nut. Of course, I'd think the action would be higher to accommodate the vibrating string arc. Bad idea ?
On this bass I used much less width taper than on a regular board (I don't have the measurements right here with me). I thought it would help amplify the look with the fingerboard going all the way through to the bridge. Unlike a flat board, I definitely feel the width at the nut. If I play it for a bit, the "weirdness" goes away, but I am not sure I'd do another like that.
 
Thanks Sheldon, it's great to hear straight from the designer (and fellow Saskatonian -- I lived there for about 10 years growing up)!

I understand what you are saying about matching the string height with the fingerboard surface. Given that is your design goal then the proportions of your compound radius board make sense.

[Now, before I go on, for most people this next bit will be TL;DR. If so you can skip to the last paragraph.]

But if I do the math (including a bit of guessing on the string spacing at the nut and assume it is 9.4 mm) to make the height of the outside string paths half of the center, then I get a nut radius of just 93 mm (or 3.7") -- and that is assuming a wide 6 string board. For narrower necks the radius gets even smaller. Here is what that looks like in CAD:
View attachment 3696897

That would be interesting to play for sure, but I don't think necessarily realistic!

If I go with the published nut radius (7.5") and solve for the change in height of the outside strings using this formula:

dz = r - (r^2 - dz^2)^0.5

...where dz is the change in string height at the outside strings and dy is the distance between the center of the fingerboard and the outside strings (for a 5 string that is double the string-to-string spacing or 18.8 mm) I get 0.92 mm.

0.92 mm thinner near the edge of the board compared to the middle seems more realistic. Now, extending that all the way down the board to the bridge, and refactoring the equation above to solve for r:

r = (dz/2)+(dy^2/(2*dz))

...with the same dz of 0.92 mm but with dy of double string-string spacing at the bridge (36 mm) gives an r of 27.6". Close enough to the published 25" specification.

Thinking about it again in the context of your explanation, I can see one other benefit to the your design: a consistent fretboard edge thickness down the length of the board. By going with the ideal "conical" compound radius board, the board actually gets thinner on the outsides towards the bridge. Not by much mind you, about 0.6 mm at the 24th fret, but something to consider.

I shouldn't have gone by memory. 3mm thick on the outside strings is too thin. The concept is still solid though. Go for something more reasonable like 4.54mm thick to end up with a 7.5" radius on a 6-string with that string spacing or 5mm to end up with a 10.9" radius etc.




