• TalkBass has been independent since 1998. Add your voice.
    Create a free account to reply to discussions, view embedded media, and browse with fewer display ads.
    Join freeLog in
    Want zero display ads or expanded classifieds tools? Compare plans.

I have modified a Harley Benton... and I love it!

Hello! First of all I apologize for my Google Translator English, as it is not my native language and I have a lot of problems writing it.

In this case I want to show you little by little the modifications that I have made to a Harley Benton PB - 50 bass. I will tell you my opinion both for and against what I have found and I will also be able to show tricks that I have found as a result. to search and search for information both in this forum and through YouTube videos, I hope you like it or at least it helps you for future modifications or possible purchases

The first thing is to show "patient zero":
https://www.thomann.de/es/harley_benton_pb_50_sb_vintage_series.htm


I don't have any photos of the bass as I took it out of the box as I really wanted to modify it.

It is a Harley Benton PB-50 bass in sunburst color that at Thormann is priced at approximately €119 at the moment, since shipping costs are free in Europe

I have heard many reviews on YouTube and I have also read wonders about this bass in forums like this and other forums, really those of us who started playing years ago cannot imagine that for €119 we would get an instrument that sounds like this for this price, it has been about 15 years. /20 Years for that price you just bought real crap that sounded terrible, disconnected or broke on the first hit...


My idea in mind was to make a relic and improve the bass components, the relic I wanted to base on was Sting's pbass bass fender, since I find it beautiful how the years have passed on that instrument, I will realize later that it wasn't the best decision...we're still going for it!

The first step is to unpack the bass and directly test that everything works, that everything is in its place (since I have seen that for many people the bass did not arrive very well assembled, I think it was in the first versions) As I unpack it First thing I said, how can this cost €119 at home?
It is really incredible to think, it looks very well finished, robust and in general you cannot ask for more for that price, I have seen Epiphones and Squier by Fender for €400/500 Which were much WORSE finished than this Harley Benton, this brand has improved a lot over time, the paint finish looks exceptional without imperfections, the neck is quite wide but if you are used to a pbass you will not have any problems, the frets can cause scratches but not all of them, he added, something that has a very easy.

The neck generally looks good, but it is perhaps my least favorite part of the bass, even though it is made entirely of maple. What I like the least is its "new" or natural color. I like vintage or oiled colors better, but this has an easy solution...

The first thing I want to do is remove the pickguard. I like the bass much better without it and the first thing I wanted to see is the joint between the neck and the body, something I have seen complaints about (I think in the first versions).
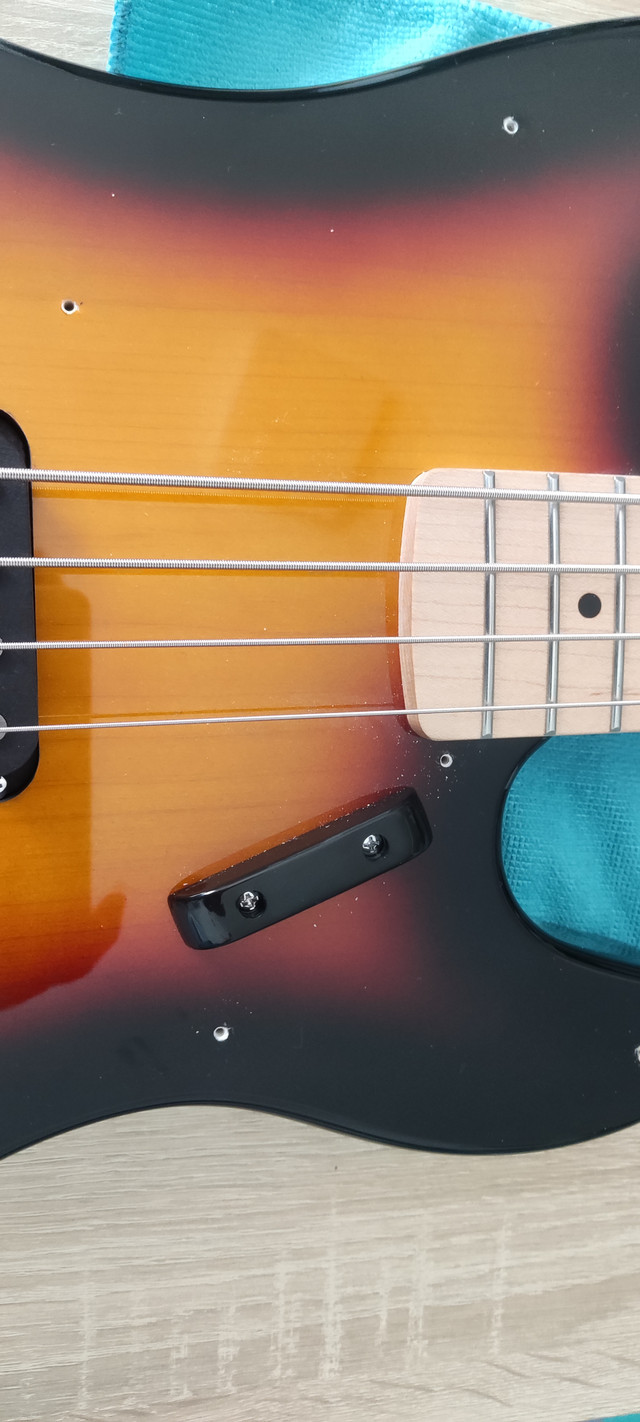
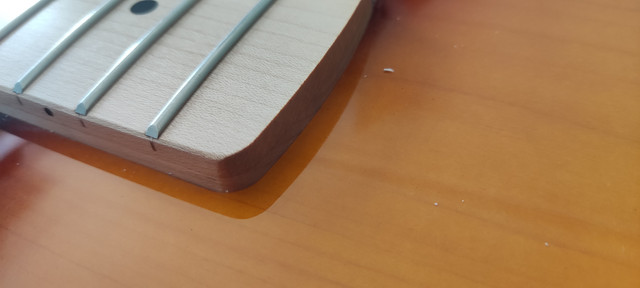
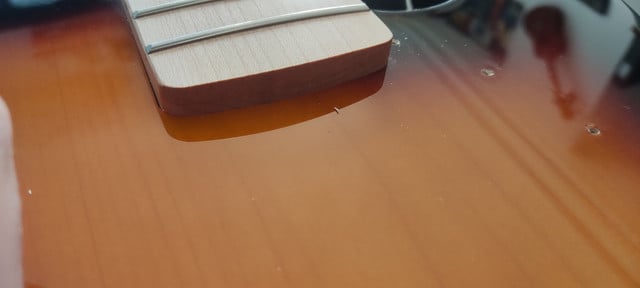


In my case it came PERFECT, not a single complaint as you can see in the photograph, very happy with it. Also in some videos or photos I have seen that there are people whose bass arrived with a hole under the pickguard to pass the cables, he added, in my case I have been lucky and it arrived without that, it was one of the things that I really liked.

The tuners are the part that I liked the least, even though they maintain the tuning, I didn't like their touch at all, the touch that I liked and that surprised me were the potentiometers although I had decided to change them for the CTS (Now I think this It was a mistake, I'll give my opinion later)

If you liked it, I'll update with everything I've done to this device!

thank you so much!
upload_2024-5-1_13-7-24-png.5434564
 

Attachments

  • upload_2024-5-1_13-7-24.png
    upload_2024-5-1_13-7-24.png
    326 bytes · Views: 316
There are lots of non-native speakers here (me included). No worries. And Google translate is doing a great job. Nice bass! Keep posting updates while you make upgrades.

Google translate version:
Hay muchos hablantes no nativos aquí (incluido yo). No hay problema. Y el traductor de Google está haciendo un gran trabajo. ¡Buen bajo! Siga publicando actualizaciones mientras realiza actualizaciones.
 
Thank you so much!!! I hope you like the project or at least find it interesting.

My opinion regarding the sound is that WOW the moment you put on quality flat strings such as Labella, GHS or TI.
upload_2024-5-1_14-5-5.png

I don't have audio clips of the original bass, but on YouTube there are a thousand and one videos about this bass, although many of them appear to be filtered with compressors and sound colorizers (I don't understand why they do that for sound demonstrations of a bass).

The ideal is direct sound samples to the injection box or to the PC to capture the most typical sound of the bass. Even so, for example, the pill that is included is from the Rosswell brand, which in my opinion gives incredible quality for its cost.

Obviously there are much better pickups that change the tone of this bass a little, in fact I leave you a video that compares it with the Seimour Duncan pickup and the truth is that there is a very subtle difference


As a curiosity, the bass from the guy in the video to mine, there is a lot of difference in the colors of the sunburst
 
Now we are going to see the electronics, in this case they are the basics of a precision, which is why it is very very simple and because we want to give it a more "professional" or higher quality touch. I have decided to buy the kits that TAD sells.

TAD Wiring Kit for P-Style Bass


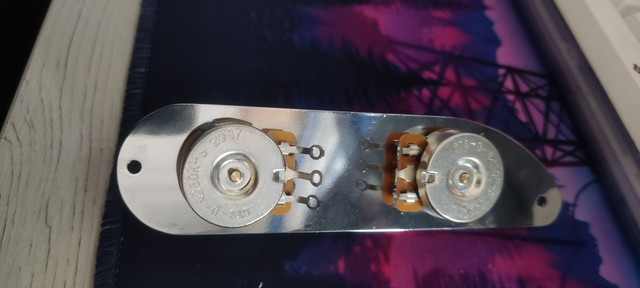
Which is composed of 2 CTS potentiometers 250k Vintage Audio Taper (30% LOG) Dimple Guitar-Potentiometer, short bushing, solid shaft, a jack and a 0.047uF @ 100V TAD / Sprague Orange Drop style capacitor
and a jack.

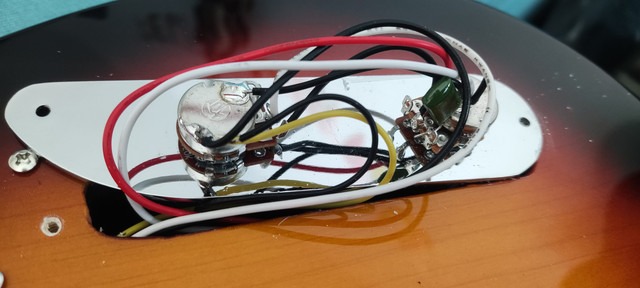
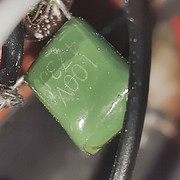
As for the Stock potentiometers of the bass itself, I quite like their feel, they look very good, very smooth, there is no reason to change them apart from fetishism LOL. The cables look cheap and the capacitor is classic, the jack also looks cheap quality, even so what surprised me the most are the potentiometers, even though I am going to change them, I really liked them.


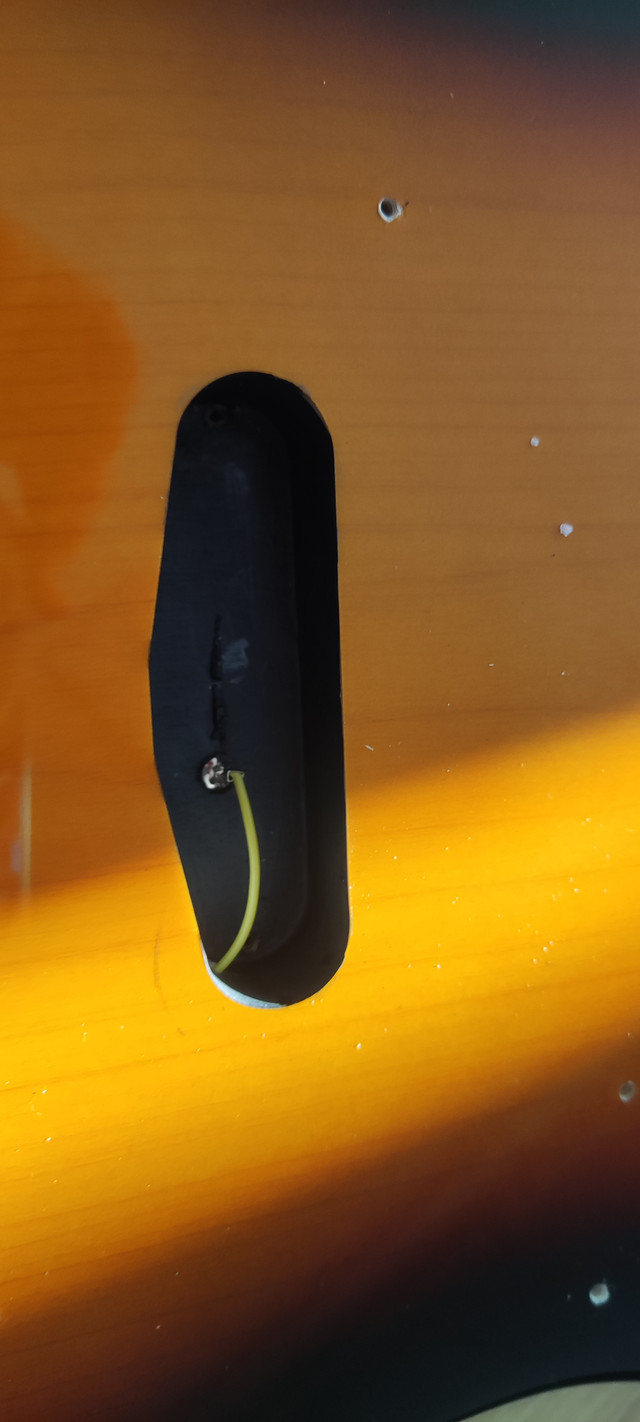
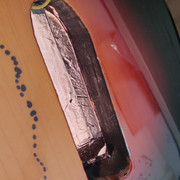
When removing the electronics, I have a question, does it have a special insulating paint? since it comes painted in a completely different dark gray color and only in that area of the body, it looks like it could be for that, despite this I have decided to cover it all with copper tape.


Well, we began to review the TAD kit with all the electronics, this is where I have been most disappointed, I have read in thousands of posts that the CTS capcitors are, to say the least, angels in heaven, that their touch is incredible and that they deserve It's worth spending €10 on each potentiometer... I've been incredibly disappointed, your tact if you were to do a blind tasting with the stock potentiometers, I'll bet whatever you want that they stay with the cheap stock potentiometers, especially in terms of its touch, electronically I wouldn't know how to judge the improvement, but it won't be noticeable to the ear.... another thing that I didn't like at all about the CTS potentiometers is that the volume potentiometer (Spoiler) after a week of its installation IT MAKES NOISE WHEN YOU MOVE IT, this is something that seems unacceptable to me for such renowned potentiometers. I can understand that you may like it or not (I find the feel of the CTS potentiometer horrible, too soft and with looseness, horrible in my opinion) but the noise seems unacceptable to me.

Another problem is the measurements of everything that are different, the knobs instead of having to buy 6mm are 1/4" or 6.35mm approx, so it is very very difficult to find cheap knobs, for example on Aliexpress

The TAD jack is also metrically different so it is not valid for mono on the serial protector or the normal connector

The plate where the potentiometers are installed must also be sanded because it is not valid for the CTS potentiometers, they are too big, but this is not a problem, it is simply the one with a file and they fit perfectly with the screw that comes as standard.


Now I will solder the quality cables and also the capacitor in this case I have decided to increase the capacitor to 0.1 nF

Obviously before doing the final welding what I will do will be all the relic and mast work that I will put in the next post

have a nice day
 
Last edited:
As for the Stock potentiometers of the bass itself, I quite like their feel, they look very good, very smooth, there is no reason to change them apart from fetishism LOL. The cables look cheap and the capacitor is classic, the jack also looks cheap quality, even so what surprised me the most are the potentiometers, even though I am going to change them, I really liked them.
As you will see from the date on the photo I've owned this PB-50 for just over 10 years.

Apart from changing the strings to TI jazz flats it remains completely stock.
Benton.JPG


The one below right was bought later, along with the re-finish it got CTS/Switchcraft/Sprague cap; that turned out to be a pointless exercise in spending money :laugh:

DSC_0527.JPG
 
The one below right was bought later, along with the re-finish it got CTS/Switchcraft/Sprague cap; that turned out to be a pointless exercise in spending money :laugh:

You are absolutely right, buying the CTS potentiometers is a waste of money, but changing the capacitor is a good option apart from putting in better wiring, even so I take it as a learning experience.
 
  • Like
Reactions: TeeSee
You are absolutely right, buying the CTS potentiometers is a waste of money, but changing the capacitor is a good option apart from putting in better wiring, even so I take it as a learning experience.
I think you've nailed it saying it's a good learning experience. You are not paying a lot of money for pots or caps and adding them to your bass gives you more a 'feel good' factor rather than experiencing a huge change to the sound. I've a couple of Harley Bentons where I've swapped out pots and caps and another where I haven't. I like to think the ones I've put the Orange Drops in sound a little different but that could be me fooling myself ;).
Anyway, I like to swap pots and caps and usually shield too just as it helps me bond with my new instrument.
Pickups? I'm yet to be convinced that spending a small fortune on high end ones is worth it, whenever I've done that the difference is minimal to the stock ones, but that's my thoughts.
 
You are right, changing the potentiometers does not change the bass sound ratio at all, however the capacitors do, but you have to change the value of the capacitor to notice the difference as you can see in this magnificent video.


When you change the value of the capacitor with the tone closed it makes the sound muddy or dirty, this value DOES affect the sound, that is a fact that can be verified.

The pickups also affect the sound but as you say the change is very subtle for the difference in price, normally changing it is to search a little more for the sound you like, but it is not a very profitable investment, I think the most profitable are the strings and amplifiers.
 
  • Like
Reactions: TeeSee and dabbler
The next step I have taken on the bass, after shielding the electronic area, would be the refinishing of both the neck, which I want to varnish with nitrocellulose, and the body of the bass. I think this is one of the worst decisions I have made about the bass. but until you move forward you don't realize it, I mean making the body of the bass.

The cause of the regret is basically the type of paint they use for this bass, which is polyurethane, and the layers of it until they reach the wood.

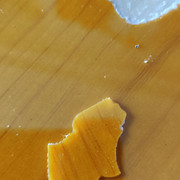
The bass may have about 3mm to 5mm of paint layer! Even if you throw it from a huge height, it will sooner break into several pieces than ruin the paint.

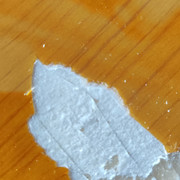
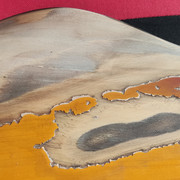
When you start sanding or trying to relic the part of the paint you realize that it has several layers, what we first find is the transparent lacquer along with the paint itself, after this the bottom looks like "wallpaper", Yes, a wallpaper that simulates the beta of wood, exactly the beta that we see through the paint, is not real, it is simply a wallpaper, it looks very pretty but in the case of relics it hinders a lot.
The last layer that we are going to find and for me the most complicated is a layer of primer or filler that comes before the wood itself, this layer is so adhered to the wood that it is impossible to make it jump and achieve the relic in a natural way. If I had known this, perhaps I would not have reliced the bass as such, or yes, the truth is that I am very stubborn and until I come to grips with it I won't stop, but this is a warning to anyone who wants to relic their bass with this type of paint, it is very very difficult to get a natural relic.


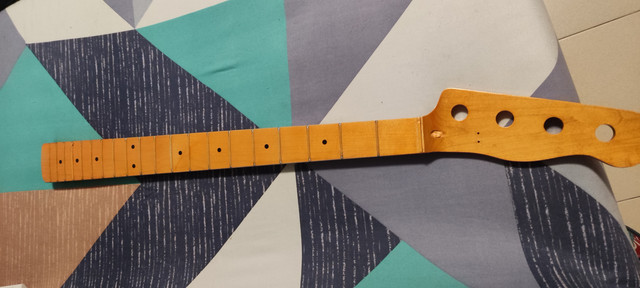
In the opposite case we have it on the neck or the neck since we varnished this part and then sanded it. I really liked the aged result that has been left.

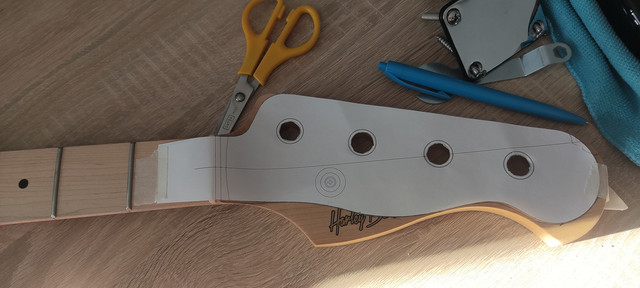
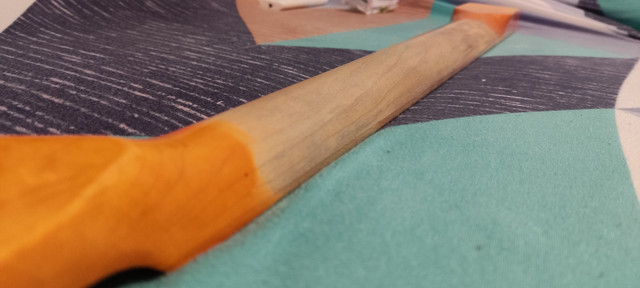
After the initial warnings we get to work, the first thing I did was with the neck and I wanted to give the headstock the shape of the classic p basses like Sting's so I simply marked the area with some sandpaper and a template. to eliminate, this is very simple if you are used to using sandpaper, I recommend that you always do the final parts by hand so that the result is more precise


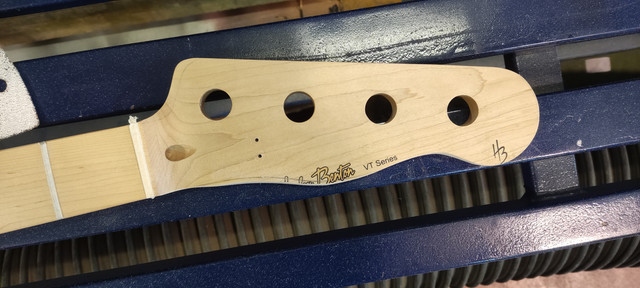
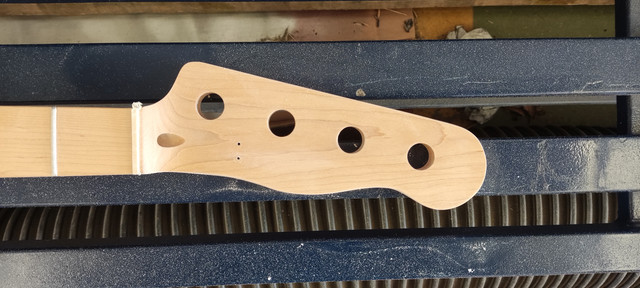
This is how the part of the blade looks after sanding, I really liked it


The next thing I did was pre-sand both the fingerboard and the neck for subsequent varnish with nitrocellulose.


Once we have the desired color, we have to let it dry for several days, even for its color and drying to be correct, they talk about weeks, but in reality if you are going to relic the mast, simply by letting it dry in one day you can start sanding without fear. , when painting it you must apply very thin layers that dry together, since this lacquer tends to cause a lot of sagging and generates paint tears. careful with this.

To be able to refinish it to taste, what I did was on the back of the neck, sand with fine sandpaper and leave the area without any lacquer, completely in wood and sand that wood more to open the pore a little, I did everything by hand to be able to control both the shape and the type of sanding. Getting to the natural wood will allow you to rust the wood, for this I simply use a jar with water and salt or vinegar where I added steel wool that began to rust and that made the water a tint of rust, then it is as simple as with a cloth with that rusty water on the sanded area and generates an incredible old effect


Last edited:
I think the most profitable are the strings and amplifiers.
Playing position on a single coil P-bass has the greatest effect regarding tone.

When you start sanding
Do Not Sand !!

The poly is a thick flat finish, Nitro is thin. Just leave the poly as is and spray the nitro on top. It does not even need a 'key', there are products like " Rust-Oleum Specialty Plastic Primer Spray" and " Krylon CoverMaxx Primer".

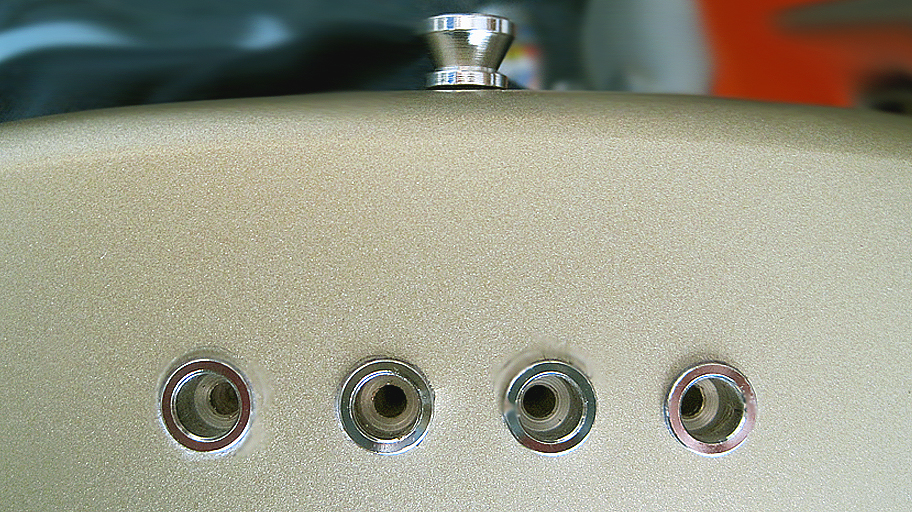
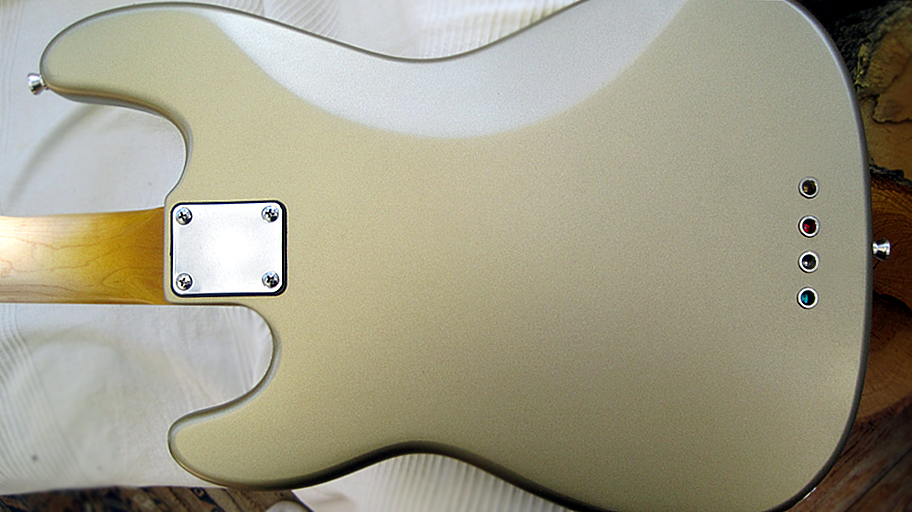
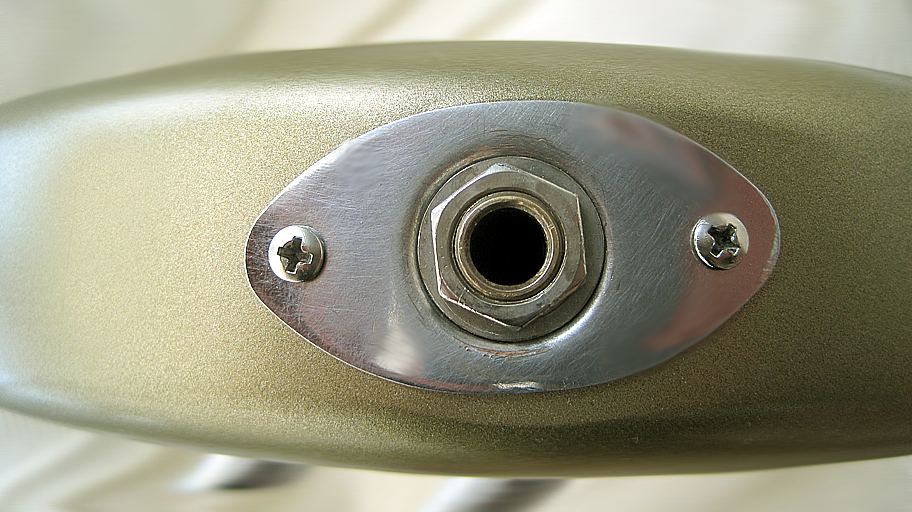
This is Nitro sprayed directly onto a PB-50.

BodyFront.jpg
Horn.jpg
Ferrules.jpg
BodyBack.jpg
JackSocket.jpg
 
As an Amazon Associate, TalkBass may receive commissions from qualifying purchases made via links on this site.
In my case I did not want to paint on top, but rather a delicate aging, where I painted with nitro is on the neck, which is natural wood without lacquer
upload_2024-5-2_10-51-32.png

Playing position on a single coil P-bass has the greatest effect regarding tone.

Do Not Sand !!

The poly is a thick flat finish, Nitro is thin. Just leave the poly as is and spray the nitro on top. It does not even need a 'key', there are products like " Rust-Oleum Specialty Plastic Primer Spray" and " Krylon CoverMaxx Primer".

This is Nitro sprayed directly onto a PB-50.
 
As an Amazon Associate, TalkBass may receive commissions from qualifying purchases made via links on this site.
  • Love
Reactions: murphy
I just want to comment on what some posters said about replacing pots being a waste of money.

Generally I agree. If the stock pots are working fine (no crackling/dropouts), and you're replacing them with CTS pots of the SAME VALUE, it won't improve your tone.

However, you can shape the tone by using pots with DIFFERENT values. And here's the thing: Pots generally have rather loose tolerances. Especially cheap pots.

I have two 250k pots from my box of spare parts in front of me right now. I've measured and labelled them. One is actually 223k and the the other one is 271k. These are both good quality CTS pots, and it's not rare to find "250k" CTS pots that deviate this much from 250k.

The difference between using a 223k pot and a 271k pot is definitely audible. The difference is easily in the same order of magnitude as say the difference between a Lollar and a Fralin P-bass pickup. Which of course means we're talking about relatively subtle nuances, but there's DEFINITELY a difference.

With the cheaper (but perfectly adequate) pots Harley Benton use I wouldn't be surprised to see even looser tolerances and bigger deviations than with CTS pots.

Good quality CTS pots also tend to last longer than cheaper pots.

So while upgrading the pots may GENERALLY be a waste of money, it can also be a way to shape the tone, depending on the ACTUAL value of the pots (rather than the theoretical value that's printed on the chassis).
 
Just thinking, would you be better off removing all the poly back to the base wood?
I did this on a natural JB-75, but I put a natural finish on after. Not gonna lie, it was really hard work with a hot air gun and a shave hook (scraper) https://www.amazon.co.uk/shave-hook/s?k=shave+hook but it did the job, it was the only way I could find that would move the poly. Had to sand it after of course. I did manage to remove all the poly in about a day (2 half days actually).
I'm not sure if this would help you as you may want to keep the 'burst'. I can only think you strip down to wood and sand, apply a nitro burst and clear coat, then do your relic.
Some links to my JB-75 stripping if that helps.
https://www.talkbass.com/threads/i-own-a-harley-benton-club.1123735/page-795#post-28113586
https://www.talkbass.com/threads/i-own-a-harley-benton-club.1123735/page-795#post-28113874
https://www.talkbass.com/threads/i-own-a-harley-benton-club.1123735/page-796#post-28118943
https://www.talkbass.com/threads/i-own-a-harley-benton-club.1123735/page-796#post-28120211
 
  • Like
Reactions: Marleybass
Just thinking, would you be better off removing all the poly back to the base wood?
I did this on a natural JB-75, but I put a natural finish on after. Not gonna lie, it was really hard work with a hot air gun and a shave hook (scraper) https://www.amazon.co.uk/shave-hook/s?k=shave+hook but it did the job, it was the only way I could find that would move the poly. Had to sand it after of course. I did manage to remove all the poly in about a day (2 half days actually).
I'm not sure if this would help you as you may want to keep the 'burst'. I can only think you strip down to wood and sand, apply a nitro burst and clear coat, then do your relic.
Some links to my JB-75 stripping if that helps.
https://www.talkbass.com/threads/i-own-a-harley-benton-club.1123735/page-795#post-28113586
https://www.talkbass.com/threads/i-own-a-harley-benton-club.1123735/page-795#post-28113874
https://www.talkbass.com/threads/i-own-a-harley-benton-club.1123735/page-796#post-28118943
https://www.talkbass.com/threads/i-own-a-harley-benton-club.1123735/page-796#post-28120211

Indeed, there you can see perfectly the dense layer of beige or wood-colored polyurethane, which covers the natural beta, I did not want to leave it on wood completely since I wanted to make a relic type of Sting's bass precision and I would not know how to paint it with the effect sunburst, maybe it was too much of a challenge for me.

I just want to comment on what some posters said about replacing pots being a waste of money.

Generally I agree. If the stock pots are working fine (no crackling/dropouts), and you're replacing them with CTS pots of the SAME VALUE, it won't improve your tone.

However, you can shape the tone by using pots with DIFFERENT values. And here's the thing: Pots generally have rather loose tolerances. Especially cheap pots.

I have two 250k pots from my box of spare parts in front of me right now. I've measured and labelled them. One is actually 223k and the the other one is 271k. These are both good quality CTS pots, and it's not rare to find "250k" CTS pots that deviate this much from 250k.

The difference between using a 223k pot and a 271k pot is definitely audible. The difference is easily in the same order of magnitude as say the difference between a Lollar and a Fralin P-bass pickup. Which of course means we're talking about relatively subtle nuances, but there's DEFINITELY a difference.

With the cheaper (but perfectly adequate) pots Harley Benton use I wouldn't be surprised to see even looser tolerances and bigger deviations than with CTS pots.

Good quality CTS pots also tend to last longer than cheaper pots.

So while upgrading the pots may GENERALLY be a waste of money, it can also be a way to shape the tone, depending on the ACTUAL value of the pots (rather than the theoretical value that's printed on the chassis).

You are right, with different values the sound changes, in my case the values would be the same, as I said in my previous post in my case the change to cts the sound changed to WORSE, since when the volume potentiometer is moved it sounds gritty and it's new

Then I wish you the best of luck and hope the heartache is not too harsh.

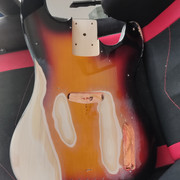
I was gifted this mess.

View attachment 5435480

what good luck! They have given you a blank canvas to carry out a new project!
 
  • Like
Reactions: TeeSee
what good luck! They have given you a blank canvas to carry out a new project!
Not quite.

This is a blank canvas.
outline.JPG


15 to 20 minutes later I'll have this, with centre line marked and bridge position set.

Not Again.JPG


Starting from scratch allows me free rein to decide pickup number/type/position. With the PB-50 body I faced other decisions, spend 1 hour + glue drying time blocking the pickup area or find a larger pickup.

The BiSonic, 2nd fromthe right, came from Stringsfield Guitars, Valencia.
51 style pt2.jpg


That pickup cost almost as much as the 51 jazz bass build budget, below with temp scratchplate, and it has custom pickups :laugh:

Tele JB (2) (Custom).jpg
 
Indeed, there you can see perfectly the dense layer of beige or wood-colored polyurethane, which covers the natural beta, I did not want to leave it on wood completely since I wanted to make a relic type of Sting's bass precision and I would not know how to paint it with the effect sunburst, maybe it was too much of a challenge for me.
Never say never. There's plenty of YT videos that tell you how to paint a sunburst. A lot use the professional spray equipment but there's a few on using rattle cans. Watch a few videos on painting guitars with rattle cans first to get a good idea on the technique; here's a couple of good ones


For a sunburst there's this guy. Personally I think he's applying too much too quickly rather than building it up, but despite a few mistakes the end product isn't bad. His guitar body is quite battered which maybe the sort of look you are going for.
 
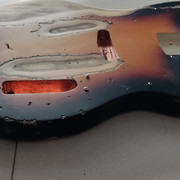
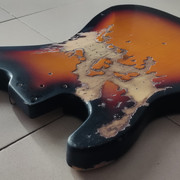
Well, in the next chapter I have done the part that I regret, the relicing due to the type of paint has not been the best option, but I think I have managed to save the situation a little, in the end I think I liked how it turned out. As a whole I'll give you photos of the process.


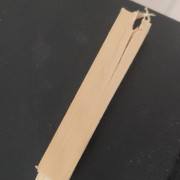
Next I made a thumrest type that uses a wooden sting and with a single anchor point, the process was to start with a basic piece of wood, then wet it with rusty water and then paint it, I put photographs of the process


  • Wow
Reactions: murphy