
• TalkBass has been independent since 1998. Add your voice.
    Create a free account to reply to discussions, view embedded media, and browse with fewer display ads.
    Join freeLog in
    Want zero display ads or expanded classifieds tools? Compare plans.

Luna: My take on a Hamer Impact

Way back in the fall of 2007, I was approached by John Hughes of Daisy Train (Link Removed) about making him a custom neck-through bass, based on Hamer Impact.

At that point, I had only ever made neck-through guitars, and wasn’t sure if the laminating method I was using would withstand the tension of bass strings.

Also, at this point, my youngest daughter was about to start taking music in school, and wanted to play guitar. \m/ \m/ :)
She liked my Poseidon design, but the 27" Baritone scale and “Fat Finger”™ string spacing was too big for her hands, so a 25.5" scale version (Poseidon II) was made.
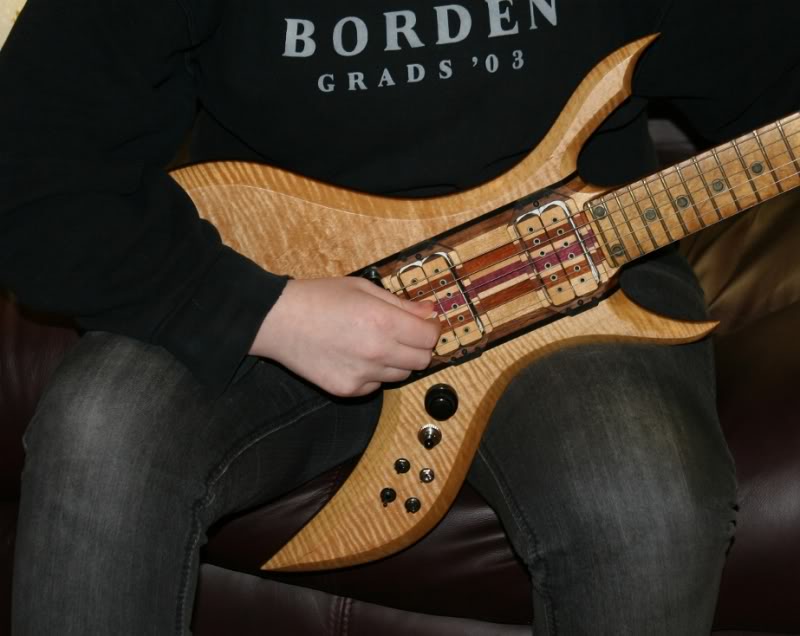
Jess03.jpg


My daughter took Poseidon II to school for her first music class, only to have the teacher tell her that they didn’t teach guitar, only bass. :(
So I made her a bass, Jove.
Jove was a test, to see if the neck laminates would stand up to the tension of bass
strings. Apparently, it passed the test.

JoveJessHappyOwner.jpg


So, on to John’s bass.
Because I like to think I’m unique, just like everybody else, I prefer not to make copies of other designs, but John was set on this design. I told John I’d make him a ‘Bizzar’ version, it looks enough like one to see the resemblance, and he went for it.

FullFront01.jpg
FullBack01.jpg


Specs
Based on a Hamer Impact bass
* 34" scale
* 7 Piece laminated neck-through (Figured Maple, Jatoba, Maple & Purpleheart)
* Mahogany Back
* Figured maple front
* Wenge Stringers
* Tigerwood (Gonalco Alves) Fretboard
* 24 frets
* Acryllic-in-steel inlay
* BadAss bridge
* 2 over-wound Bizzar Humbuckers
* 2 Individual Coil Select (North/Humbucker/South) mini toggle switches
* 1 phase (In/Out) mini toggle switch
* 3-way toggle
* 2 individual volume
* Corian Nut
* Gotoh Tuners
* Tung oil finish
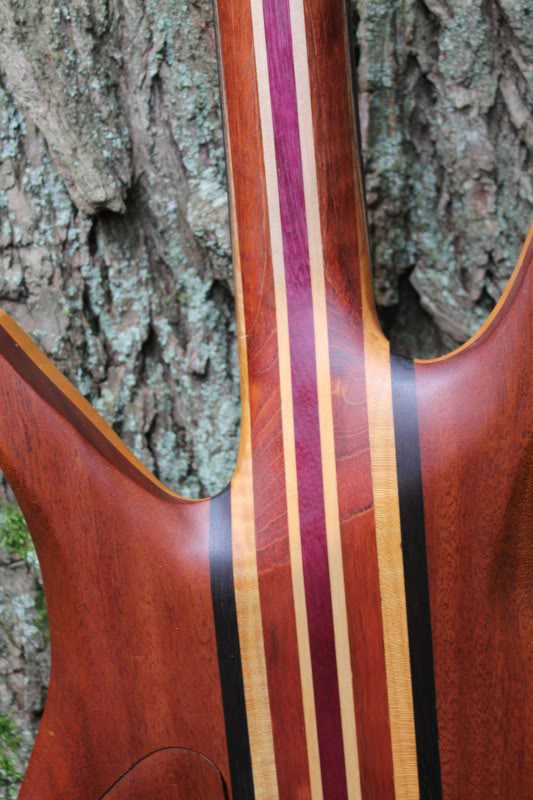
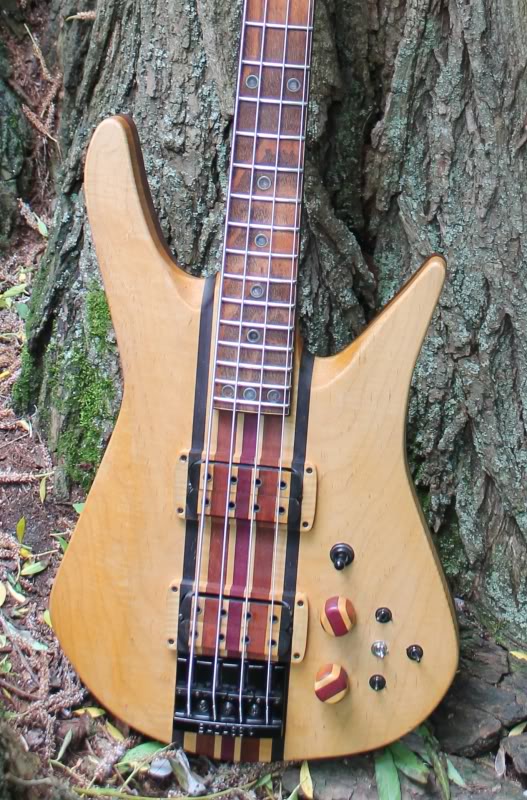
NeckHeel01.jpg


LunaBodyFront01.jpg


Controls01.jpg


Wiring Diagram:

___2HumbuckerIndividualCoilSelectionwPhaseSwitch724IndividualCoilCombinations2.jpg


Ciao,

Garth
 
I am totally stoked!

Here's a review of Luna from its new owner John Hughes of Daisy Train.

"My very own line of Bass Guitar! I've been playing this all week! I have to say I am quite impressed.

The neck is perfect with a bit of a groove in the back for comfort, and seriously, for a guy like me with tendonitis, it was so much more comfortable.

The sound is alive and present with punch and articulation.

The wide frequency response of the pickups allows you to shape your tone from punchy and aggressive to soft and mellow.

Every note is balanced and smooth. The different sounds I get from the pickups... I've never had a bass that can do that.

The woodwork is incredible and it shows and adds to the clarity and tone of this bass. My dad is a carpenter... he was amazed too.

Along with it's stamped "Handcrafted for John Hughes" and numbered 001 on the back of the headstock it comes with a custom case!

Thinking of getting a guitar or bass?

Get exactly what you want!

You'd be crazy not to go to Bizzar Guitars!'

The Proud owner:
John1.jpg
 
Thanks Beej, here's a few build pics:

Luna plans:
impact_plans_full_size_01a.jpg


Truss rod channel cut:
i-02a-01.jpg


Neck laminates clamped:
i-02a-03.jpg


Wings rough cut and ready for clamps:
i-03a-08.jpg


Neck Laminates rough trimmed”
i-02a-04.jpg


Fretboard 1:
i-02c-05.jpg


Drilling truss rod access from headstock:
Impacttrussrodchannel32.jpg


Headstock stringers:
Impacttrussrodchannel33.jpg


Truss rod anchor:
Impacttrussrodanchor34.jpg


Spoke Wheel Truss Rod Nut test fit:
Impactheadstock06.jpg


Truss rod anchor location side profile:
Lunatrussrodachorsideshot.jpg


Sanding neck to width & levelling truss rod fillet:
Lunasandingneckprofileflat.jpg


Sanding fretboard binding & fret ends in one step:
Lunasandingfretboardbingingflat3.jpg


Fretboard pins 1:
Lunafretboardstaples01.jpg


LED wire channel, Truss rod anchor & Fretboard pins 2:
Lunafretboardstaples02.jpg


LED wire channel, Truss rod anchor & Fretboard pins 3:
Lunafretboardstaples03.jpg


Raw fretboard:
Lunafretboardprefrets.jpg


Oiled Fretboard:
Lunafretboardoiledprefrets.jpg


Control cavity with rough jack hole:
Lunacontrolsholes06.jpg


Control Cavity with rare earth magnets:
Lunacontrolsholes04.jpg


Control cavity with wiring channel hole:
Lunacontrolsholes05.jpg


Control layout:
Lunacontrolsholes01.jpg


Back oiled:
Lunaback02.jpg


Pickup Tutorial

1. Cut/shape/de-burr/sand bobbin tops (the de-burring process is crucial to make sure there is absolutely nothing that the coil wire can get caught on).

2. Cut/shape/de-burr bobbin bottoms (make sure that the pickup height adjustment screws can pass by the ends of the bobbins uninhibited).
Lunapickups10.jpg


3. Cut/de-burr pole pieces.
Lunapickups05.jpg


4. Polish pole piece bobbin tops (if they’re going to be exposed).

5. Drill pole piece holes in bobbin tops and bottoms.

6. Drill eyelet holes in bobbin bottoms (far enough apart so that the solder from the lead wires will not touch the wound coil wire).

7. Set eyelets with punch and tack hammer.

8. Ream holes in eyelets to ensure 5 wraps of coil wire and lead wire can fit through.

9. Finish bobbin tops to match body of guitar/bass (if you are using matching laminate off cuts).

10. Install pole pieces flush to top of the bobbin tops.

11. Wrap poles pieces with shrink tubing to prevent possible shorts.

12. Install bottoms parallel to the tops.

13. Make and insert “Power Blocks™” mounting ring anchors :) (“Power Blocks™” are just pieces of wood that will accept the mounting screws used to attach the bobbins to the baseplate).

14. Locate and drill baseplate mounting holes through bobbin bottom and into “Power Blocks™”.

15. Drill baseplate mounting holes slightly oblong to allow for lining up the laminates on the bobbin tops.

16. Make spacers, small pieces of wood used to keep the bobbins level to the baseplate. I use the tongues and grooves from the hardwood flooring I use as neck laminates.

17. Test assemble pick up to make sure everything goes together properly.
05a-12-Jove_pickup_bobbin_12.jpg


18. Load wire into winder.

19. Tape 6" of coil wire to underside of bobbin for a buffer.

20. Wrap coil wire around all pole pieces several times, crossing over the previous wrap like a ½ hitch knot.
Lunacoilonwinder01.jpg


21. Start counter application. http://pickups.myonlinesite.com/programs.php

22. Test counter.

23. Reset counter.

24. Mount bobbin on winder with double sided tape.

25. Enter desired number of turns.

26. Slowly wrap several traverses of coil wire, ensuring the limiter is doing its job accurately.

27. Wind to desired number of turns.

28. Extract bobbin.

29. Cut coil wire, leaving a foot or so to load the next bobbin.

30. Un-tape start of coil wire (buffer) from bottom of bobbin.

31. Feed start end of coil wire through south eyelet (5 wraps).

32. Feed finish end of coil wire through north eyelet (5 wraps).

33. Tin eyelets.

34. Test coil resistance with an ohm meter at the grommets.

35. Secure ends of coil wire to top of bobbin bottom with clear nail polish, to prevent accidental breakage. The Teflon tape won’t stick to the coil wire.

36. Wrap coil with Teflon tape, to allow for unwrapping/repairing (if necessary).

37. Solder ground wires to start ends of copper tape.

38. Wrap coils in copper tape.

39. Wrap bobbin in cloth tape.

40. Feed lead wire through baseplate hole from bottom. I use some shielded computer wire for this. This wire contains 5 stranded wires inside a shielded cover. I use the 5th wire as a ground wire.

41. Solder lead wires to bobbins. I use the DiMarzio colours scheme.

42. Connect copper tape ground wire to ground wire.

43. Connect ground wire to baseplate.

44. Loosely attach bobbins to baseplate with mounting screws.

45. Insert magnet, Alnico V from Stew-Mac.

46. Insert spacers.

47. Line up laminates in bobbin tops.

48. Tighten baseplate mounting screws.
Lunacoils04.jpg


49. Install pickups in mounting rings.
Lunamountingrings01.jpg


50. Install pickups in guitar/bass.
LunaBridgepickupandmountingring01.jpg


Here are the four coils in the different stages of wrapping.
Lunacoils03.jpg


The four coils (from right to left) freshly wound, wrapped in Teflon tape, wound in copper tape and grounded, wrapped in black pickup tape. Wrapping the coils in copper tape and grounding them acts as a Faraday cage, eliminating RF interference.

A video of my winder in action:
http://s44.photobucket.com/albums/f21/Bizzar_Guitars/Vids/?action=view&current=Winder001.mp4
 
Really cool build! I love the matching wood pickup bobbins. It's all the little creative details that make it so impressive and interesting. You know the owner is going to have a conversation starter any time he brings that bass to a gig. Having grown up in a wood shop, I also happen to have a fondness for creations like this, with beautiful wood combinations and an oil finish.
 
I just so happen to have found a link to this thread while on google... I am the proud owneR of this BEAUTIFUL bass... I have to say this baby is top notch... I do apologise for the lack of soundbites but when i figure out how to get that up I will... You want a custom bass this is your guy!!!
BIZZAR GUITAR

:bassist:

John
 
I used to live in Bells Corners (worked in Kanata).
I had no idea this level of awesome craftsmanship was happening right in my backyard.
Simply stunning stuff, my favourite parts are the little touches like the wood pickup bobbins and the way you shielded them with copper tape, love the shape of the body for John's bass.
 

Latest posts