Recently I made some fretting tools for my first build, and I thought that the Luthier's Corner would find it interesting on how I went about to make my own tools ! Here I am going to show a series of pictures of how the tools are assembled. These tools are for a fellow TB-er 
I used my computer skills in the design and drawings of the tools, a laser cutting machine using CAD drawings, a hardware store, and a skilled machinist for some custom components.
The two tools that I came up with are the Fret Bender and the Fret End File. This post will cover the Fret Bender.
My fret bender was designed and built due to the lack of an available fret wire un-bender. Hence I designed my tool to be able to bend and unbend wire precisely. Also the rollers of the tool are so close that minor adjustment to wire radius can also be made after a piece of fret is cut. This was extremely useful for me when fretting my fanned fretboard, which has a slightly different curve to each fret. The adjustment range of this tool is high enough to bend or unbend wire to and from a 3" radius.
Starting with the Laser cutting -

Then to drilling the hole for the height adjustment -
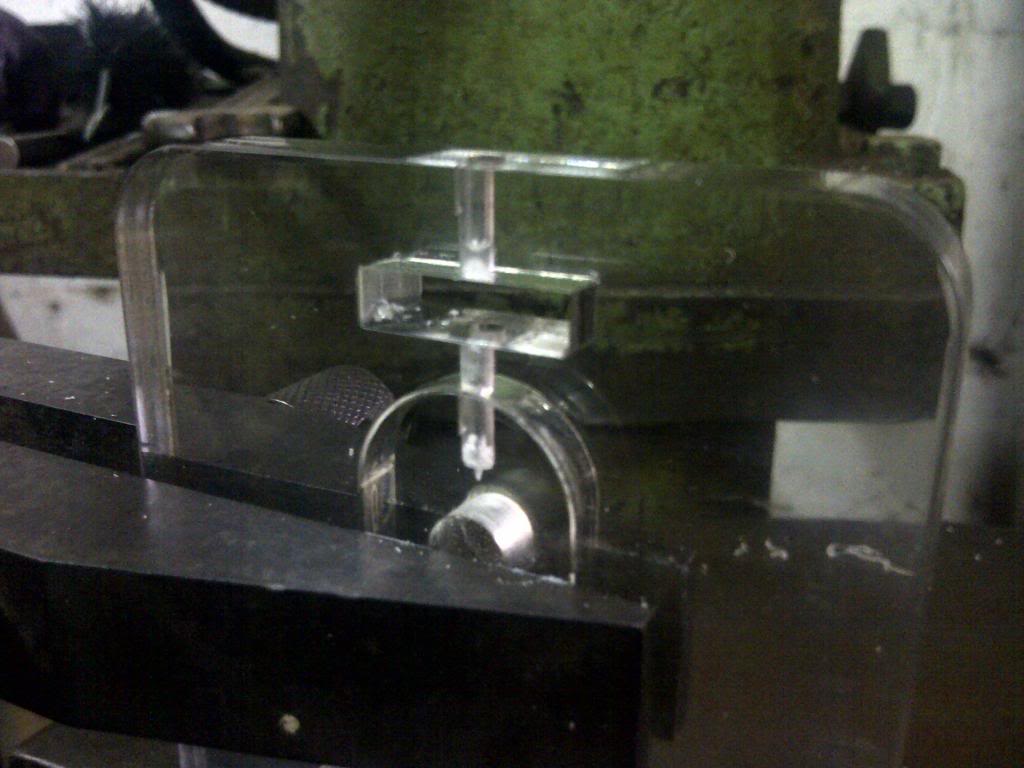
That hole is drilled right into the moving piece of the height adjustment system. A bolt will later be inserted and threaded into it.
Next up are assembly shots -
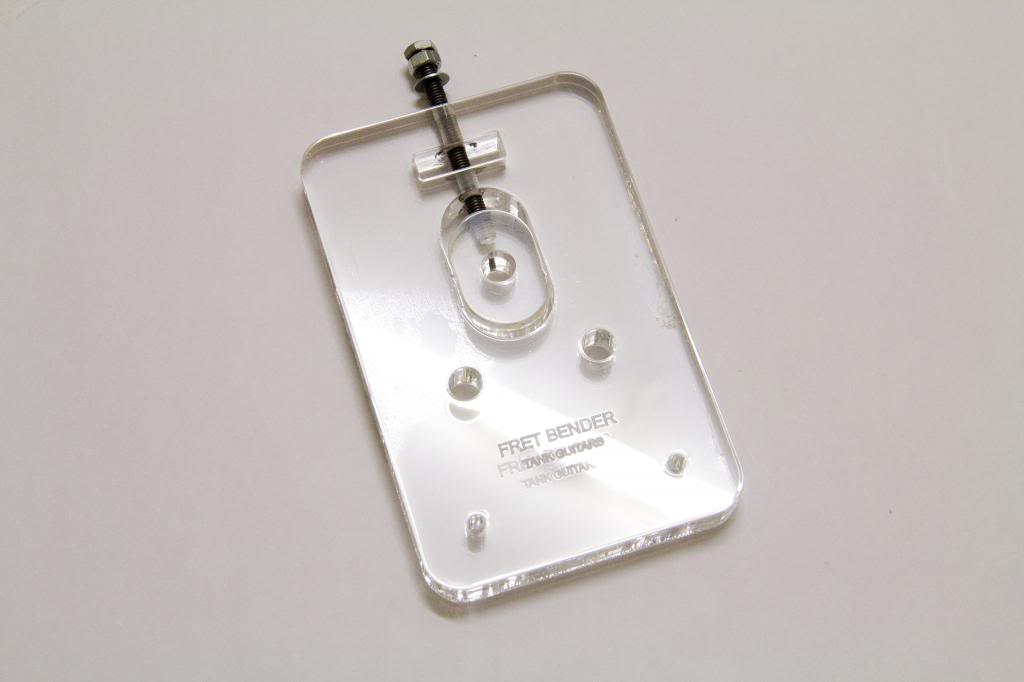
The bare plate -

The adjustment bolt threaded into the plexiglass height adjustment piece -
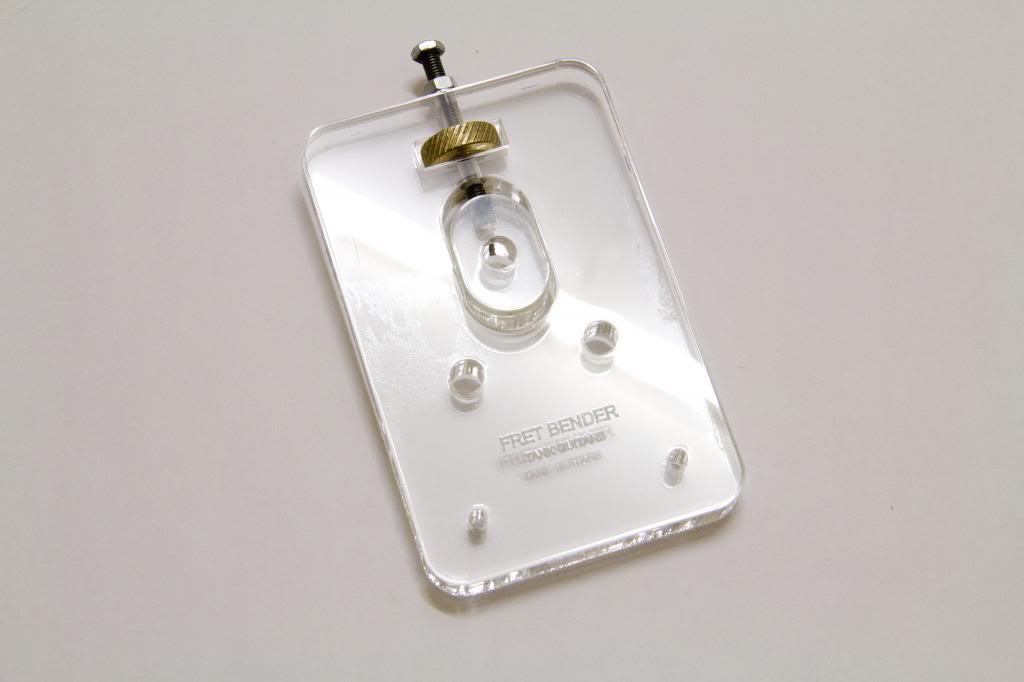
The Brass adjustment knob -
The different custom turned aluminium rollers -

The top roller has a collar for the attachment of the crank handle. Each roller has a high quality bearing pressed into it for accurate and smooth rolling.
The rollers get mounting bolts and spacers -

The bottom two rollers mounted, while the top one gets a special spacer to help the height adjustment to be guided only in the up and down movement. This white spacer eliminates any unwanted play in the system -
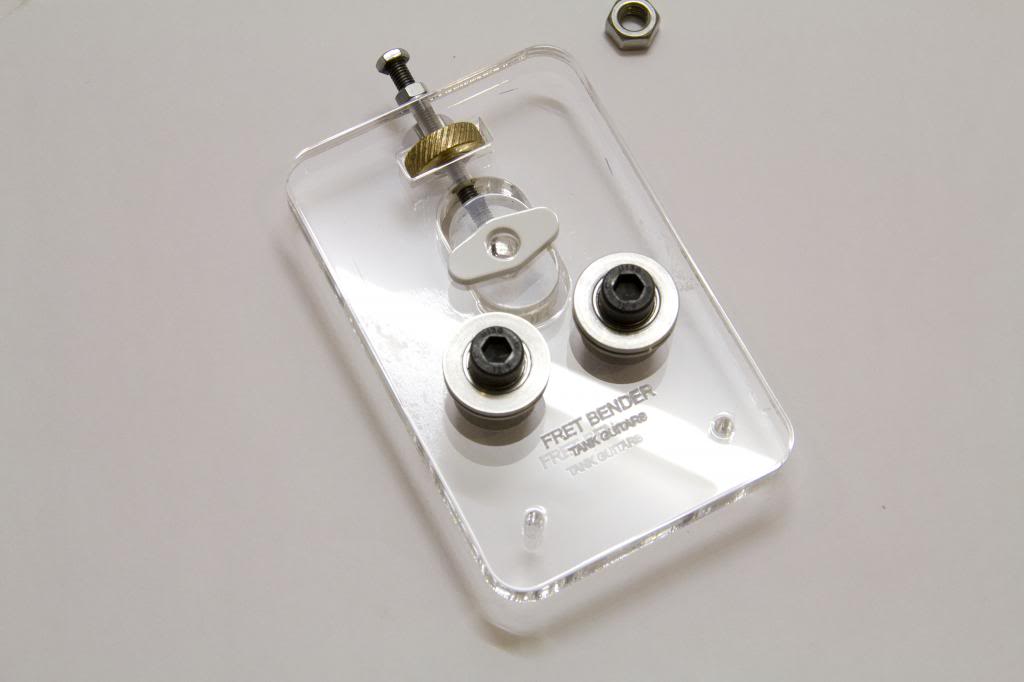
And all the rollers mounted -
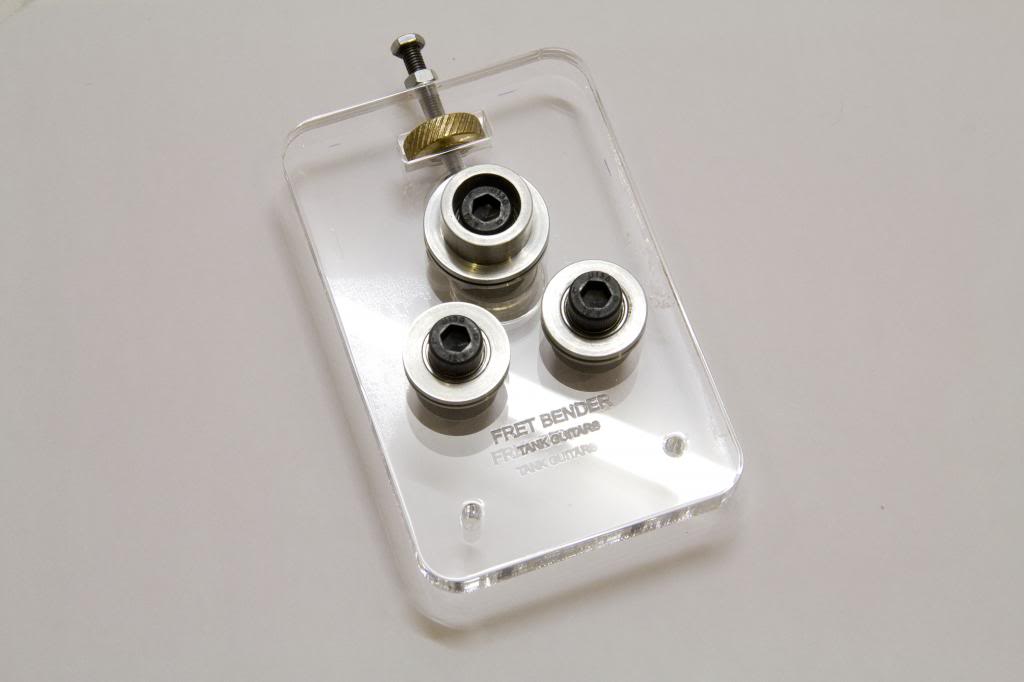
The top roller gets a spacer for the attachment of the crank handle. It is grub screwed into place.
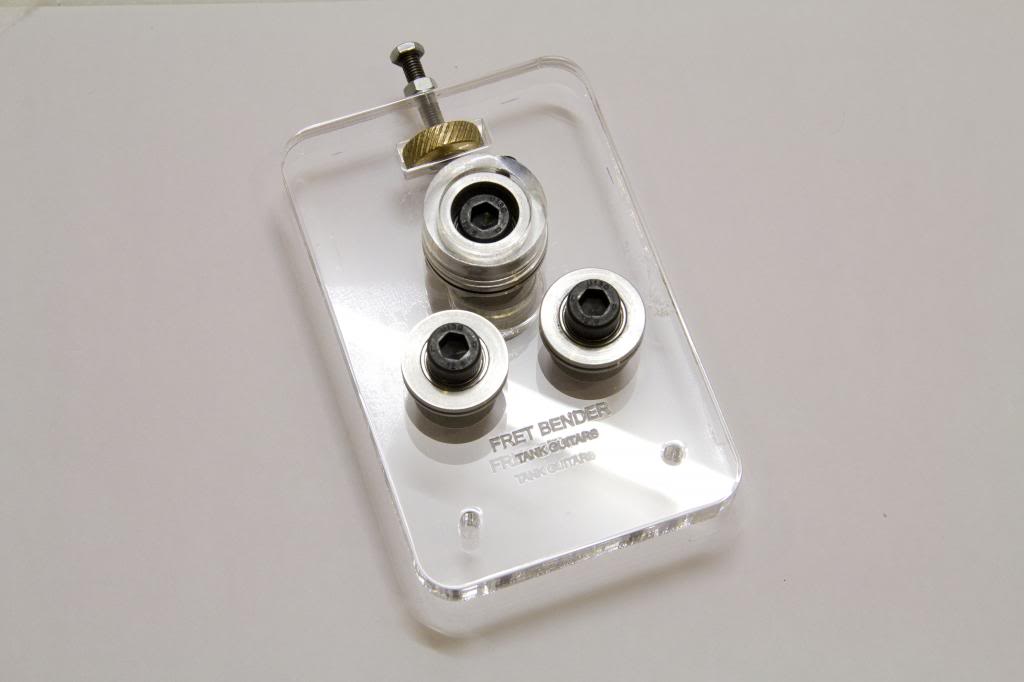
The handle with its cranking mechanism yet to be mounted -

And here it is -
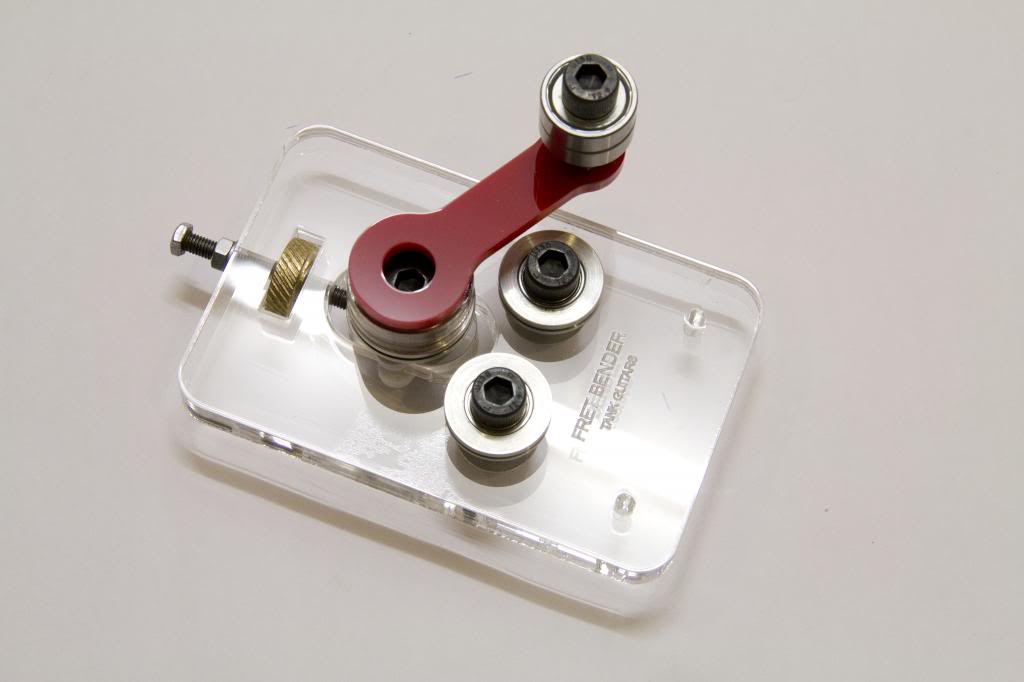
I like this view where you can see all the reflections of the bolts and brass knob from the edge -
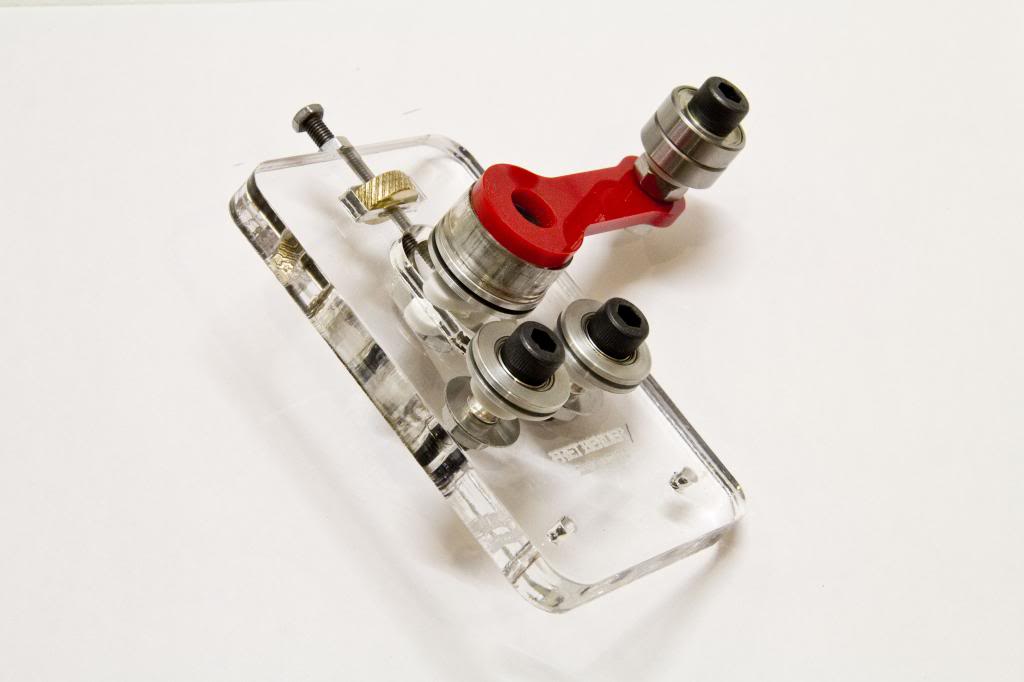
I straightened some heavy gauge stainless wire to test it out -

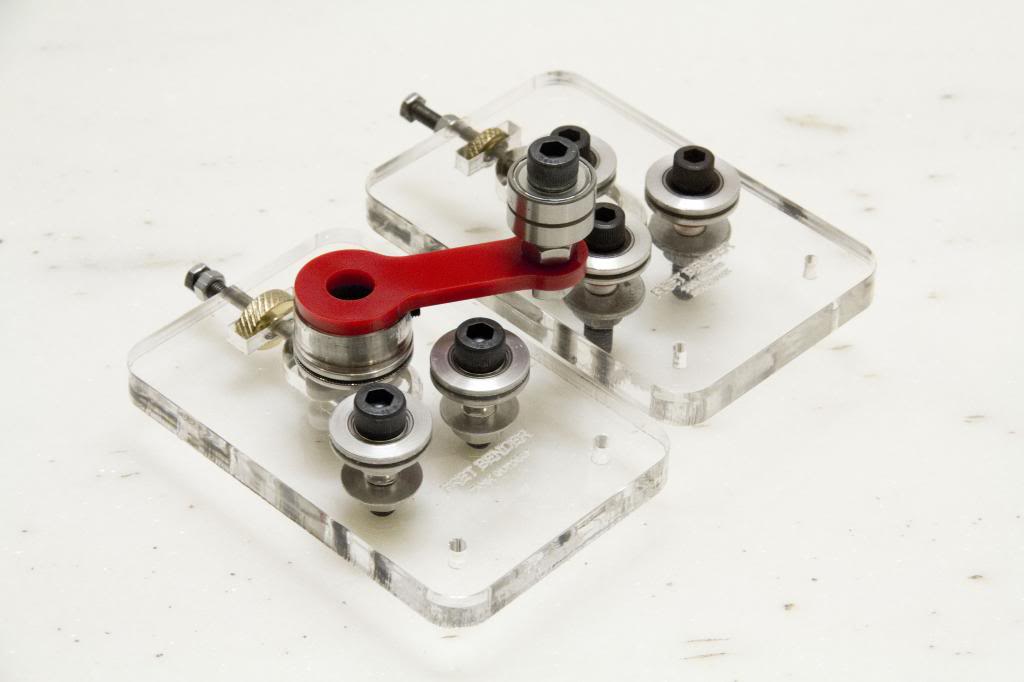
And here it is next to my older design. I made a few changes that aren't too noticeable visually but make a big difference in the performance of the tool -
The Fret End File tool will be pictured tomorrow. Hope all you gearheads and tool freaks enjoy this post
I used my computer skills in the design and drawings of the tools, a laser cutting machine using CAD drawings, a hardware store, and a skilled machinist for some custom components.
The two tools that I came up with are the Fret Bender and the Fret End File. This post will cover the Fret Bender.
My fret bender was designed and built due to the lack of an available fret wire un-bender. Hence I designed my tool to be able to bend and unbend wire precisely. Also the rollers of the tool are so close that minor adjustment to wire radius can also be made after a piece of fret is cut. This was extremely useful for me when fretting my fanned fretboard, which has a slightly different curve to each fret. The adjustment range of this tool is high enough to bend or unbend wire to and from a 3" radius.
Starting with the Laser cutting -
Then to drilling the hole for the height adjustment -
That hole is drilled right into the moving piece of the height adjustment system. A bolt will later be inserted and threaded into it.
Next up are assembly shots -
The bare plate -
The adjustment bolt threaded into the plexiglass height adjustment piece -
The Brass adjustment knob -
The different custom turned aluminium rollers -
The top roller has a collar for the attachment of the crank handle. Each roller has a high quality bearing pressed into it for accurate and smooth rolling.
The rollers get mounting bolts and spacers -
The bottom two rollers mounted, while the top one gets a special spacer to help the height adjustment to be guided only in the up and down movement. This white spacer eliminates any unwanted play in the system -
And all the rollers mounted -
The top roller gets a spacer for the attachment of the crank handle. It is grub screwed into place.
The handle with its cranking mechanism yet to be mounted -
And here it is -
I like this view where you can see all the reflections of the bolts and brass knob from the edge -
I straightened some heavy gauge stainless wire to test it out -
And here it is next to my older design. I made a few changes that aren't too noticeable visually but make a big difference in the performance of the tool -
The Fret End File tool will be pictured tomorrow. Hope all you gearheads and tool freaks enjoy this post





 will ship the tools out to you tomorrow