• TalkBass has been independent since 1998. Add your voice.
    Create a free account to reply to discussions, view embedded media, and browse with fewer display ads.
    Join freeLog in
    Want zero display ads or expanded classifieds tools? Compare plans.

More Fun with the Modelo Uno: Forward and Lateral Motion

Subbing for pickups! Every time I look into electric bass and guitar wiring in general and into pickups specifically I feel like there is much to be discovered, if just stepping out of worn path (and wanting to have something new / different / unique).
If I understand correctly, each string is picked up by 2 coils. So, you could make individual outputs that are still hum-cancelling for each string, like piezo pickups but magnetic.
 
  • Like
Reactions: Freekmagnet
Subbing for pickups! Every time I look into electric bass and guitar wiring in general and into pickups specifically I feel like there is much to be discovered, if just stepping out of worn path (and wanting to have something new / different / unique).
If I understand correctly, each string is picked up by 2 coils. So, you could make individual outputs that are still hum-cancelling for each string, like piezo pickups but magnetic.

Haha - I could do that, but I probably won’t. Right now, I’m just trying to get it to work! If you’re following this thread, you can find more up-to-date info on the pickup:

Magnets & Copper Wire: A Pickup Building Thread

In the end, with all of my builds, I am striving to do one thing: design an instrument that will support a rhythm section in a working environment. I know that sounds kind of boring, but there is still some room for experimentation within that context.
 
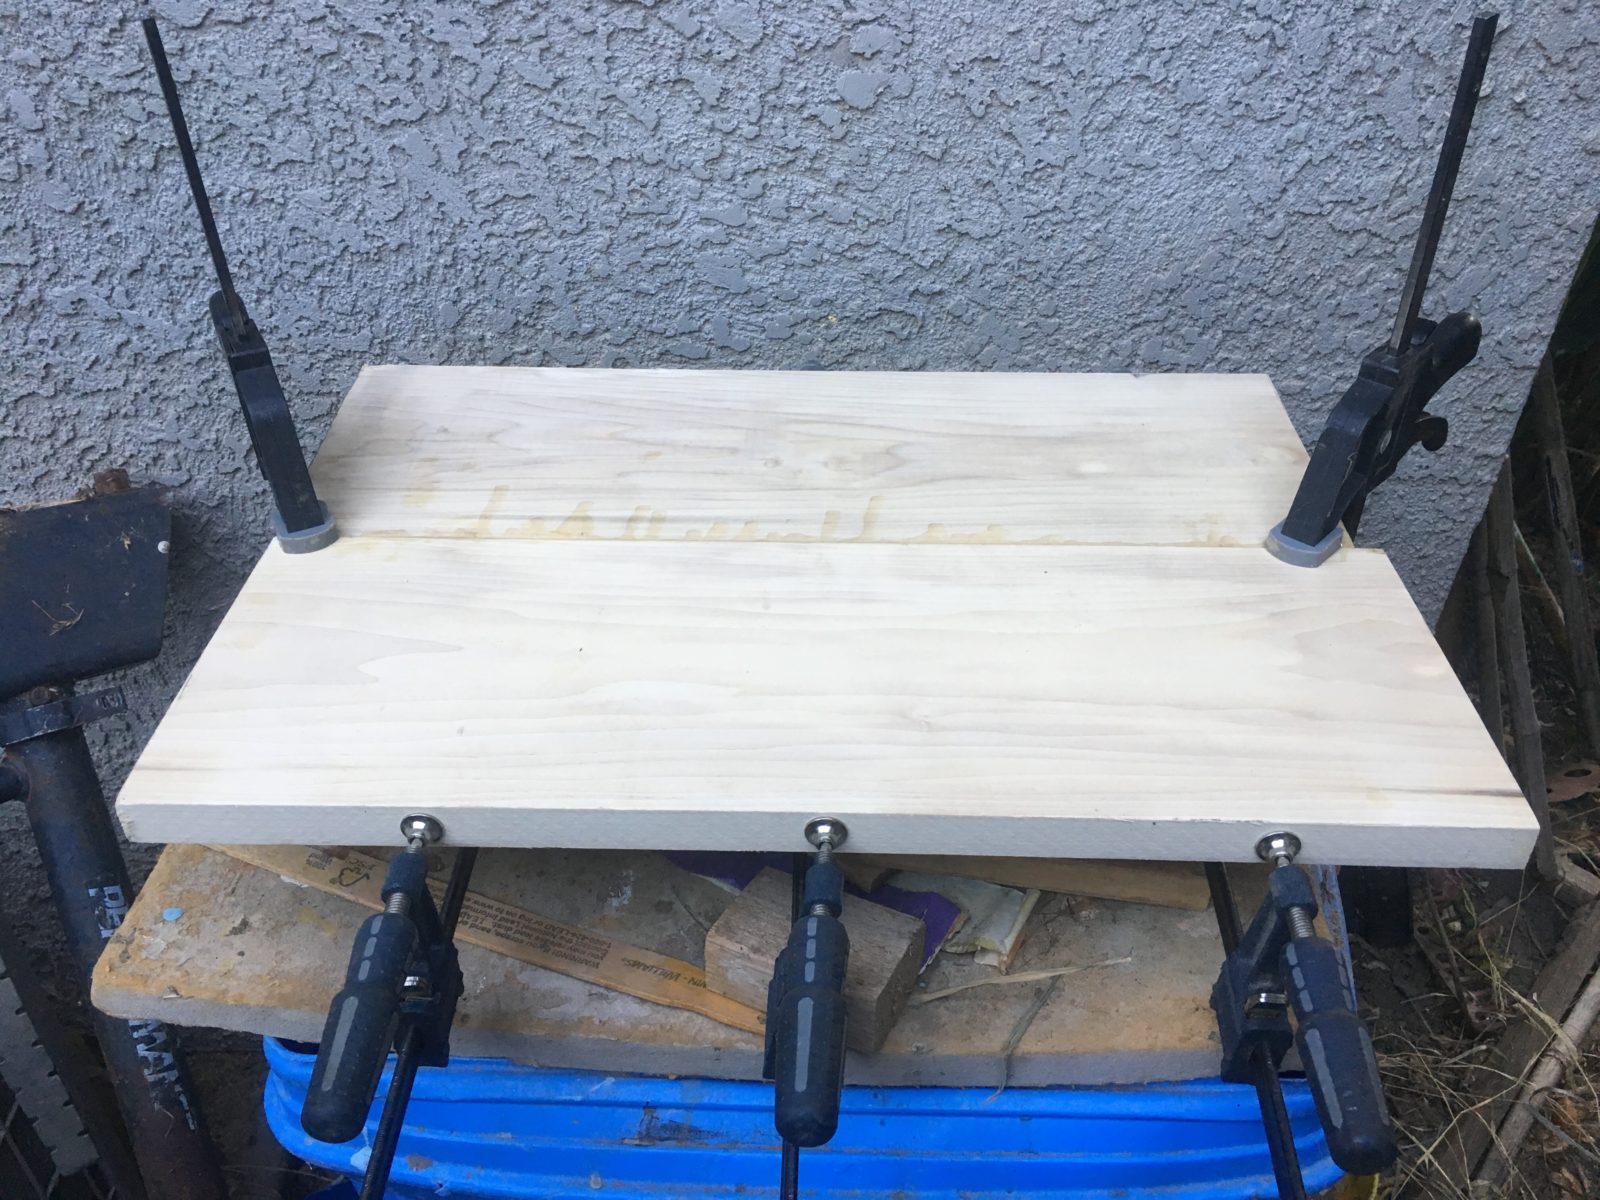
I got some milling done over the weekend, and I joined the body blanks together. Here’s a picture of the top half:

img_6389.jpg


I did the bottom half the day before. I just milled the edges and joined the with West Systems.

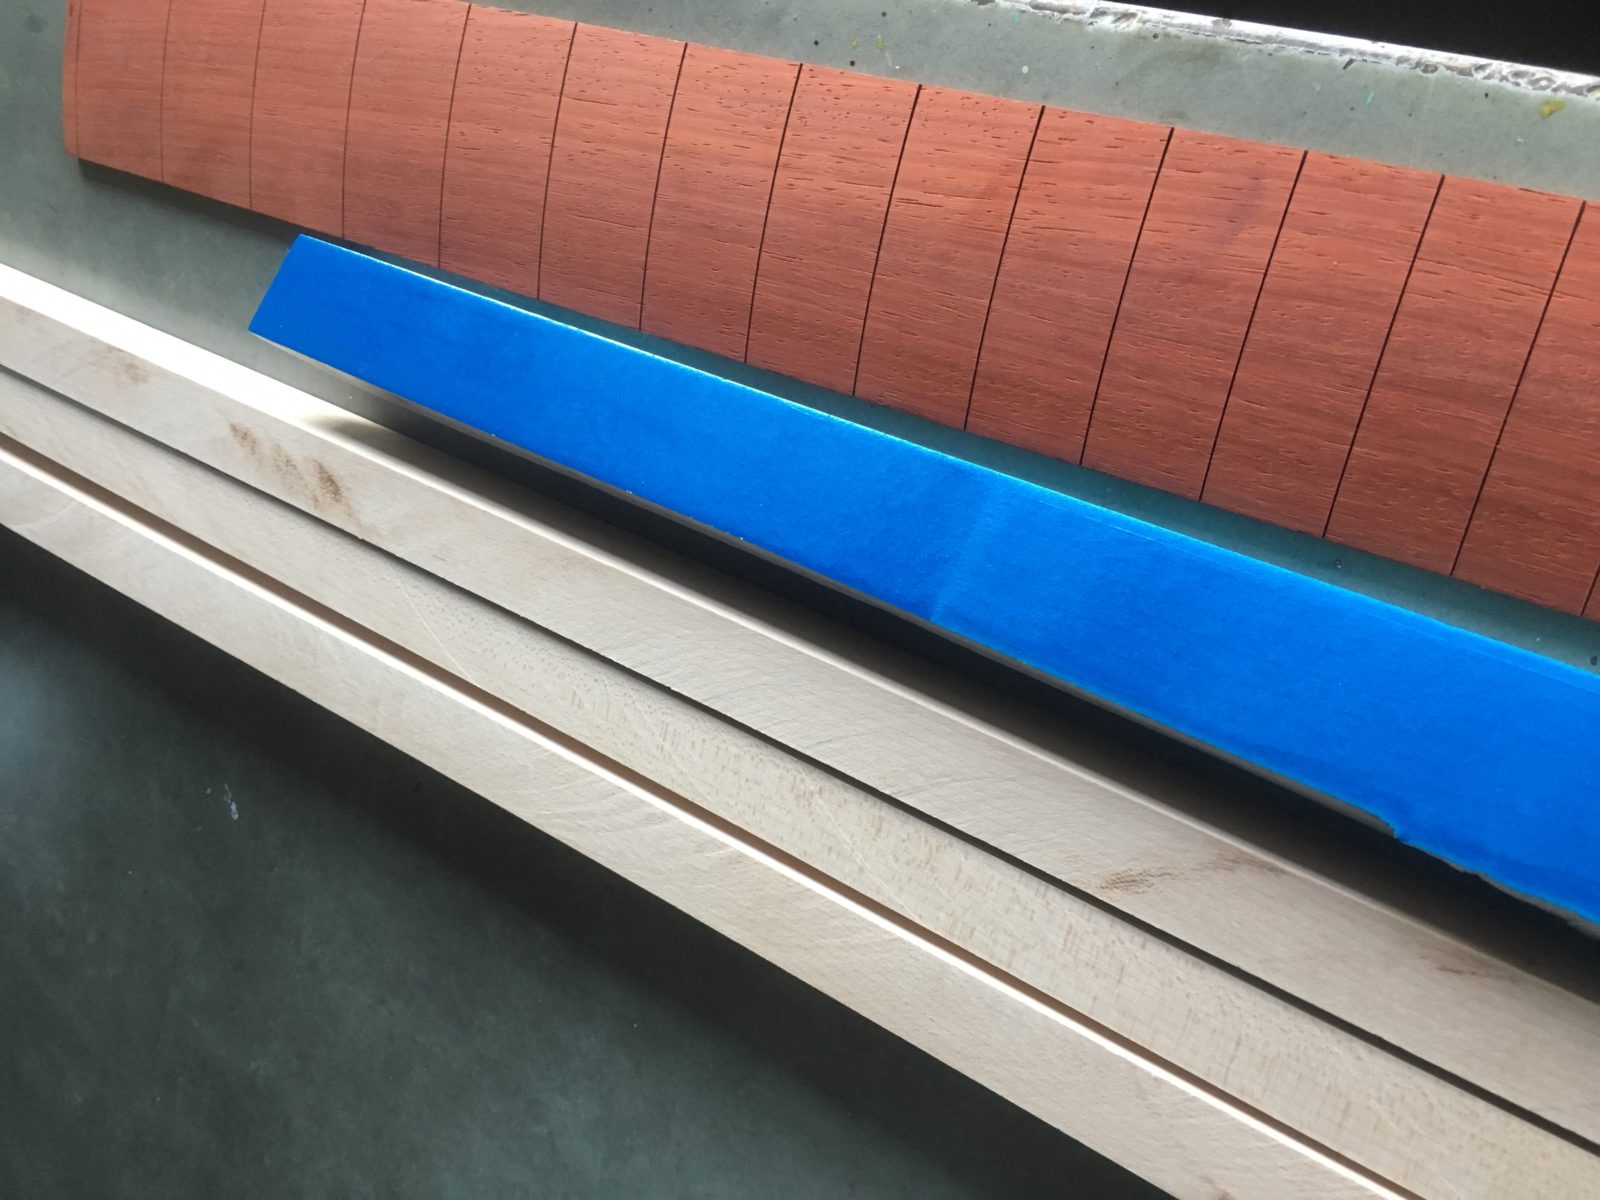
I also milled the neck blank and cut it down into strips. I’m going to let them sit for a few days before I glue them up to make sure they don’t do any twisting.

Here’s a picture of them alongside my fretboard that came in the mail from LMII this afternoon:

img_6387.jpg


That blue thing is a color sample I sprayed a few months ago.

I ordered a padauk fretboard. Originally, I wanted to get a roasted maple fretboard and keep my woods all North American. However, I have not really seen any roasted maple examples that really knocked my socks off color-wise. Admittedly, I have not seen many examples - mainly just the Ernie Ball instruments at GC and I wasn’t all that impressed. I’m the end, the roasted maple fretboards were pretty expensive for a wood color I’m not really all that sure about. I decided on padauk - it’s a great color, it was $12 cheaper and as far as I can tell, it’s not critically endangered or anything. I think it’ll kick a** next to that pearlescent blue. In the future I’ll keep looking for a roasted maple sample I like.
Guess I should.get it in gear and finish my pear blue and padauk bass done before you do!
 
  • Like
Reactions: Freekmagnet
I haven't posted an update since last week, but I have been working pretty diligently on this project. I've been working on 3-4 facets of it at once, so I decided I would make posts when I complete one facet rather than post a hodgepodge of things at once.

The last few days I have been working on the neck blank. Here's a photo of the wood:

img_6388-e1563941499887.jpg


I'm making a laminated maple neck for the first time. I cut the center strip 3/4" wide and the sides are a little over 1" wide. I let them sit in my shop for about a week to make sure they didn't move or twist. After consulting with Bruce, I laid them out with the grain like so:

\\\|||///

and from there, I epoxied them together with West:

img_6401.jpg


I let that sit overnight and milled the board down to a hair over 3/4". I used my routing fixture and my router with a 1 1/4" mortising bit to surface it. It makes pretty quick work of these maple boards:

img_6403.jpg


Afterwards, I cut the scarf joint. I have a little jig I made for my table saw that cuts the board at an angle. From there I have another fixture that I use to surface the joint area. From there, I glued the joint together. The crucial part is making sure that the boards are clamped so that they are square with the clamping surface:

img_6404-e1563944722864.jpg


After unclamping, I put the piece back in the routing fixture where I cleaned up the joint. On the initial surfacing, I usually leave the board a hair over 3/4". That way, when I go back and clean up that joint, I just make a quick pass over the whole board and bring it down to 3/4". Then I turn the board around and mill the headstock down to about 19/32" - 9/16". And here's my neck blank:

img_6406-e1563945069654.jpg


I'll glue the wings on to the headstock after I cut the truss rod channel. I'm pretty much done with this stage until I get the body cut out.

I think that this is the best neck blank I've made thus far. I think that means that I'm getting to be a better luthier, but I'm not sure.

Either tomorrow of Thursday, I'll have a pickup-making update. I have some coils that I encapsulated in epoxy sitting on my desk.
 
Last edited:
I’ve been working on ways to make more pickups. Up until now, I’ve been making one at a time. In a previous post, I showed some improvements to my winding apparatus. I also made a fixture in which to cast 6 coils at once:

img_6396.jpg


This thing actually took a long time to make. I have one master to work with, and each mold is a two-piece mold. Each piece of silicone required 6 hours of cure time, so you can do the math. The key is to slather paste wax on all of the pieces. The epoxy will spill and maybe even leak.

Here’s a part out of the mold:

img_6409.jpg


I made little wooden plugs to fit in that slot and I covered them with Scotch tape to keep the epoxy from seeping into the slot. These are the same plugs in my winding set-up; the plugs remain within the coils throughout the winding and casting process. I use the screw holes in the plugs for registration - I insert brass rods through the holes and they suspend the coil within the mold while it is being cast.

This was my first try, and it came out pretty good. I have a little more clean-up, but it’s mostly pretty easy work. As I refine this new process, my castings will improve.

Sometime within the next few days I will either post a update on the new pickup design or post progress on the body build.
 
Last edited:
I’ve been really busy with the band the last couple of weeks. We’ve been gigging a lot - July was super busy and it looks like my August calendar will be pretty packed up too. Getting in and working on bass-building projects has been a challenge.

Nevertheless, I got enough work done to do a post.

I milled down the blanks with my router sled. I’m going to be making a clamshell type of assembly. The edges of the board extended beyond the border of my router sled, so I hit the edges with a bench plane. The was actually the first time I used it and I was surprised by how effective it was.

img_6420.jpg


Next, I drilled some registration holes to center the routing templates. I had trouble with the registration holes - the epoxy seam was harder than the wood, so the brad point bit would always go to one side of it. I’ll have to come up with another way to go about this. The center line is not crazy off, but I’ll have to scribe a more solid line to work from. It’s mostly the back.

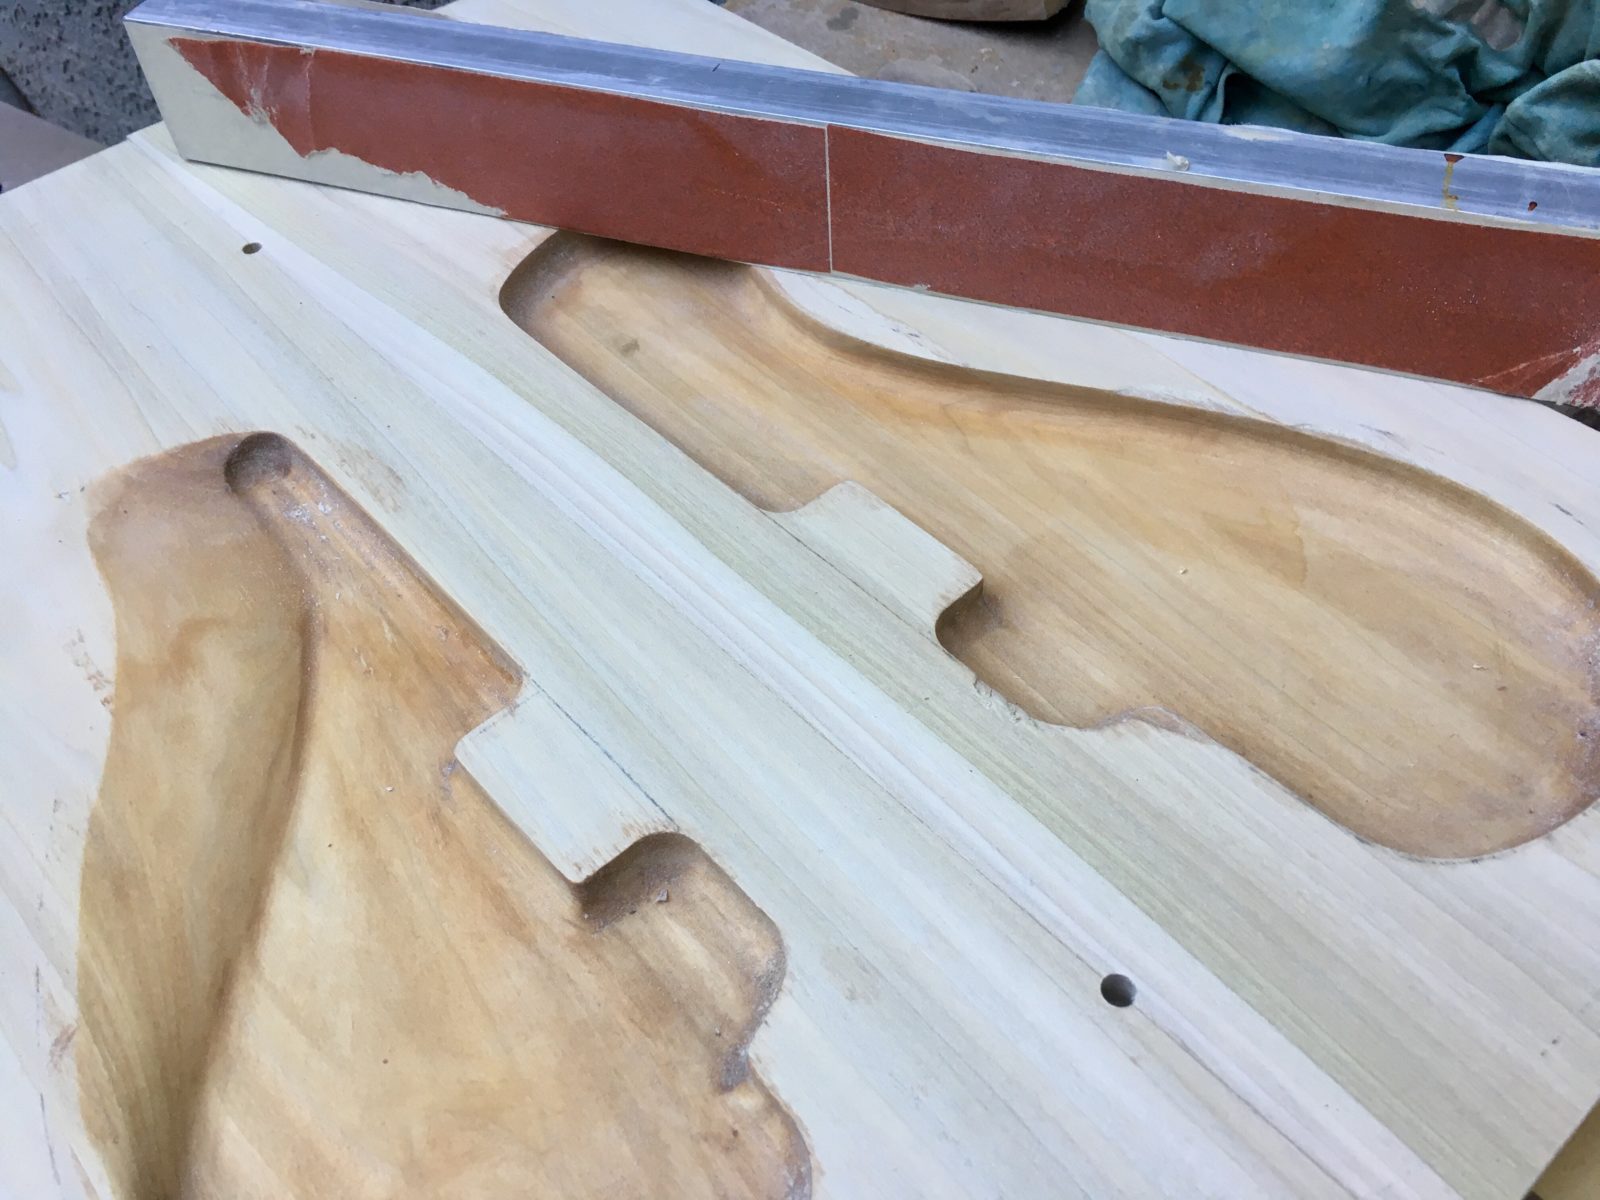
Here I am getting ready to hollow out the inside.

img_6422.jpg


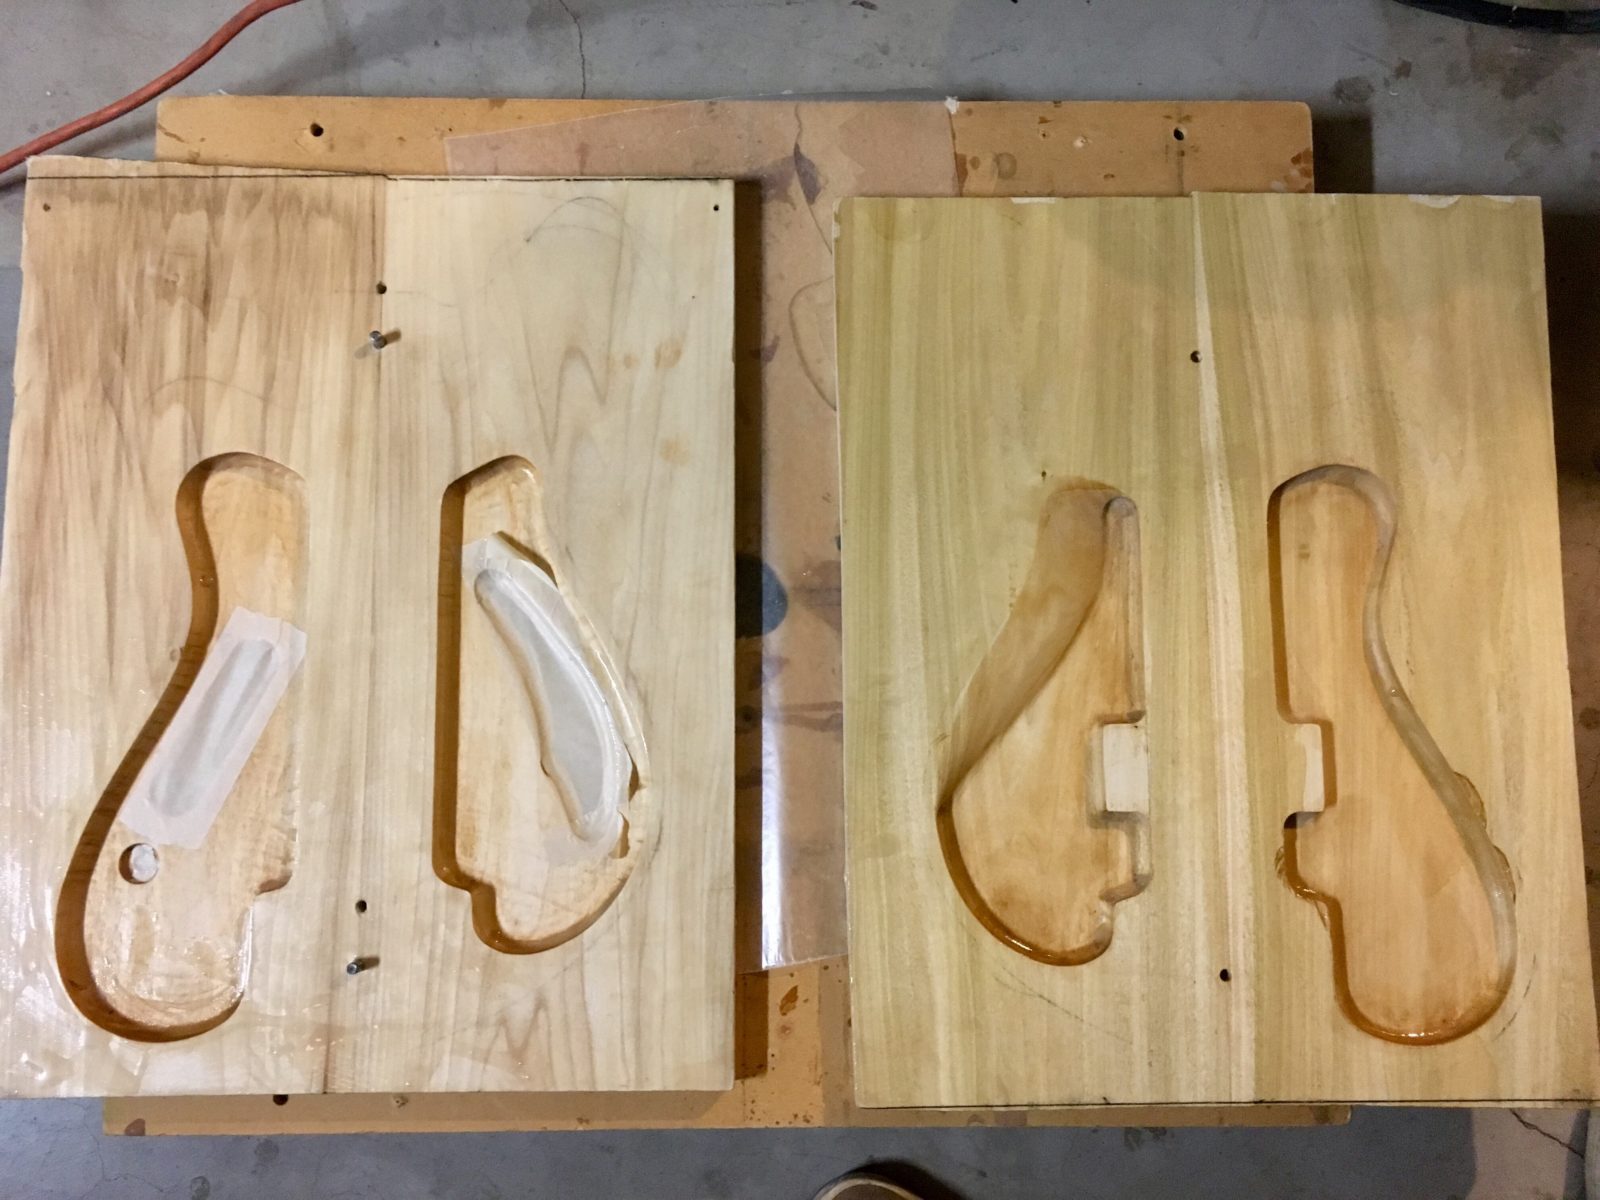
And here’s both halves hollowed out. Next, I have to carve out the section where the tummy cut will be, cut the sound hole and the control holes. Then, I’ll glue the two halves together. I’m not going to worry about the battery box now - if the new pickup works, I might not need one!

img_6465.jpg


I bought some holly binding strips from a guy on eBay. They look OK - they’re more of a cream color than white. It’s just that they’re .125” thick. There’s another guy selling pieces that are .06” thick. Those might be easier to bend. Besides, I’m thinking about binding the sound hole, and the thick pieces would not only be a PITA, but cosmetically, they are too thick for my sound hole. Either way, I think the holly will look sharp against the pearl blue finish and the padauk fretboard.

img_6470.jpg


And for a special treat, I’m posting a video from our gig the other night. It’s an iPhone vid the li’l Lady shot. She missed the intro, but it sounds OK. Anyway, I’m playing the orange Uno I built earlier this year and it’s loaded with the Funktronic Sidewinder and my modded preamp. The backline was a Fender Bassman 1200 Pro and an SVT cab with an indeterminate number of blown speakers. The Fender Bassman controls were confusing at best, but I think I managed to get a fairly representative tone out of it. I’d bust out the big speakers; it’s pretty sub-sonic. Hope you enjoy.

 
Last edited:
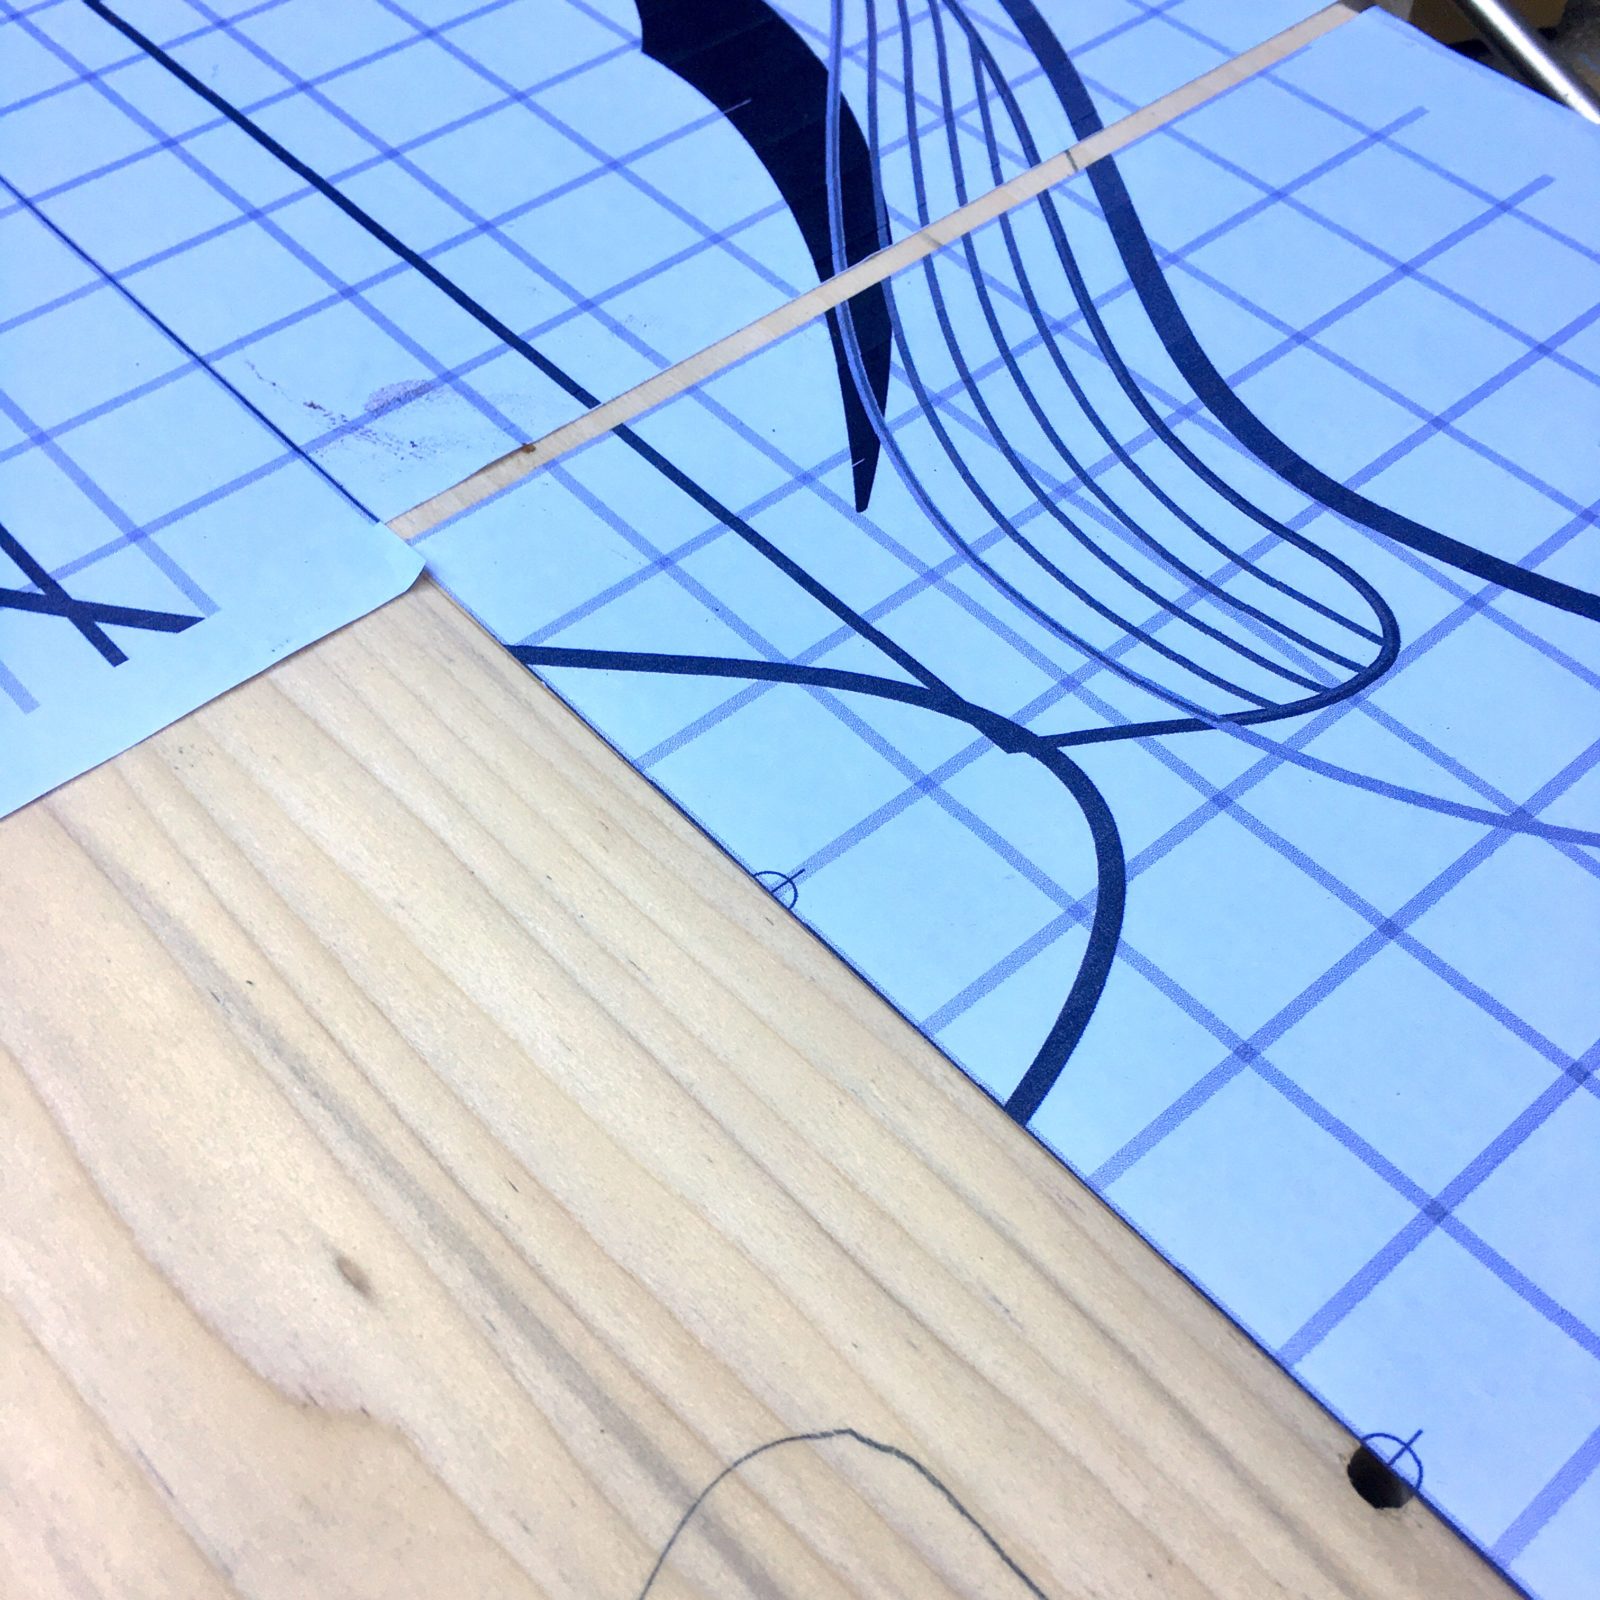
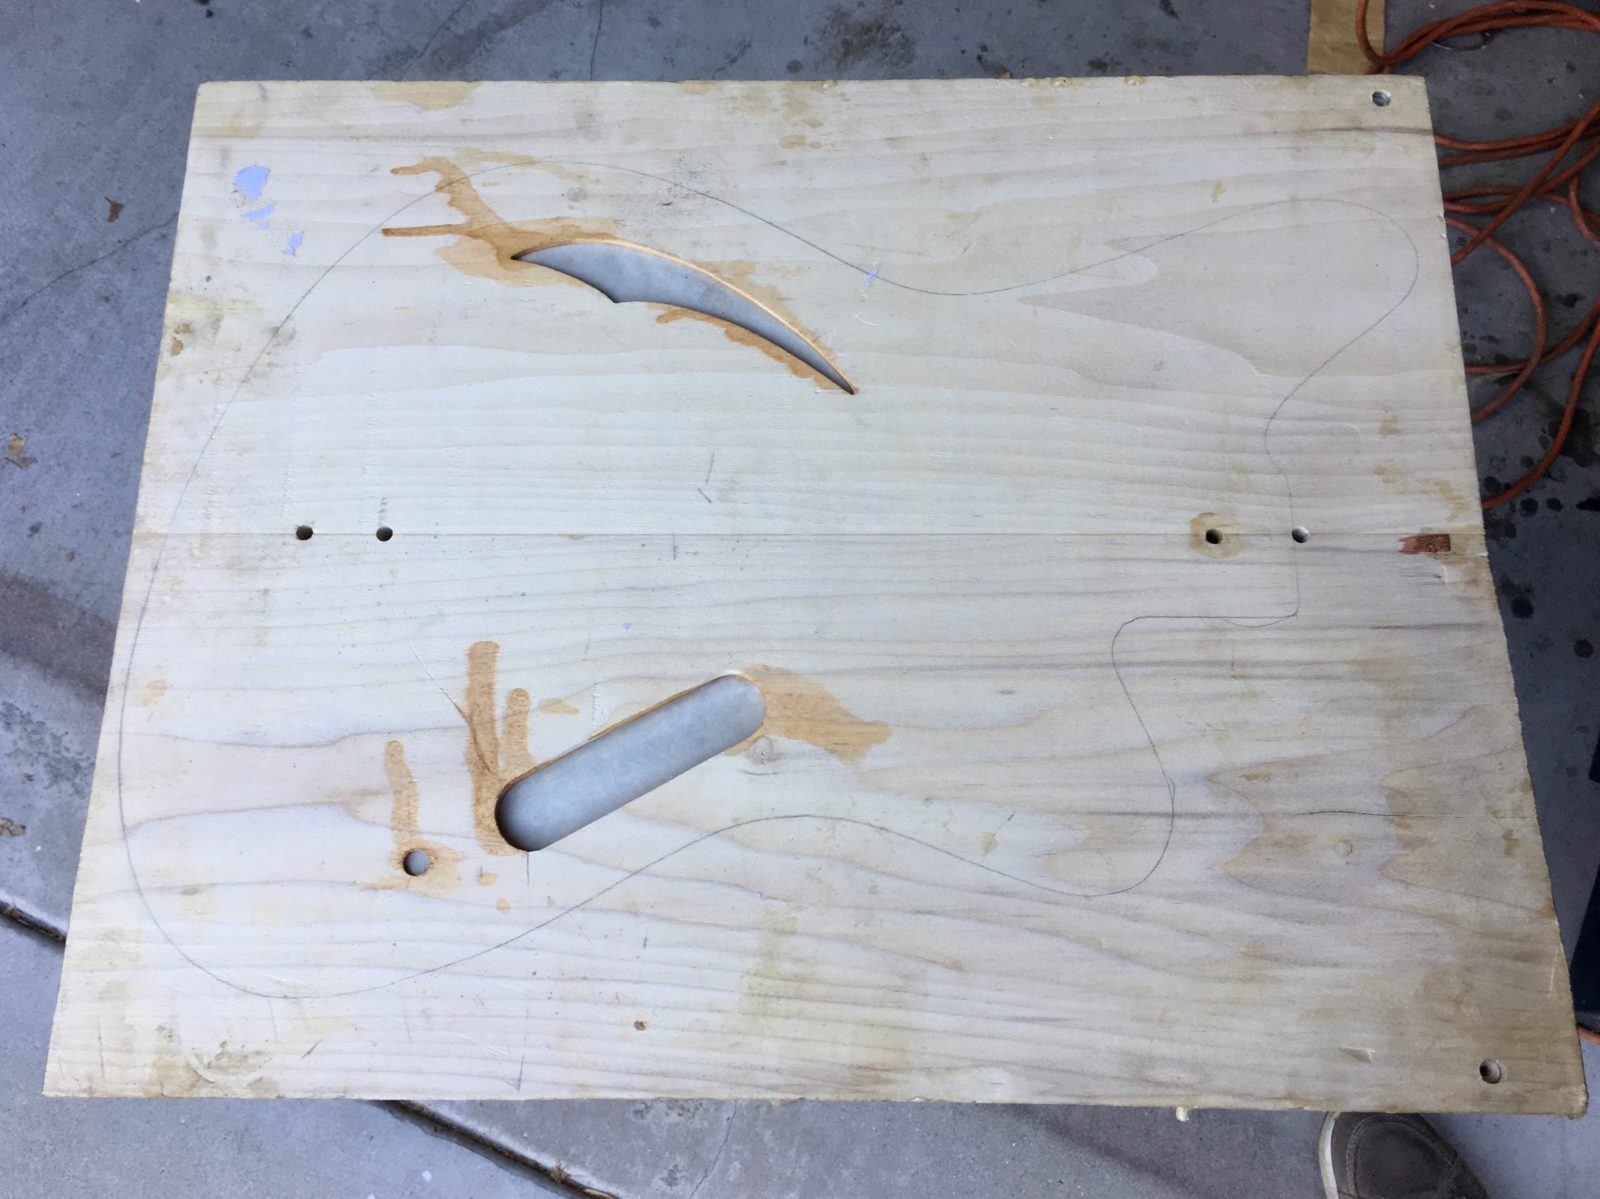
This week, I carved out the interior tummy cut and the sound holes. I started with spray-mounting some paper templates of the sound hole and control cavity.

img_6481.jpg


Here’s the roughed out insides:

img_6486.jpg


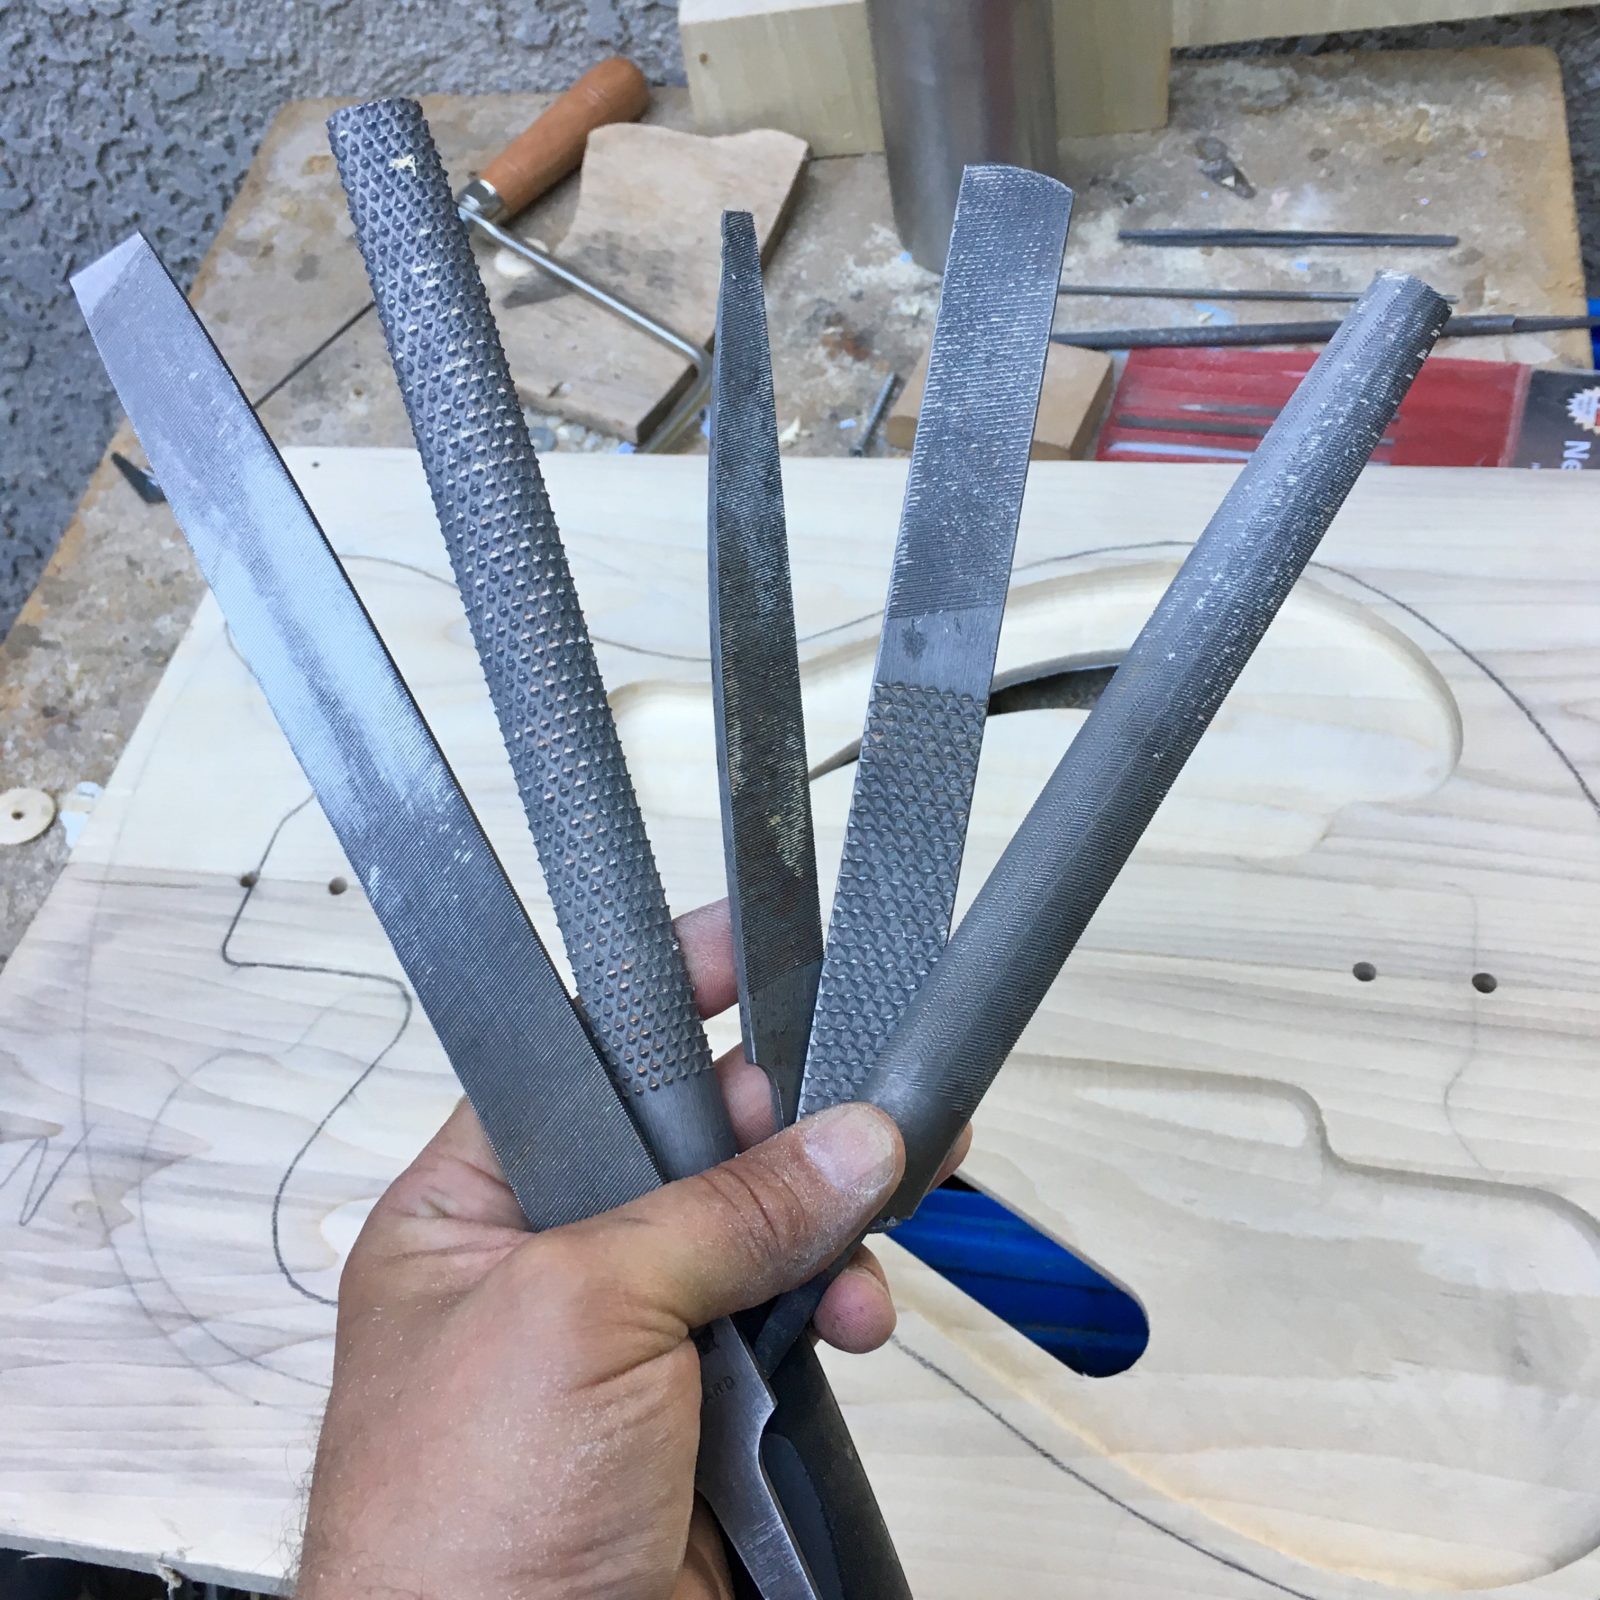
These are the files I used for the whole operation - a bastard file, farrier’s rasp, half-round, and I guess you call the last one an angled file. I dunno. The whole process took about an hour:

img_6482.jpg


Another photo of the cut-outs:

img_6484.jpg


After I sanded the insides down to 220, I sealed them with de-waxed shellac with a couple drops of orange dye mixed in. The visible part was that really ugly poplar green - I used the dye to warm it up a bit. I used to use epoxy for this, but since it’s not really exposed, I chose to use shellac instead. Epoxy is harder to sand smooth and working all those contours is a PITA. I didn’t see the point in doing all that extra work. I sanded the finished upper area down to 320.

img_6489.jpg


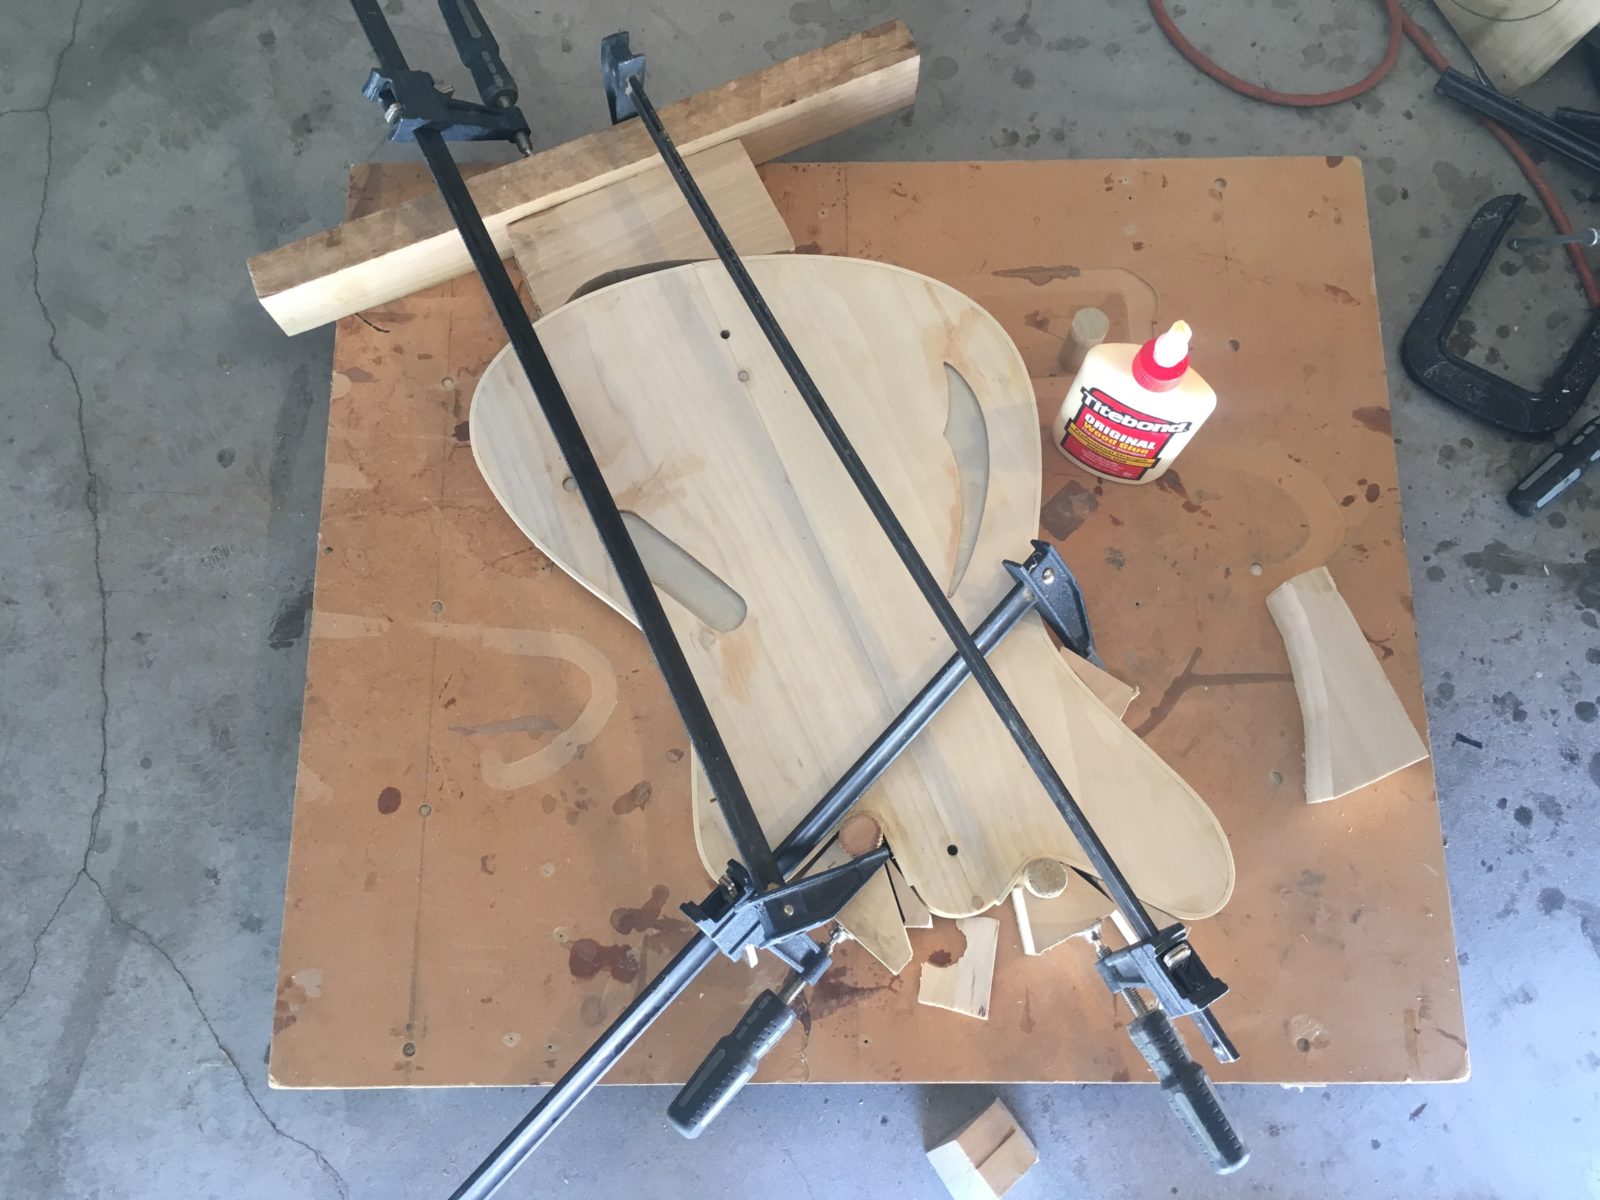
Next, I spread a fairly liberal amount of West Epoxy on the two halves. The poplar really soaks up the epoxy. Notice the sound holes are taped from the inside with masking tape.

img_6490.jpg


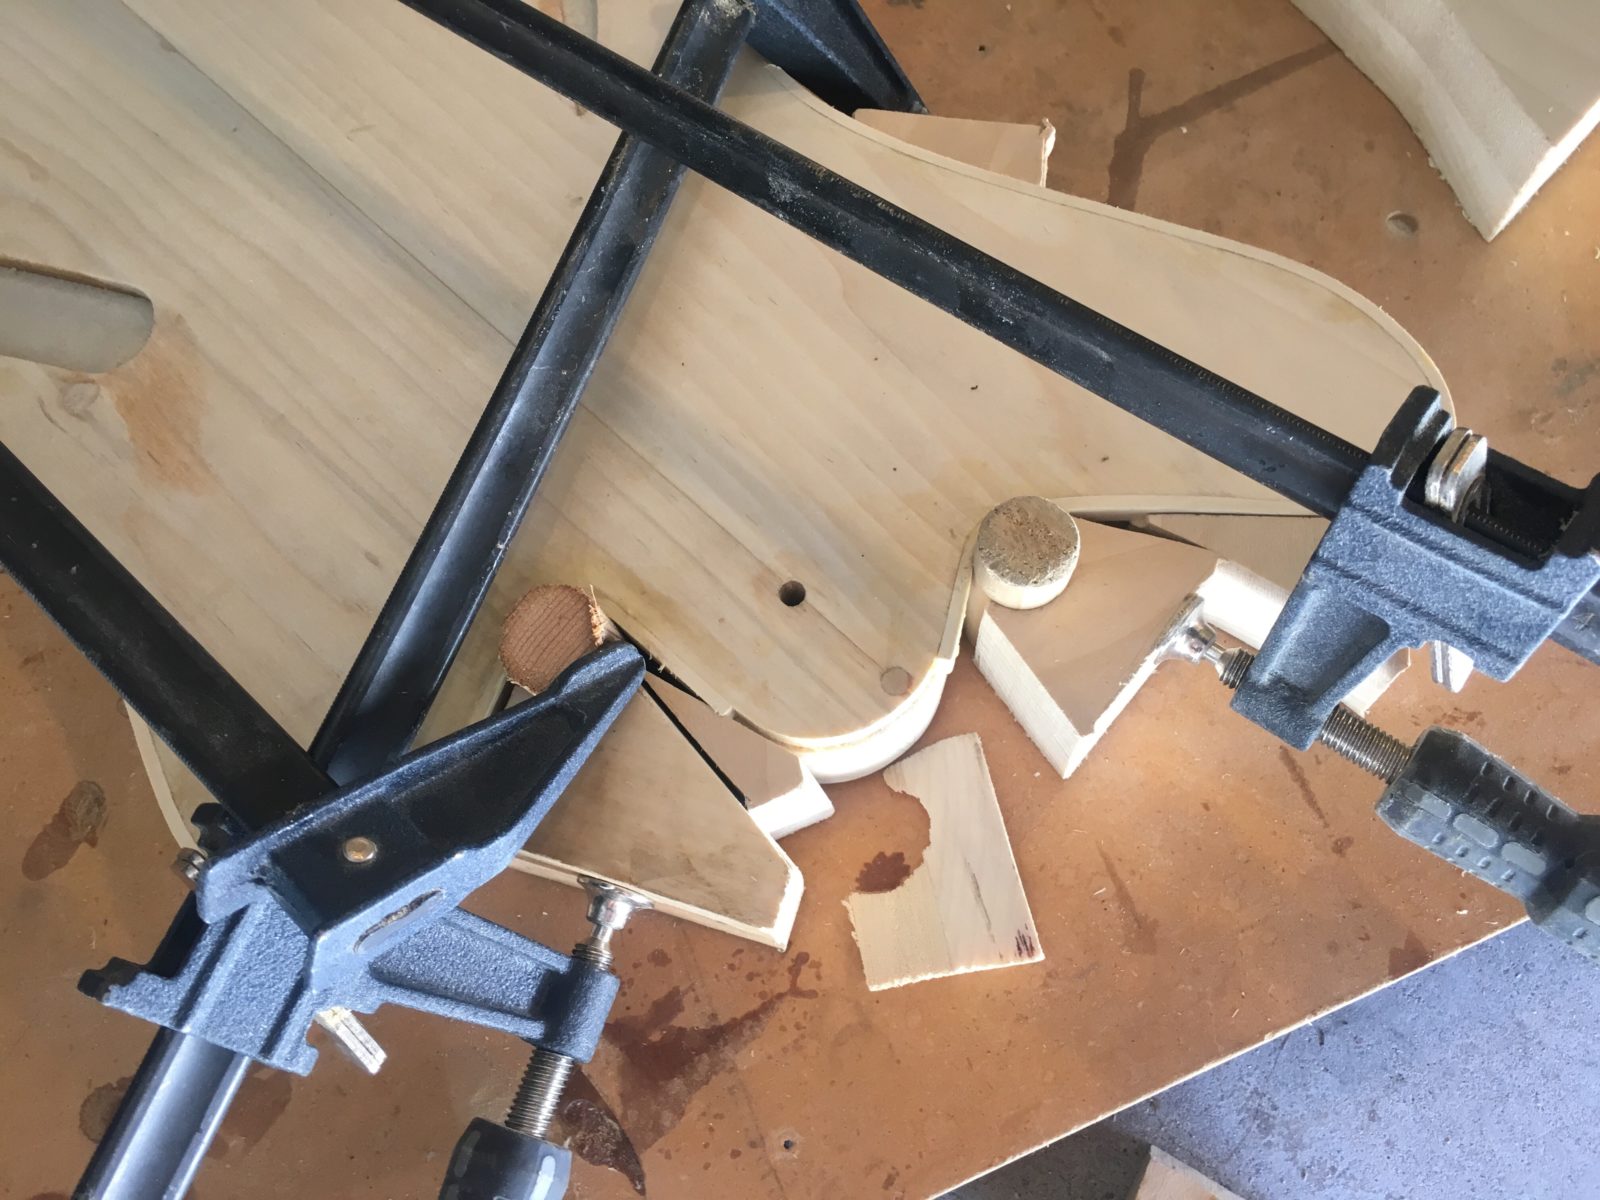
Clamping - for some reason, this part always stresses me out. Normally, I use the dowel pins to register the two halves, but I had to do it manually this time to compensate for my lousy drill hole. Next time I’m going to come up with a better registration method; doing it on the center line seems to be problematic for me.

img_6491.jpg


And here’s that body blank:

img_6492.jpg


My next hurdle is to make a new body template - I’m changing the neck heel design. Hopefully, I’ll have that done before Sunday. Once I get the body shape cut, the pocket routed and neck shape cut out, I’ll prolly go back to working on the pickup. I have some changes to do on that as well.
 
The next task was to make a new body template. I only had one change and there was nothing wrong with the original template, so this wasn't a huge task. But, for the posterity's sake, I'll post what I did or generally do in this case. Basically, start out with my original drawing and print it out full-size at Kinkos. If you request the blueprint machine, it only costs a couple of bucks. Then I spray-mount it to a piece of MDF:

img_6493.jpg


After rough-cutting the shape, I used the reference holes to attach the old template to the new template. While being careful not to cut the part I wanted to update, I used a make-shift router table to cut the shape. From there, I used the OSS to shape the new curve and sand any imperfections out of the new template.

img_6494.jpg


And here's the new shape attached to the body blank. I rough-cut the shape beforehand.

img_6496.jpg


And here's the new body all cut out:

img_6499.jpg


This is the first time I used a router table to cut the shape out. In the past, I used a hand-held router. I liked the router-table because it was a lot more fool-proof than using a hand-held. However, I felt that using a hand-held is a lot more forgiving than the table. For instance, if there's a problematic spot that I know is likely to tear out, I've cheated and done a climb cut on that spot. You really can't do that on the table. Another thing is that with the table, you really have to make sure that you've cut your rough pretty darn close to the line or you're going to be spending a lot of time making really narrow passes over and over again. I don't have a bandsaw, cutting a close shape is either challenging or time-consuming. Anyway, I'm likely to continue using the table method again in the future.

Next, I have to give the sides a good sanding and then cut the roundover on back and the binding channel on the top. I'll probably use the table again for this operation. I probably won't post an update for that procedure because it's the following step that is going to be the real doozey. I'm going to attempt to install the wood binding. I've never done this, so I'm not sure what to expect. I don't have a bending iron, so I'm going to try soaking the holly overnight and bending the tight corners using a heat gun. If that doesn't work, I can either build an iron or go over to my buddy David's and use his.

On a side note, I noticed today that the top is actually a pretty nice-looking piece of poplar. In a way, it's a kind of a shame it's going to get painted over. It would look nice with another transparent dye finish, but I think I'm going to stick with the pearl blue plan. I want a pearl blue bass more than I want another trans finish bass.

I'm not sure but I think I'm getting to be a better luthier. I'm pretty happy with how this body is turning out and it really didn't give me any trouble. The glue seams look a little better to me than usual. It really only took a few days for me to get this done, which ain't bad.
 
Last edited:
Over the last day or two, I installed the holly binding onto the body of the bass. In the past, I have installed your typical ABS plastic binding, but I had not done wood binding before.

By chance, I ran into my buddy David at the local breakfast joint. David builds traditional Mexican instruments. He specializes in Jarana Jarochas, but he as built other instruments such as guitars, bajo sextos and even arpa jarochas (harps). His binding work is killer, and he makes most of it himself. Picture crazy checkered binding strips made of wood. Anyway, I figured while we were chowing down waffles, I'd ask him for some advice on bending wood binding and installing it. His reply was, "It's totally easy, dude. Hey, you want to go sea kayaking next weekend?"

Basically, I started by routing 1/16" deep binding channel. The holly strips were 1/8" thick and took two of them to go around the whole perimeter of the bass. The procedure went as follows: mist the strip with distilled water, hit it with the heat gun and shape it around the body. I used Titebond as an adhesive and tape as a clamp. I used Titebond because it was easy to apply, easy to clean up and was pretty forgiving with both the moisture and the dry time. Unfortunately, I was kind of in the zone, and photographing this procedure was difficult. However, I do have pictures.

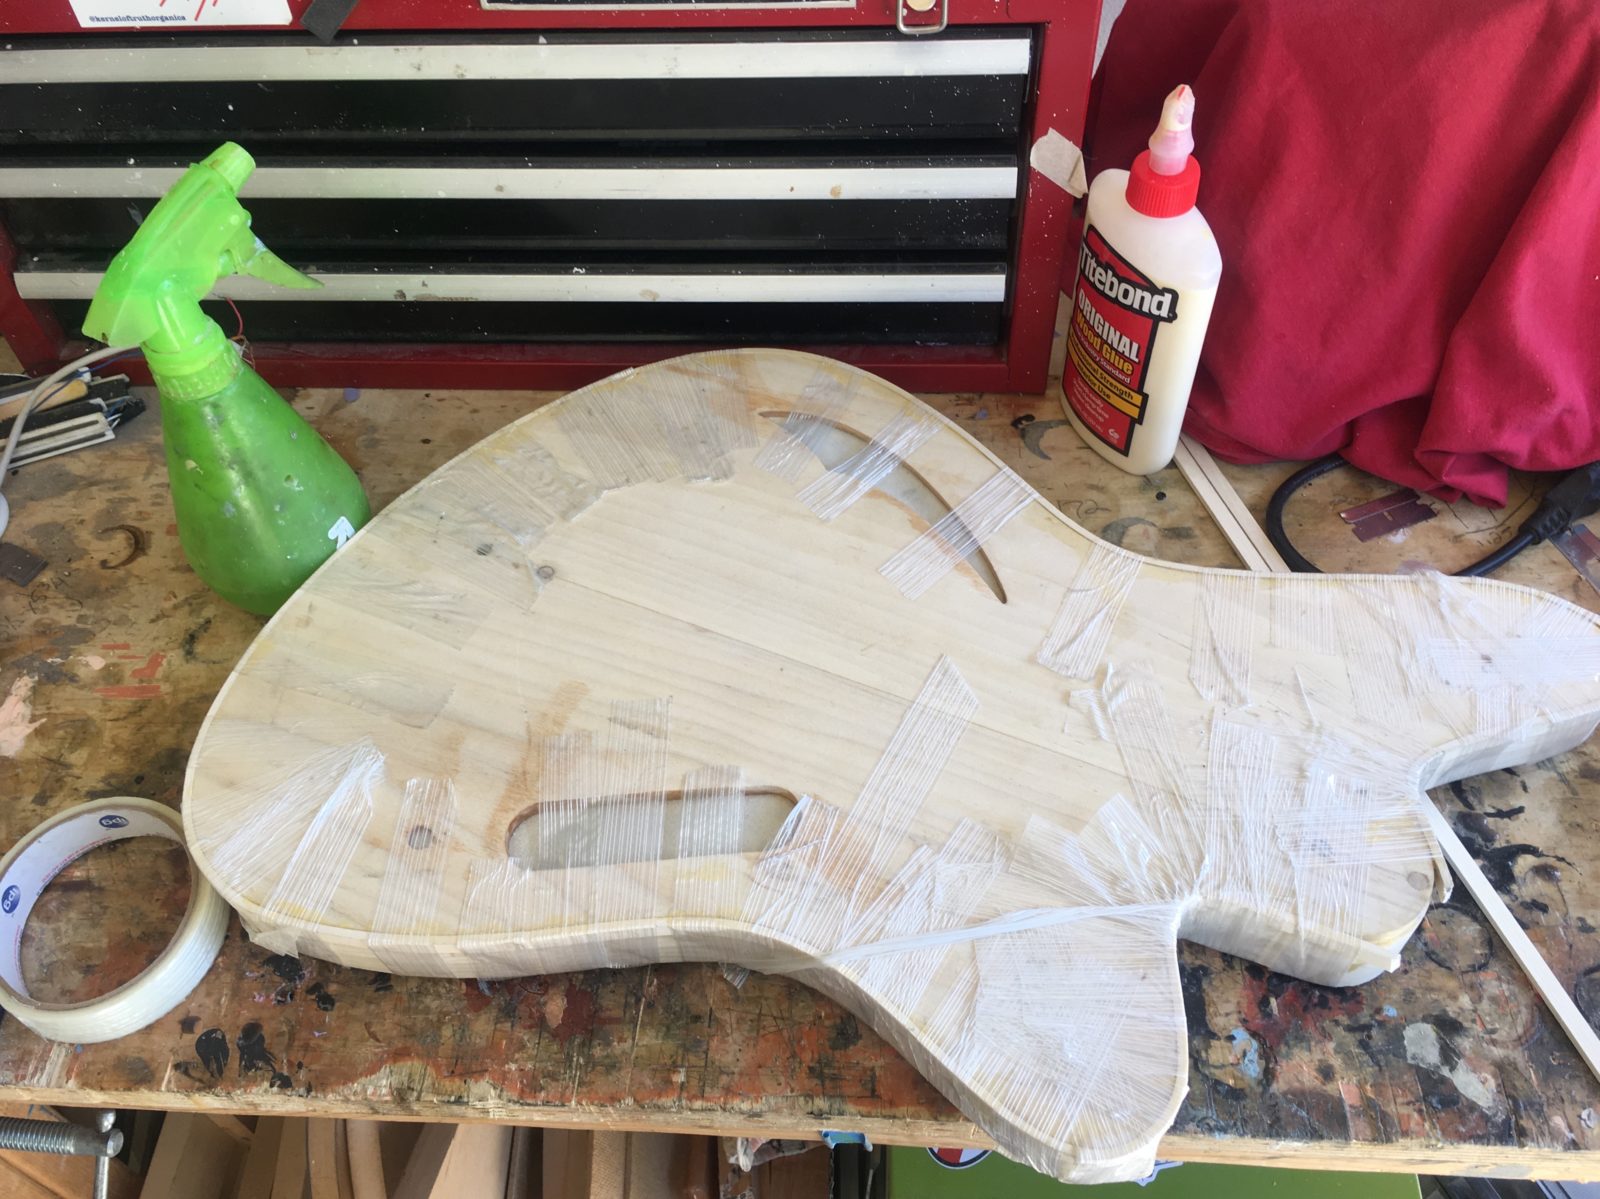
Here's a picture of the body all taped up:

img_6512.jpg


I ran into two small snags. One, the tape just wasn't strong enough to hold the sharp turns.

img_6513.jpg


The split was on the inside, so I didn't worry about it. In any case, the remedy was simple: just squirt some more Titebond in there and...

img_6515.jpg


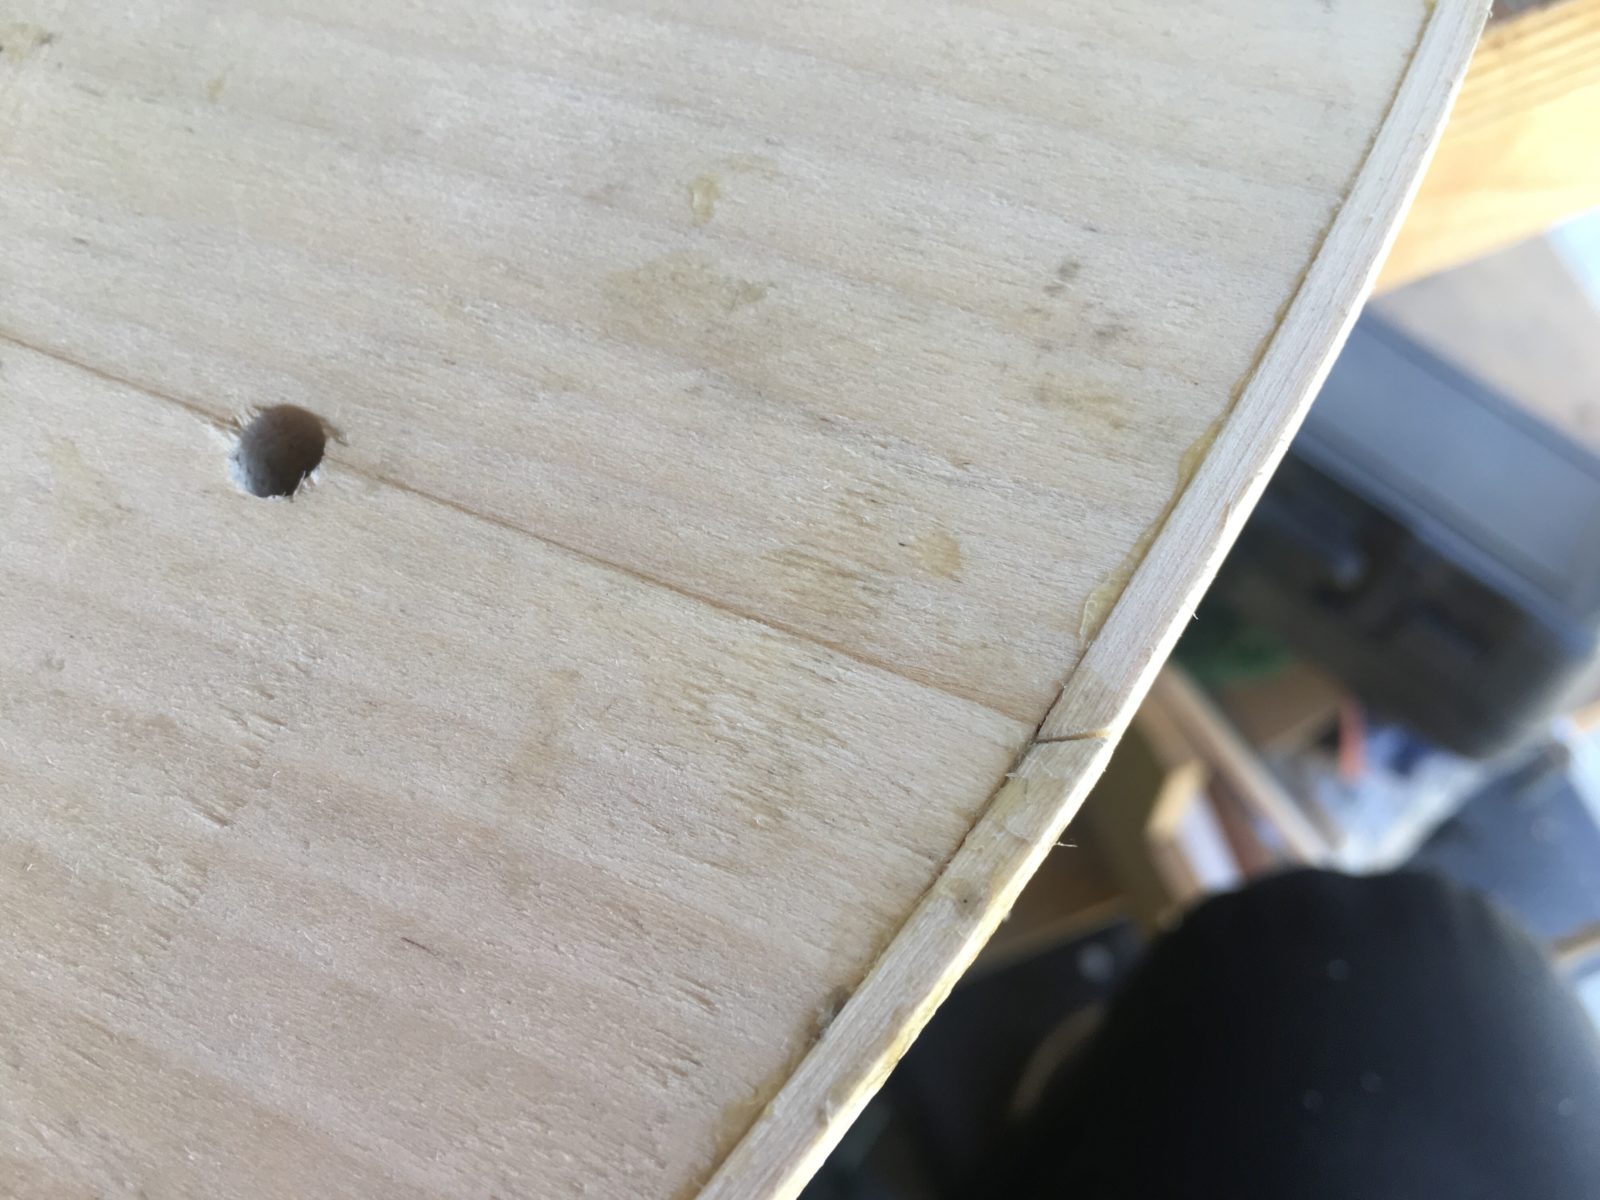
Here's a close-up:

img_6516.jpg


The other snag, was that the wood was damp when I glued it to the bass. I had the ends butted up tightly together, but as the wood dried, it shrank and left a pretty sizable gap:

img_6514.jpg


That was also an easy fix. Elmer's Glue and holly dust fixed that.

Anyway, I filed edge flush with the top and used the router to trim the 1/16" excess off.

Here's that tight turn all cleaned up:

img_6518.jpg


Here's that seam:

img_6520.jpg


img_6519.jpg


Some thoughts:

David was correct; bending wood binding was not difficult. I don't think bending holly was much more difficult than bending ABS.

At first, since I was planning on trimming the binding down to 1/16", I thought the 1/8" binding was too thick. But, after all the clamping and stuff, the sides got pretty chewed up. On the tight turns, the binding really compressed considerably. The jury is still out on the the thickness. In this case, I was happy that it was too thick - once I trimmed it down, the edges came out nice and clean. A thinner strip might be easier to bend and might not require really aggressive clamping.

I'm really digging the holly binding vibe. I'm not one of those weirdos that doesn't like plastic binding, but the holly is going to lend the look of this instrument a ton of class. The holly has a nice color - it's not white white, but more of a warm ivory color. There's no visible grain and I really like that look. It remains to be seen if it will solve the finishing problems that first set me on the wood binding path. I won't find out until I seal the body with epoxy.

Because I attempted and pretty much succeeded in doing something I haven't done before, I will say that this experience has made me a better luthier. However, there is a caveat: if I choose to install wooden binding again, and while doing so, use the knowledge I have gained to take steps and make the process more foolproof, then I will definitely have accomplished something that will lead to improvement.
 
Last edited:
Over the last day or two, I installed the holly binding onto the body of the bass. In the past, I have installed your typical ABS plastic binding, but I had not done wood binding before.

By chance, I ran into my buddy David at the local breakfast joint. David builds traditional Mexican instruments. He specializes in Jarana Jarochas, but he as built other instruments such as guitars, bajo sextos and even arpa jarochas (harps). His binding work is killer, and he makes most of it himself. Picture crazy checkered binding strips made of wood. Anyway, I figured while we were chowing down waffles, I'd ask him for some advice on bending wood binding and installing it. His reply was, "It's totally easy, dude. Hey, you want to go sea kayaking next weekend?"

Basically, I started by routing 1/16" deep binding channel. The holly strips were 1/8" thick and took two of them to go around the whole perimeter of the bass. The procedure went as follows: mist the strip with distilled water, hit it with the heat gun and shape it around the body. I used Titebond as an adhesive and tape as a clamp. I used Titebond because it was easy to apply, easy to clean up and was pretty forgiving with both the moisture and the dry time. Unfortunately, I was kind of in the zone, and photographing this procedure was difficult. However, I do have pictures.

Here's a picture of the body all taped up:

img_6512.jpg


I ran into two small snags. One, the tape just wasn't strong enough to hold the sharp turns.

img_6513.jpg


The split was on the inside, so I didn't worry about it. In any case, the remedy was simple: just squirt some more Titebond in there and...

img_6515.jpg


Here's a close-up:

img_6516.jpg


The other snag, was that the wood was damp when I glued it to the bass. I had the ends butted up tightly together, but as the wood dried, it shrank and left a pretty sizable gap:

img_6514.jpg


That was also an easy fix. Elmer's Glue and holly dust fixed that.

Anyway, I filed edge flush with the top and used the router to trim the 1/16" excess off.

Here's that tight turn all cleaned up:

img_6518.jpg


Here's that seam:

img_6520.jpg


img_6519.jpg


Some thoughts:

David was correct; bending wood binding was difficult. I don't think bending holly was much more difficult than bending ABS.

At first, since I was planning on trimming the binding down to 1/16", I thought the 1/8" binding was too thick. But, after all the clamping and stuff, the sides got pretty chewed up. On the tight turns, the binding really compressed considerably. The jury is still out on the the thickness. In this case, I was happy that it was too thick - once I trimmed it down, the edges came out nice and clean. A thinner strip might be easier to bend and might not require really aggressive clamping.

I'm really digging the holly binding vibe. I'm not one of those weirdos that doesn't like plastic binding, but the holly is going to lend the look of this instrument a ton of class. The holly has a nice color - it's not white white, but more of a warm ivory color. There's no visible grain and I really like that look. It remains to be seen if it will solve the finishing problems that first set me on the wood binding path. I won't find out until I seal the body with epoxy.

Because I attempted and pretty much succeeded in doing something I haven't done before, I will say that this experience has made me a better luthier. However, there is a caveat: if I choose to install wooden binding again, and while doing so, use the knowledge I have gained to take steps and make the process more foolproof, then I will definitely have accomplished something that will lead to improvement.


Nice job, that binding looks killer! I've been wanting to use some holly myself and I have a really good source as well.
 
Nice job, that binding looks killer! I've been wanting to use some holly myself and I have a really good source as well.

Oh yeah? Let me know how that goes!

I bought my holly strips from a guy on eBay. They were surfaced pretty well and were precise. Pricey, though. With shipping they were $26 for the pair.

Thx for the kind words.
 
Over the last day or two, I installed the holly binding onto the body of the bass. In the past, I have installed your typical ABS plastic binding, but I had not done wood binding before.

By chance, I ran into my buddy David at the local breakfast joint. David builds traditional Mexican instruments. He specializes in Jarana Jarochas, but he as built other instruments such as guitars, bajo sextos and even arpa jarochas (harps). His binding work is killer, and he makes most of it himself. Picture crazy checkered binding strips made of wood. Anyway, I figured while we were chowing down waffles, I'd ask him for some advice on bending wood binding and installing it. His reply was, "It's totally easy, dude. Hey, you want to go sea kayaking next weekend?"

Basically, I started by routing 1/16" deep binding channel. The holly strips were 1/8" thick and took two of them to go around the whole perimeter of the bass. The procedure went as follows: mist the strip with distilled water, hit it with the heat gun and shape it around the body. I used Titebond as an adhesive and tape as a clamp. I used Titebond because it was easy to apply, easy to clean up and was pretty forgiving with both the moisture and the dry time. Unfortunately, I was kind of in the zone, and photographing this procedure was difficult. However, I do have pictures.

Here's a picture of the body all taped up:

img_6512.jpg


I ran into two small snags. One, the tape just wasn't strong enough to hold the sharp turns.

img_6513.jpg


The split was on the inside, so I didn't worry about it. In any case, the remedy was simple: just squirt some more Titebond in there and...

img_6515.jpg


Here's a close-up:

img_6516.jpg


The other snag, was that the wood was damp when I glued it to the bass. I had the ends butted up tightly together, but as the wood dried, it shrank and left a pretty sizable gap:

img_6514.jpg


That was also an easy fix. Elmer's Glue and holly dust fixed that.

Anyway, I filed edge flush with the top and used the router to trim the 1/16" excess off.

Here's that tight turn all cleaned up:

img_6518.jpg


Here's that seam:

img_6520.jpg


img_6519.jpg


Some thoughts:

David was correct; bending wood binding was not difficult. I don't think bending holly was much more difficult than bending ABS.

At first, since I was planning on trimming the binding down to 1/16", I thought the 1/8" binding was too thick. But, after all the clamping and stuff, the sides got pretty chewed up. On the tight turns, the binding really compressed considerably. The jury is still out on the the thickness. In this case, I was happy that it was too thick - once I trimmed it down, the edges came out nice and clean. A thinner strip might be easier to bend and might not require really aggressive clamping.

I'm really digging the holly binding vibe. I'm not one of those weirdos that doesn't like plastic binding, but the holly is going to lend the look of this instrument a ton of class. The holly has a nice color - it's not white white, but more of a warm ivory color. There's no visible grain and I really like that look. It remains to be seen if it will solve the finishing problems that first set me on the wood binding path. I won't find out until I seal the body with epoxy.

Because I attempted and pretty much succeeded in doing something I haven't done before, I will say that this experience has made me a better luthier. However, there is a caveat: if I choose to install wooden binding again, and while doing so, use the knowledge I have gained to take steps and make the process more foolproof, then I will definitely have accomplished something that will lead to improvement.

Nice work, man! To me, wood binding is in the Advanced Luthier Techniques category. I've never tried it myself. We all appreciate you digging in and figuring out the technique, and showing us!
 
I tried doing a walnut binding on a build, it did not go well, I tried using a pipe heated with a torch as a bending iron. I also didn't pay attention to grain runout, which causes splits, obvious in retrospect. I need to try it again, nice job!

I was expecting a similar kind of nightmare going into this, but fortunately for me, the holly was a really cooperative wood. I have read that with some woods, you really have to pay attention to the grain while bending; figured woods are apparently Split City.

Nice work, man! To me, wood binding is in the Advanced Luthier Techniques category. I've never tried it myself. We all appreciate you digging in and figuring out the technique, and showing us!

Thanks, Bruce!

Yeah, the whole process wasn’t too hard, but I’m picturing a better way of going about it for next time. I think a jig to clamp the tight corners is in order. i think it would be better to allow the dampened wood to dry in the clamps before gluing them to the body might be better.

I’ve been meaning to bring David by the shop. He makes nice instruments. They are well executed and they walk the line between classy and rustic. He took his Instagram down, otherwise I’d post a link. He’s been wanting me to learn some of his process ‘cuz I think he needs help. Apparently there’s only a few guys in the world that build those jarocho instruments and he says he’s selling them as fast as he can build them.
 
  • Like
Reactions: wraub and tbrannon
I’ve been meaning to bring David by the shop. He makes nice instruments. They are well executed and they walk the line between classy and rustic. He took his Instagram down, otherwise I’d post a link. He’s been wanting me to learn some of his process ‘cuz I think he needs help. Apparently there’s only a few guys in the world that build those jarocho instruments and he says he’s selling them as fast as he can build them.

Sure, bring him by! I'd like to meet him.
 
Today I carved body contours.

img_6524.jpg


I used a farriers rasp and a half round file. Since I have never done a contoured heel, I sketched out the neck pocket and possible bolt positions to make sure that I would have adequate clearance.

Some thoughts:

I’ve never really liked the look of contoured heels. I’m going to try and incorporate it into the back of the neck, and maybe that will make a nice looking joint. I’ve seen it done, and I think it looks a little better. Fender style squared heels are pretty kludgy looking, so it’s not like I’m making a huge esthetic sacrifice. I’m just trying to look at it as another back contour. I figure this will be an easy improvement to make even if I rarely venture above the 7th fret.

Next I have to cut the pocket. I have yet to come up with an efficient way to drill the bolt holes. I use neck inserts, so what I usually do is this: before I attach the FB, I use the bolt holes in the neck as a guide to drill holes into the neck pocket. It works OK and I usually get good results, but it seems like there’s gotta be an easier way. I’m thinking about making a drill template that affixes to both the neck and the pocket. But if that’s the way I’m going to do it, I might as well use the neck as my template.

Bruce recommended fabricating a bolt plate out of 1/4” aluminum instead of using thick ferrules around the screws. I might give that a try as well.