I just recently purchased this 95 Warwick Fortress from TB. It's a lovely bass and sounds phenomenal. My reason for getting the bass with the specific intention of having something I could set the action STUPID low.
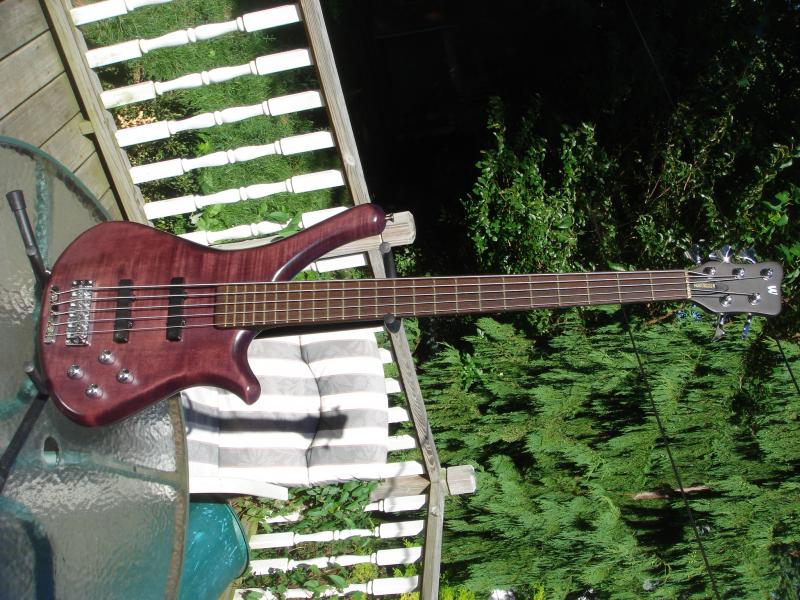
After a few attempts at setting the neck properly, waiting and seeing what happened, it wasn't getting lower. It was maxed.
GOOD THING it was made before 1996, though! These have easily replaced truss rods.
So if you don't mind, here's a brief pictorial/tutorial. Yes, there's a wonderful video on how to do it... But if you want the Cliffs Notes, here you go!
1) Take off the truss rod cover, screws and all (loosen strings, if you didn't already):
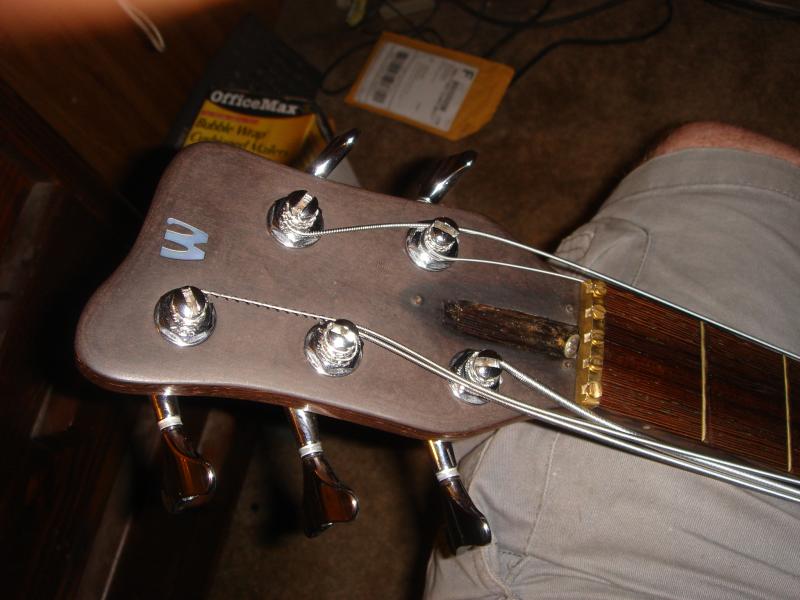
2) Unscrew the truss rod nut so that it moves freely.
If the nut head is stripped, you may have to work it harder.
If it's broken, it should be loose as is.
If it's all the way backed out and tight, try screwing it in.
Point is, take the tension off the rod.
3) When it's loose, put the tool into the nut and press it sideways (or "tilt" the wrench so it presses into the truss rod nut), then pull the rod out:
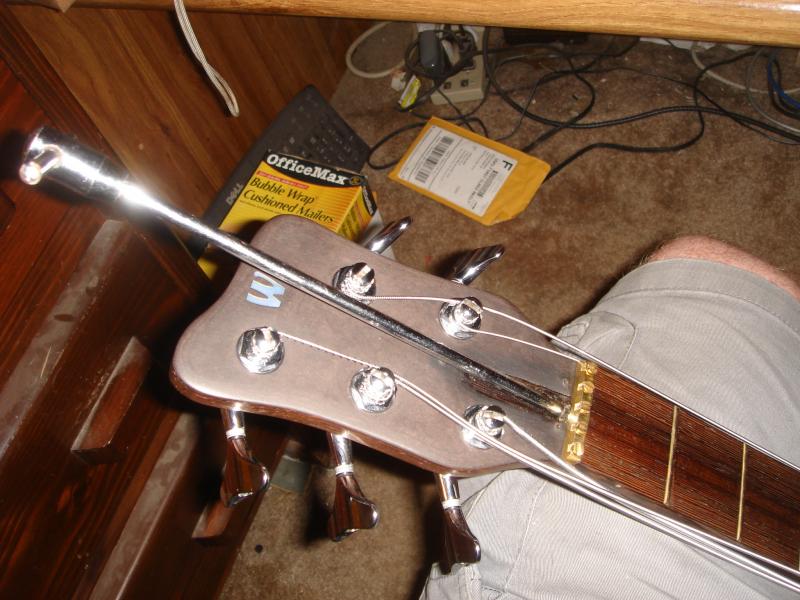
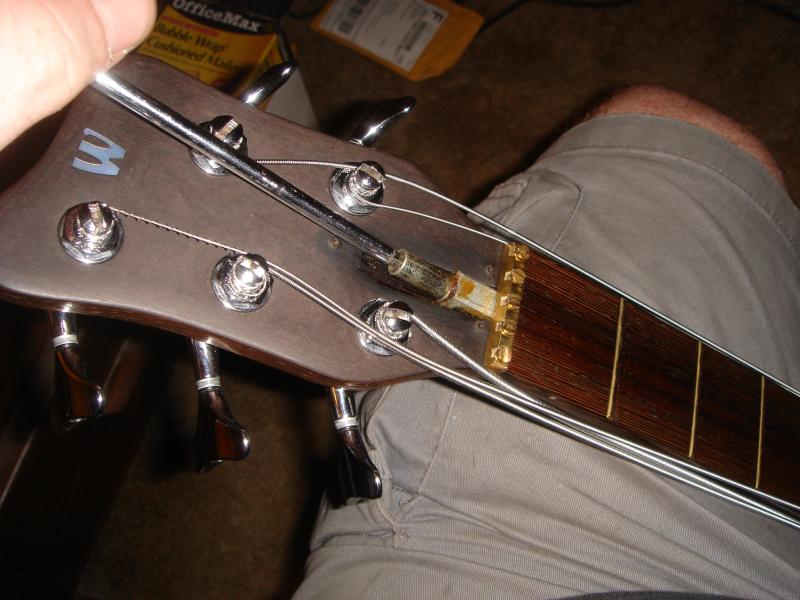
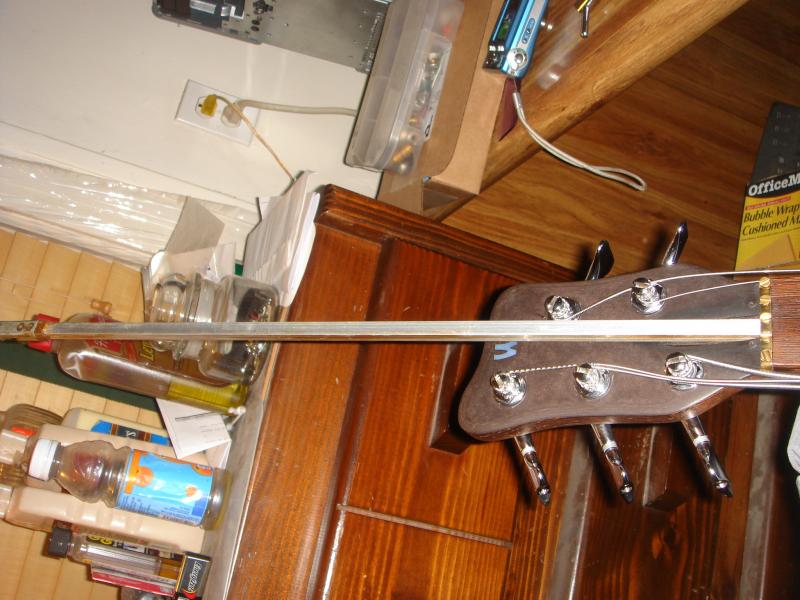
4) You can look at it and see what may have gone wrong. In my case, the screws that hold the top assembly in place were stripped out and loose And it was also a little bent.
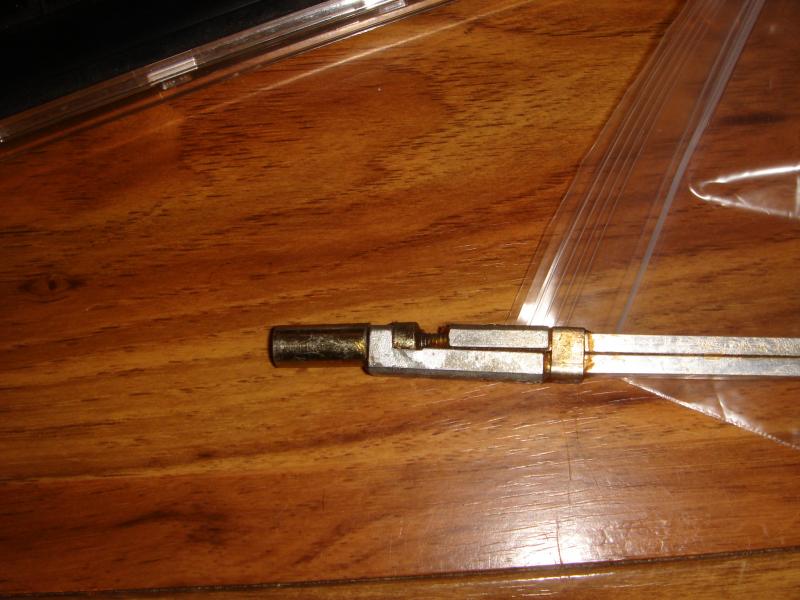
5) If you didn't get one already, have a replacement rod sent to you from the Warwick Custom Shop in NYC. Mine was $58 shipped, but prices may vary depending on model and shipping distance.
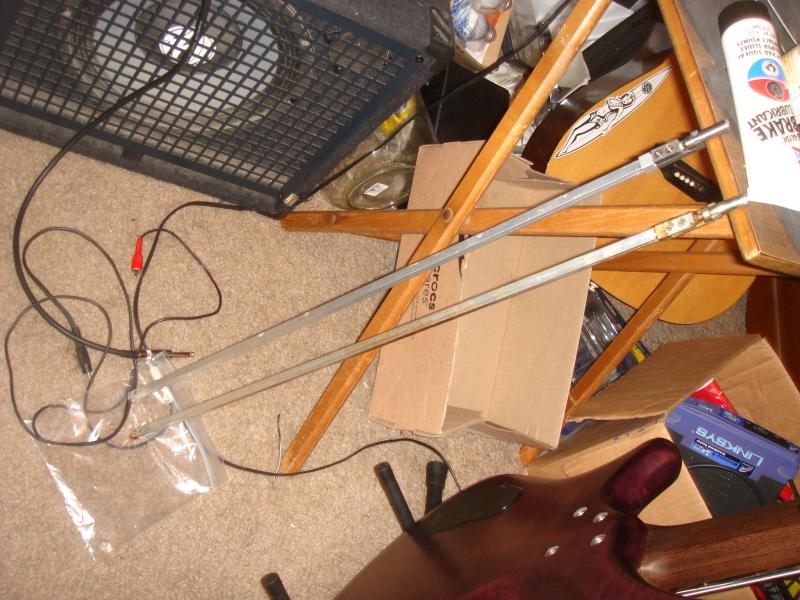
6) Before putting the rod in, make sure you grease it up with SILICONE GREASE (yes, I know this post is filled with "That's what she said" moments... grow up ).
).
I took the nut off so I could grease the threads, in between the rods, and anywhere else I could keep moving smoothly.
i) slide this thing down:
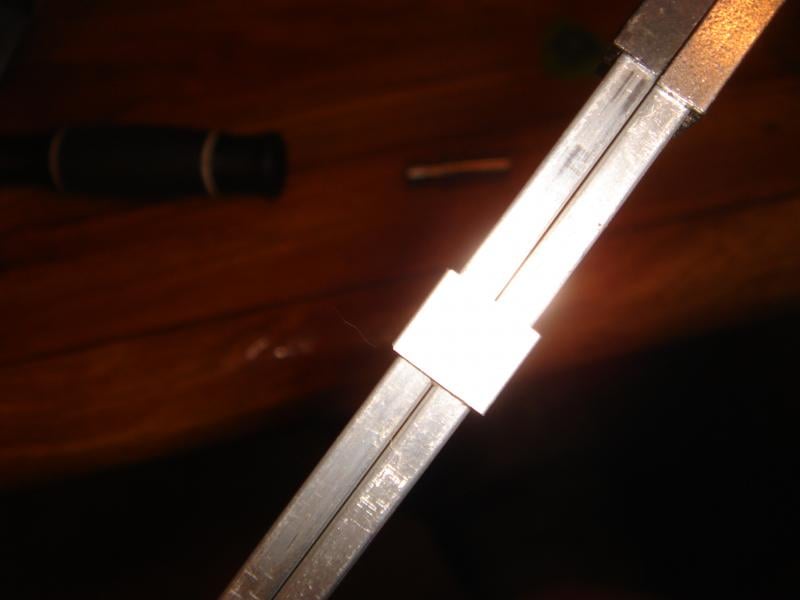
ii) open it up a bit and get it greazy:
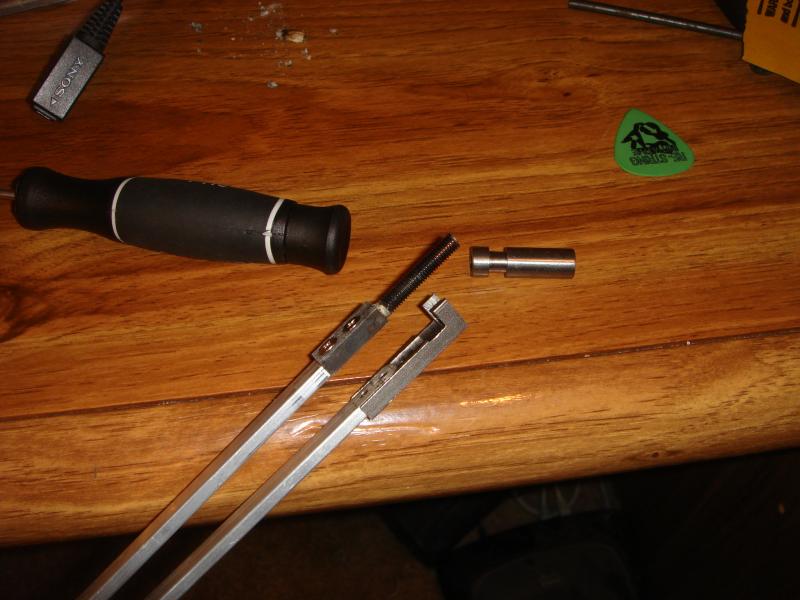
(forgot to get pics of greasing it!)
7) Insert the new truss rod, threads down:
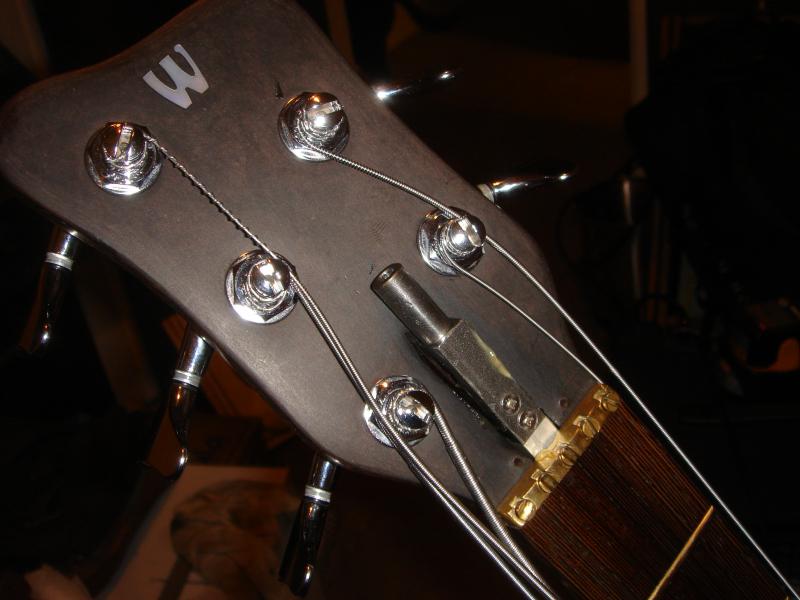
8) Put all of the parts back, wipe off extra grease, put the strings back in tune, then adjust the rod according to how it should be done.
It's an intuitive truss rod design, so if the neck bows too much OUT and the strings are too high, turn it CLOCKWISE to lower the action.
If the neck is bowed in and hits the strings, you go COUNTER CLOCKWISE and it will push the other way.
Hope that helps someone. The video is good, but not much depth to it. And I managed to find a lot of info everywhere, but never in one place. So here it is.
Any other questions, I'll try to answer them.
RESOURCES:
Silicone Grease, got it at Advance Auto Parts. It's for brake sliders, but it works well here, too.
I didn't know if I could use Molybdenum, Lithium, Anti-Sieze or other greases, but Warwick said Silicone, so I abide.
Warwick Custom Shop, NYC: 212-777-6990
Just tell them what year, they'll get you hooked up. And mine came FAST, so be ready!
After a few attempts at setting the neck properly, waiting and seeing what happened, it wasn't getting lower. It was maxed.
GOOD THING it was made before 1996, though! These have easily replaced truss rods.
So if you don't mind, here's a brief pictorial/tutorial. Yes, there's a wonderful video on how to do it... But if you want the Cliffs Notes, here you go!
1) Take off the truss rod cover, screws and all (loosen strings, if you didn't already):
2) Unscrew the truss rod nut so that it moves freely.
If the nut head is stripped, you may have to work it harder.
If it's broken, it should be loose as is.
If it's all the way backed out and tight, try screwing it in.
Point is, take the tension off the rod.
3) When it's loose, put the tool into the nut and press it sideways (or "tilt" the wrench so it presses into the truss rod nut), then pull the rod out:
4) You can look at it and see what may have gone wrong. In my case, the screws that hold the top assembly in place were stripped out and loose And it was also a little bent.
5) If you didn't get one already, have a replacement rod sent to you from the Warwick Custom Shop in NYC. Mine was $58 shipped, but prices may vary depending on model and shipping distance.
6) Before putting the rod in, make sure you grease it up with SILICONE GREASE (yes, I know this post is filled with "That's what she said" moments... grow up
).I took the nut off so I could grease the threads, in between the rods, and anywhere else I could keep moving smoothly.
i) slide this thing down:
ii) open it up a bit and get it greazy:
(forgot to get pics of greasing it!)
7) Insert the new truss rod, threads down:
8) Put all of the parts back, wipe off extra grease, put the strings back in tune, then adjust the rod according to how it should be done.
It's an intuitive truss rod design, so if the neck bows too much OUT and the strings are too high, turn it CLOCKWISE to lower the action.
If the neck is bowed in and hits the strings, you go COUNTER CLOCKWISE and it will push the other way.
Hope that helps someone. The video is good, but not much depth to it. And I managed to find a lot of info everywhere, but never in one place. So here it is.
Any other questions, I'll try to answer them.
RESOURCES:
Silicone Grease, got it at Advance Auto Parts. It's for brake sliders, but it works well here, too.
I didn't know if I could use Molybdenum, Lithium, Anti-Sieze or other greases, but Warwick said Silicone, so I abide.
Warwick Custom Shop, NYC: 212-777-6990
Just tell them what year, they'll get you hooked up. And mine came FAST, so be ready!