
Enjoy the benefits of a premium membership!
Upgrade Account
-
TalkBass has been independent since 1998. Add your voice.
Create a free account to reply to discussions, view embedded media, and browse with fewer display ads.
Join free Log in
Want zero display ads or expanded classifieds tools? Compare plans.
You are using an out of date browser. It may not display this or other websites correctly.
You should upgrade or use an alternative browser.
You should upgrade or use an alternative browser.
New How-To: Dye/Oil/Varnish finish Process
- Thread starter Lonnybass
- Start date
More options
Who Replied?


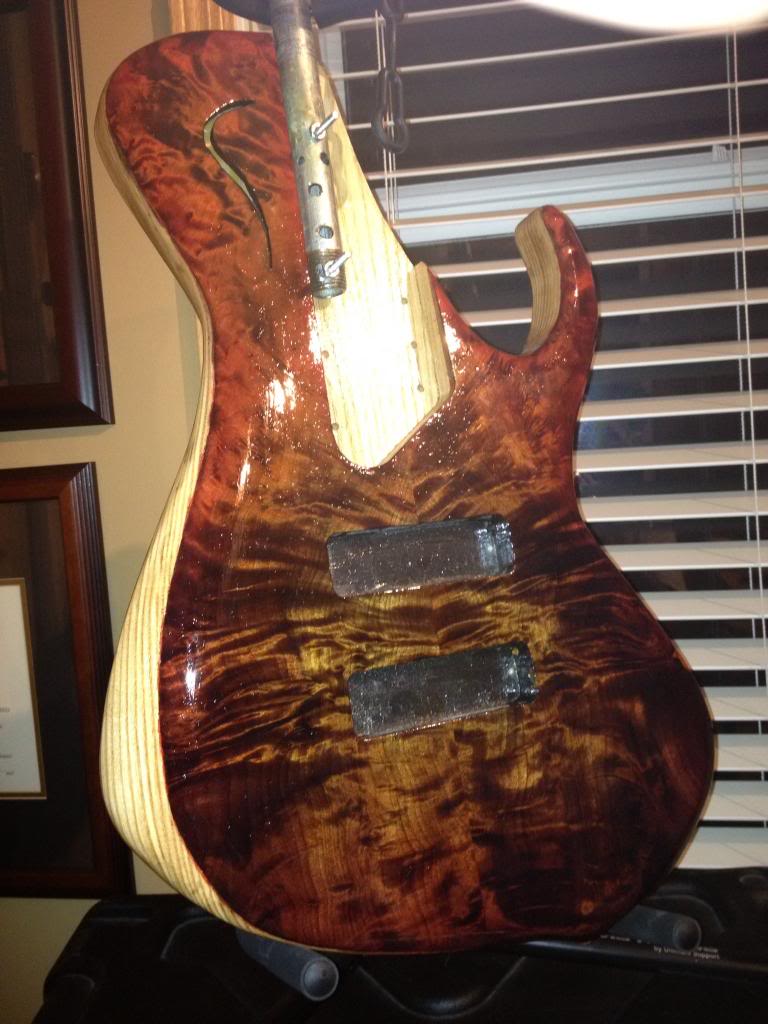
The bass now has approximately 14 successive coats applied to it with a light scuff sand roughly every 3 coats to remove dust and minor finish niggles.
It's streak and drip free at this point, so I'll leave it to cure for a couple weeks along with the rear cavity cover which has received the same finish applications.
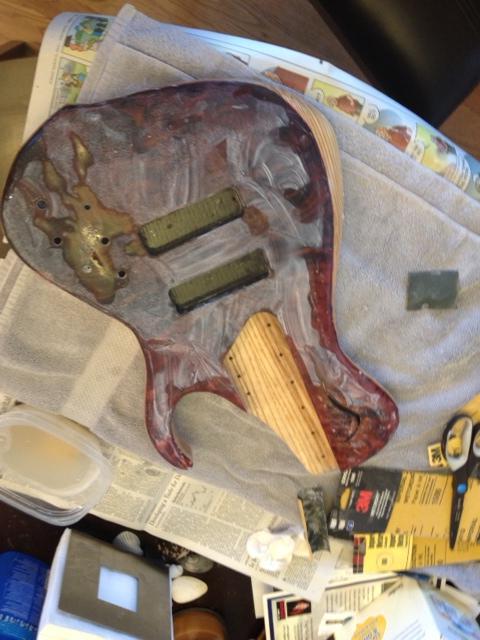
Here is a shot of the curing bass. As you can see, there is a degree of dust/lint that has settled but these will easily be removed during the buffing phase.
Now onto neck construction while this dries out!
Lonnybass
It's streak and drip free at this point, so I'll leave it to cure for a couple weeks along with the rear cavity cover which has received the same finish applications.
Here is a shot of the curing bass. As you can see, there is a degree of dust/lint that has settled but these will easily be removed during the buffing phase.
Now onto neck construction while this dries out!
Lonnybass
so sexy!
Thanks! It's a looker. I'm excited to buff this one out as the top on this is VERY alive and I haven't been able to really get any really worthy shots of it yet.
Lonnybass
wow, it will be s great mirror!!! I started spraying today nitro for my refinishing job, but there were something white coming out as the nitro dried over the wood...i think it was because i didnt use a sealer since the nitro can says its both sealer and finish...I will wet sand once have dried a bit to remove it
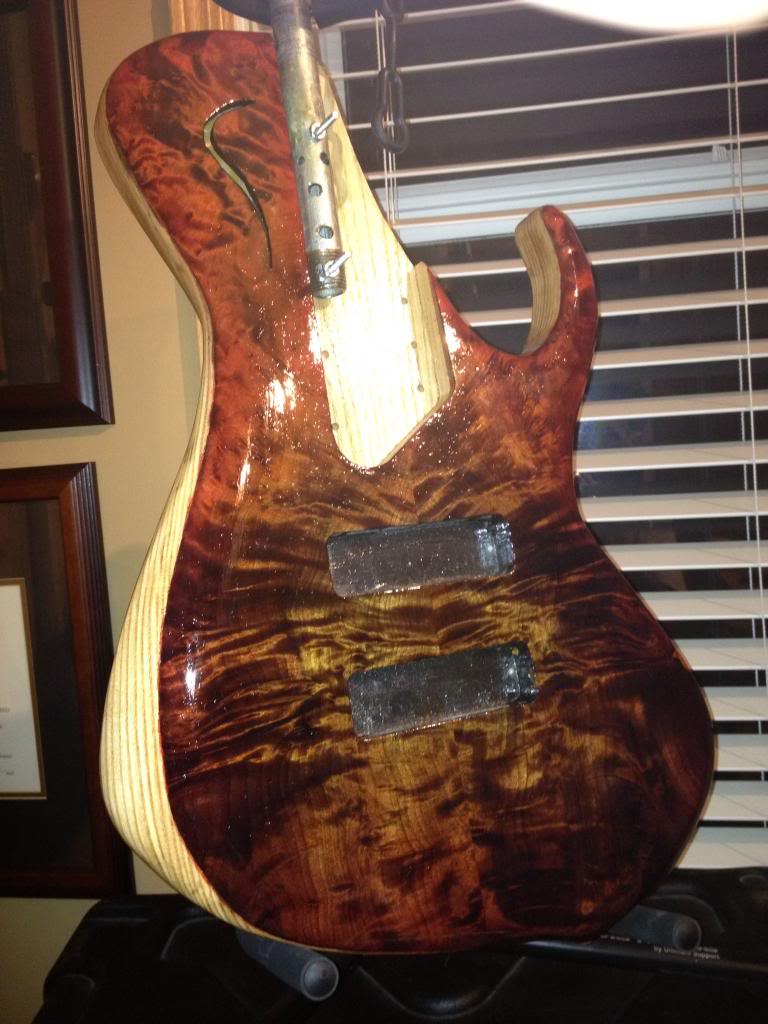
The bass now has approximately 14 successive coats applied to it with a light scuff sand roughly every 3 coats to remove dust and minor finish niggles.
It's streak and drip free at this point, so I'll leave it to cure for a couple weeks along with the rear cavity cover which has received the same finish applications.
Here is a shot of the curing bass. As you can see, there is a degree of dust/lint that has settled but these will easily be removed during the buffing phase.
Now onto neck construction while this dries out!
Lonnybass
Wow wow nice job that's a work of art. I'm doing something similar in color & veneer but not as nice.
meh...i just found out that the "transparent" nitro i found have a yellowish tone when it dries.... Kinda sad....will have to sand and re-do 
I've yet to find a finish that doesn't have an amber effect to some degree. I've seen a few threads that have mentioned non-yellowing products but until I see the pictures with my own eyes...
However the plus side of the ambering is that this is where you get the grain patterns in the wood to really jump out at you and get that depth of the pattern.
Clear coating is definitely a pain but once I came to the realization that all finishing is generally a three steps forward, one step back proposition I became ok with the headaches. Fortunatly, since I don't typically aim for super high-gloss finishes over natural wood grain (a look I find somewhat plasticky), the process is a little more forgiving.
But without question, witness lines are the big enemy that need to be avoided at all costs!
Lonnybass
However the plus side of the ambering is that this is where you get the grain patterns in the wood to really jump out at you and get that depth of the pattern.
Clear coating is definitely a pain but once I came to the realization that all finishing is generally a three steps forward, one step back proposition I became ok with the headaches. Fortunatly, since I don't typically aim for super high-gloss finishes over natural wood grain (a look I find somewhat plasticky), the process is a little more forgiving.
But without question, witness lines are the big enemy that need to be avoided at all costs!
Lonnybass
yeah thats true, it was really nice the way the grain popped it seemed a totally different wood, but...i didnt like how it looked with the hardware and pickguard i have, and not being able to buy another, well, i will get rid of it and paint solid black the entire body...with a draw.
and paint solid black the entire body...with a draw.
btw..i did find naphta!!!! Smells lots like oil....it is useful with poly finishes for wet sanding too?
btw..i did find naphta!!!! Smells lots like oil....it is useful with poly finishes for wet sanding too?
It's been a long time since I've used polyurethane - while it's likely entirely safe, I'd hate to steer you in the wrong direction with a well educated guess!
ok i guess i better use mineral spirits for the poly, will save naphta for another project
While I can't speak directly to naptha, I do know I've used mineral spirits with poly in the past and it's been fine. Also makes a good thinning agent.
Lonnybass
Here we are with the sawn neck, with a tiger maple fingerboard and headstock that received the same dye enhancement technique as applied to the body. According to the finish schedule, I'll give the body another week before buffing, and will work on carving the neck profile and oiling it in the meantime.

Following three weeks of curing time, the bass is now ready for the rubout process.
As many of you know, great care must be taken as the biggest enemy of the rubout is burning through the finish to create witness lines or worse, removal of color. As such - after taking a close look at the finish to assess how much would be required to even it out - I would start at 800 grit wetsanding, and work my way up to 1500. I first fill up a small tupperware container with hot water and a few drops of liquid soap to help the sandpaper glide over the wood.
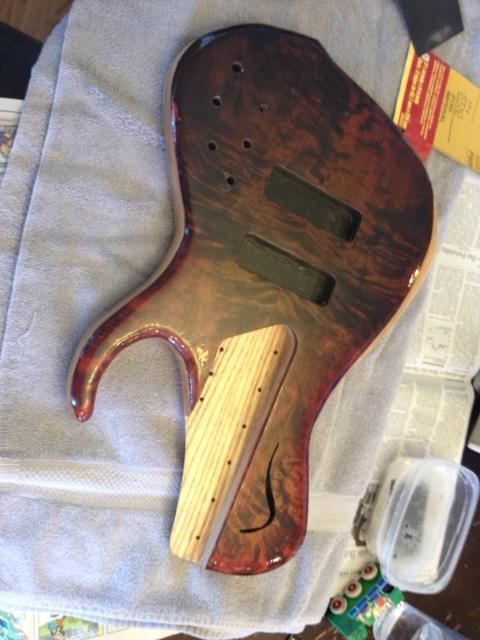
Here is the body before buffing:
And now, after 800:
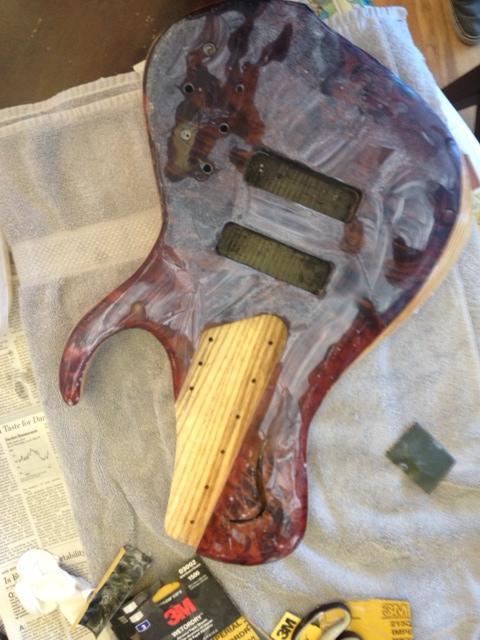
Things are looking pretty good at this point. A quick wipedown with naptha and then on to our next grits:
It's looking pretty good at this point. After another wipedown with naptha I've spotted some shiny spots surrounding the edges of the pickup cavities that require need some further attention, and will work on those tonight!
More pictures and updates to come...
As many of you know, great care must be taken as the biggest enemy of the rubout is burning through the finish to create witness lines or worse, removal of color. As such - after taking a close look at the finish to assess how much would be required to even it out - I would start at 800 grit wetsanding, and work my way up to 1500. I first fill up a small tupperware container with hot water and a few drops of liquid soap to help the sandpaper glide over the wood.
Here is the body before buffing:
And now, after 800:
Things are looking pretty good at this point. A quick wipedown with naptha and then on to our next grits:
It's looking pretty good at this point. After another wipedown with naptha I've spotted some shiny spots surrounding the edges of the pickup cavities that require need some further attention, and will work on those tonight!
More pictures and updates to come...

- May 2, 2004
- 2,862
- 244
- 38
- Disclosures
- owner/builder, ISLAND Instrument Mfg.
Lonny,
You did a beautiful job rubbing that burst! I'm going to need to hand rub a sunburst soon and am looking into all the dye options... it's a little overwhelming.
I'm concerned about colorfastness. I've read that water-based aniline dyes are actually more lightfast than alcohol based, and the complex metal (transtint) are even better. Though I have heard it's much more difficult to rub the transtint... did you find that to be the case? You were using it with water, correct?
Also, how nasty/smelly is the stuff to work with?
Cheers, beautiful work!
You did a beautiful job rubbing that burst! I'm going to need to hand rub a sunburst soon and am looking into all the dye options... it's a little overwhelming.
I'm concerned about colorfastness. I've read that water-based aniline dyes are actually more lightfast than alcohol based, and the complex metal (transtint) are even better. Though I have heard it's much more difficult to rub the transtint... did you find that to be the case? You were using it with water, correct?
Also, how nasty/smelly is the stuff to work with?
Cheers, beautiful work!
Lonny,
You did a beautiful job rubbing that burst! I'm going to need to hand rub a sunburst soon and am looking into all the dye options... it's a little overwhelming.
I'm concerned about colorfastness. I've read that water-based aniline dyes are actually more lightfast than alcohol based, and the complex metal (transtint) are even better. Though I have heard it's much more difficult to rub the transtint... did you find that to be the case? You were using it with water, correct?
Also, how nasty/smelly is the stuff to work with?
Cheers, beautiful work!
Thanks! I'm continuing to level out the clearcoat on this bass and hope to have it all in final shape soon.
In terms of the dye, Transtints really are fabulous for this sort of thing and with just your primary colors and some black you can mix up just about any shade under the sun.
The dye job on this particular bass (as were the last few I've completed) were done using Transtint with hot water. It actually doesn't have any smell at all, which is nice.
The key to nailing the right colors I've found is to experiment on a few sample pieces of your topwood to make sure you've got the right shade relative to 1) the existing coloration of the wood, and 2) the ambering effect of the clearcoats (I aim for a slightly lighter shade of dye knowing it will darken slightly on the bass after being clearcoated).
I haven't noticed colorfastness being a problem, though it is a little startling to see how different the wetted dye looks compared to when it is dried on the body wood. The main thing when applying the dye is to make sure the surface wood is saturated with water without having puddles - otherwise you'd risk diluting your color. And keep your rag or pad moving so that you get a consistent blend of colors between your lighter shades and darker shades.
One last thing - I always recommend hitting the finished dye application with a few coats of shellac to seal in the colors. Otherwise, if you were to apply clearcoat you could pull some dye up leaving a nasty blotchy run in the finish.
Let me know if you have more questions!
Lonnybass


