
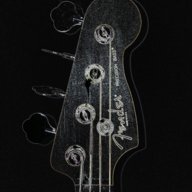
Hi everyone. I have a lot going on the last few years, and my mental health is deteriorating, which was the reason to pick up the bass although i played the drums for almost 15 years. I decided to do a build, a poor man's precision to be exact, although i haven't tried something like this before. My goals are that the build should last a while to keep me occupied and within a budget of maximum 500€.
I choose ash for the body which i will be buying online and treating with stain and tru-oil. My intention is to source Fender and/or Squier parts to keep quality to a decent level, with that in mind i bought a used, but almost new, Matt Freeman neck localy, pup and electronics that came from a 70's Vintage with a .47μF capacitor. The neck had the tuners removed so i'll be looking for a set of those as well.
With that in mind here is the list of parts and materials i will be needing:
•Ash body build to spec, contemplating on having it as a string-through-body. Prices start from about 140€ for a 3-piece-body and go as high as 250€ for a one-piece-body which i think is the route i will be taking
•Bridge
•Squier or Fender tuners with ferrules
•String tree
•F-Neck plate
•One black pickguard
•All screws will be original Fender
•Tru-oil (ordered)
•Sealer & filler (ordered)
•Wax (ordered)
•Steel wool 0000 (ordered)
•Various grid sandpapers (got them)
•Color stain. I am toying with the idea of a maple yellow for the body and darkening the same color for the grain for a more dramatic effect.
•Strap holders (got a spare pair from my MIA pbass)
I will try to recreate a 70's p bass as much as i can, so any feedback in general is always welcome. Hopefuly the thread will keep going and be a place to exchange opinions.
Take care everybody.
I choose ash for the body which i will be buying online and treating with stain and tru-oil. My intention is to source Fender and/or Squier parts to keep quality to a decent level, with that in mind i bought a used, but almost new, Matt Freeman neck localy, pup and electronics that came from a 70's Vintage with a .47μF capacitor. The neck had the tuners removed so i'll be looking for a set of those as well.
With that in mind here is the list of parts and materials i will be needing:
•Ash body build to spec, contemplating on having it as a string-through-body. Prices start from about 140€ for a 3-piece-body and go as high as 250€ for a one-piece-body which i think is the route i will be taking
•Bridge
•Squier or Fender tuners with ferrules
•String tree
•F-Neck plate
•One black pickguard
•All screws will be original Fender
•Tru-oil (ordered)
•Sealer & filler (ordered)
•Wax (ordered)
•Steel wool 0000 (ordered)
•Various grid sandpapers (got them)
•Color stain. I am toying with the idea of a maple yellow for the body and darkening the same color for the grain for a more dramatic effect.
•Strap holders (got a spare pair from my MIA pbass)
I will try to recreate a 70's p bass as much as i can, so any feedback in general is always welcome. Hopefuly the thread will keep going and be a place to exchange opinions.
Take care everybody.
Last edited:





