• TalkBass has been independent since 1998. Add your voice.
    Create a free account to reply to discussions, view embedded media, and browse with fewer display ads.
    Join freeLog in
    Want zero display ads or expanded classifieds tools? Compare plans.

Re-Tolexing a Cabinet Project

About a month or so ago I bought a used Trace Elliot 410. The speakers and cab itself were all sound, however the tolex was peeling off and chunks of it were missing. I thought about putting some new tolex on it. I checked into how hard it would be to retolex the cab, but I ended up going the Duratex method. It was a lot easier to just roll one base coat of Duratex on then another coat and the finished result was a very nice rolled on tolex job that also added not only a great brand new look to the cab, but also some more stability and waterproofing. I then sold the cab and was able to get a little bit more for it because of the clean newer look instead of the beaten look it had before.
 
so I did the tolex today... what an ordeal. haha.

here's some pics.
 

Attachments

  • PICT0020.JPG
    PICT0020.JPG
    60.2 KB · Views: 111
  • PICT0021.JPG
    PICT0021.JPG
    86.4 KB · Views: 115
i just couldn't help myself... I've done everything except;

1) install the plastic corners (waiting for special rivets to show up)
2) secure the baffle board permanently
3) install the speakers

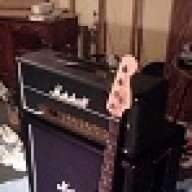
as you can see, it turned out pretty good. :)

I'll try some more detailed pics tomorrow when it's light out.
 

Attachments

  • IMAG0080.jpg
    IMAG0080.jpg
    49.2 KB · Views: 178
  • IMAG0079.jpg
    IMAG0079.jpg
    38 KB · Views: 133
thanks guys.

Some observations from my first time working with tolex...

- working it with your hands heats it up and it expands ever so slightly, so later once the cement cures, the tolex shrinks back and you get that nice tight look, so make sure mistakes get fixed before this happens.
- a big, clean, uncluttered workspace is a must
- make sure you have enough glue BEFORE you start

Once I get the plastic corners on, it's going to look nearly flawless. If I could do it again I'm positive it would come out even better.

Stay tuned for pictures of the complete halfstack (super bass + 1552) once I get the corners on and speakers installed.

I'm also on the look out for some sort of foam to line the inside of the cabinet.
 
I went to every hardware/home improvement store in Niagara Falls, couldn't find a nail, tack or rivet with a head that matches the original ones. This is important because I don't want a bunch of screw heads all over the cabinet, they need to match the ones on the Super Bass.

I had to order the Marshall style hammer drive rivets (more of a furniture tack than a rivet) from JAM industries... backordered 4 weeks :(

Luckily, I did the corners SO well on my cabinet that it looks finished without the plastic corners, so I don't mind leaving it the way it is for a few weeks.

PS: I even plan on using a product (tried vinegar, doesn't work good enough) to oxidize the heads of the brass Marshall rivets to make them match the ones on the Super Bass.
 
"The Rivet Problem" is solved. Used a blow torch to heat the rivet head up red hot, then roughed it up with the steel brush attachment on my dremel, then PSSSS in the water to cool down. When I took them out they were very close to the same color as the old rivets I pulled out of the cabinet. SUCCESS!

Now I gotta do it 44 more times. lol