Part 1
Since I've only found limited information and never in a concise format (with photos), I decided to photo document my front-mount technique for loading drivers on a damaged baffle board and post it here.
For me, this is usually needed when I buy a used cabinet or combo amp and discover previous damage done to the baffle board, but I've also done it if there is a lot of buzz or rattle from the driver vibrating against the baffle board, often because air is leaking around the driver's mounting surface.
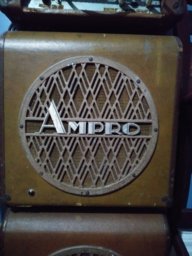
In this particular example, I'm repairing my vintage Acoustic Amplification Corporation 106 bass cabinet (2 x 15").
For space reasons I'm putting only image thumbnails in the body of the text... just click on them to see the full size version.
Parts list (I got mine from Home Depot):
1/2 inch Rigid 1-hole Strap (4 pack) @ $0.64 each pack x 2 packs


1/4 in.-20 tpi x 5/16 in Tee Nut (4 pack) @ $1.18 each pack x 2 packs


1/4 in.-20 x 1-1/4 in. Round Head Machine Screw (4 pack) @ $1.18 each pack x 2 packs

1/4 in. x 5/8 in. Flat Washers @ $0.12 each x 8 individual washers

1 in x 1/4 in x 120 in. Self-Adhesive Sponge Rubber Weather Strip @ $4.95 for a 10 ft spool

Tools:
Phillips screwdriver
Workman's pliers
Pencil
1/4 in drill bit + Electric drill
Scissors
Procedure:
a) Lay the cabinet down on its back and remove the current retaining bolts or screws that hold the drivers in place, but don't pull the drivers out.
b) Take the 4 rigid straps (make sure you get the rigid kind as they are thicker and stiffer) and use the workman's pliers to partially straighten out the curve in the part of the strap tip that extends beyond the ridge down the center of the strap. Don't try to bend the portion that has the ridge as this is too difficult and also what gives it strength.


c) Lay the 4 rigid straps on the driver rim, evenly spaced around the perimeter, making sure they don't extend onto the edge of the paper cone. Use a pencil to trace the hole of each one onto the baffle board... be sure holes don't occur on top of any bracing that may be on the back side of the baffle board.

d) Remove the rigid straps and pull the drivers, being careful to unhook the wires from the drivers (take note of which wire attaches to each terminal).
[Continued next post]
Since I've only found limited information and never in a concise format (with photos), I decided to photo document my front-mount technique for loading drivers on a damaged baffle board and post it here.
For me, this is usually needed when I buy a used cabinet or combo amp and discover previous damage done to the baffle board, but I've also done it if there is a lot of buzz or rattle from the driver vibrating against the baffle board, often because air is leaking around the driver's mounting surface.
In this particular example, I'm repairing my vintage Acoustic Amplification Corporation 106 bass cabinet (2 x 15").
For space reasons I'm putting only image thumbnails in the body of the text... just click on them to see the full size version.
Parts list (I got mine from Home Depot):
1/2 inch Rigid 1-hole Strap (4 pack) @ $0.64 each pack x 2 packs
1/4 in.-20 tpi x 5/16 in Tee Nut (4 pack) @ $1.18 each pack x 2 packs
1/4 in.-20 x 1-1/4 in. Round Head Machine Screw (4 pack) @ $1.18 each pack x 2 packs
1/4 in. x 5/8 in. Flat Washers @ $0.12 each x 8 individual washers
1 in x 1/4 in x 120 in. Self-Adhesive Sponge Rubber Weather Strip @ $4.95 for a 10 ft spool
Tools:
Phillips screwdriver
Workman's pliers
Pencil
1/4 in drill bit + Electric drill
Scissors
Procedure:
a) Lay the cabinet down on its back and remove the current retaining bolts or screws that hold the drivers in place, but don't pull the drivers out.
b) Take the 4 rigid straps (make sure you get the rigid kind as they are thicker and stiffer) and use the workman's pliers to partially straighten out the curve in the part of the strap tip that extends beyond the ridge down the center of the strap. Don't try to bend the portion that has the ridge as this is too difficult and also what gives it strength.
c) Lay the 4 rigid straps on the driver rim, evenly spaced around the perimeter, making sure they don't extend onto the edge of the paper cone. Use a pencil to trace the hole of each one onto the baffle board... be sure holes don't occur on top of any bracing that may be on the back side of the baffle board.
d) Remove the rigid straps and pull the drivers, being careful to unhook the wires from the drivers (take note of which wire attaches to each terminal).
[Continued next post]
Last edited: