

- Aug 6, 2005
- 6,505
- 75
- 60
- Disclosures
- Owner/Builder: HJC Customs USA, The Cool Lute, C G O
As stated in the headline, this is a pictorial of "The 10 day bass build" for Jauqo III-X's "One day of Bass" in Chicago that took place last weekend (September 10, 2011).
I had no intent of doing this pictorial, but a number of people asked if I could post some pics of the process, as a 10 day build was kind of unusual. I did take some pics that I was keeping Jauqo updated with, so here is what I have.
The build would consist of woods and parts I had in my shop, and nothing being ordered other than knobs(which didn't show up anyway....LMAO)
Body- Poplar with 1/2" African Mahogany top
Neck- 5 piece Wenge and Maple with East Indian RW FB.....this neck is one I was rebuilding from an Asian Bass that was in a crash.
Pick-ups- handwound stacked humbuckers in Jazz shells
Pre-amp- salvaged from a Brubaker that I did a passive conversion on
Hardware- Die Cast Gotoh tuners, and Die Cast monorail bridges in satin chrome
Sculpted heel with 6 bolt/ferrule attachment
Recessed Jack
Graphite nut
Here we go....The glue up process of the body wings

wings were joined and a centerstripe of light walnut was added to bring the blank to the correct width and then glued for optimim visual consistency

After thickness sanding to 1 5/8" the body was sketched out for cutting

Cutting the exterior of the body


At this point, after the body was cut out and neck pocket routed,


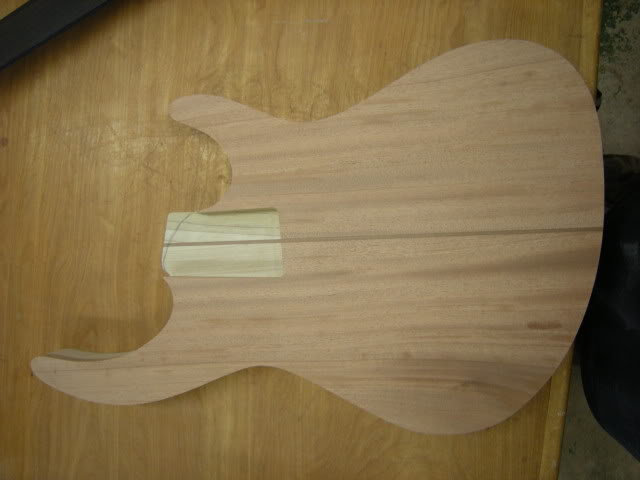
I began repairing the neck which had a cracked and chipped heel, neck bolts broken off in neck, broken headstock, and multiple cracks in the FB.
The heel was repaired and re-shaped, the FB was removed and a new one put in it's place, the headstock was cut down and repaired with East Indian Rosewood.
I completely re-shaped the neck to more of a Jazz bass feel. .810 at 1st fret, and .985 at 17th fret.
The body was shaped with my Signature 2 body style template, I checked the neck pocket fit before rounding over
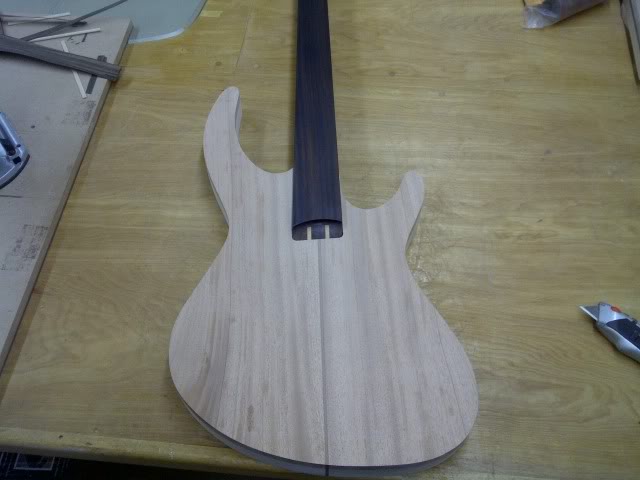
I rounded the body with a 5/8" roundover bit, then, using a modified 70's spacing Jazz set-up adjusted 1/8" towards the bridge to compensate for fretless routed for the pickups.

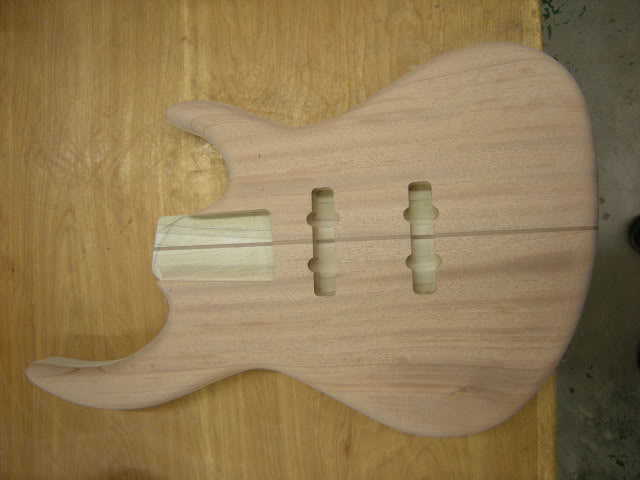
Next I went to start hogging it out for the rear control cavity.

and finished shaping the heel

Next was to complete the rear control cavity, shape the headstock, drill for the electronics, and finish sand the body and neck. I also inlaid a quilted maple autograph strip for signing and dating.

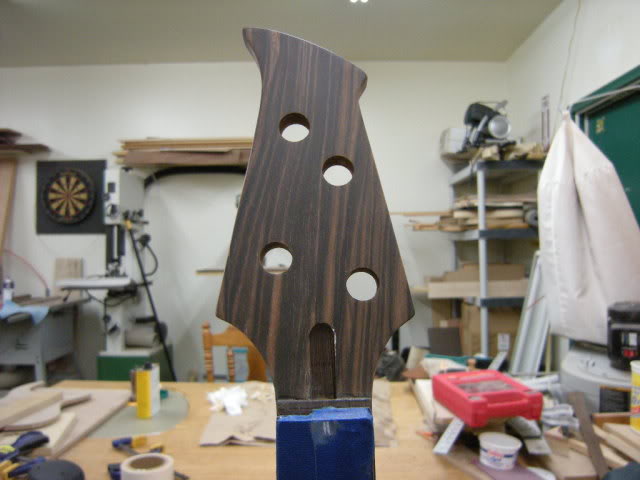
Signed and dated along with serial number applied in metal acid ink after finish sanding to 400 and before finish is applied
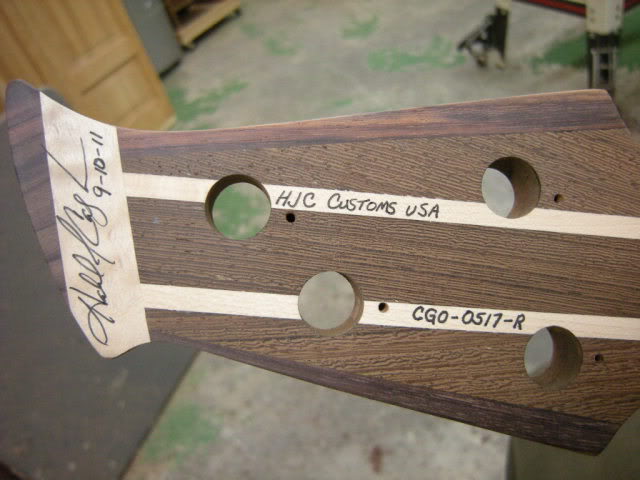
Finish sanding to 400 complete, and the finish is applied. Finish is a combination (50/50 mix) of Boiled Linseed Oil and Varnish, a classic wood finish. The first saturation is applied, allowed to soak in, then wetsanded with the oil/varnish mix using 400 grit and a styrofoam block to create a slurry and partially fill the pores for a smoother finish.
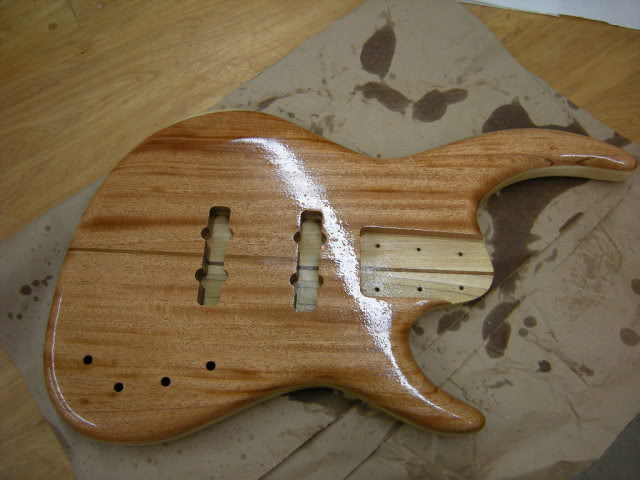
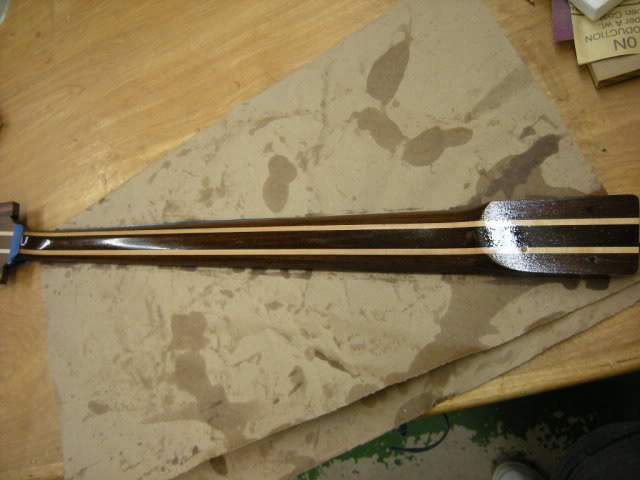
and hung to dry after buffing out the 1st coat
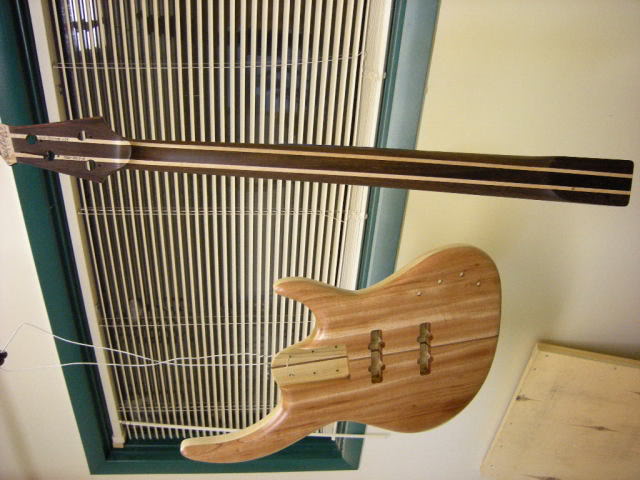
The bass recieved 4 coats of oil/varnish finish over 4 days and buffed after each coat, similar to french polishing.
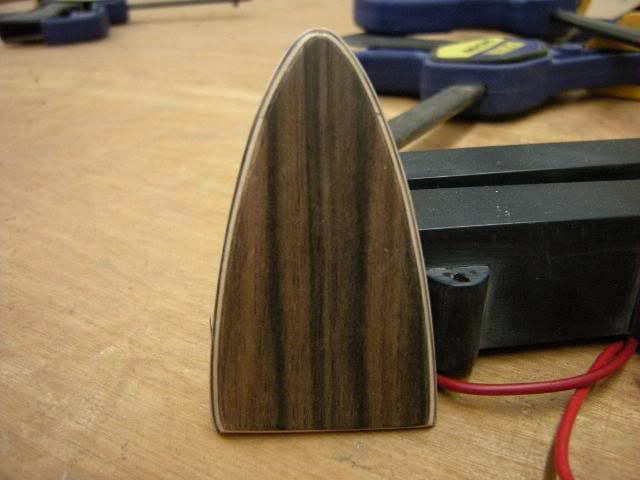
While the bass was drying, I started working on the 5 layer truss rod cover to match the neck

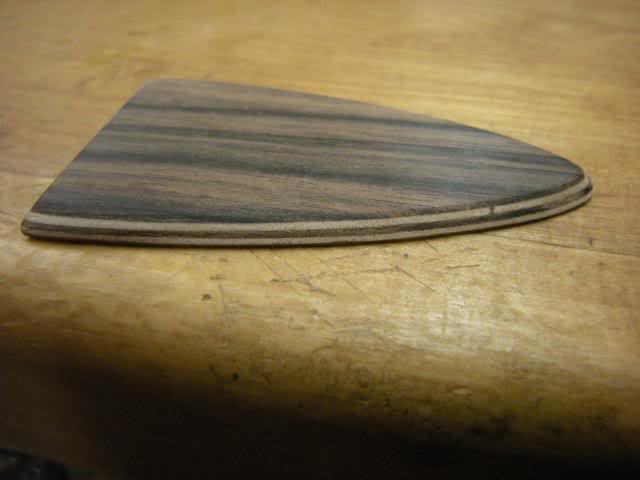
and finally finsihed, Pick-ups in background that went into this
As usually happens, when things are going smoothly, something has to implode, and my knob package arrives with only 2 knobs in it....screwed...Jauqo suggests I make wood knobs....LOL My lathe (sm bench top model) is on loan to a friend, and I had no way to do knobs as I usually do, so it all about creativity.
I cut up a block of wenge I had for making knobs, trimmed the corners, and mounted each piece in my drill press, using a sanding block to sand each piece round, then drilling out skirts and shaft holes. Not perfect by any stretch, but for an hours work at the last minute, it worked out.

Ooooo...almost look really good.....almost!


Time to start assembly, things are looking good;
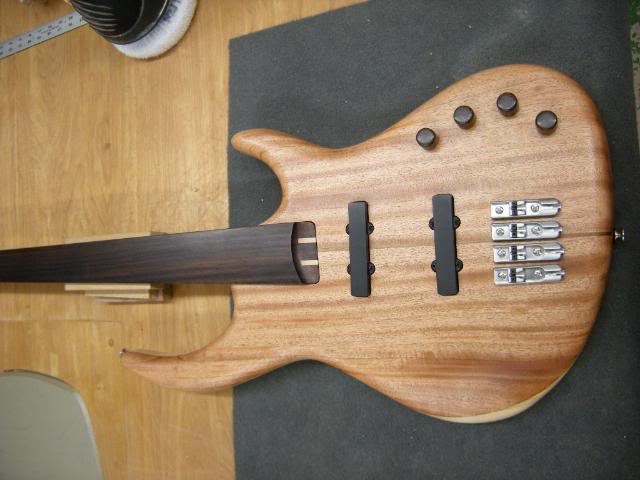
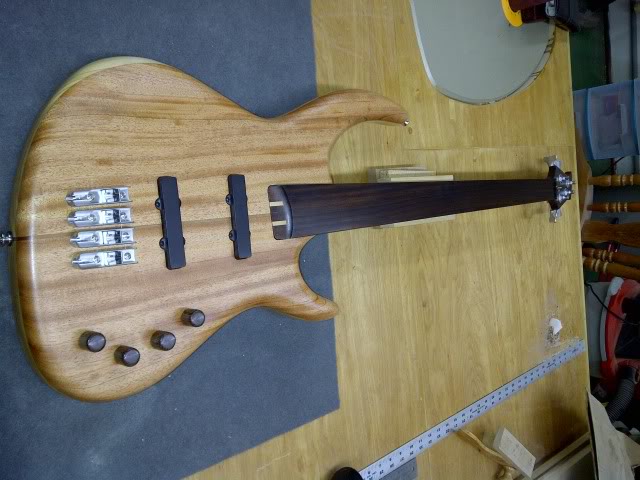
I started this bass on September 1st at 7pm and had the bass assembled and strung on September 10th at 5:30 am BUT it needed some setup work, and the neck had not even started to adapt to the D'Addario Chromes. I went to sleep for 2 1/2 hours and at 8:30 am after making a HUGE cup of coffee, went back out to the shop, and started trying to get this thing into playable shape. 11:20 am it's playable, action down to 3/32"(could have been lower if I had time, and a couple days for the neck to adjust more) but it played good, and sounded great. Packed it in the gig bag for the 3 hour drive to Chicago....LMAO
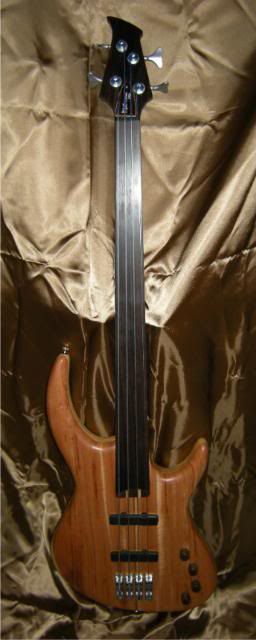
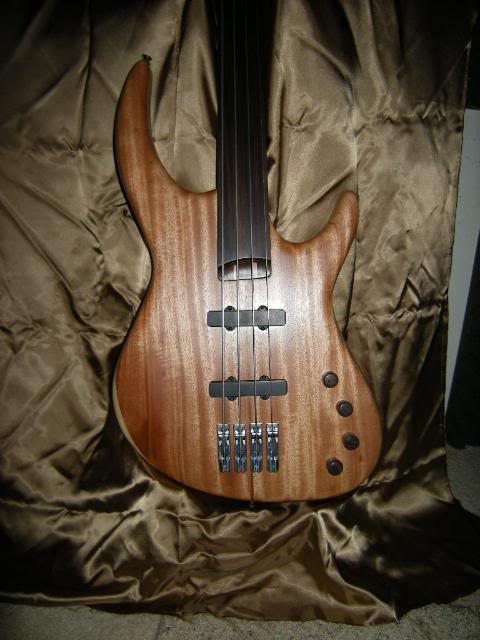
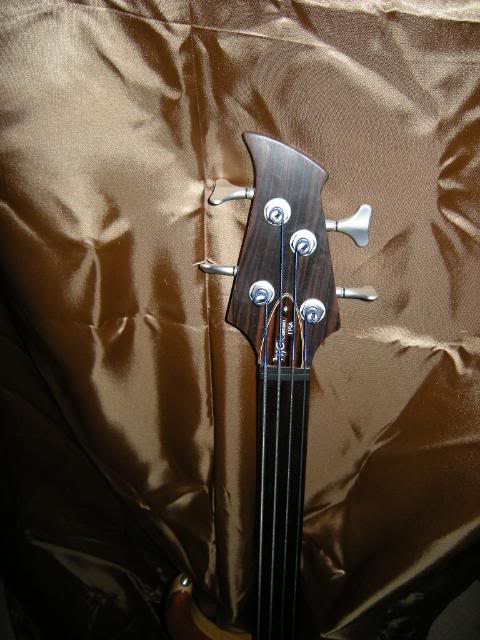
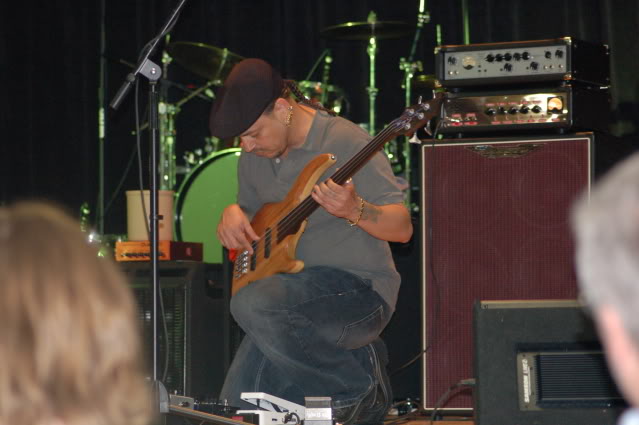
and on the stage at the "One Day of Bass" show in Chicago

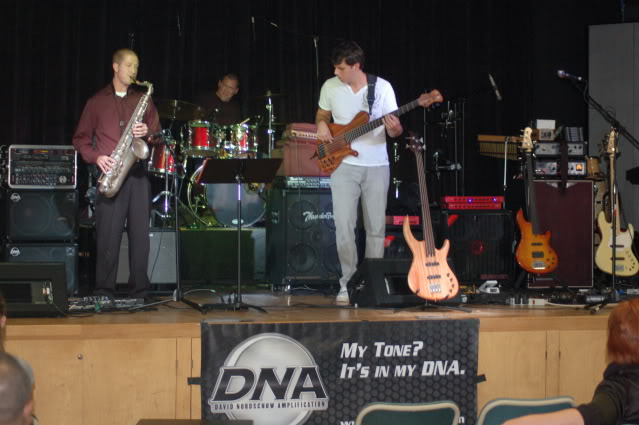
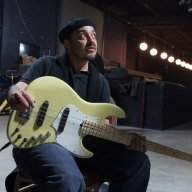
I got this one from Jauqo III X of him playing the bass, which is a very cool shot I didn't have, Thanks Jauqo
FOR all of the WEIGHT Watchers....This bass weighed in at 7 lbs. 14 oz. on my shipping scale
Not something I want to do again anytime soon, but it was a cool challenge to see if I could do it.
Thanks for looking
JC
I had no intent of doing this pictorial, but a number of people asked if I could post some pics of the process, as a 10 day build was kind of unusual. I did take some pics that I was keeping Jauqo updated with, so here is what I have.
The build would consist of woods and parts I had in my shop, and nothing being ordered other than knobs(which didn't show up anyway....LMAO)
Body- Poplar with 1/2" African Mahogany top
Neck- 5 piece Wenge and Maple with East Indian RW FB.....this neck is one I was rebuilding from an Asian Bass that was in a crash.
Pick-ups- handwound stacked humbuckers in Jazz shells
Pre-amp- salvaged from a Brubaker that I did a passive conversion on
Hardware- Die Cast Gotoh tuners, and Die Cast monorail bridges in satin chrome
Sculpted heel with 6 bolt/ferrule attachment
Recessed Jack
Graphite nut
Here we go....The glue up process of the body wings
wings were joined and a centerstripe of light walnut was added to bring the blank to the correct width and then glued for optimim visual consistency
After thickness sanding to 1 5/8" the body was sketched out for cutting
Cutting the exterior of the body
At this point, after the body was cut out and neck pocket routed,
I began repairing the neck which had a cracked and chipped heel, neck bolts broken off in neck, broken headstock, and multiple cracks in the FB.
The heel was repaired and re-shaped, the FB was removed and a new one put in it's place, the headstock was cut down and repaired with East Indian Rosewood.
I completely re-shaped the neck to more of a Jazz bass feel. .810 at 1st fret, and .985 at 17th fret.
The body was shaped with my Signature 2 body style template, I checked the neck pocket fit before rounding over
I rounded the body with a 5/8" roundover bit, then, using a modified 70's spacing Jazz set-up adjusted 1/8" towards the bridge to compensate for fretless routed for the pickups.
Next I went to start hogging it out for the rear control cavity.
and finished shaping the heel
Next was to complete the rear control cavity, shape the headstock, drill for the electronics, and finish sand the body and neck. I also inlaid a quilted maple autograph strip for signing and dating.
Signed and dated along with serial number applied in metal acid ink after finish sanding to 400 and before finish is applied
Finish sanding to 400 complete, and the finish is applied. Finish is a combination (50/50 mix) of Boiled Linseed Oil and Varnish, a classic wood finish. The first saturation is applied, allowed to soak in, then wetsanded with the oil/varnish mix using 400 grit and a styrofoam block to create a slurry and partially fill the pores for a smoother finish.
and hung to dry after buffing out the 1st coat
The bass recieved 4 coats of oil/varnish finish over 4 days and buffed after each coat, similar to french polishing.
While the bass was drying, I started working on the 5 layer truss rod cover to match the neck
and finally finsihed, Pick-ups in background that went into this
As usually happens, when things are going smoothly, something has to implode, and my knob package arrives with only 2 knobs in it....screwed...Jauqo suggests I make wood knobs....LOL My lathe (sm bench top model) is on loan to a friend, and I had no way to do knobs as I usually do, so it all about creativity.
I cut up a block of wenge I had for making knobs, trimmed the corners, and mounted each piece in my drill press, using a sanding block to sand each piece round, then drilling out skirts and shaft holes. Not perfect by any stretch, but for an hours work at the last minute, it worked out.
Ooooo...almost look really good.....almost!
Time to start assembly, things are looking good;
I started this bass on September 1st at 7pm and had the bass assembled and strung on September 10th at 5:30 am BUT it needed some setup work, and the neck had not even started to adapt to the D'Addario Chromes. I went to sleep for 2 1/2 hours and at 8:30 am after making a HUGE cup of coffee, went back out to the shop, and started trying to get this thing into playable shape. 11:20 am it's playable, action down to 3/32"(could have been lower if I had time, and a couple days for the neck to adjust more) but it played good, and sounded great. Packed it in the gig bag for the 3 hour drive to Chicago....LMAO
and on the stage at the "One Day of Bass" show in Chicago
I got this one from Jauqo III X of him playing the bass, which is a very cool shot I didn't have, Thanks Jauqo
FOR all of the WEIGHT Watchers....This bass weighed in at 7 lbs. 14 oz. on my shipping scale
Not something I want to do again anytime soon, but it was a cool challenge to see if I could do it.
Thanks for looking
JC







 congradulations on the success of the build in such short time


