

Enjoy the benefits of a premium membership!
Upgrade Account
-
TalkBass has been independent since 1998. Add your voice.
Create a free account to reply to discussions, view embedded media, and browse with fewer display ads.
Join free Log in
Want zero display ads or expanded classifieds tools? Compare plans.
You are using an out of date browser. It may not display this or other websites correctly.
You should upgrade or use an alternative browser.
You should upgrade or use an alternative browser.
Warmoth P-Bass Build
- Thread starter ErikW
- Start date
More options
Who Replied?


Sanded body with 220 grit and attempted epoxy grain fill the back of the body, FAIL! I just couldn't get the hang of it and abandoned that route. So, I spent better part of a day sanding epoxy back off of the body. Next I sprayed the body with Deft sanding sealer. A medium heavy coat, let it dry for a day, sanded with 320 grit and applied a second coat of sealer and repeated sanding. The Deft sealer did a decent job of filling a good part of the grain. I then proceded to apply Behlen stringed instrument lacquer. Sanded with 500 grit paper between each coat. Each coat was left to dry for at least a day. After about the 5th or 6th coat the grain was non existant. Going for a total of 10 coats. I have 2 more to go. These pics are coats 5 and 7.
Attachments


This is after coat 8. 2 more to go. They're calling for a lot of rain for the next 4 days, so no more coats until probably next weekend. That will give it plenty of time to cure. I know everyone is going to say I should have grain filled, but this is working so far. plus it has a nice deep finish. More to come.
Erik
Erik
Attachments



...............is that African Mahogany..??This is after coat 8. 2 more to go. They're calling for a lot of rain for the next 4 days, so no more coats until probably next weekend. That will give it plenty of time to cure. I know everyone is going to say I should have grain filled, but this is working so far. plus it has a nice deep finish. More to come.
Erik

...............is that African Mahogany..??
looks like sapele to me.
...............is that African Mahogany..??
Yes, Warmoth uses African Mahogany

I know everyone is going to say I should have grain filled, but this is working so far. plus it has a nice deep finish.
Most sanding sealer is just thin shellac, which is a great filler, it just takes a lot of coats.
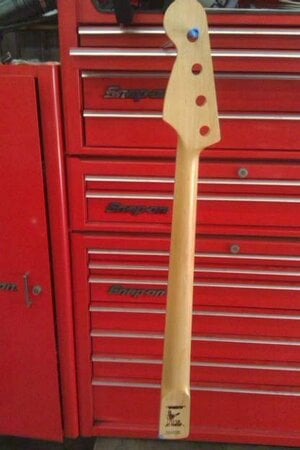
I decided to tint the maple on the neck so there wouldn't be such a sharp contrast to the mahogany. A trip to Lowes netted me three different shades to try. I used the base of the neck (where the bolt holes are) to try out the different shades and ended up with Minwax's Ipswich Pine stain. Gives it a nice vintage shade. Picture kinda sucks (camera phone) and doesn't do it justice. I sanded the maple with 320 grit paper, cleaned it with naptha and applied the stain as per minwax's directions. I think I'm going to go with a second coat. I'll decide after the 4-6 hour recommended drying time.
More to come.
Erik
More to come.
Erik
Attachments


The weather gods were on my side today and I was able to get coat number 9 on the body and another coat of stain on the neck. The neck looks awesome. Hard to tell from the pics. Tomorrow I'll seal and clear the neck and hopefully get the last coat of clear on the body. Then comes 3-4 days of drying before wet sand and buff.
More to come.
Erik
More to come.
Erik
Attachments





This thread makes me wonder: Will Warmoth update the size of their P-necks to match what Fender now produces (1.625"), or will they stay at the older 1.75" size?

changes at Warmoth occur very slowly, but I am not complaining at all! To me they are the best alternative to a custom shop Fender.



I'm ready for the sh*t storm about the decal but that's what I wanted on there. It will never be sold. I built it to have a nice passive studio bass for our home studio. That being said she's all done and is dead quiet and sounds fantastic. The first set of strings I'm trying are GHS Bass Boomers, 45-65-85-105. Going to give them a chance to "break in" then try some Fender flats.


