• TalkBass has been independent since 1998. Add your voice.
    Create a free account to reply to discussions, view embedded media, and browse with fewer display ads.
    Join freeLog in
    Want zero display ads or expanded classifieds tools? Compare plans.

WBO26 - The Reboot

A few years ago, I built my very first bass. My skills as a builder have improved significantly since then and as a result it never gets played. My plan this year is to use the hardware and pickups from it on a new build. In keeping with my theme of repurposed parts, I also plan to use scrap and offcuts for my wood.

PXL_20260101_172815802.jpg


The body will be wenge over a cherry core. The wenge was originally used to make charcuterie boards and the cherry is what's leftover from a wine rack.

PXL_20260101_173003253.jpg


The neck will be padauk with maple laminates and a birdseye maple fingerboard. The padauk is an offcut from a longer piece that I had to cut off so it would fit in my car. The laminates are leftover from my last build (I don't know why I cut so many more than I needed). The birdseye was used to make a batch of coasters for the family several Christmases ago.
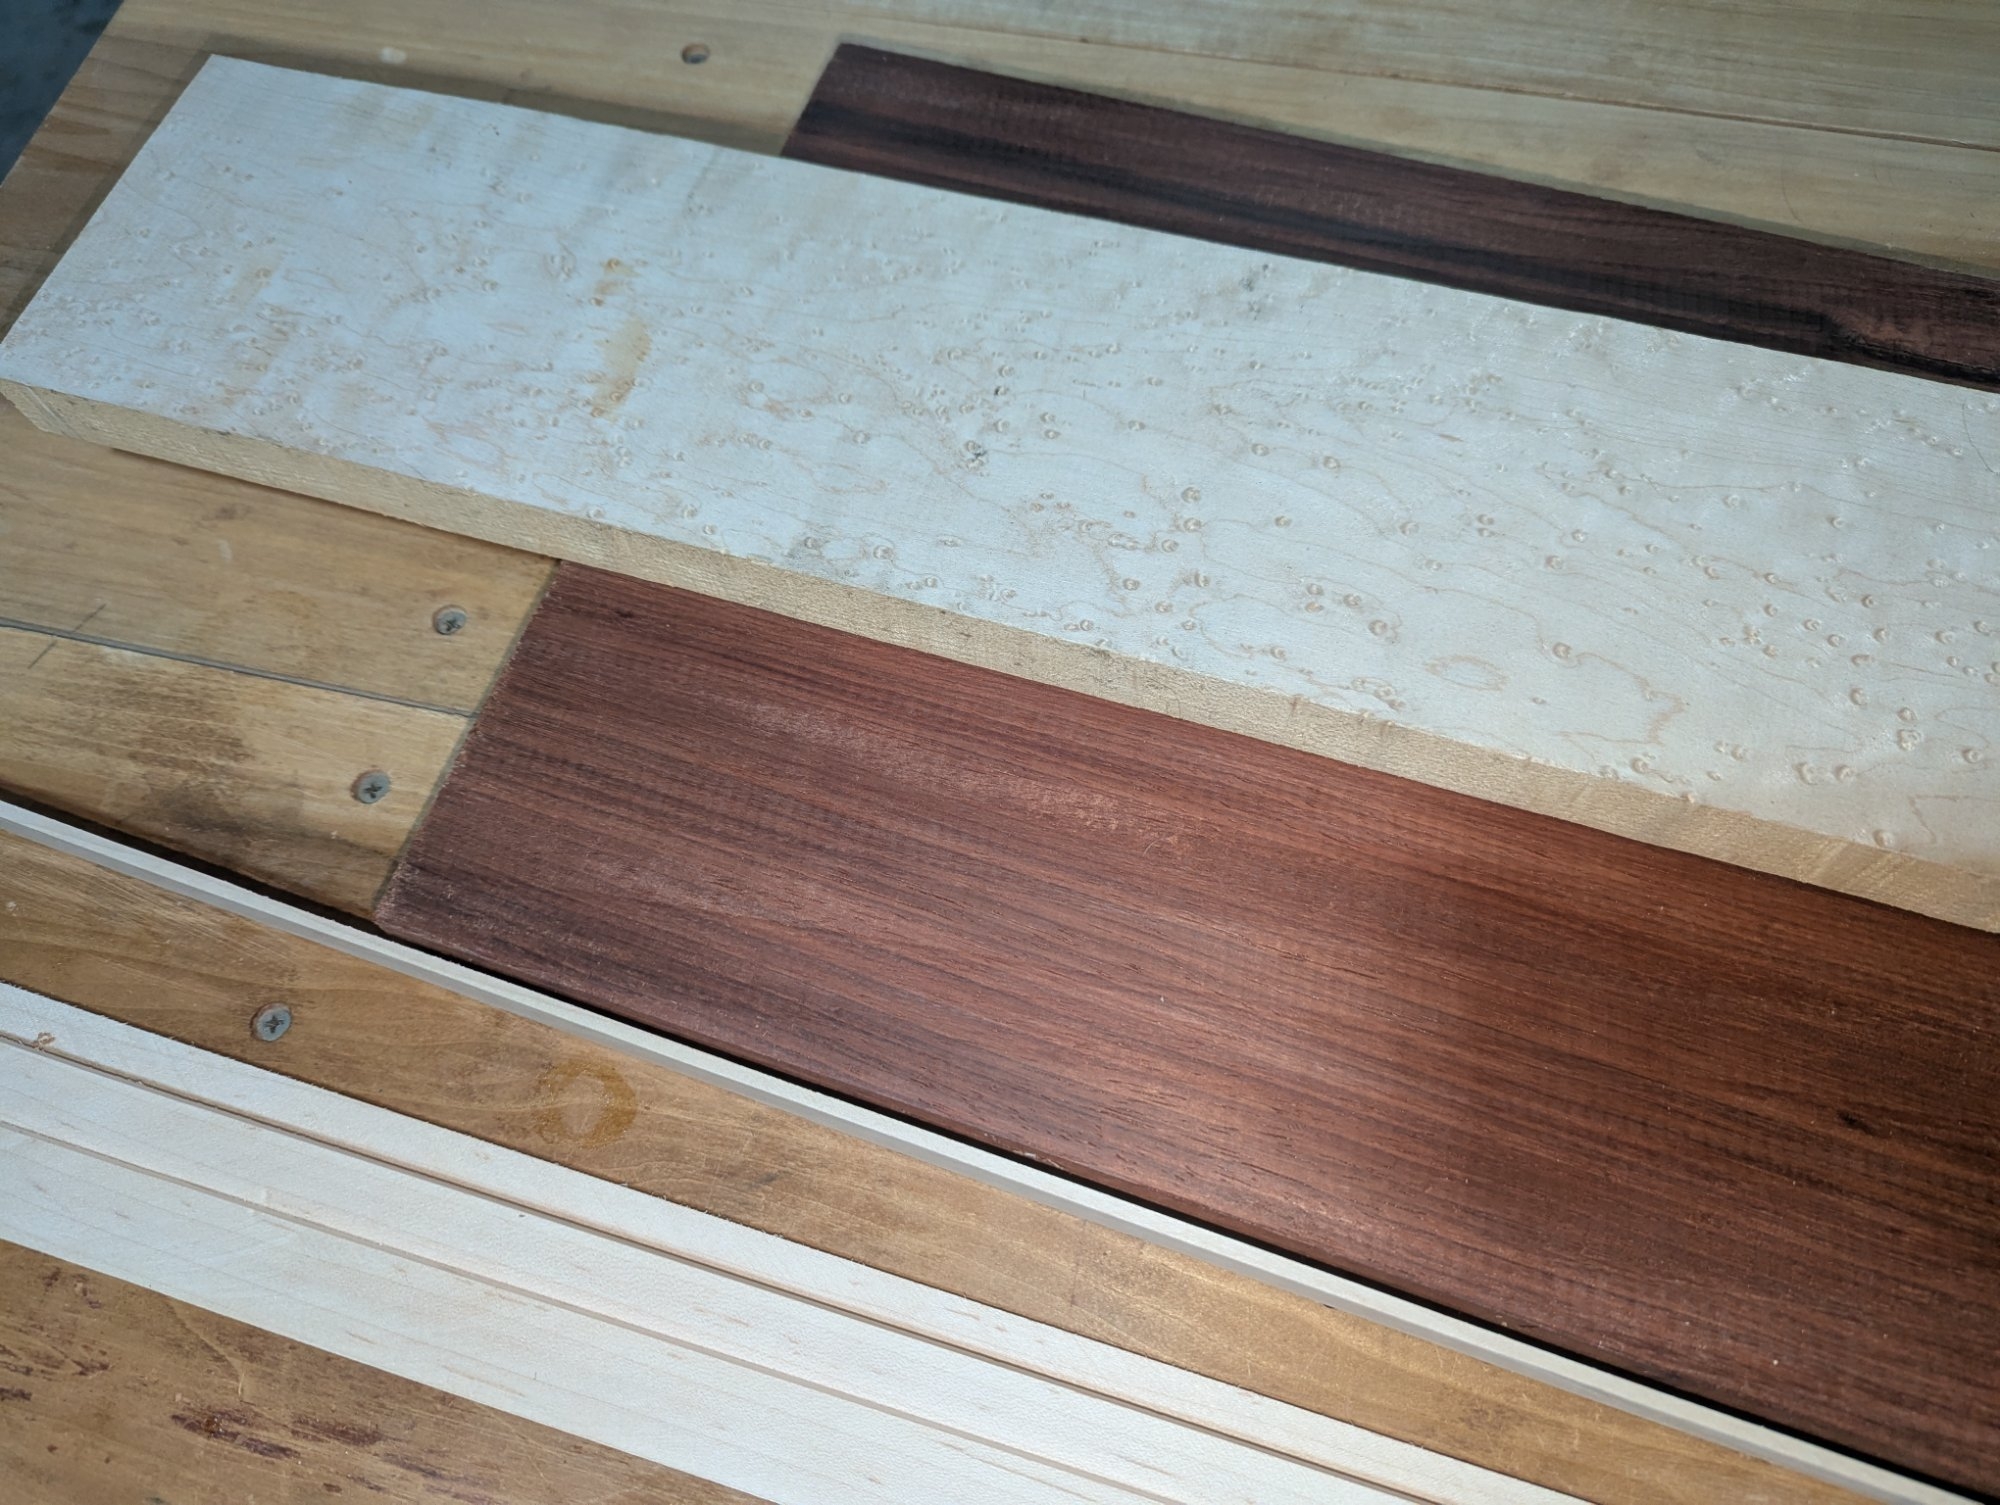
PXL_20260101_173242589.jpg


A few other things about the plans. So far I've only built neck through, but my planned neck wood isn't long enough so this time it will be a set neck and a scarf joint headstock made from a different piece, probably a body wood offcut. It is long enough to have the set neck go all the way to the neck pickup, so I can still contour the heel for that seamless neck through look.
 
Last edited:
It always feels good to get the first glue on a new project.

I figured out why my maple laminates were unused from my previous project; they have horrible tool marks from the table saw. I must have recut them rather than clean them up. That's ok, nothing the planer won't take care of. And since they're longer than needed, I can just cut off any planer snipe.

Here is the mockup.
PXL_20260103_212430133.jpg


And the clamps.
PXL_20260103_214736519.jpg


It felt bad such a wide piece of wood to make a multi laminate neck, but the leftover piece is the perfect width to resaw into some decorative veneers for the body.
 
Finally had some time for the shop this weekend. I spent some time on the bandsaw, resawing my top and veneers.

I made two wenge tops. The nicer one will be the top, the other will be the back. Because of the size of my board, the back won't end up being a proper bookmatch but should be close enough.

Using the shooting board to join the edge.
PXL_20260223_225035277.jpg


A nice clean fit.
PXL_20260223_225353132.jpg


And in the clamps.
PXL_20260223_230012264.jpg


The wenge turned out great. The padauk veneers, not so much. My bandsaw blade wanted to drift to follow the grain of the wood. I ended up with one pretty even thin veneer and one that went much too thick at one end.
PXL_20260223_230102042.jpg


I have a few options to solve this. The veneers will be between my cherry body core and a maple faux binding layer. The veneer is far too thin to run through the planer on its own, but I could glue it to the body core to give some support and then run it through with light enough passes to hopefully not plane through it. Or I could use elbow grease and sand it down by hand, I already have a sanding board with spacers to give me the right thickness. I usually just use the sanding block to remove the blade marks but could use it to get the thickness down if I feel like the effort.
 
The world seems to be conspiring against my using veneers on my body. When planing my maple layer, I had a big chunk tear out. It's right in the middle so I don't think I can place my template around it.
PXL_20260228_180722141.jpg


I tried hand sanding my Padauk layer to even it out. After sanding about fifteen minutes with no progress, I switched to my hand planer for rough work, went another fifteen minutes. If the pile of shaving is to be believed, I made significantly more progress but still not enough to continue down this path. At least I get to count this as my upper body workout for the day. I decided to glue the veneer to the body core and try to send it through my planer. I'll report back in a few days once the glue dries.
 
Sad news. Gluing the veneer to the body core didn't work. The veneer bubbled up in places. I suspect it did this because the veneer was uneven, so I couldn't get even clamping pressure, so the moisture from the glue caused the thin veneer to swell where it didn't have enough pressure, causing it to buckle. The project is in time out for a while I figure out what to do.

I'm not concerned about the tear out on the maple. The picture I posted a few days ago is two pieces that aren't glued together, I actually think I can rearrange it so the tear out is in the control cavity that will be routed out anyway. If not, I have enough scrap to cut it again.

First to recap the original plan: I had plans to make a body top of wenge (~1/4"), with a thin layer of maple (~1/8") under it to look like faux binding when I carved the edge. Between the maple layer and the cherry body core was to be thin veneer of padauk; this was to add a shadow line for visual interest and to increase contrast between the cherry and maple.

I have a few different ideas of how to proceed.

1. I have a little bit more padauk from the same blank, I can try one more time to cut a veneer. I already turned almost two board feet of nice padauk into sawdust for this venture. I might as well eat up the rest of it trying. Ideally, if I use a veneer, I'd like it cut from the same blank since padauk can vary a lot in color; I'm using padauk for the neck, so I want the body veneer from the same board so the color matches on the finished product.

2. Go buy veneer rather than cut my own. Color might not match, but it's just a thin line so nobody but me will ever notice. Since it's just a shadow line, I could even use a dyed black veneer and it would be close enough. But I would notice.

3. Just give up on the padauk veneer. Maple and cherry contrast well enough once the cherry gets a little age to it.

4. Give up the veneer and change the body core. If I want more contrast between the maple layer and the core, I could use a walnut core instead. I don't have walnut scrap, so I'd have to sacrifice the theme of using up my scraps. But it gives me an excuse to go wood shopping.

Currently leaning on trying option 1, then option 4 if that doesn't work. I'll give it some thought while the project is in time out for the week.
 
Success! I gave my bandsaw a tuneup and went extra slow.
PXL_20260315_190401246.jpg


Two pieces about a mm each, saw marks aren't too bad. One side is planed but they're too thin to send through the planer, so it's hand work to get the other side flat. My jig to do this is to tape the veneer to a piece of MDF and sandpaper to another. Rails on my sanding block keep it even thickness. This veneer is a little thicker than the last piece I used this jig for, so a few layers of tape on the rails make the jig a just a bit taller.
PXL_20260315_190903189.jpg


A trick I've learned about tapeing the veneer to the board is to overhang the tape, that way I can peel the tape off the board without cracking the end of the veneer too much.
PXL_20260315_191010200.jpg


Lots of work and dust, but it made much more noticable progress than the failed attempt. Its rewarding watching the saw marks slowly go away.
PXL_20260315_191904469.jpg


Once the sanding block is sliding free, you know it's at uniform thickness. I needed two pieces to get the width I needed. One piece was a bit thicker than the other; about halfway through the first piece, I dared to hope I was working the thicker piece first. I was not so lucky.

I've mocked up the body blank, I'll glue it another day. It will look good once it's finished, well worth the trouble to get the veneer right.
PXL_20260315_210839157.jpg


Total thickness is a just about 1 3/8", right where I wanted it. It'll probably be a bit under once everything is sanded.

