
• TalkBass has been independent since 1998. Add your voice.
    Create a free account to reply to discussions, view embedded media, and browse with fewer display ads.
    Join freeLog in
    Want zero display ads or expanded classifieds tools? Compare plans.

Winter Build Off 2020 - Un-named

The last couple of days I have been getting a little shop time before work, a little after work and have made some good progress.

I cut out the neck on the bandsaw; obviously I need practice! Here you can see where I plugged the original TR channel and rerouted.
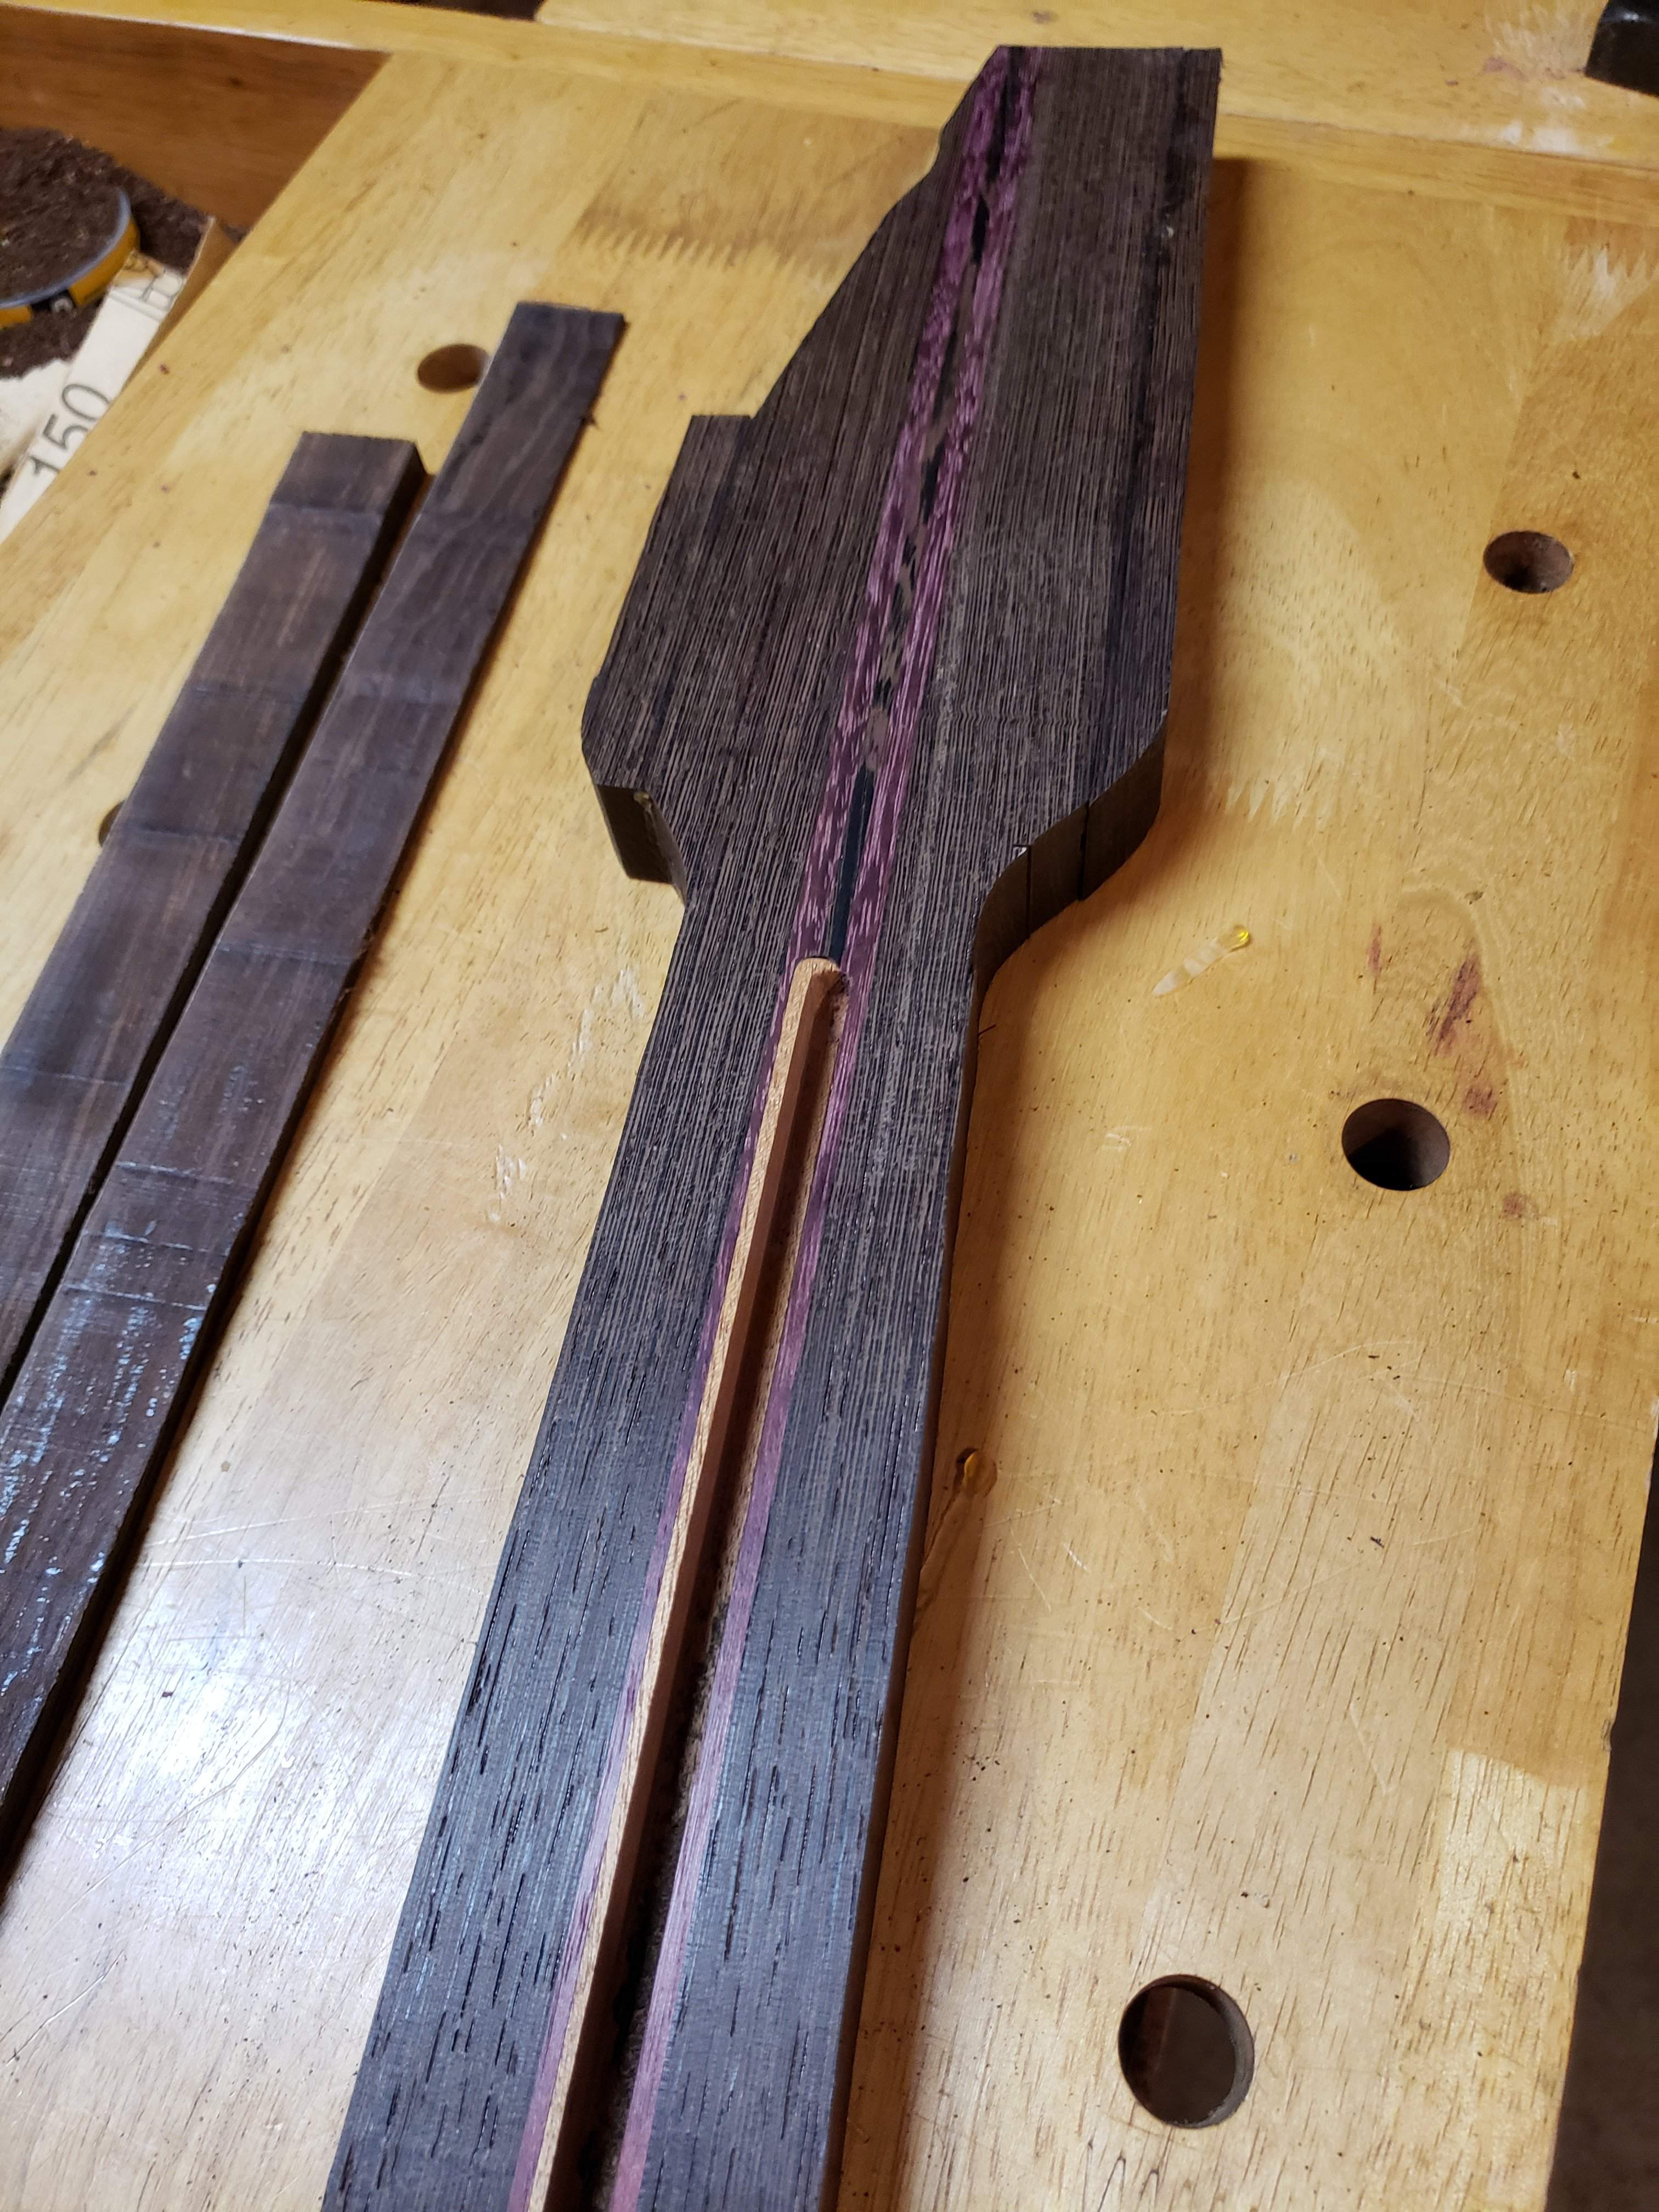
20200117_091553.jpg
Used the off-cuts to glue on some "ears"...
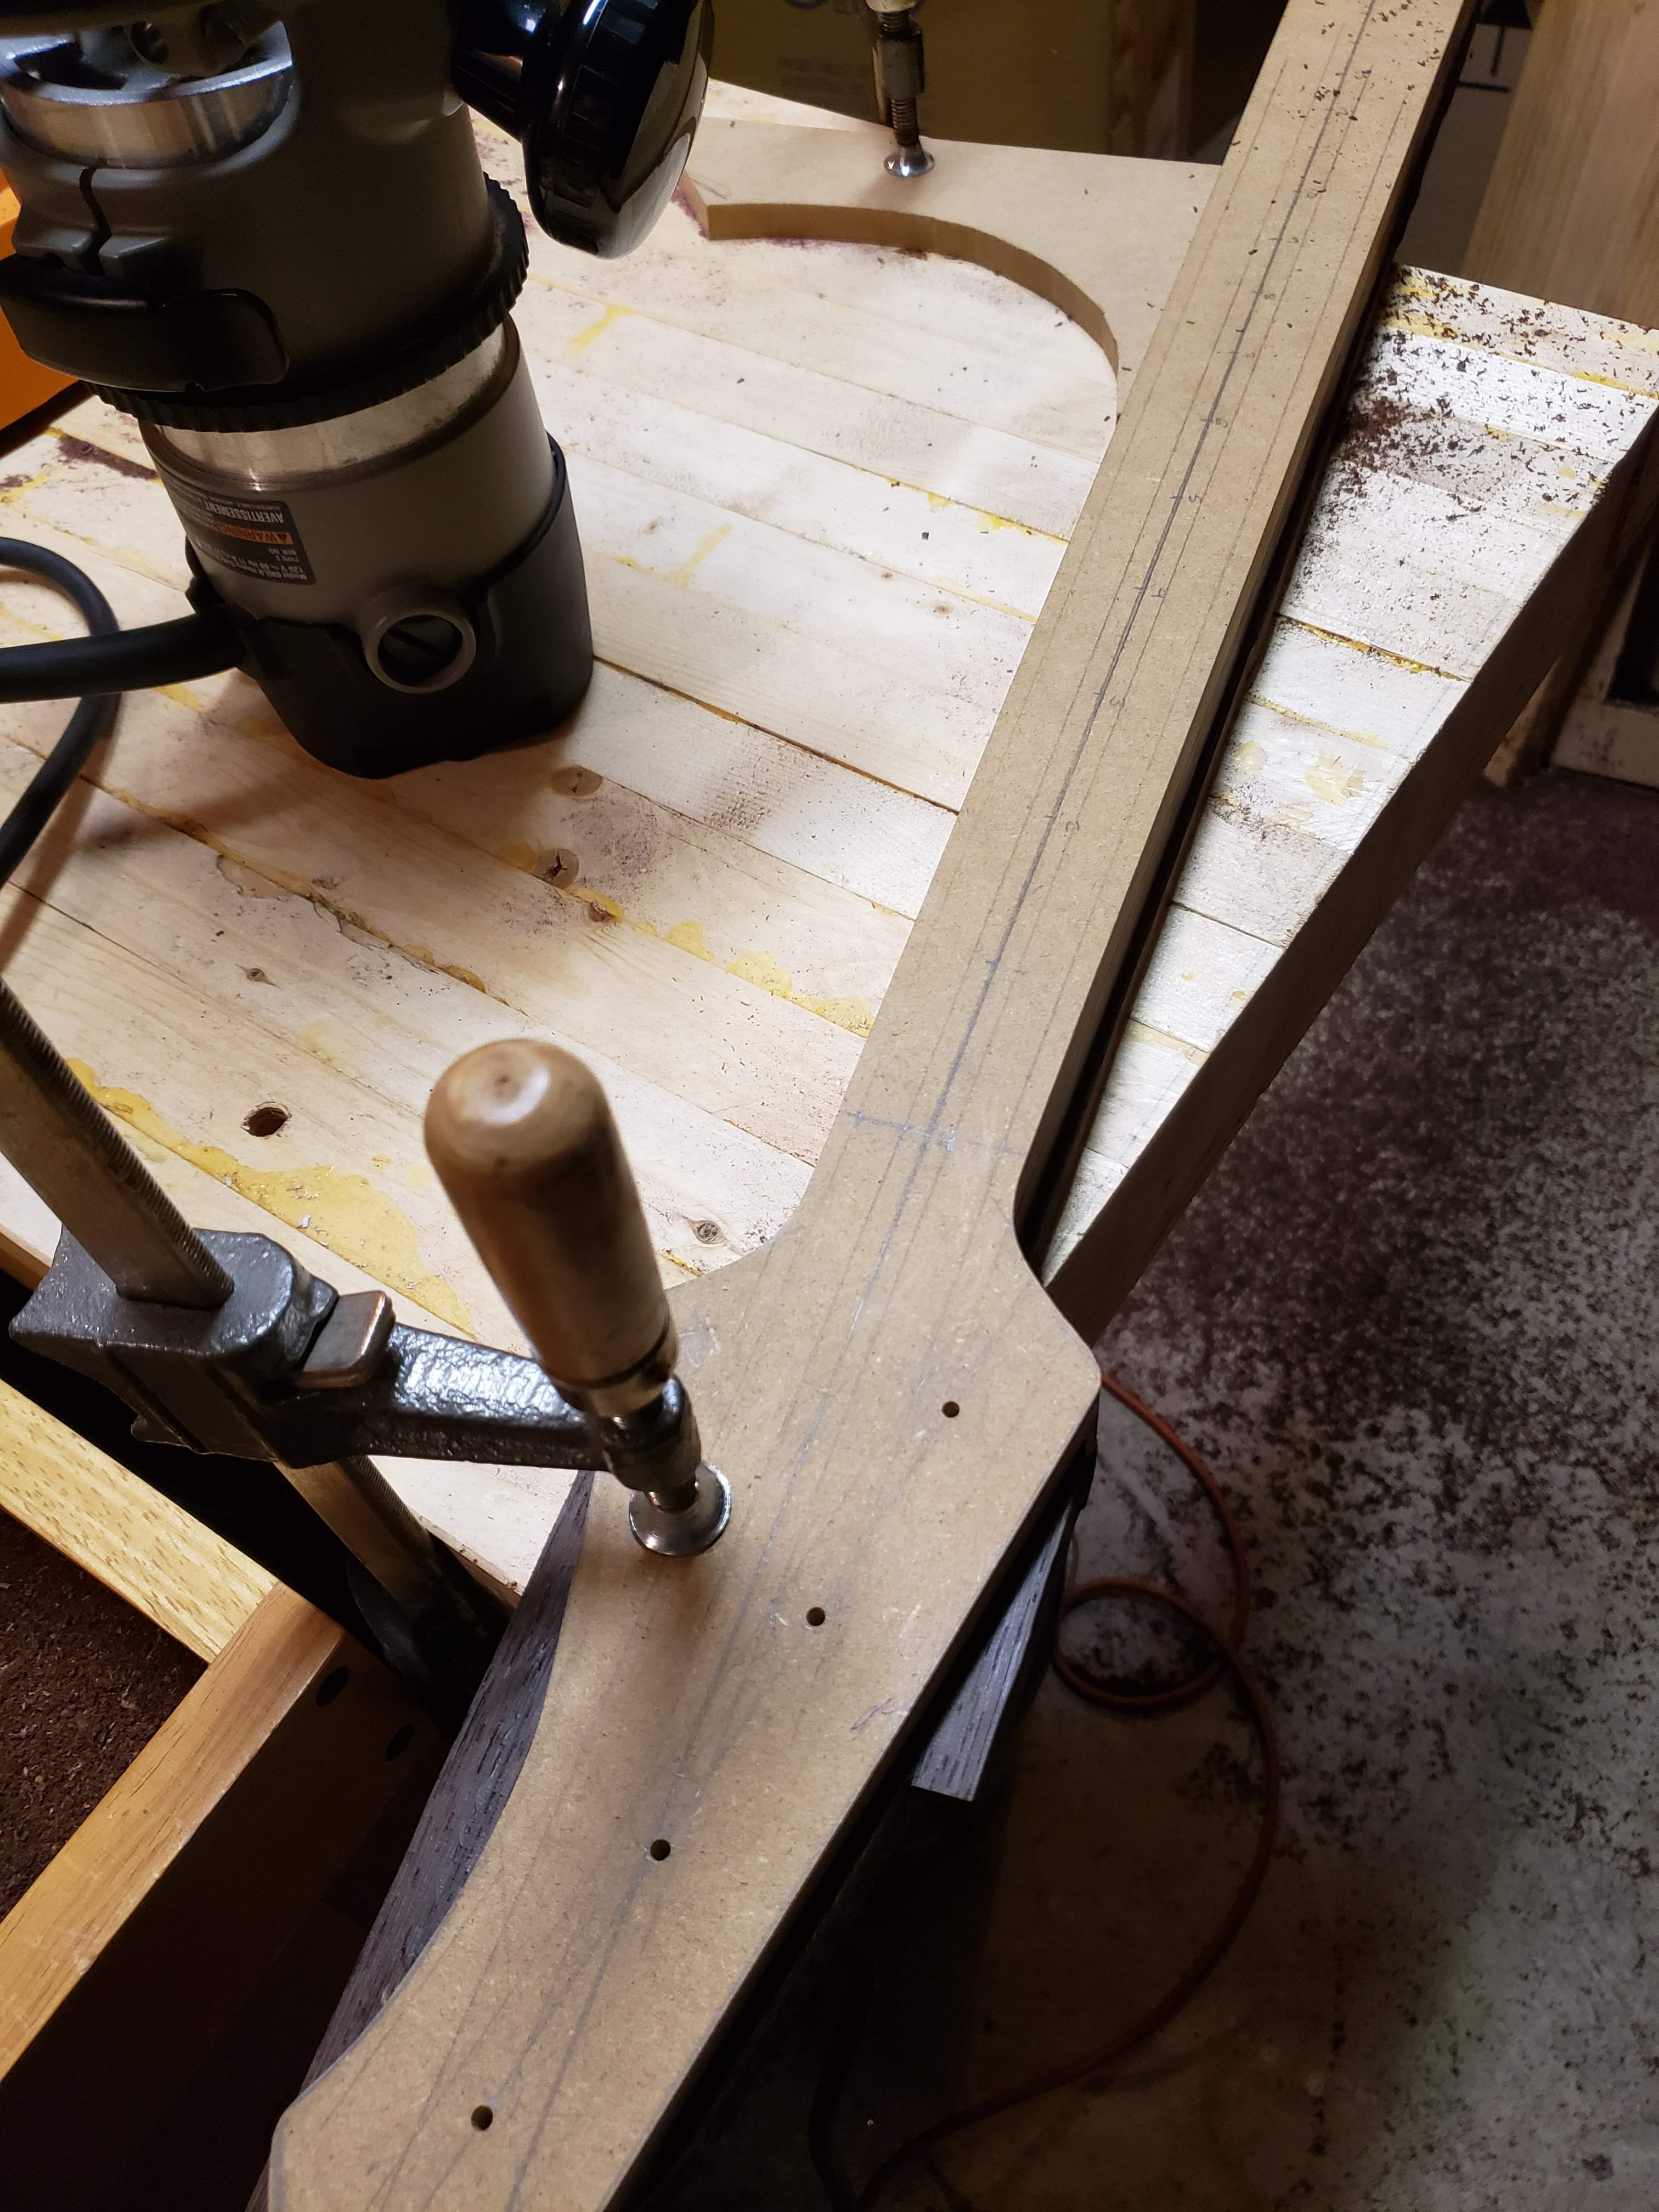
20200117_094041.jpg

The template is stuck to the neck blank with tape/super glue, I clamp one end of the neck and clamp a stop-block to the bench to support the other end. I route on side at a time, approx 1/8" depth increments. Flip it, do the other side, the headstock is last. Once I get to the last 1/4", I pull the template of and finishing routing.

I would like to try this on my router table, but I have this method figured out already and I didn't want to take the time to figure out a new method.
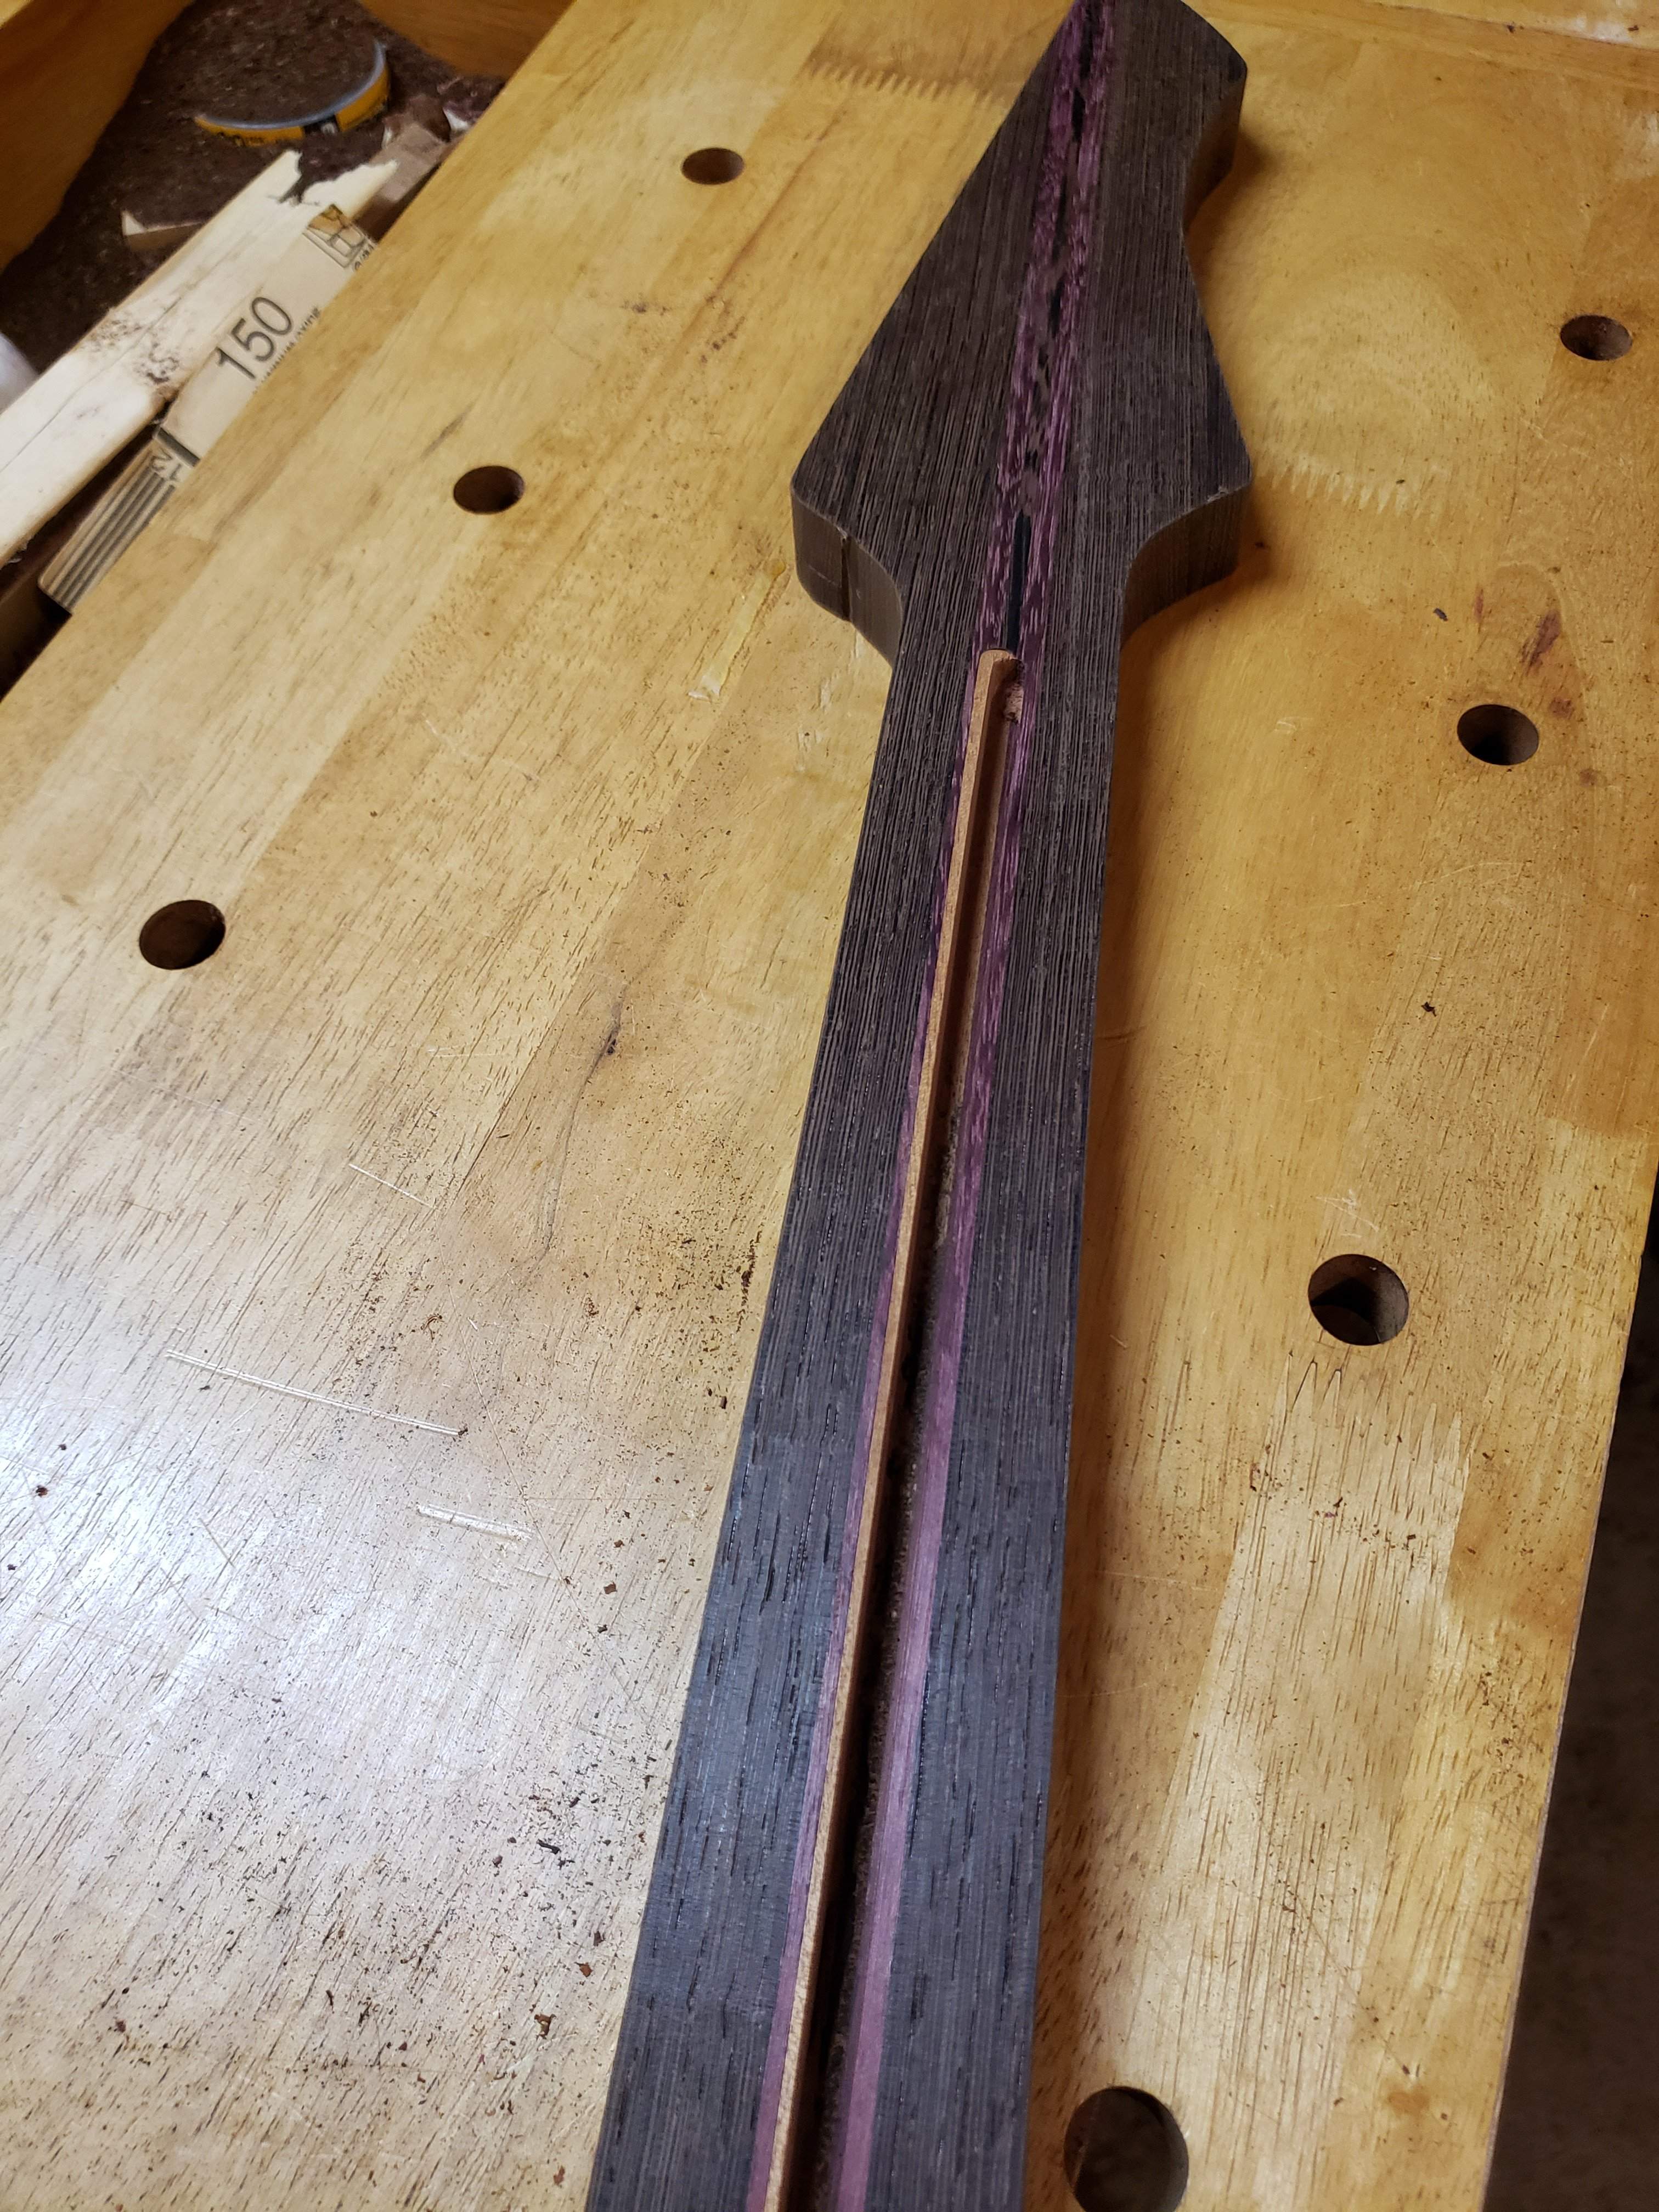
20200117_100851.jpg
Neck ready to be shaped!

Really enjoying the grain pattern of the wenge, here...
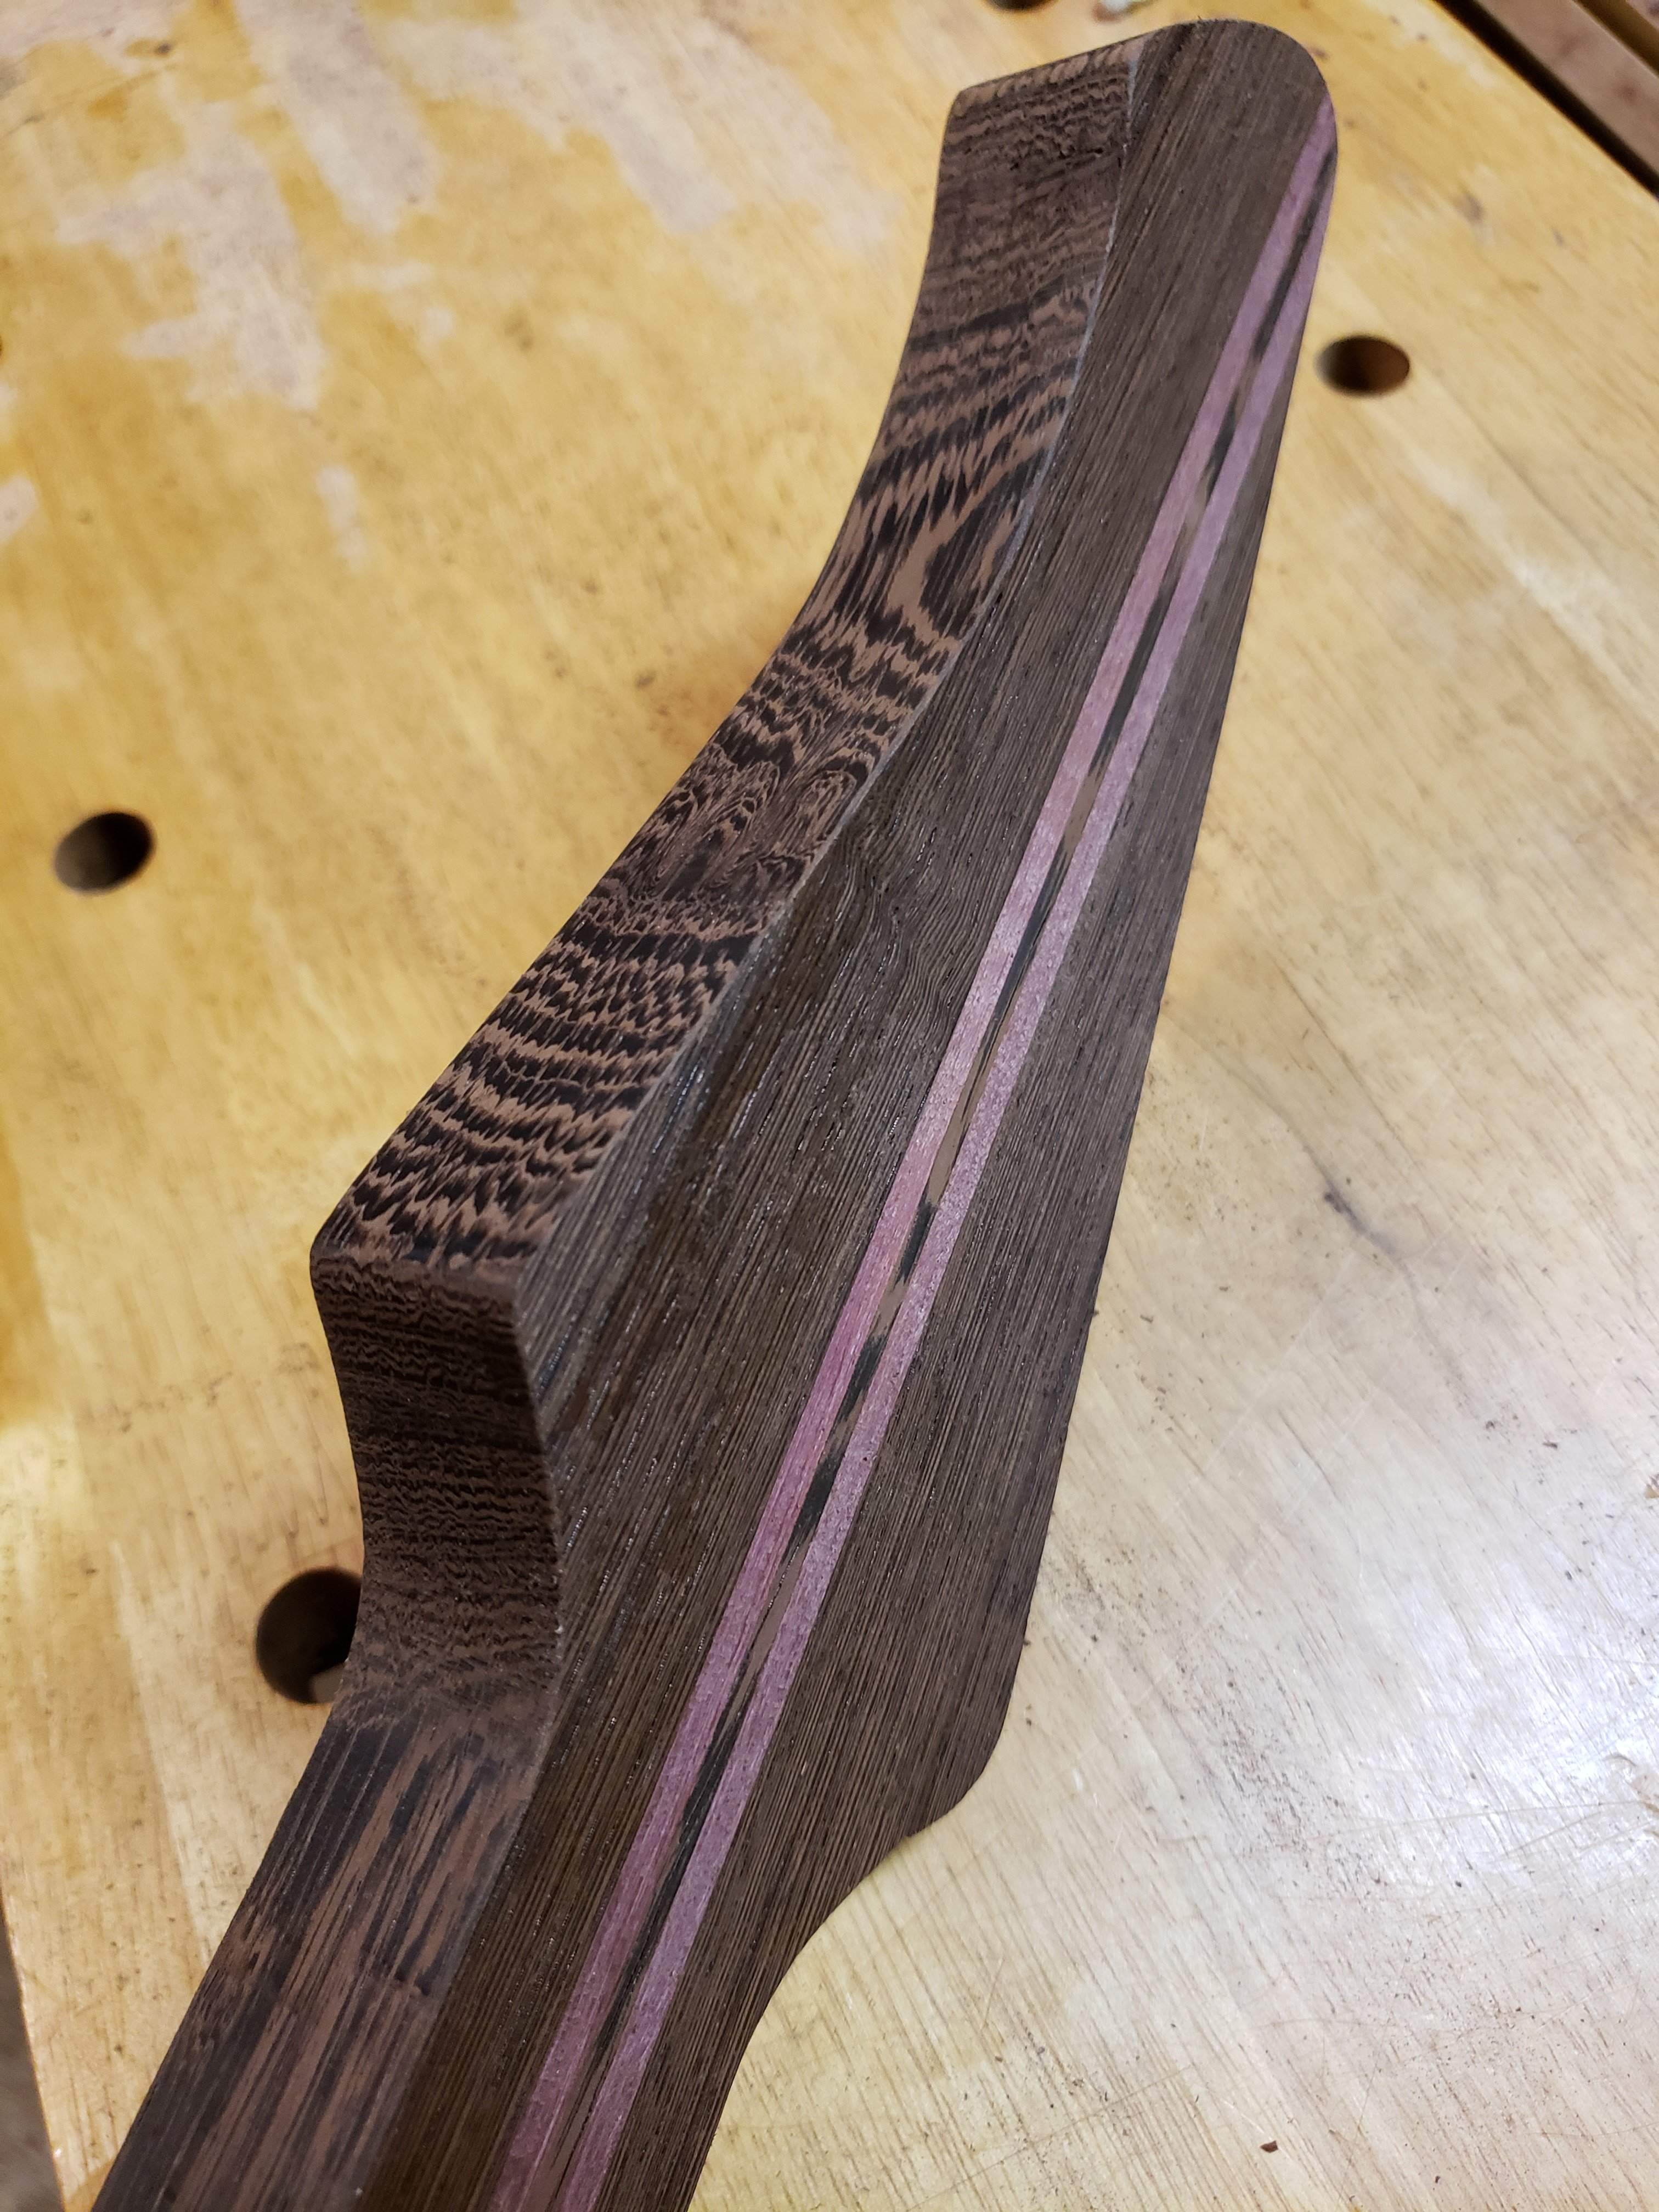
20200117_100928.jpg
... color contrast is cool, too.

Pretty happy with this week's progress, I am starting to feel like I might actually finish on time!
 
Back on task after a busy week!

Added a neck pocket to the interior template. I did not take pictures of how I jigged it, but for anyone who is interested...
I clamped the neck to the template, checked alignment using two 36" straight-edges, then used an awl to score the MDF around the neck. I taped MDF scraps to the template to use as a router guide. I covered the scored lines (rather than placing the pieces up to the line) so I could sand the neck/neck pocket to fit.
20200120_200815.jpg


Nice, clean neck pocket!
20200120_202601.jpg


The back/core is almost ready for glue-up. I will do some more shaping to the interior of the belly-carve.
20200126_180151.jpg

I also routed the control cavity access...

...and carved the sound holes. They will also get some more refining.
20200126_180407.jpg

The neck pocket in the top is undersized so I can fit it more precisely once the top is glued on.

I should be able to glue together the body pieces in the next couple of days, maybe even tonight.
 
It's exciting, Bishop!

Thanks! Here's a teaser...

20200127_204153.jpg
Clamp-henge 2: Ecclectic Boogaloo

What you can't quite see cuz it's out of frame, 3 of the clamps are 3 footers. :) You gotta do whatcha gotta do! Also, there is a 2x4 block under this whole mess so the kettle bell is bearing on the block, not the clamps. Just a BTW.


I have since unclamped (de-clamped?) the body, routed the round-overs and fit the neck. I was enjoying the work so much I forgot to take any pics! More to come soon, though.
 
Not much progress since my last post, had a little time this morning.

Installed t-nuts for the neck attachment...
20200204_083611.jpg
I am using stainless machine screws in countersunk ferrules to thread into the t-nuts, but I neglected to get a picture of the back of the neck joint.

Prepping for gluing on the fret board...
20200204_093802.jpg
...I hacked out some wooden discs (not my best work) to cover the t-nuts, both to fill the void and to keep glue out of the threads. They are wedged in and sanded flush. Except for that little guy in left corner; he's a little shy.

I wanted to glue on the fretboard so it would be dry when I get out of work, but I ran out of time so I will have to glue it up tonight.
 
Not much progress since my last post, had a little time this morning.

Installed t-nuts for the neck attachment...
View attachment 3694947 I am using stainless machine screws in countersunk ferrules to thread into the t-nuts, but I neglected to get a picture of the back of the neck joint.

Prepping for gluing on the fret board...View attachment 3694948 ...I hacked out some wooden discs (not my best work) to cover the t-nuts, both to fill the void and to keep glue out of the threads. They are wedged in and sanded flush. Except for that little guy in left corner; he's a little shy.

I wanted to glue on the fretboard so it would be dry when I get out of work, but I ran out of time so I will have to glue it up tonight.
Another way to keep glue out of the threads is to coat the screws you'll be using liberally with wax, screw them to block the opening, then glue away.
 
Had nasty little storm blow through NC yesterday, so I shut down my shop early and went home to work in the home shop. Not the sick day I was wishing for, but I did get a few extra hours to make sawdust.

Routed the taper into the neck...
20200206_182323.jpg
...clamped the neck into my fret saw miter box with an 1/8" shim at the nut. Final thicknesses; 7/8" at the nut, 1" at the heel transition. The heel itself is about 1-3/16"

Thinned the headstock down to 5/8"...
20200206_194234.jpg

...yes, I'm using the purple heart chunks again. They are the right size and are readily at hand.

Using the spindle sander, I sanded the swoop into the headstock...
20200206_200912.jpg

...and started the transition on the back.
20200206_200937.jpg


Finally, I get to put the router away (for now) and go after it with hand tools! Not that mind using the power tools when appropriate, but I get tired of wearing ear muffs and appreciate the quiet work with hand tools.

20200207_092149.jpg

Here is the neck after the first set of facets, shinto-ed and spoke shaved. A little carving at the headstock transition as well.

It's starting to look like a bass!
 
Chipped away a little more this weekend.

Started shaping the fretboard...
20200209_131916.jpg
Rather than using a sanding block and grinding away for hours, as I have done previously, I started by planing the the rough shape into the fretboard. I had to pause midway to cut the fret slots deeper (note to self for future builds).

I also drilled the tuner holes...
20200209_183937.jpg

Fretboard is rough sanded to 60 grit, next will be working up through the grits.

I also shaped the back of the neck, it still needs work, but it is getting close. No pictures 'cause the shape does not seem to read well.

Still have a lot to do, but the end is in sight!

Anybody have opinions on pick-up covers? I don't want to introduce any new woods, so I was thinking of sapele with a wenge cap?
 
Anybody have opinions on pick-up covers? I don't want to introduce any new woods, so I was thinking of sapele with a wenge cap?

Less is more. Have it match as much as possible. TBH, I think a lot of wooden covers on PUs are unwarranted. On your bass for instance, a black plastic cover would look as good as wenge and be better wearing under use.



