• TalkBass has been independent since 1998. Add your voice.
    Create a free account to reply to discussions, view embedded media, and browse with fewer display ads.
    Join freeLog in
    Want zero display ads or expanded classifieds tools? Compare plans.

Winter Build Off 2022: Aria Kidding Me

rojo412

Sit down, Danny...
Supporting Member
Feb 26, 2000
10,914
15,077
46
Cleveland, OH.
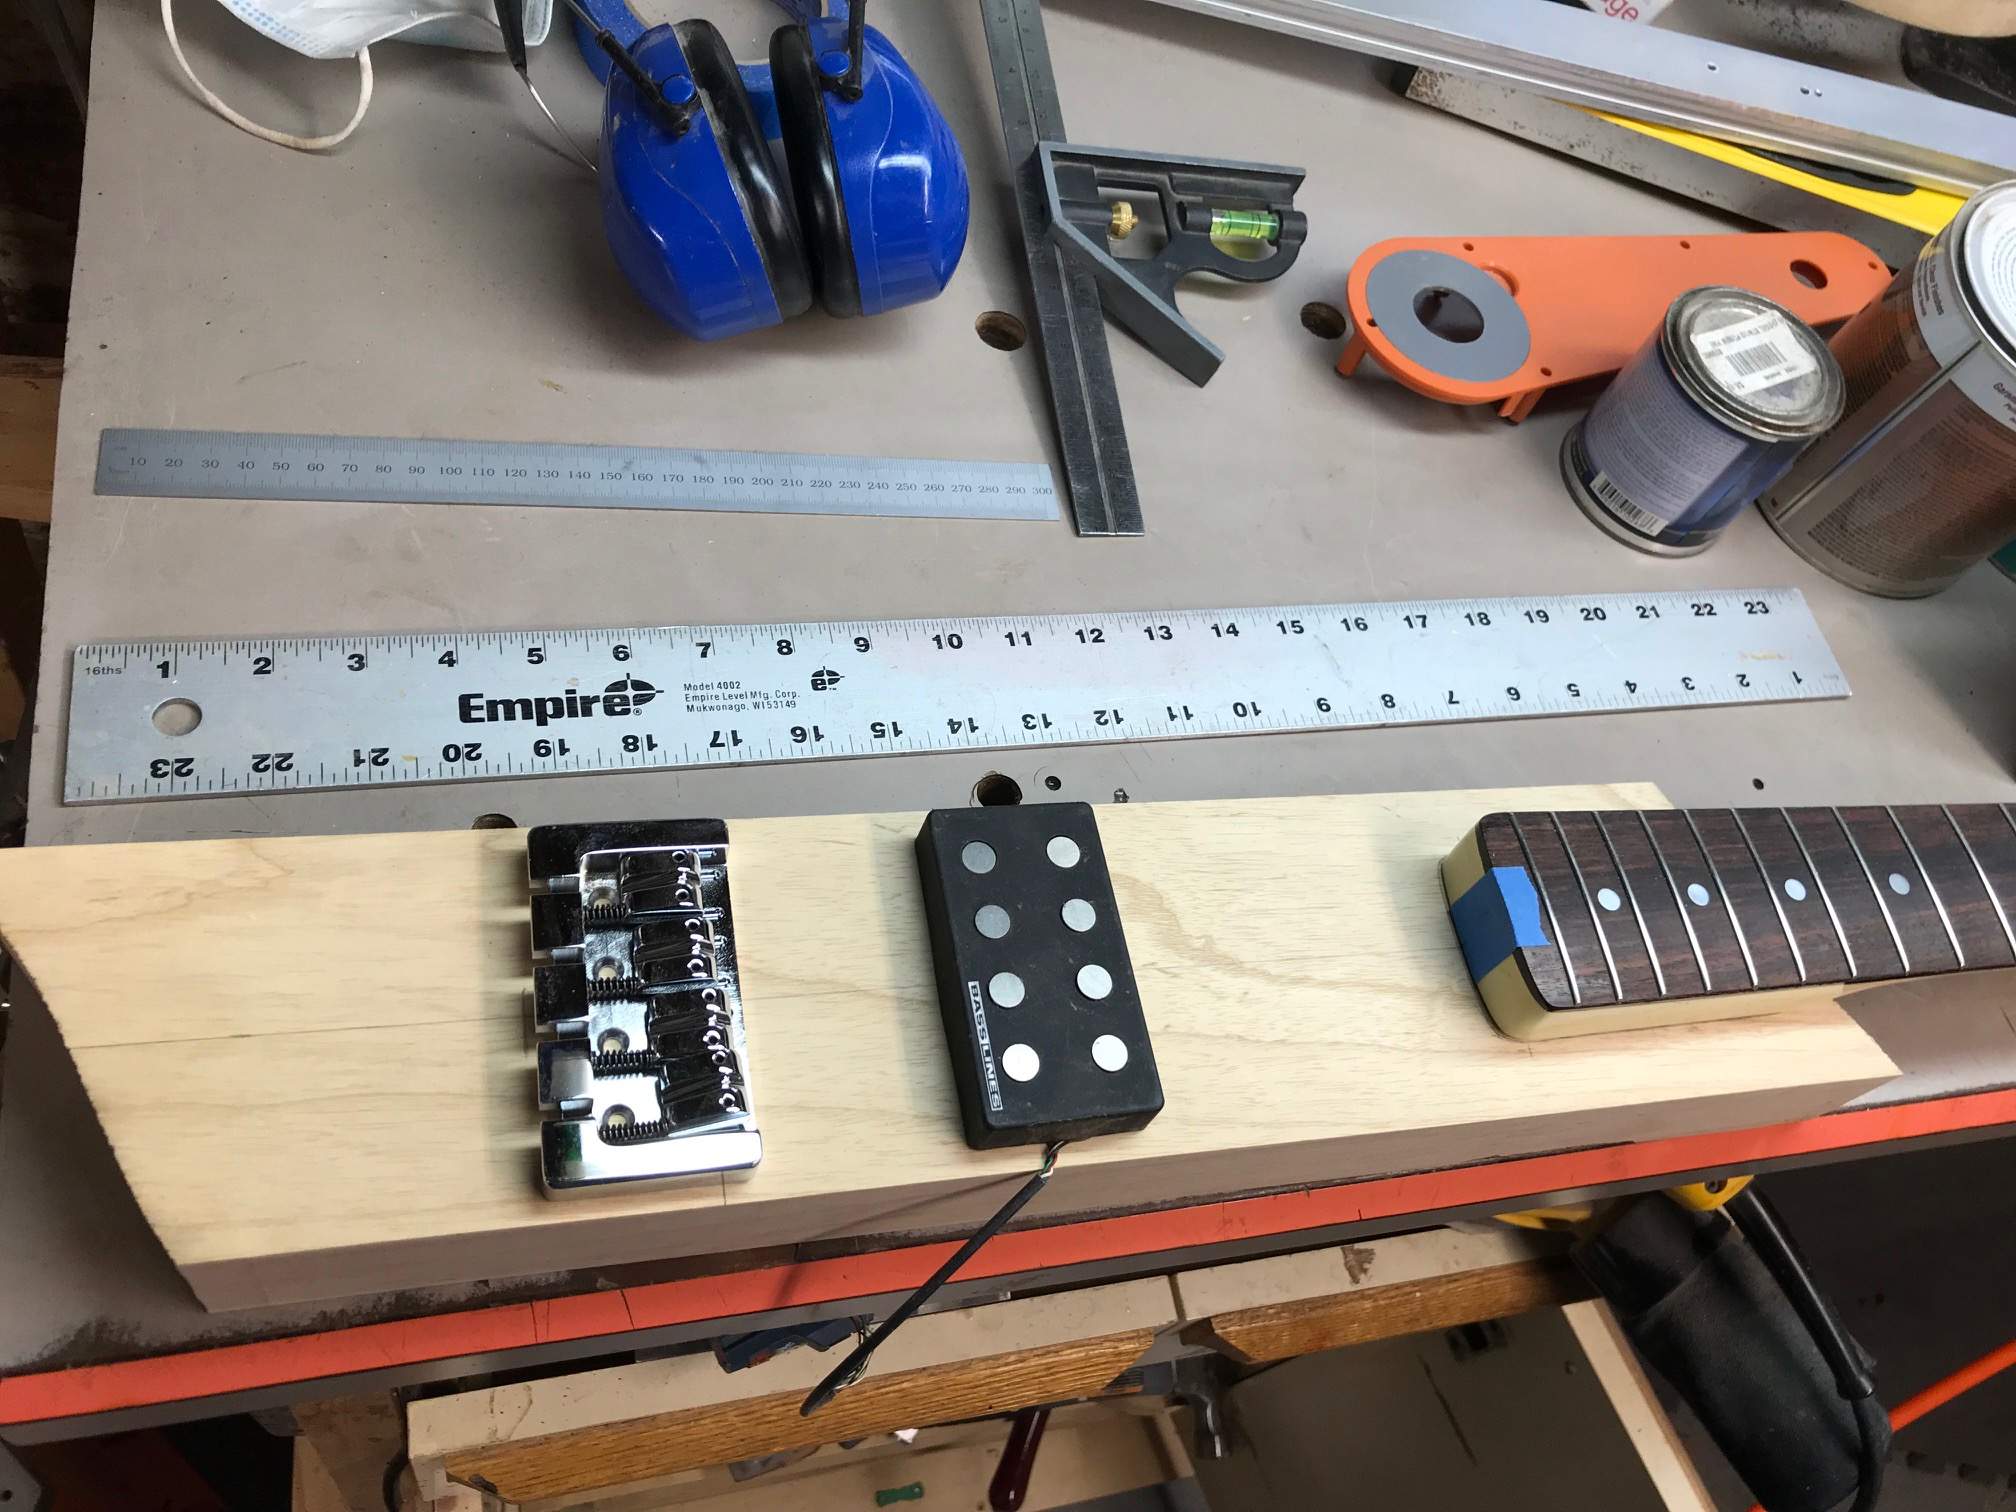
As if I don't already have enough on my plate! But hey, I couldn't help myself. Inspiration struck and this one's intent is to be built very quickly. Having the neck already made certainly helps that, no doubt!

I present to you, my second WBO entry for this season:
"Aria Kidding Me"
IMG_1070.jpg


IMG_1071.jpg


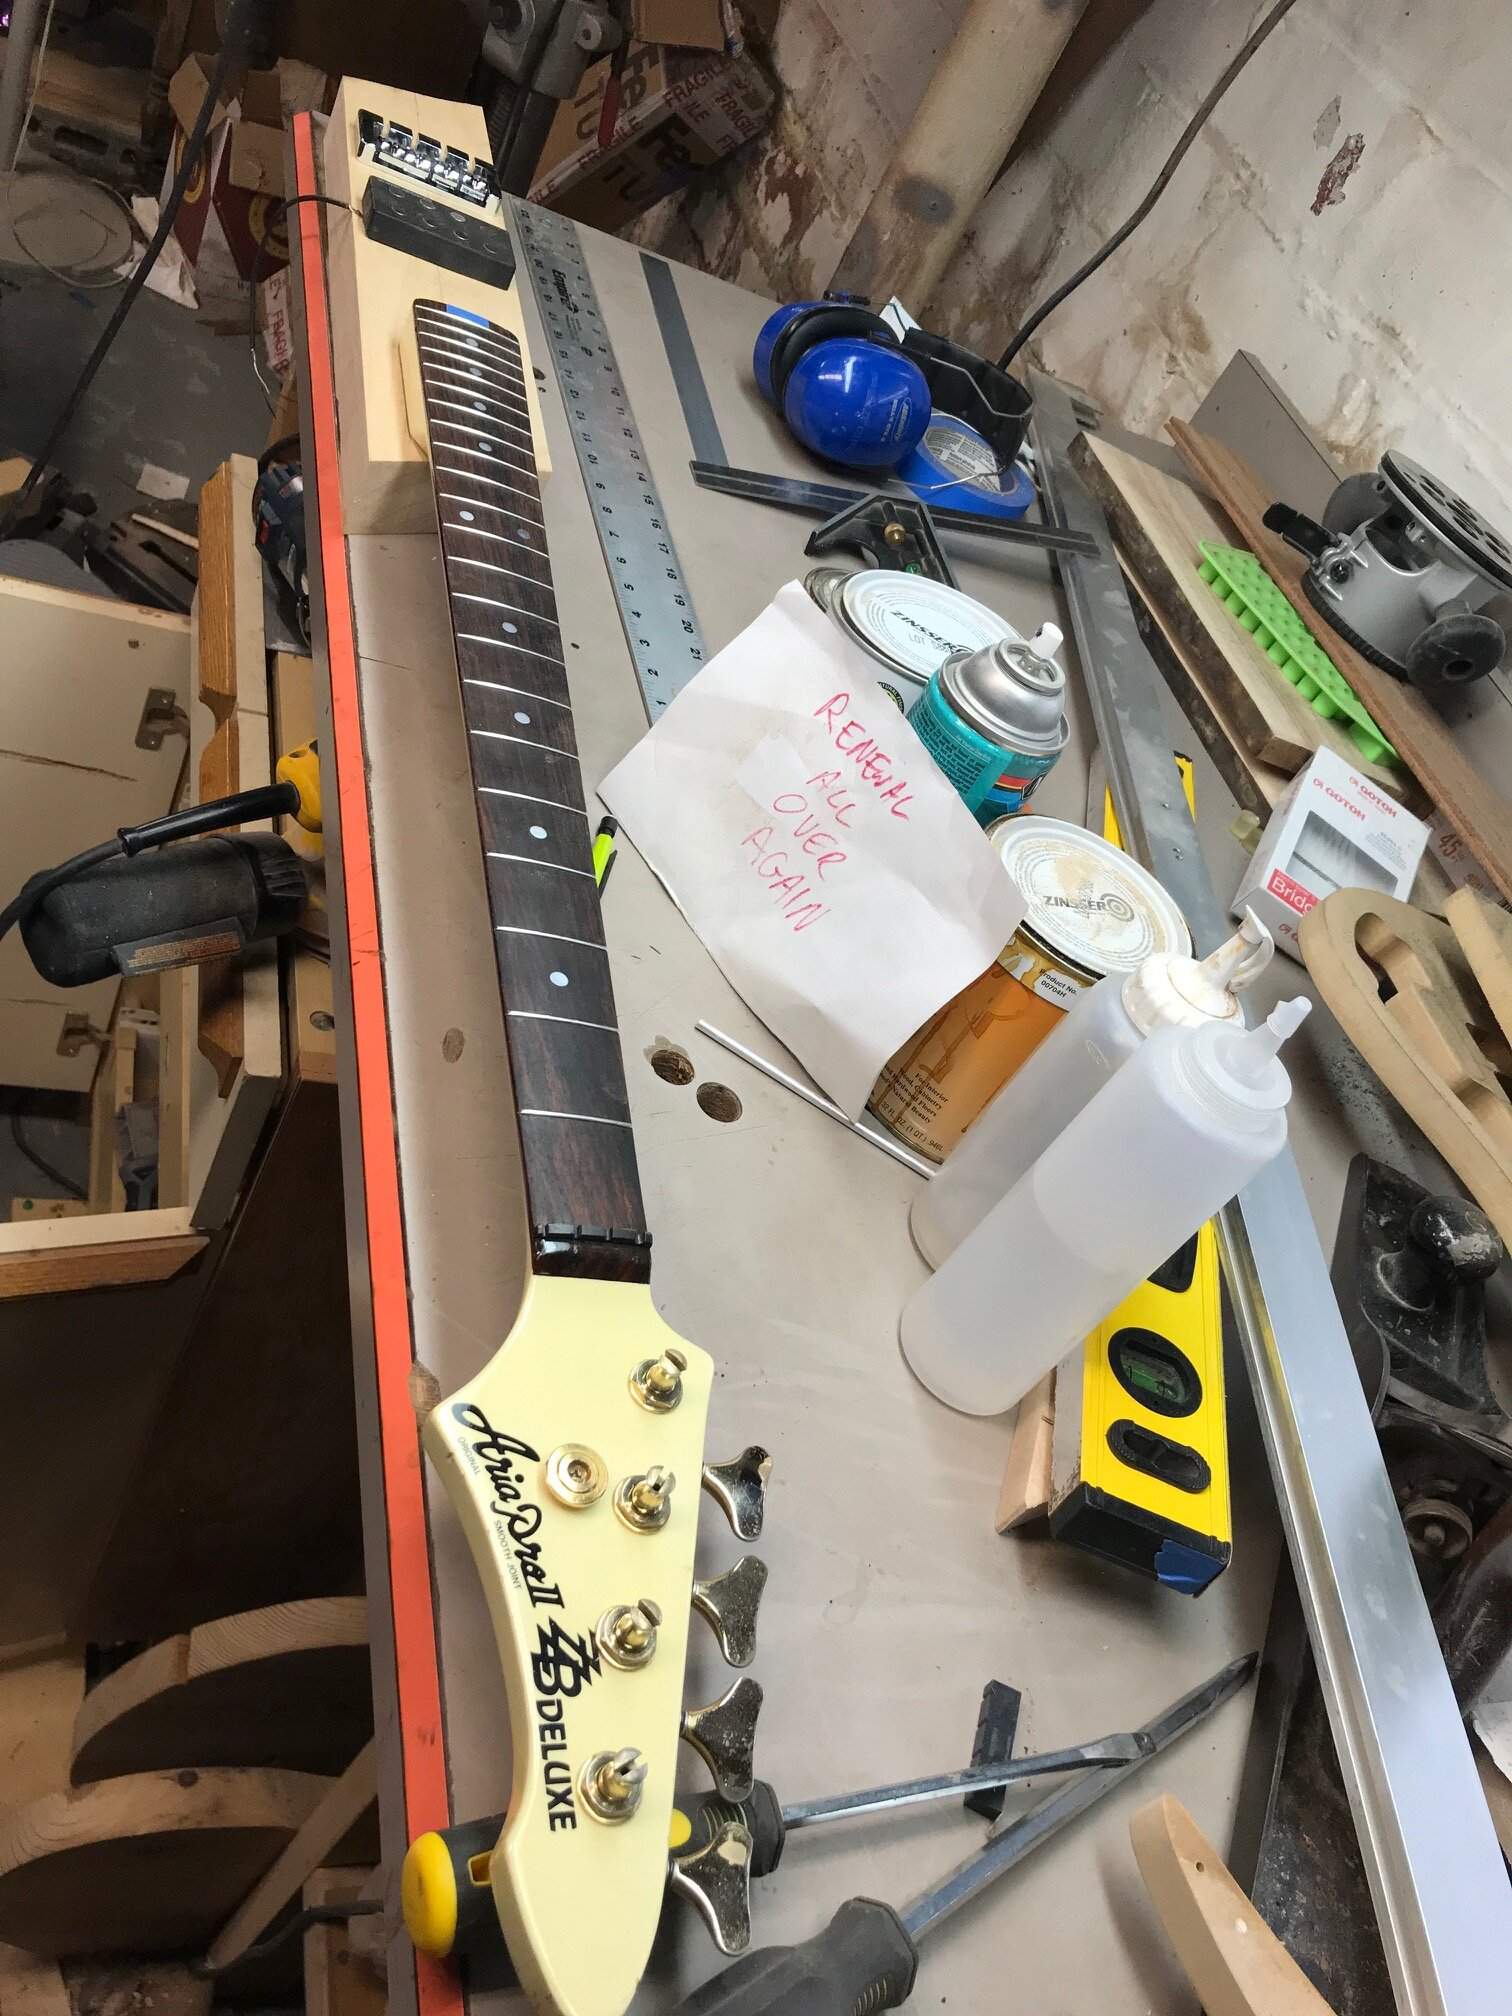
The neck was acquired as part of a trade with @cholyoke in exchange for some beers.
The pickup was part of a parts box buy and the previous owner "Triple Van Gogh'ed" the 3 ears that were on the cover.
Bridge was given to me by @Rapisme (thank you kind sir!).
The piece of swamp ash here is something out of the scrap bin that was likely hard to use for a full-on build.

Honestly, the idea for this came about after seeing the project that @smart51 has been building, the Essence. It utilizes the sort of sparse, skeletal structure that was akin to Paul Lairat's basses.
So here I was, liking the looks of that and thinking about this neck that was from an Aria ZZB. That bass was like "super 80s pointy Explorer style on c'caine" and doing that full on shape was unlikely for me. But thinking about how to make something with the outline in some respects, using scraps for whatever I can, making it "skeletal" in some ways, certainly fit the renewal/rebirth theme.

The general plan will be to build off of this central beam, adding supports and bowed woods to create a sort of outline of a ZZB shape. This will evolve as I figure stuff out, but that's where I'm beginning.

SPECS (so far):
- 32.25" scale Aria Pro ZZB neck
- Swamp ash central beam
- Duncan MM pickup in a custom shell
- Heavy Duty Bridge

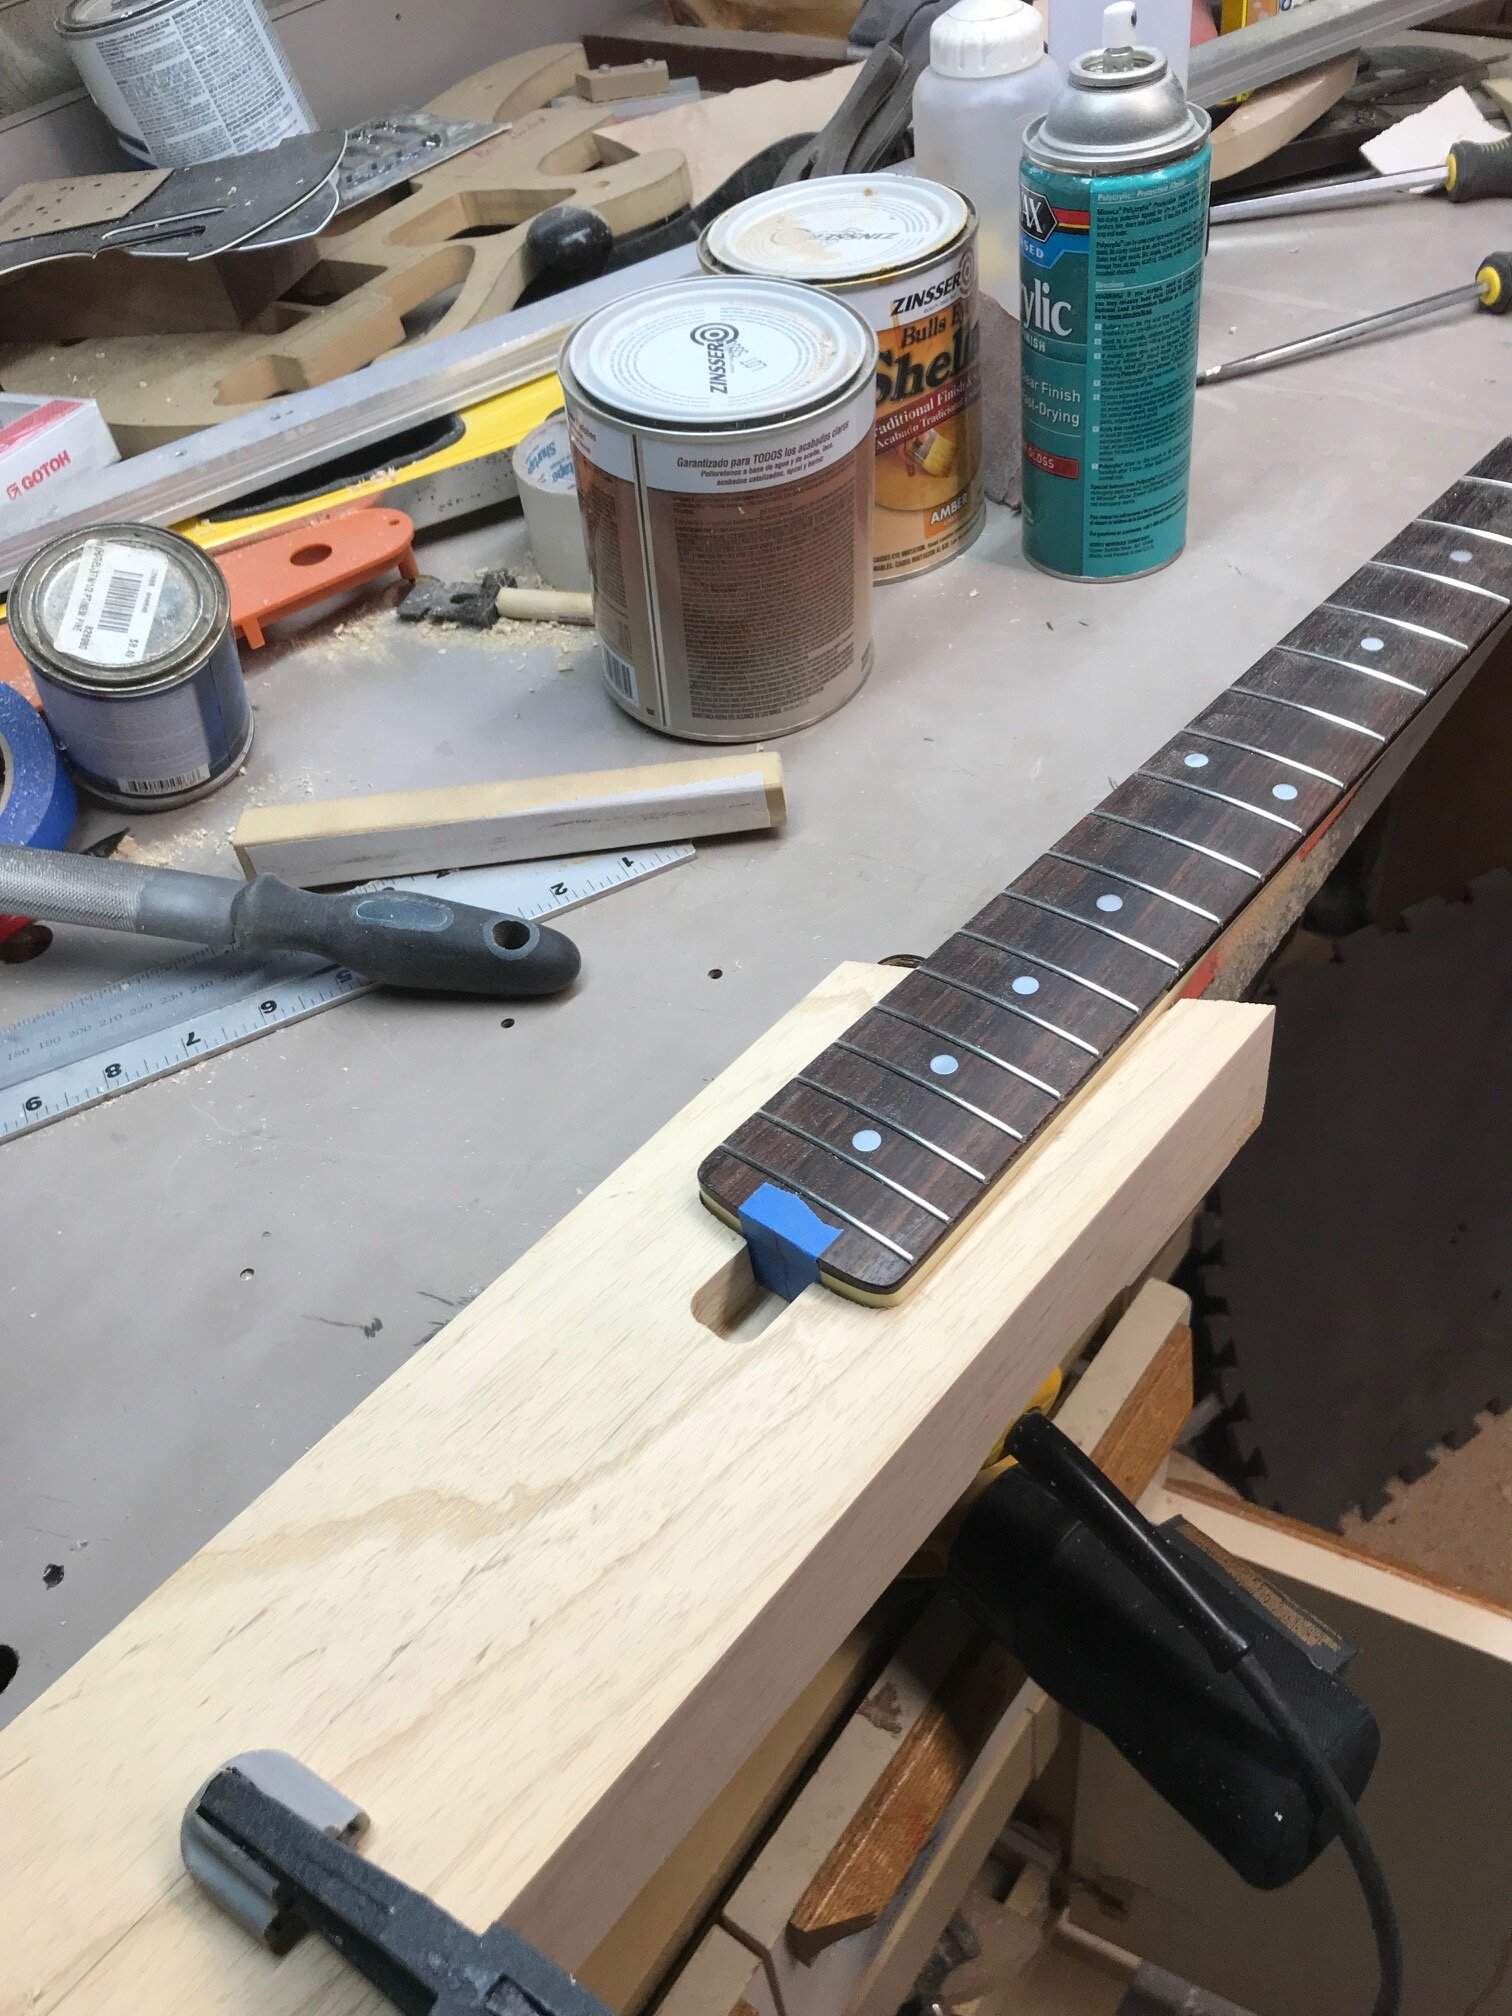
Traced the neck heel into some MDF and made a template. Then cut out the neck pocket:
IMG_1072.jpg


Because that was a little deep and the beam was more than 1.75" thick anyway, I sent it through the planer and brought that down to proper depth.

Now as for a pickup cover, I've only rarely made wooden ones and most I was not only annoyed by the efforts required, but unhappy with the end result. So I'm not much for making them, but this is needed for a functional pickup.
Went through the old scrap bin and found a chunk of wood that was cut from a neck build for a bass from a few years back (I believe @bassbully has the bass now). It was wide enough for the task, so I measured where to hog out and went to work:
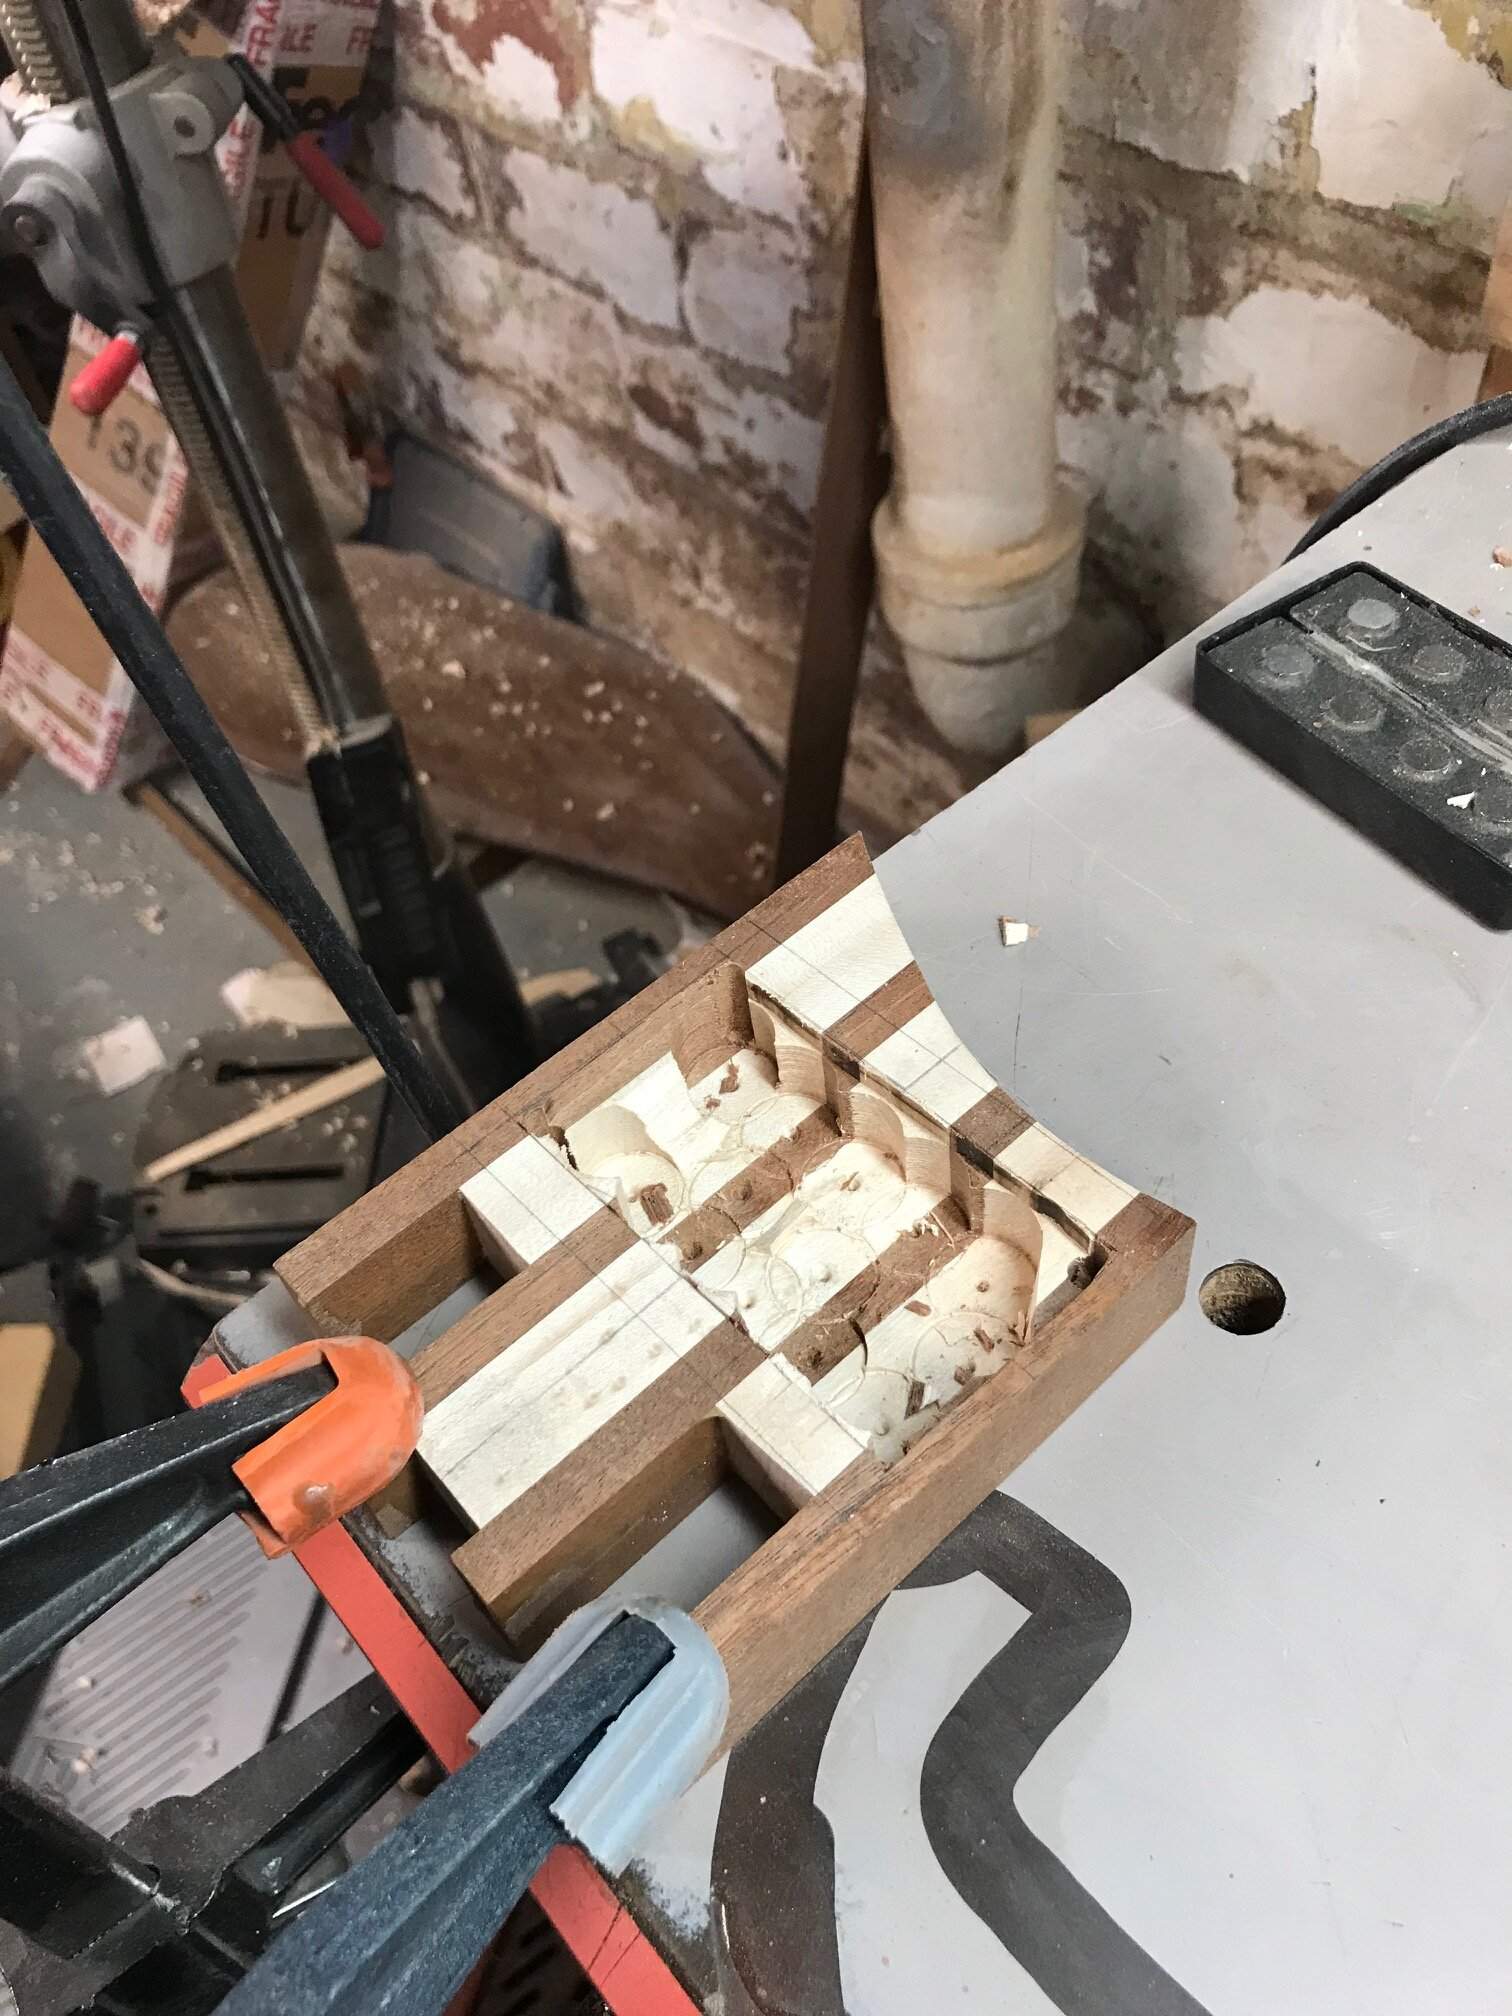
IMG_1073.jpg


Using the top of the bad cover to guide the pickup pole hole cuts:
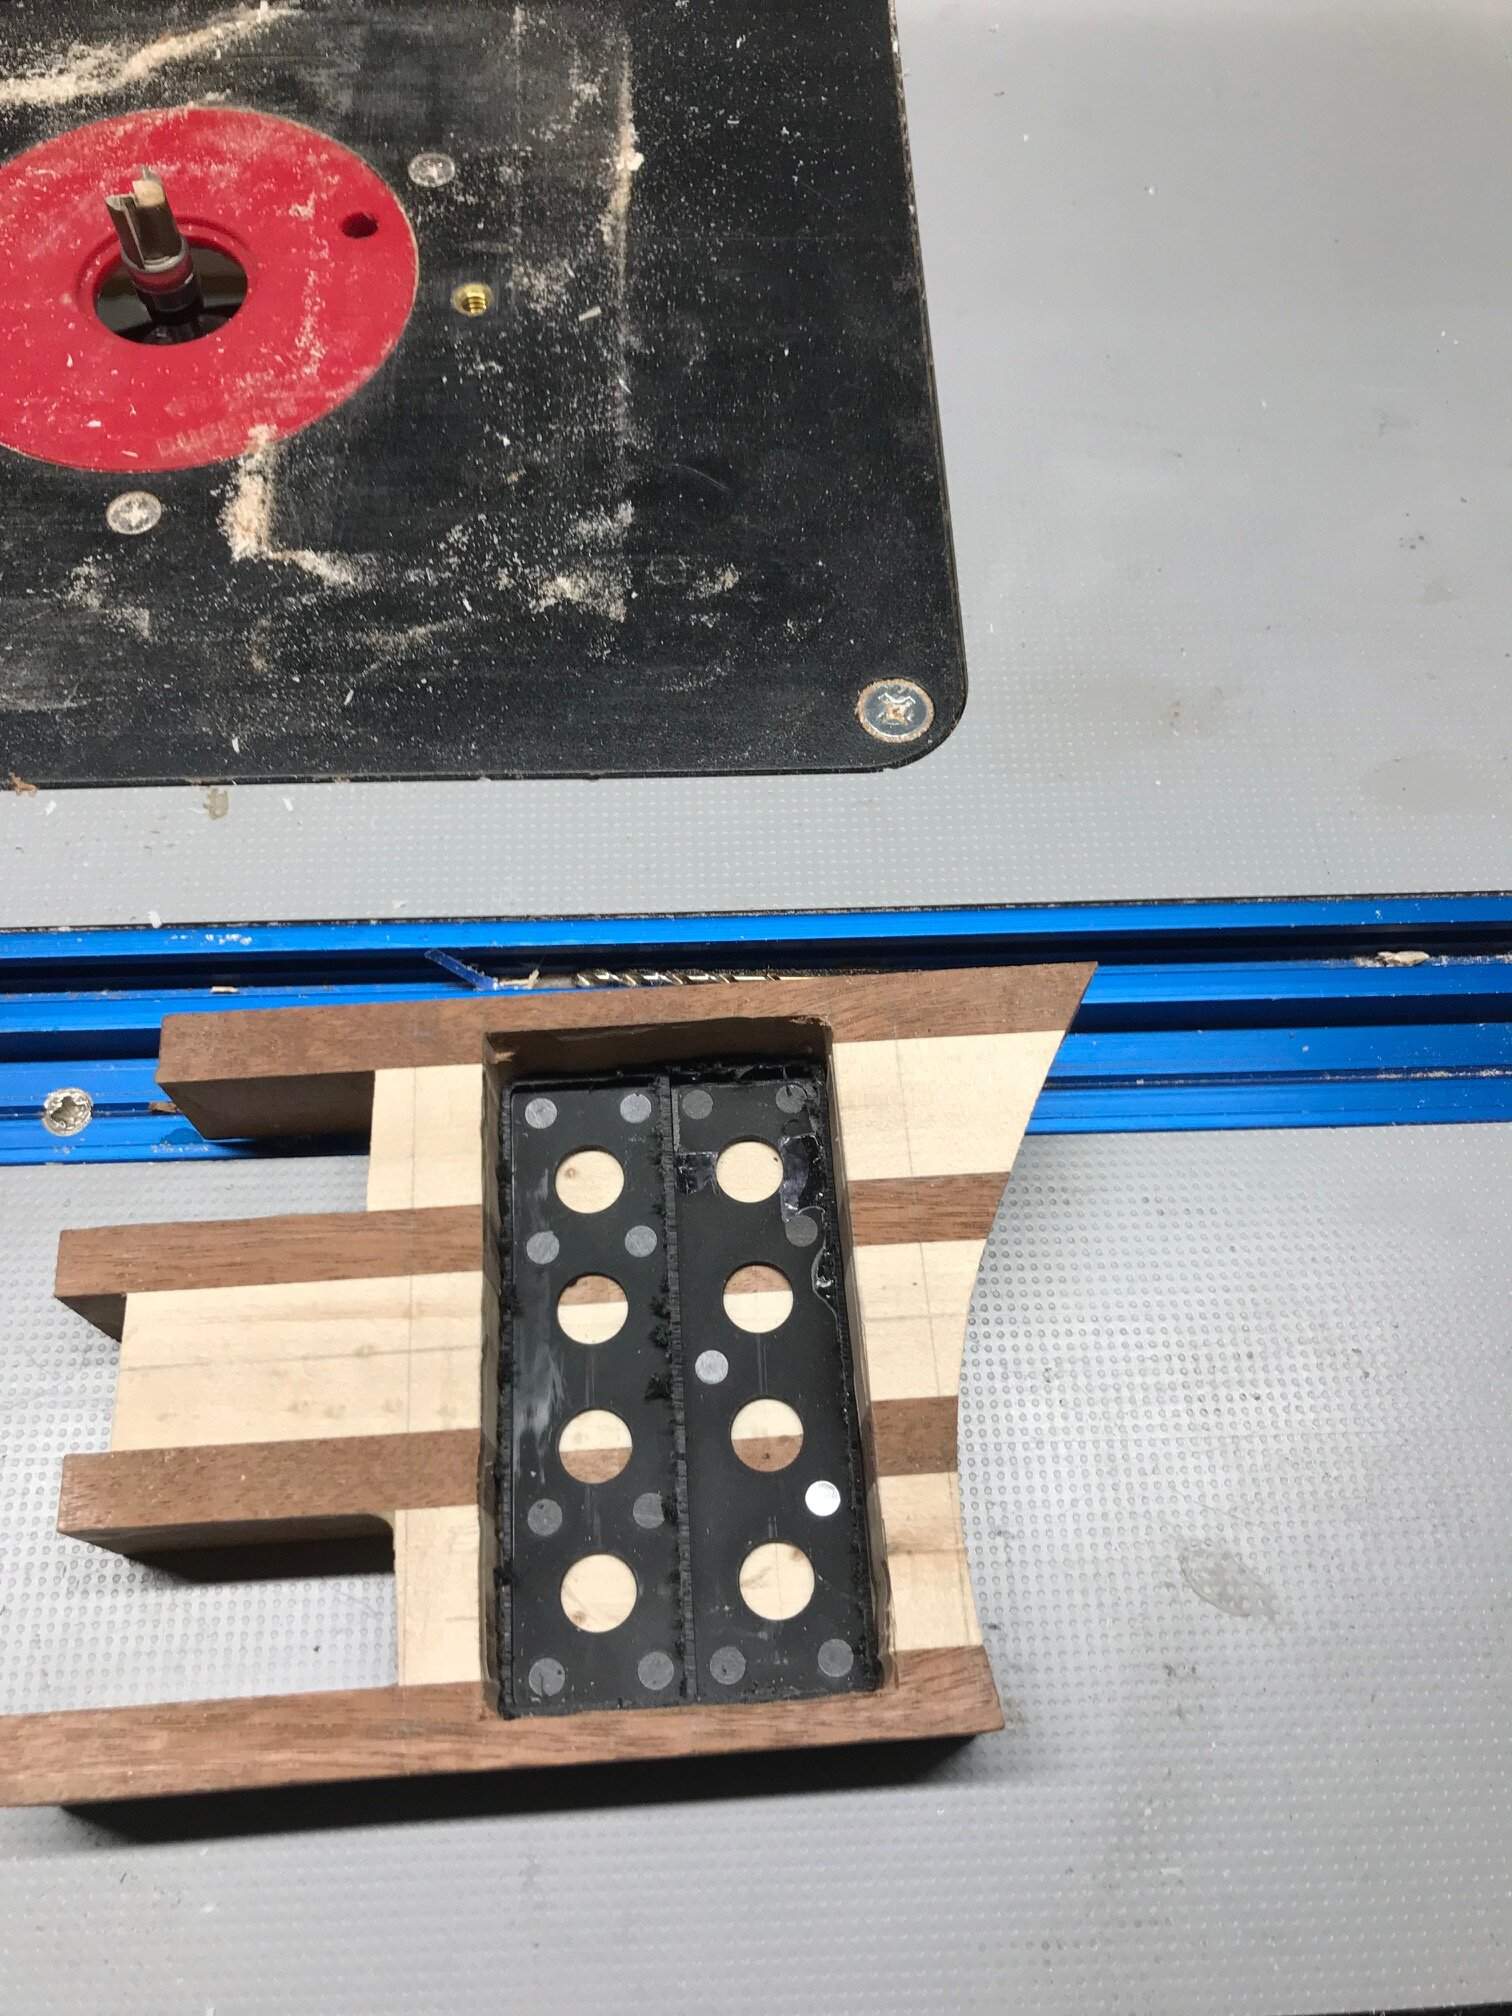
IMG_1074.jpg


After a little fine tuning, the coils fit into the cover. I trimmed that down closer to size, plugged the face holes with tape and filled the thing with epoxy:
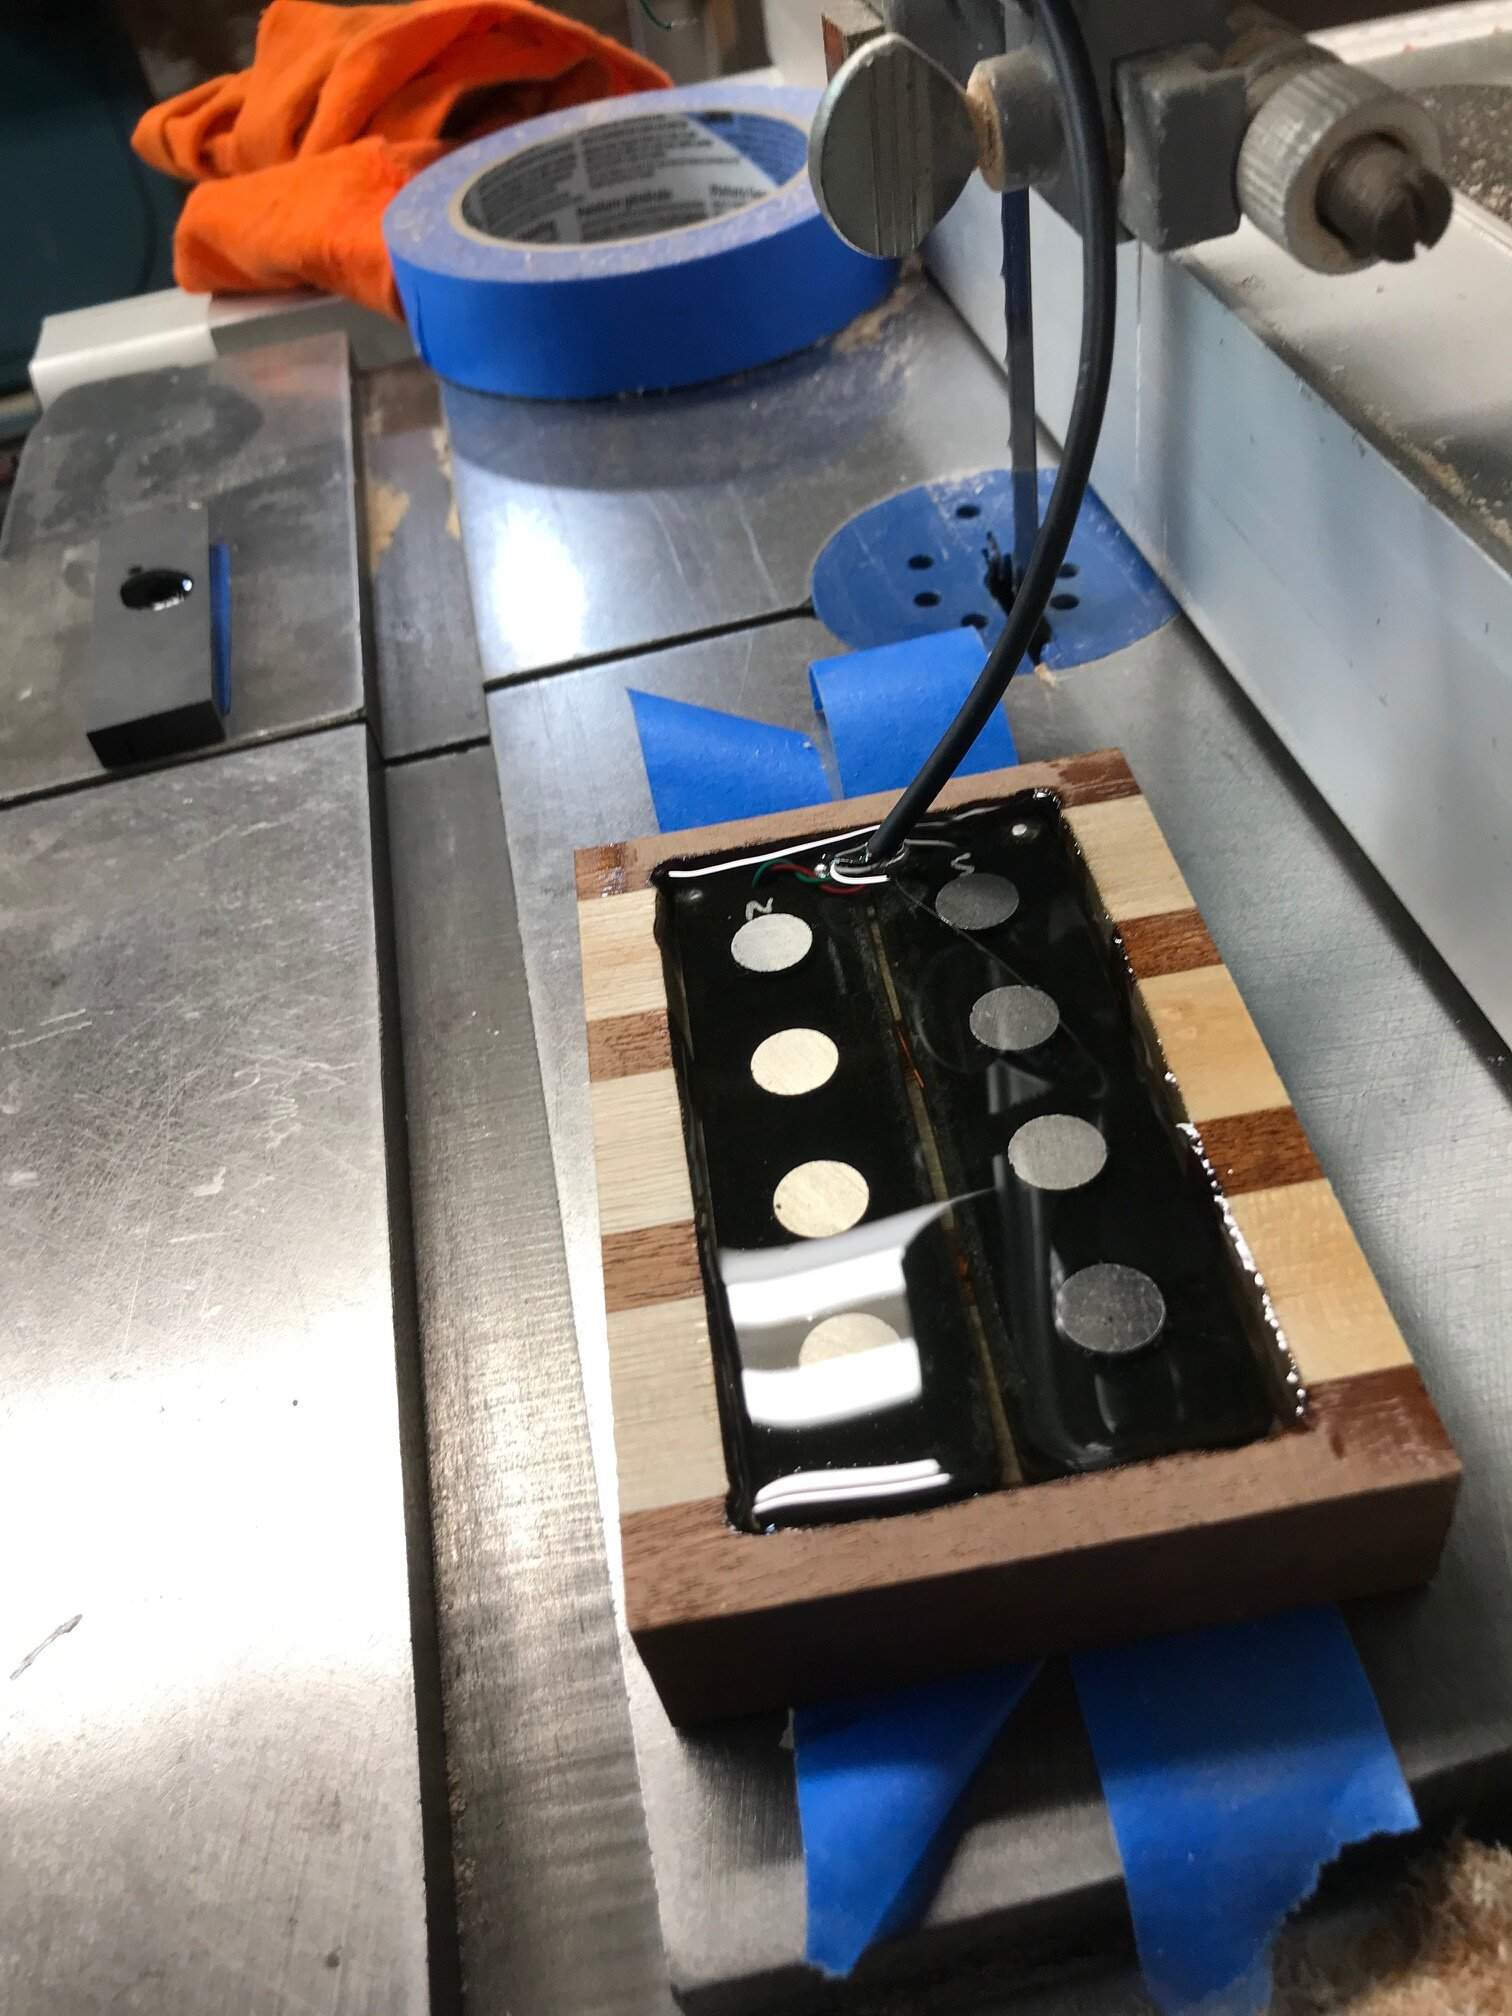
IMG_1076.jpg


And that's where I left off. Obviously, it will need to be shaped a bit more, but the end result will be a working pickup in a wood case that was made of scraps.
 
I'm thinking of freeforming this one. Though if I get a mental block, I may call upon you for a measurement or 2.
Gotta wonder what would have more residue on it: an 80s hair metal instrument or your average $20 bill?
 
  • Like
Reactions: cholyoke
I'm thinking of freeforming this one. Though if I get a mental block, I may call upon you for a measurement or 2.
Small observation, enlightened by @smart51 noting some neck dive (despite what looks to be an upper horn out to about 11-1/2 fret if I counted right) that you might want to make that bit overly long and then test your way back to find a nice balance length to cut it off to, given the lack of body mass on the balance.

Not sure how that plays with the body shape you are skeletally representing, but playability-wise it makes sense to me.
 
Now as for a pickup cover, I've only rarely made wooden ones and most I was not only annoyed by the efforts required, but unhappy with the end result. So I'm not much for making them, but this is needed for a functional pickup.
Went through the old scrap bin and found a chunk of wood that was cut from a neck build for a bass from a few years back (I believe @bassbully has the bass now). It was wide enough for the task, so I measured where to hog out and went to work:

View attachment 4551716

Using the top of the bad cover to guide the pickup pole hole cuts:

View attachment 4551717

After a little fine tuning, the coils fit into the cover. I trimmed that down closer to size, plugged the face holes with tape and filled the thing with epoxy:

View attachment 4551718

And that's where I left off. Obviously, it will need to be shaped a bit more, but the end result will be a working pickup in a wood case that was made of scraps.

This is perfect timing, because I just decided to do a wooden pickup cover for one of my ongoing builds as well. May I bombard you with some questions?
-What kind of epoxy did you use for this, and how did you make sure that it didn't come out of the polepice holes?
-what thickness does the top have?
-are you using the original mounting holes, or do you place new ones?

Thanks in advance!
 
- Epoxy was West Systems. I use it all the time, but never tried this before. Hope there's no issues!
- Used masking tape and pressed it into the holes as much as I could. The pole pieces did a pretty good job blocking it, though not perfect.
- Top may only be about 1/8" thick. I was winging this and basically used the router table and pattern bit to get it as close as I could.
- Mounting holes are gonna be completely different places.

IMG_1078.jpg

(lots of cleanup needed, I know)

All of that said, I'd certainly like to suggest how I'd do this better next time:
1) Use silicone sealant around the pole holes. Run a thin bead around all of them, then press the pickup coils in place. Alternatively, could have used hot glue to seal around coils, then filled with epoxy. Either would have prevented the leaks.
2) Use some copper tape and an extra wire to ground all of the pole pieces. Tape the backs, solder a wire to the tape, then fill with epoxy to make sure it stays put.
I've experienced a few pickups in my day that buzz when you contact the poles and that was fixed by grounding them. If I'd been thinking before I poured the epoxy, I'd have done that.

As for balance, this is an Explorer shaped instrument...

b1c0275896692b2f2f9c64a62546930e--thor-music-instruments.jpg


It's gonna balance for crap, no matter what. So I'll likely put the strap button near the neck screws to aid in pulling the headstock up.
Or, I could make the back part heftier than needed to counterbalance.
It's gonna be interesting, no matter what.

That bass had quite a bit of residue of something on it when I bought it.
4YMgGH.gif
 
Small observation, enlightened by @smart51 noting some neck dive (despite what looks to be an upper horn out to about 11-1/2 fret if I counted right) that you might want to make that bit overly long and then test your way back to find a nice balance length to cut it off to, given the lack of body mass on the balance.

Not sure how that plays with the body shape you are skeletally representing, but playability-wise it makes sense to me.
The strap sits on the button over the 12th fret on Essence. I didn't really want to make it longer. Because the whole thing is so light, the weight of your right arm counteracts the neck dive. It doesn't take much to hold it straight. I do now want to make a headless one though.
 
What tuners are you using? This design looks like it could use some lightweight ones, for example the Schaller BM Lights. Combined with a proper body wood could with some weight, it can make a huge difference.
 
- As for balance, this is an Explorer shaped instrument...

It's gonna balance for crap, no matter what. So I'll likely put the strap button near the neck screws to aid in pulling the headstock up.

Much to my surprise, this bass didn't neck dive. That huge back wing is a great counterweight. The strap pin is in the center front part of the neck plate. Just get yourself some lead to insert in a strategic location of the frame.
 
  • Like
Reactions: rojo412
Managed to get the pickup and template organized, so all I'll need to do for that is final sanding and finish work.

IMG_1081.jpg


As for doing bent plywood... that is 100% new to me. So I'm experimenting (unless it works, then that means this was totally intended for this). This is 3 strips of walnut with 2 strips of maple veneer inbetween. I used extra wood to press on the front and back, more clamps, and of course, over-bent it to compensate for what will likely be sprung back slightly.

IMG_1080.jpg


Doesn't need to be drastic, just a slight curve. I'll handle the rest.
 
The ZZB Dlx was a short scale bass?? I never realized that. My ZZ guitars have all been full scale. Only one left that I have is a set neck Custom Z. I had a black/white ZZ Custom (ACT3 trem) and a white w/blood Dlx.
Maybe just triple check the scale before bolting down the bridge!


Edit: Researched, and they did make 32” scale ZZB’s. I guess a 34” scale would have had too much neck dive?
 
Last edited:
Nothing like the feeling of "Wow... that worked better than I thought!"

IMG_1082.jpg


There doesn't seem to be much "flexback" of this. I unclamped it and it stayed like this. I don't think it will be too extreme for my needs, which is good, but it's less subtle than the original shape, that's for sure. I'll have to experiment more with stuff like this in the future, it's not unpleasant to do at all.

I also glued up more scrap ash to the center blank, for more room to shape with.

IMG_1084.jpg


And I also did some shaping of the pickup top to make it feel nicer and forgot to post that.

IMG_1083.jpg


This bass will truly end up as a case of "why did I do this?" at the end, as it's certainly not my normal routine on... well, anything bass build related for me. But so far, it's been a blast. Feels like an art project more than anything else.
 
Where DOES the time go?!?!
Made some moves on this one the past couple days (being snowed in helps).

Pickup can be mounted:

IMG_1189.jpg

IMG_1190.jpg


Control cavity is mostly functional and shaped to the body:

IMG_1191.jpg

IMG_1192.jpg


And yes, a magnet helps keep it closed:
IMG_1193.jpg


Control cavity will function well:

IMG_1196.jpg


Glued up the back part:

IMG_1197.jpg


Mounted the bridge. But since medium scale strings are scarce, I'm doing string thru body on this so sets of long scale will work just fine:

IMG_1207.jpg

IMG_1209.jpg


And got the neck mountable:
IMG_1208.jpg


This has definitely become more "art project" than anything specific. It will work too, don't get me wrong. But it's coming together in a way where I don't really see the end result yet. I'm winging a lot of the stuff happening. The overall idea though is going to be a no-nonsense player with some oddball looks.

And yeah, it's also kind of a "practice run" as I feel the need to do something like this to get the "yips" out before tackling some other projects (which have me flustered in various ways, so this is the "build therapy").

The next step is likely going to be some major power carving for all the contours, I just need to be prepared for the dust storm.