
If you've ever had a bass that just wouldn't look right with an extra control hole and you've been dying to try a new preamp that had one too many knobs, you've probably thought to look up a concentric pot.
The trouble with that plan is the fact that some preamps have a different value of pot for each of the two controls. I built a StingRay 2-band clone (thanks to the efforts of UncleFluffy doing the board layout and getting a run made up) and put it in an external box but decided that I wanted one in my Warmoth P for good. Rather than carry around a box, I figured I'd just install one.
There are only 3 holes in the pickguard, one is the jack and one is the concentric volumes (V-V-T config) for the PJ config on that bass. The last hole, and the reason I'm here, is the passive tone pot. I have three options. (I'm wiring the preamp at full volume and using the stacked knobs I already have)
1. Drill for a side jack and just install the 2-band in the tone and jack holes.
2. Drill another hole in the pickguard (thanks mikezimmerman).
3. Find a concentric pot for the treb/bass of the 2-band.
On the StingRay 2-band, the treble control is a reverse log 1Mohm pot and the bass control is a log 100Kohm pot. Good luck finding that mix on a concentric pot without having to find 1000 other people with the same issue or... not?
This does NOT work with all types/brands of pots, but there are quite a few that it does work just fine with (this one happens to be an Alpha build up, but CTS pots are usually easier to do this with its just harder to find some of these crazy values in a CTS pot). This is also not something to be undertaken lightly. Its a fairly hard thing to do right. If you screw up, its your fault

Things required:
2 individual pots of the correct value (same manufacturer/series/model).
1 concentric pot of any value as long as its the same manufacturer/series/model as the 2 above.
Drill with 5/16 or 3/8 drill bit.
Very small flat blade screwdriver for prying up the crimp tabs.
A small pair of short needle nose pliers to reapply crimping force to crimp tabs.
I've only included reassembly photos, you should be able to get an idea how this came apart from the reassembly of it.
Step 1: Getting the new wafers
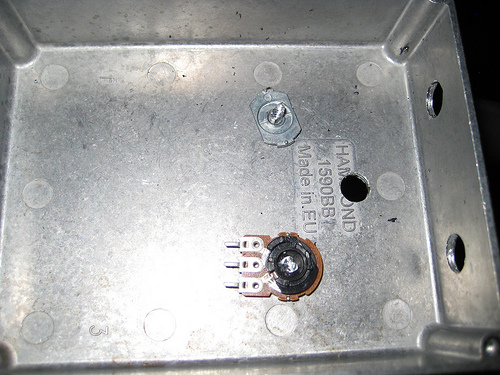
Some pots are easy. Others, like these alpha pots, are stamped onto the control stem and require careful drilling to free the wafer.
The case in the picture is an old stomp project that is now being used as a jig to hold the pots for drilling. I highly recommend something metal for this so you don't drill through your hand.
It is critical that all the pots used, both the individual and the concentric are from the same manufacturer AND series/model.
I forgot to mention that some pots are constructed in such a way that you can saw off the top of the pot (just go through the threaded part) and you can free the wafer that way..
Be VERY sure not to touch the side of the wafers that have the resistive material on them. If you do, your pot will be scratchy in no time...
Step 2a: Assembly
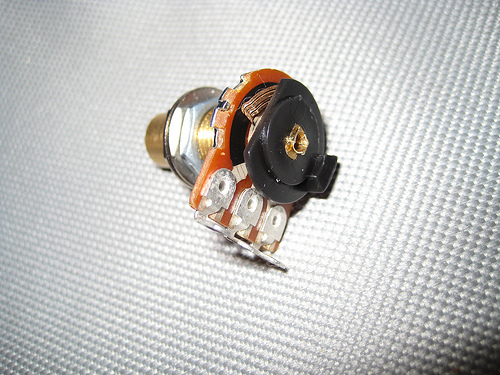
After disassembling the new target concentric pot you can start to reassemble your frankenpot.
There was a tiny bit of drilling required to get this spindle free, but since its all held together with clips, you're not going to need any crazy MacGyver-skills with a small spring to keep things in their place.
Basically you just take the old wafer out, and put the new one in. Remember that the outer ring on the knob side is the pot wafer closest to the knobs.
Just make sure that all of the wipers fall within the right areas and adjust any that don't. You have about .1mm max of wiggle room here. There is also an inner track with 1-2 wipers as well so check down in there too.
YES I kow there is a hair in the pot in the picture, I removed it way later when I checked these pictures!
Step 2b: Put the clip on
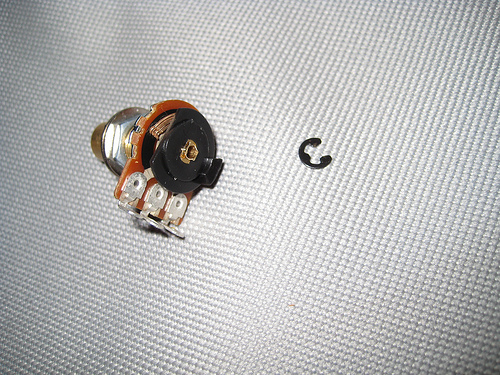
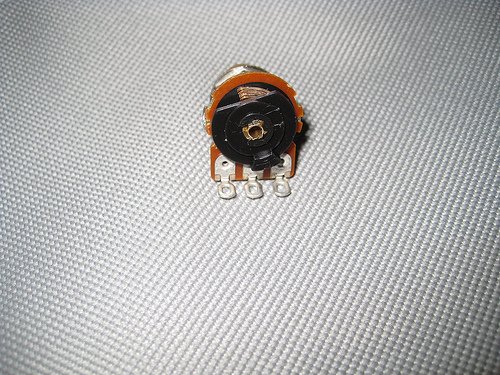
Step 2c: Put the center shaft clip on
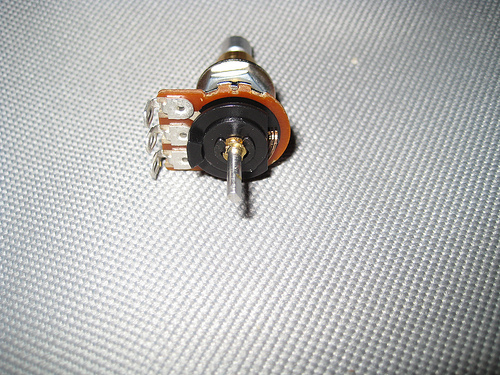
Put the inner shaft through and place its clip on the shaft. Its really hard to see small here so take a good look in the large size picture. Its a small brass clip.
Step 3: Replace the inner cover
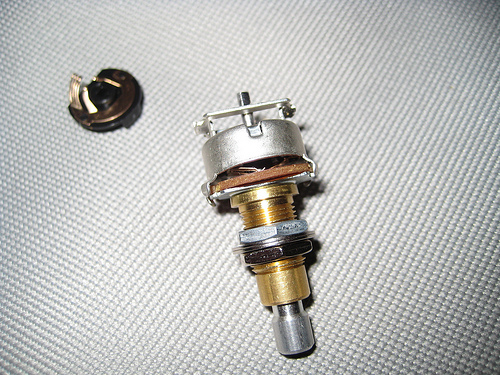
Replace the cover of the first pot level. You want to try and get your tabs to look like they did before you pried them up. Make sure things are tight and don't wiggle at all.

Step 4: Repeat with next level

There is a 50/50 chance that this one won't require a clip, depending on the manufacturer. Then crimp the cover for this one, just like the last one.
You can also install this wafer 180 degrees out to make soldering easier later (these Alpha pots are symetric). Its completely up to you.
Step 5: Done! (and test!!)
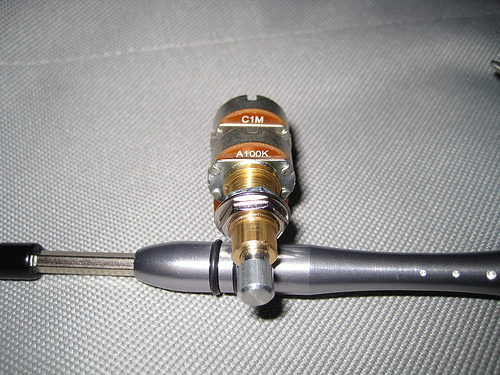
Once you're done crimping you'll want to break out your ohm meter and check your work. The outer two lugs should read the value of the wafer and both the outer two lugs, when read from the middle (wiper) lug, should read the position of the wiper.
Then install just like you would a regular pot.
Instead of paying a ton of money for a single custom pot (or buying a few hundred/thousand just to get one), you can make your own as needed. Total cost for this pot, including shipping: $16. The concentric was purchased on ebay (was a A250Kohm), the two others were bought from Mouser. Don't forget to save the wafers taken from the concentric pot, you never know if you might need one in the future
The trouble with that plan is the fact that some preamps have a different value of pot for each of the two controls. I built a StingRay 2-band clone (thanks to the efforts of UncleFluffy doing the board layout and getting a run made up) and put it in an external box but decided that I wanted one in my Warmoth P for good. Rather than carry around a box, I figured I'd just install one.
There are only 3 holes in the pickguard, one is the jack and one is the concentric volumes (V-V-T config) for the PJ config on that bass. The last hole, and the reason I'm here, is the passive tone pot. I have three options. (I'm wiring the preamp at full volume and using the stacked knobs I already have)
1. Drill for a side jack and just install the 2-band in the tone and jack holes.
2. Drill another hole in the pickguard (thanks mikezimmerman).
3. Find a concentric pot for the treb/bass of the 2-band.
On the StingRay 2-band, the treble control is a reverse log 1Mohm pot and the bass control is a log 100Kohm pot. Good luck finding that mix on a concentric pot without having to find 1000 other people with the same issue
or... not?This does NOT work with all types/brands of pots, but there are quite a few that it does work just fine with (this one happens to be an Alpha build up, but CTS pots are usually easier to do this with its just harder to find some of these crazy values in a CTS pot). This is also not something to be undertaken lightly. Its a fairly hard thing to do right. If you screw up, its your fault
Things required:
2 individual pots of the correct value (same manufacturer/series/model).
1 concentric pot of any value as long as its the same manufacturer/series/model as the 2 above.
Drill with 5/16 or 3/8 drill bit.
Very small flat blade screwdriver for prying up the crimp tabs.
A small pair of short needle nose pliers to reapply crimping force to crimp tabs.
I've only included reassembly photos, you should be able to get an idea how this came apart from the reassembly of it.
Step 1: Getting the new wafers
Some pots are easy. Others, like these alpha pots, are stamped onto the control stem and require careful drilling to free the wafer.
The case in the picture is an old stomp project that is now being used as a jig to hold the pots for drilling. I highly recommend something metal for this so you don't drill through your hand.
It is critical that all the pots used, both the individual and the concentric are from the same manufacturer AND series/model.
I forgot to mention that some pots are constructed in such a way that you can saw off the top of the pot (just go through the threaded part) and you can free the wafer that way..
Be VERY sure not to touch the side of the wafers that have the resistive material on them. If you do, your pot will be scratchy in no time...
Step 2a: Assembly
After disassembling the new target concentric pot you can start to reassemble your frankenpot.
There was a tiny bit of drilling required to get this spindle free, but since its all held together with clips, you're not going to need any crazy MacGyver-skills with a small spring to keep things in their place.
Basically you just take the old wafer out, and put the new one in. Remember that the outer ring on the knob side is the pot wafer closest to the knobs.
Just make sure that all of the wipers fall within the right areas and adjust any that don't. You have about .1mm max of wiggle room here. There is also an inner track with 1-2 wipers as well so check down in there too.
YES I kow there is a hair in the pot in the picture, I removed it way later when I checked these pictures!
Step 2b: Put the clip on
Step 2c: Put the center shaft clip on
Put the inner shaft through and place its clip on the shaft. Its really hard to see small here so take a good look in the large size picture. Its a small brass clip.
Step 3: Replace the inner cover
Replace the cover of the first pot level. You want to try and get your tabs to look like they did before you pried them up. Make sure things are tight and don't wiggle at all.
Step 4: Repeat with next level
There is a 50/50 chance that this one won't require a clip, depending on the manufacturer. Then crimp the cover for this one, just like the last one.
You can also install this wafer 180 degrees out to make soldering easier later (these Alpha pots are symetric). Its completely up to you.
Step 5: Done! (and test!!)
Once you're done crimping you'll want to break out your ohm meter and check your work. The outer two lugs should read the value of the wafer and both the outer two lugs, when read from the middle (wiper) lug, should read the position of the wiper.
Then install just like you would a regular pot.
Instead of paying a ton of money for a single custom pot (or buying a few hundred/thousand just to get one), you can make your own as needed. Total cost for this pot, including shipping: $16. The concentric was purchased on ebay (was a A250Kohm), the two others were bought from Mouser. Don't forget to save the wafers taken from the concentric pot, you never know if you might need one in the future