
Hello all,
I was asked to put together a how-to on how I did the crushed turquoise inlay on my latest build, so here's a quick and dirty one.
First off, I've got a few more "burst" eyelets that need to be filled:

Here's the standard equipment that I use:

The bag on the left has my general stock of crushed turquoise, and the bag on the right has the reclaimed larger pieces that are sifted from the finer during the process. I use both thin and medium viscosity CA glues, depending on the size of the holes to fill (thin for smaller because there isn't much gap to fill, thicker for the larger holes). I use the paint can opener for a scoop, as it gives an almost perfect amount for my purposes. The re-bent paperclip in the foreground is for manipulating the pooling glue and the glue-wet turquoise when it lifts from the hole and needs to be pushed back in. Not pictured is a folded paper towel.
Here I've got myself a single scoop of the crushed stone:

Running a finger lightly across the top, back and forth will begin to pull the larger pieces out of the mix. For the small holes I'm filling, they aren't needed and I will move them off to the side for putting in the other bag.

Here the pieces are mostly seperated:

Once separated, I'll "pull" the pile of finer turquoise dust over the holes and rub it across the holes a few times until they are filled with finer particles.

I put about two drops on this spot and spread it (when necessary) with the paperclip. When using the thin CA glue, I soak up the excess with a paper towel (quickly).

I took the opportunity to do a few touch-ups. With this walnut burl, every time I do a thorough sanding I find a few more burst eyelets.



I let it sit for about an hour or so. With the thin glue it's probably not necessary to wait this long, but I was hungry and had to feed our dogs as well.
Once I was back in, everything was nice and dry with absolutely no tack. With the medium viscosity CA glue this probably wouldn't be the case. When using the medium, I usually let it pool and set up over night to be absolutely certain. Here I've begun sanding with 320 grit due to the fact that it's thin CA glue, the holes are small so the amount of turquoise was small, and the excess CA was soaked up before drying.

Sanded:





The largest holes took some extra effort. Titebond had leeched into and filled some of them while gluing the top onto the core, and so a Dremel with the finest engraving bit I could find was used to remove the glue and open them up. This was time-consuming because I wanted to make sure the holes maintained a natural look and not a drilled-out look. I also undercut the holes when possible to create something of a dovetail so that the turquoise (once glued) would form a wedge and hold in place.
Then, with these big holes, I filled them and pressed/packed them. Once leveled, I put a bit extra on top to create small heaps. After this I dripped on the medium viscosity CA (the yellow bottle). One problem is that due to the thickness each drop formed a droplet on the pile and then tried to roll off. I put more on, it began to pool and then to soak in. I'd drip a bit more on until no more was soaking in and it was forming a small puddle. I soaked up excess from the edges of the puddle with a paper towel, but stayed clear of the turquoise. It's better to have a little extra CA there then to start pulling turquoise out of the puddle.
After setting up over night, I busted out the random orbital sander and the 150 grit and went to town. It took some effort to sand down the turquoise/CA pile back to level with the top, but it worked and came out nice. I did the first round (all the large/medium holes and most of the small ones) early on in the process of the build...after the shape was cut out but before any real contouring had taken place. You don't have to do this, but I suggest doing the filling long before your doing your final contouring and finish sanding. The extensive sanding required to re-level the fills can end up changing the landscape of the surface a bit. The pics above were very minor fills, so I had no problem going in and doing them using thin CA and fine grit paper. The bass is about 30 minutes of 400 grit away from the first layer of finish...
I was asked to put together a how-to on how I did the crushed turquoise inlay on my latest build, so here's a quick and dirty one.
First off, I've got a few more "burst" eyelets that need to be filled:
Here's the standard equipment that I use:
The bag on the left has my general stock of crushed turquoise, and the bag on the right has the reclaimed larger pieces that are sifted from the finer during the process. I use both thin and medium viscosity CA glues, depending on the size of the holes to fill (thin for smaller because there isn't much gap to fill, thicker for the larger holes). I use the paint can opener for a scoop, as it gives an almost perfect amount for my purposes. The re-bent paperclip in the foreground is for manipulating the pooling glue and the glue-wet turquoise when it lifts from the hole and needs to be pushed back in. Not pictured is a folded paper towel.
Here I've got myself a single scoop of the crushed stone:
Running a finger lightly across the top, back and forth will begin to pull the larger pieces out of the mix. For the small holes I'm filling, they aren't needed and I will move them off to the side for putting in the other bag.
Here the pieces are mostly seperated:
Once separated, I'll "pull" the pile of finer turquoise dust over the holes and rub it across the holes a few times until they are filled with finer particles.
I put about two drops on this spot and spread it (when necessary) with the paperclip. When using the thin CA glue, I soak up the excess with a paper towel (quickly).
I took the opportunity to do a few touch-ups. With this walnut burl, every time I do a thorough sanding I find a few more burst eyelets.
I let it sit for about an hour or so. With the thin glue it's probably not necessary to wait this long, but I was hungry and had to feed our dogs as well.
Once I was back in, everything was nice and dry with absolutely no tack. With the medium viscosity CA glue this probably wouldn't be the case. When using the medium, I usually let it pool and set up over night to be absolutely certain. Here I've begun sanding with 320 grit due to the fact that it's thin CA glue, the holes are small so the amount of turquoise was small, and the excess CA was soaked up before drying.
Sanded:
The largest holes took some extra effort. Titebond had leeched into and filled some of them while gluing the top onto the core, and so a Dremel with the finest engraving bit I could find was used to remove the glue and open them up. This was time-consuming because I wanted to make sure the holes maintained a natural look and not a drilled-out look. I also undercut the holes when possible to create something of a dovetail so that the turquoise (once glued) would form a wedge and hold in place.
Then, with these big holes, I filled them and pressed/packed them. Once leveled, I put a bit extra on top to create small heaps. After this I dripped on the medium viscosity CA (the yellow bottle). One problem is that due to the thickness each drop formed a droplet on the pile and then tried to roll off. I put more on, it began to pool and then to soak in. I'd drip a bit more on until no more was soaking in and it was forming a small puddle. I soaked up excess from the edges of the puddle with a paper towel, but stayed clear of the turquoise. It's better to have a little extra CA there then to start pulling turquoise out of the puddle.
After setting up over night, I busted out the random orbital sander and the 150 grit and went to town. It took some effort to sand down the turquoise/CA pile back to level with the top, but it worked and came out nice. I did the first round (all the large/medium holes and most of the small ones) early on in the process of the build...after the shape was cut out but before any real contouring had taken place. You don't have to do this, but I suggest doing the filling long before your doing your final contouring and finish sanding. The extensive sanding required to re-level the fills can end up changing the landscape of the surface a bit. The pics above were very minor fills, so I had no problem going in and doing them using thin CA and fine grit paper. The bass is about 30 minutes of 400 grit away from the first layer of finish...
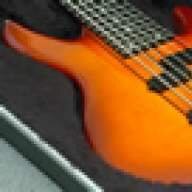




 . The top should look very close to that color, as it's very similar to the result I get with Naptha. I'm using a clear oil/urethane blend and the test scraps when very deep and rich while the lighter parts went red and golden.
 . Actually, I figured I'd take my time with it until I've got my technique fully down, after which I'd definitely go for the accelerator. As for the un-stick-it, agreed. I was very thorough inspecting the bass to make sure there weren't any unexpected pore terminations. Still, when working with CA it's a solid policy.