• TalkBass has been independent since 1998. Add your voice.
    Create a free account to reply to discussions, view embedded media, and browse with fewer display ads.
    Join freeLog in
    Want zero display ads or expanded classifieds tools? Compare plans.

Sponsored Lowe Custom Guitars Shop Notes

BTL

Commercial Seller
Commercial User
Sep 26, 2006
3,674
1
6,861
Odessa, FL
Disclosures
Brad Lowe, Lowe Custom Guitars
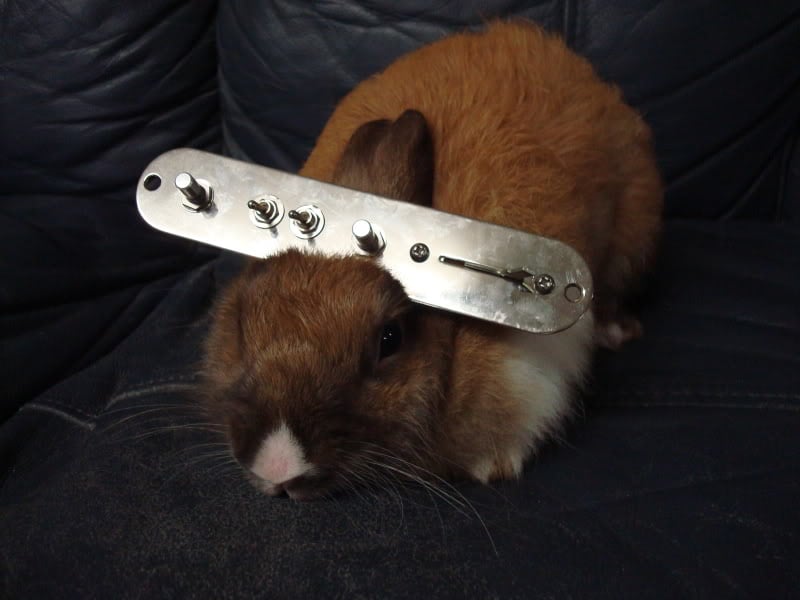
Going forward, here is where I'll blog about projects, power tools, bacon, bunnies, and other occurrences in the shop.

First, may I introduce Roxy, the shop bunny:

DSC00826.jpg
 
Last edited:
Subscribed. Roxy and Safety Cat should party some time.
bacon and bunnies.. mmmmm
Sounds like food network :p
Subscribed, This thread shows promise!
Thanks guys!

So, it seem like I’ve spent the last three summers “getting ready to get ready”, but it seems to be time well spent.

This summer I’ve focused on building up tools and inventory and getting organized.

Since I haven’t seen too much on the topic and I think I have a little different approach, I thought I’d share how I’ve built my workbenches and storage shelves.

I’m a one-man show and I HATE moving heavy stuff around, so I decided everything heavy or awkward in the shop will be on wheels.

I’m not 100% there yet, but I’m getting close.

For my benches and shelves I start with ½” or thicker ply cut into 2’ x 4’ pieces.

Next, I notch the corners of the lower shelves out like this:

DSC00829.jpg


I then frame the shelves out with 1” x 3” pine for rigidity:

DSC00794.jpg


…and add a center stringer for shelves that will carry very heavy loads:

DSC00797.jpg


Then I lay the shelves out on 2” x 4” support rails:

DSC00795.jpg


…make sure they’re square and tack them up with 2” finishing brads:

DSC00800.jpg


After that I glue and nail 2” x 4” shim blocks to the support legs and screw the 1” x 3” frames to the blocks.

DSC00807.jpg


DSC00808.jpg


Next I add locking casters to the base:

DSC00809.jpg


…stand ‘em up and paint ‘em black:

DSC00811.jpg


The finished product, in a variety of forms:

DSC00830.jpg


DSC00831.jpg


DSC00832.jpg
 
Thanks!

I've spent a fair bit of time arranging things so I can complete each step of a build quickly and with as little mess as possible.

Today I got back to guitar work. I have quite a few guitars I’d like to finish in 2011, and this will be the beginning of the push to get that done.

I had a few necks to reshape…I don’t want to infringe on anyone’s Trademarks.

My templates are already made, so I trace the outline in pencil on the back of the stock necks and head to the scroll saw:

DSC00837.jpg


DSC00838.jpg


Cut as close to the line as possible to minimize the potential for tear-out at the router:

DSC00841.jpg


DSC00842.jpg


DSC00843.jpg


The less mess you make, the less you need to clean up, so I use a shop-vac and auto switch to suck the dust away from all cutting and sanding tools:

DSC00839.jpg


DSC00840.jpg


A Skil Xbench insert adapted to my sanding station:

DSC00848.jpg
 
Finished with the rough cut, so on to the router with a ½” template bit. By the way, I’ve never seen anyone use a dowel instead of double sided tape for templates, so I’m pretty pleased with that little trick:

DSC00844.jpg


DSC00845.jpg


DSC00846.jpg


Finished with that, and over to the spindle sander to smooth things out and fix up the back contours:

DSC00847.jpg


After final hand work at the sanding station:

DSC00849.jpg


Setting up to mount the bridge:

DSC00850.jpg


The first two ChromaSonic basses mocked up:

DSC00853.jpg


DSC00854.jpg


DSC00855.jpg


DSC00856.jpg
 
It's the angle, and the pickup isn't actually attached.

Those are Fralin split singles, essentially a P pickup under an HB cover.

The outer poles are towards the upper right and lower left corners, so the rotation actually optimizes the string location over the pole.

It's the bass version of the Twangmaster:

Invalid Link Removed

By the way, your avatar scares me. :(
 
It's the angle, and the pickup isn't actually attached.

Those are Fralin split singles, essentially a P pickup under an HB cover.

The outer poles are towards the upper right and lower left corners, so the rotation actually optimizes the string location over the pole.

It's the bass version of the Twangmaster:

Invalid Link Removed

By the way, your avatar scares me. :(

That makes a bit more sense with the pickup.

You don't like Sweet Link Removed?
 
That makes a bit more sense with the pickup.

You don't like Sweet Link Removed?
I'll have to look him up...:help:
Epic bass time! :D
:D
MOAR BUNNY!
Maybe later today...:D

Up until now I have considered myself to be a “finisher” exclusively.

I have only done a little bit of woodworking, soldering and setup, and I consider my skills in each of these areas to be “workmanlike”…not bad, respectable in fact, but not great.

My goal over the next 12 months is to gain proficiency in these areas.

It’s not rocket science by any means, but it requires a great deal of attention and SKILL to be able to get things done QUICKLY.

Since I don’t have a great attention span, I need to be both good AND quick to enjoy this kind of work.

Today I’m building templates to build my first body from scratch.

The donor bass is a short scale Yammy with a whammy…a fun little project.

Step one is to get my new (to me) bandsaw set up.

I got the new poly-u tires and 1/8” blade installed, and I’m ready to go:

DSC00858.jpg


DSC00857.jpg


Next, I trace the outline of the donor body on to some ¾” MDF:


DSC00859.jpg


DSC00860.jpg


Cut it out on the bandsaw:

DSC00861.jpg


…and sand it smooth on the spindle sander:

DSC00862.jpg


Next I need to measure out the pickup, neck and whammy cavity:

DSC00863.jpg


DSC00864.jpg


DSC00865.jpg


DSC00867.jpg


DSC00868.jpg


...transfer the measurements onto an MDF blank and use a straightedge to project the outside edges of the neck out through the body:

DSC00869.jpg


…and locate the bits and pieces appropriately relative to the centerline and neck lines:

DSC00870.jpg


Then I cut it all out on the jigsaw:

DSC00871.jpg


Everything fits perfectly:

DSC00874.jpg


DSC00872.jpg


Did I ever mention that I have a 15” x 8/4” x 6’ hunk of sapele sitting in the shop?

DSC00873.jpg


bananadevil.gif
 
OK, time to make a body from the templates. First, I’ll cut off a hunk of sapele:

DSC00875.jpg


DSC00876.jpg


Then trace the outline of the template on to the blank:

DSC00878.jpg


Cut it out on the bandsaw, close to the line, nice and clean:

DSC00879.jpg


DSC00880.jpg


Next, I attach the template to the blank and head over to the router table. I use ¾” flush trim bit with a 2” cutting edge. This is the scary part…that bit can do some damage very quickly:

DSC00881.jpg


DSC00883.jpg


DSC00884.jpg
 
  • Like
Reactions: Salicete
Over to the sander to smooth out the edges and back to the router table to round off the back edge:

DSC00885.jpg


DSC00886.jpg


DSC00887.jpg


Next, I get ready to rout out the neck, pickup and tremolo cavities. I mark out the location and then hog out the bulk of the wood with a forstner bit:

DSC00888.jpg


DSC00889.jpg


Set the depth, and go to it:

DSC00890.jpg


DSC00892.jpg


I forgot to snap pics cleaning up the pockets with the router, so here it is mocked up…everything fits:

DSC00895.jpg