
• TalkBass has been independent since 1998. Add your voice.
    Create a free account to reply to discussions, view embedded media, and browse with fewer display ads.
    Join freeLog in
    Want zero display ads or expanded classifieds tools? Compare plans.

3 Wood Challenge: headless, multiscale, fretless 4 with Aussie timbers

This is a build I semi started last year, however, a stack of things have changed in the mean time. Here are the new specs.

Multi-scale fretless 4 string.
34" E string (with 38" D extension)
33" A string
32" D string
31" G string

I'd have like to go 34-30, but the slant at the nut would have been too big for intonating the F on the E string, or the PU wouldn't have coped with the spread. I'm using a MM PU. I know the magnetic field is plenty wide enough.
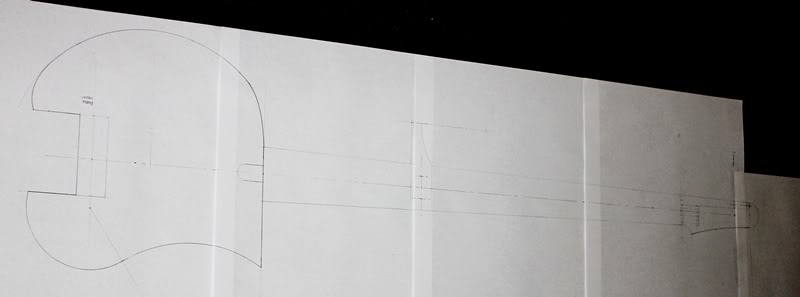
balance001.jpg

plan.

I'll be using these three Aussie timbers;
Silky Oak - Top slab
Victorian Ash - Neck and back slab
Jarrah - fingerboard, nut and bridge

The 3 timber thing is gonna make fret markers interesting... :hmm:
 
Sorry they're crappy pics. The bridge is at about 65deg.

bridgeangle.jpg


The nut is a lot less acute... on purpose.

nutangle.jpg


On a fretless you don't have some of the ease of use of a fretted bass, so I elected to soak up some of the difference in scales in the area you most use the bass. Fret 7 is straight across the board if I remember correctly.

But please tell me if it's still way too crazy. I still have time to change it now. :hyper:

re the D extension, yes, it's like a Kubicki.
 
That's odd looking - that'san awfully minor angle at the nut for a fan with the 7th fret perpendicular. My guess is either maybe the fourth or fifth is perpendicular, or the seventh is perpendicular but you have very wide string spacing at the nut.
 
Do you plat with your thumb on the pickup, and are you slanting the pickup to make it respond "normally"? If so, and if your angle at the bridge is too severe, then you need to check whether as your hand reaches across the strings, you end up plucking right on the G string bridge.
 
A heap done so far today...

Neck joint glued with basic shape.
IMAG0850.jpg


Neck pocket finalized. Gee I hate routers some times.
IMAG0851.jpg


Neck semi shaped and read for fingerboard (almost forgot to glue it on) with trussrod in.
IMAG0852.jpg


Board clamped up.
IMAG0853.jpg


I have to say, I've made a few silly mistakes today coz I was in a bit of a rush. With a public holiday today I want to get as much done as possible. Just got to make sure I don't stuff it by rushing and having to redo this and that. I've already forgotten to do one thing. Oh well. Have to do it another way later...
 
Board attached and headstock shaped...
IMAG0860.jpg


IMAG0856.jpg

The sides of the neck have also been planed down as straight as possible. I might be getting the hang of planing I think. Although I have to say, because of the narrowing of the neck, you can only plane one direction and it makes doing the body end of the neck pretty hard. I ended up using a rasp, coarse sanding block and then coming back to it with the plane. Next I have to get the body insert the right width. This too is proving to be a pain to plane down... and my disc/belt sander is in a bad spot for long bits. Kicking my self there... :/

Cavity done.
IMAG0858.jpg

I know lots of people like to do recessed covers, but I don't. :lol:

IMAG0857.jpg

Also redid all the roundover after planing more than 10mm off the thickness of the body. This thing SUPER light now. :)
 
Last update for today.

Neck in... almost.
IMAG0861.jpg


IMAG0862.jpg

As you can see it's about 1mm proud. For some reason it just won't seat properly. I'll have to figure out why later. But let me just say this. It's hell tight. I mean super snug. So there should be lots of transmission to the body.

IMAG0863.jpg

A quick pic of the backangle built in. I think it's going to make a lot of difference to comfort. Have to sort where the strap hanger will go now, but that depends on the weight of the bridge/tuners and pickup.
 
Neck joint all done today. Still snug, but it actually fits properly now which was nice. So I got started on the nut and fingerboard.

IMAG0866.jpg

The nut is angled enough to keep up with the multiscale, but enough so I can reach the first fret on the E string.

Then I started marking out for the fret markers...
IMAG0867.jpg

Frets 1-4

IMAG0868.jpg

Frets 5 and upwards. Fret 5 is straight across the neck.

IMAG0869.jpg

Top end of the fingerboard. As it stands it's 24fret (markers).

To my eyes it doesn't look too extreme at this point. Course I'm always an optimist. :/

