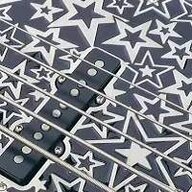
Thanks! Yes, I'll be using a product called Waterlox. It's a resin modified tung oil that dries hard.All the more impressive then that you made them so uniform and cut the recesses so cleanly. I tried REALLY hard to keep them as tight as possible, but still ended up with some tiny gaps around the stars I had to fill with fretboard sanding dust and CA glue. Never done this kind of inlay before. Have you decided on a finish yet? I'm going to give the Tru-Oil one more week to cure, so three weeks total, and then give it a very light wetsand, just to get the dust motes and some very minor laps marks out. Not sure where I should start grit-wise? Maybe 1000 grit? I can always go coarser if i seems to be taking to long, or gums up. I'll rub it out by hand using McGuiars compoind and swirl remover. I won't touch the carvings though.

Enjoy the benefits of a premium membership!
Upgrade Account
-
TalkBass has been independent since 1998. Add your voice.
Create a free account to reply to discussions, view embedded media, and browse with fewer display ads.
Join free Log in
Want zero display ads or expanded classifieds tools? Compare plans.
You are using an out of date browser. It may not display this or other websites correctly.
You should upgrade or use an alternative browser.
You should upgrade or use an alternative browser.
4004 LK Rickenbacker Build
- Thread starter Lickmaker
- Start date
More options
Who Replied?

Are you planning on wetsanding or buffing it out to high gloss, or leaving it satin. I was a little torn, but I'm going for gloss, figuring normal wear and tear on an oil finish will knock it back to satin anyway.
I like the satin waterlox...I use it a lot. No wetsanding. You apply it and then buff it off with a soft clean cloth before it dries. 2 or 3 coats and the wood just glows.Are you planning on wetsanding or buffing it out to high gloss, or leaving it satin. I was a little torn, but I'm going for gloss, figuring normal wear and tear on an oil finish will knock it back to satin anyway.
Some more progress.
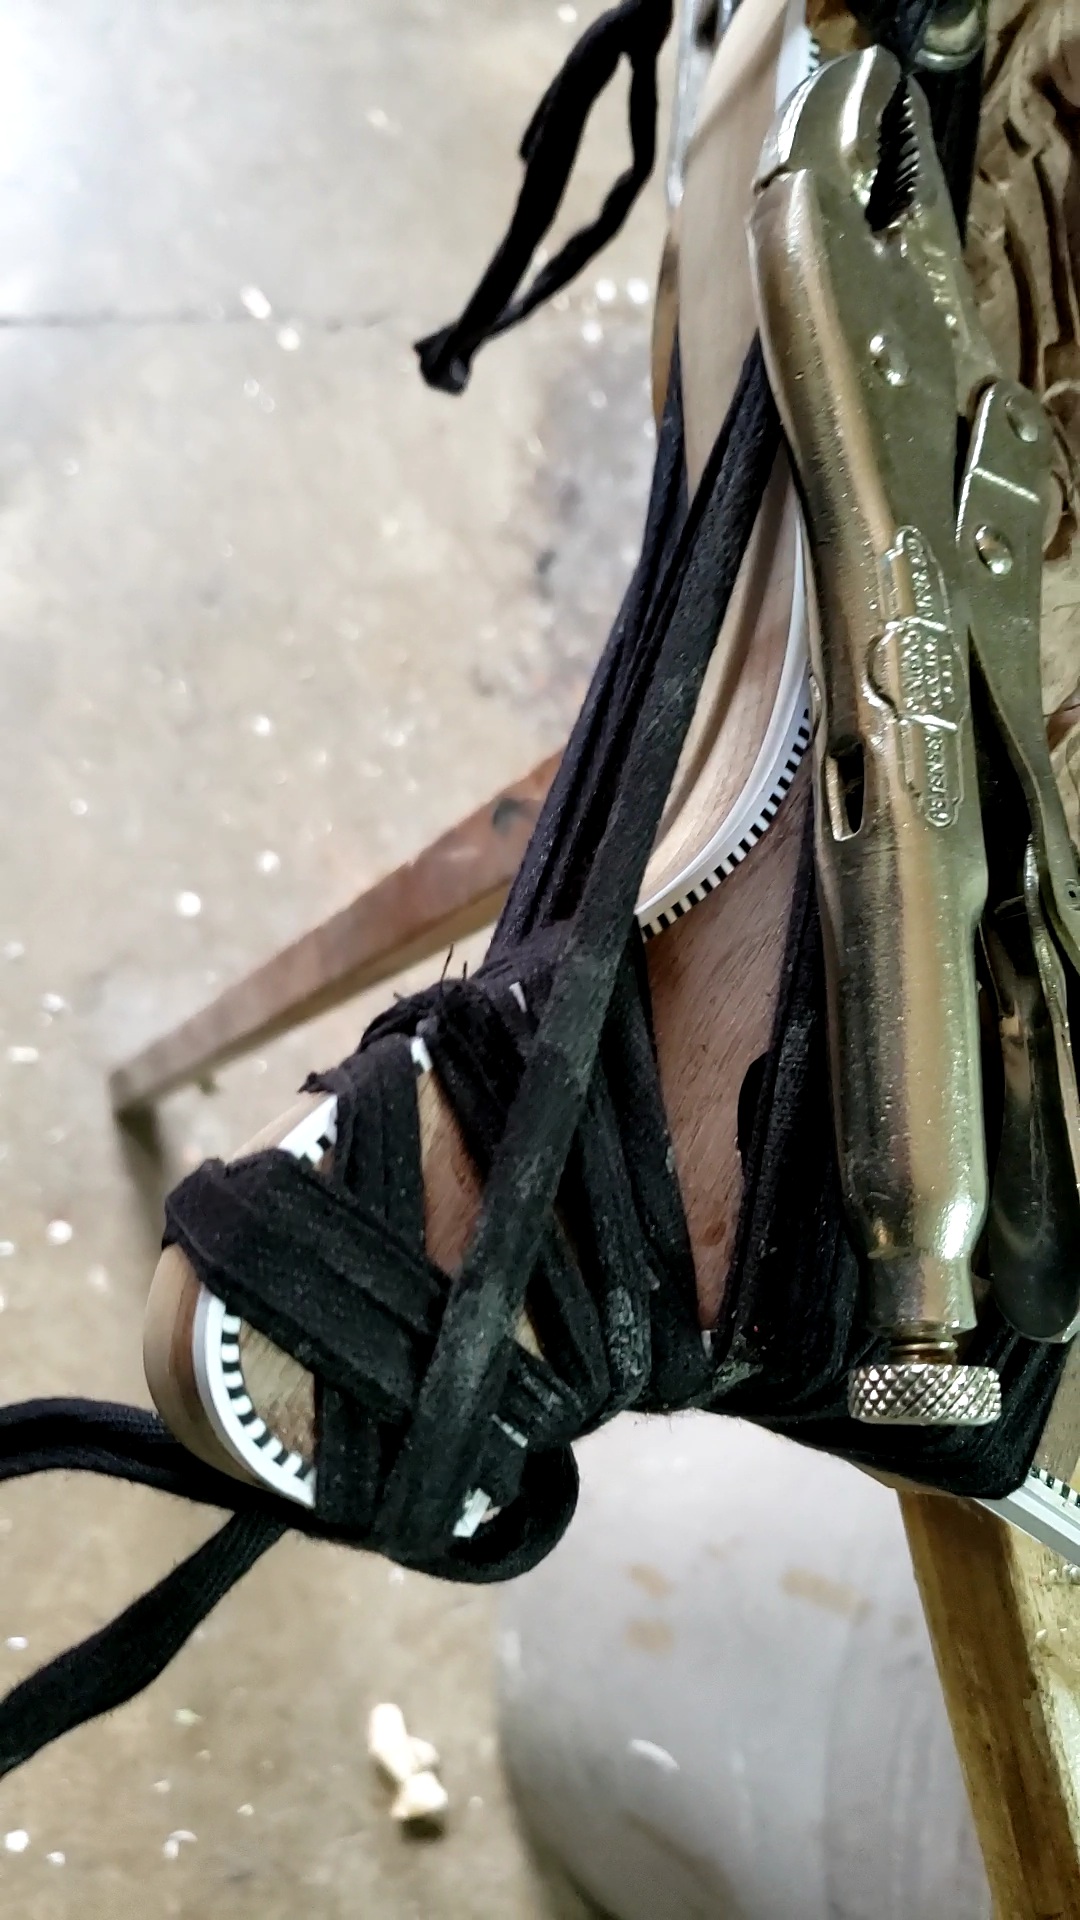
Gluing the inside horn curve binding in. A heat gun is used to bend the binding for the tight bends around the horns. I use cotton twill tape pulled tight to hold the binding. The mitered joints at the horn tip are cut to fit perfectly....an acetone based glue is used.....this fuses that mitre together so the joint becomes invisible.
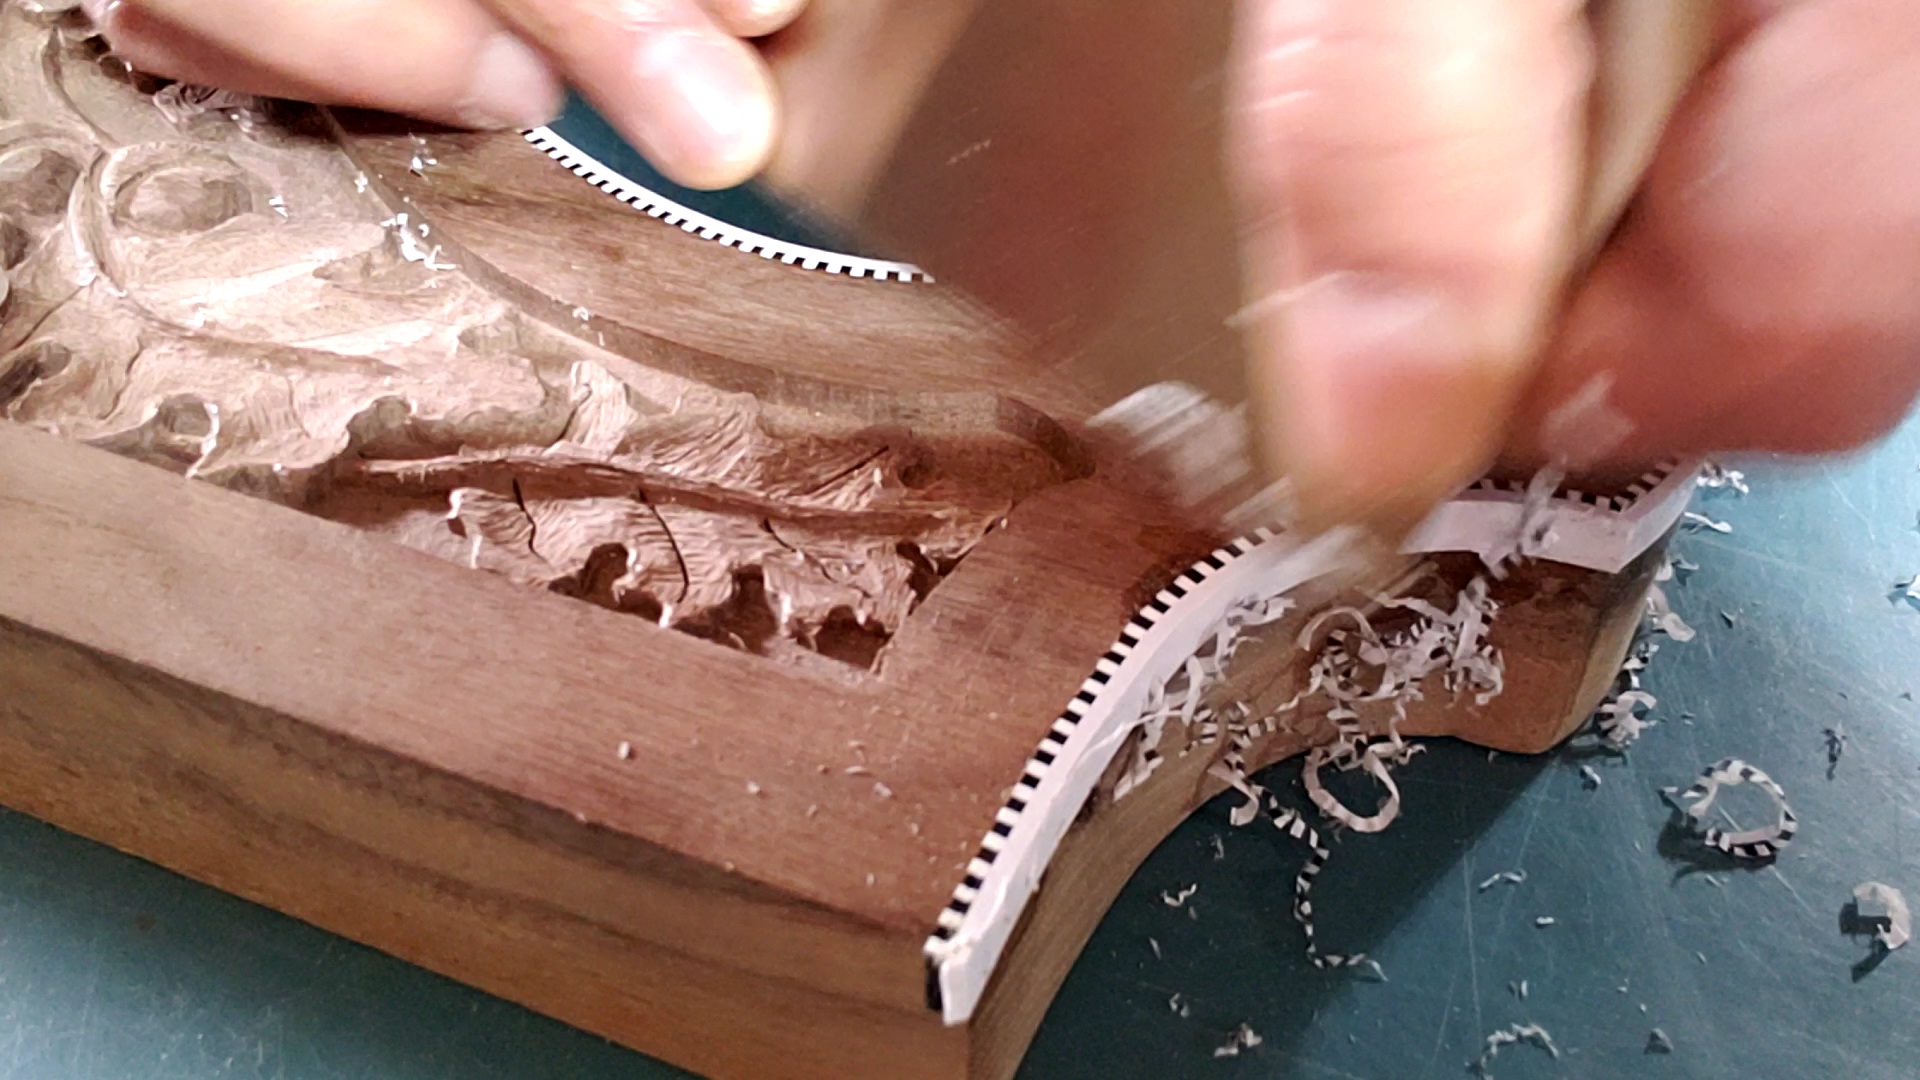
Scraping the binding.
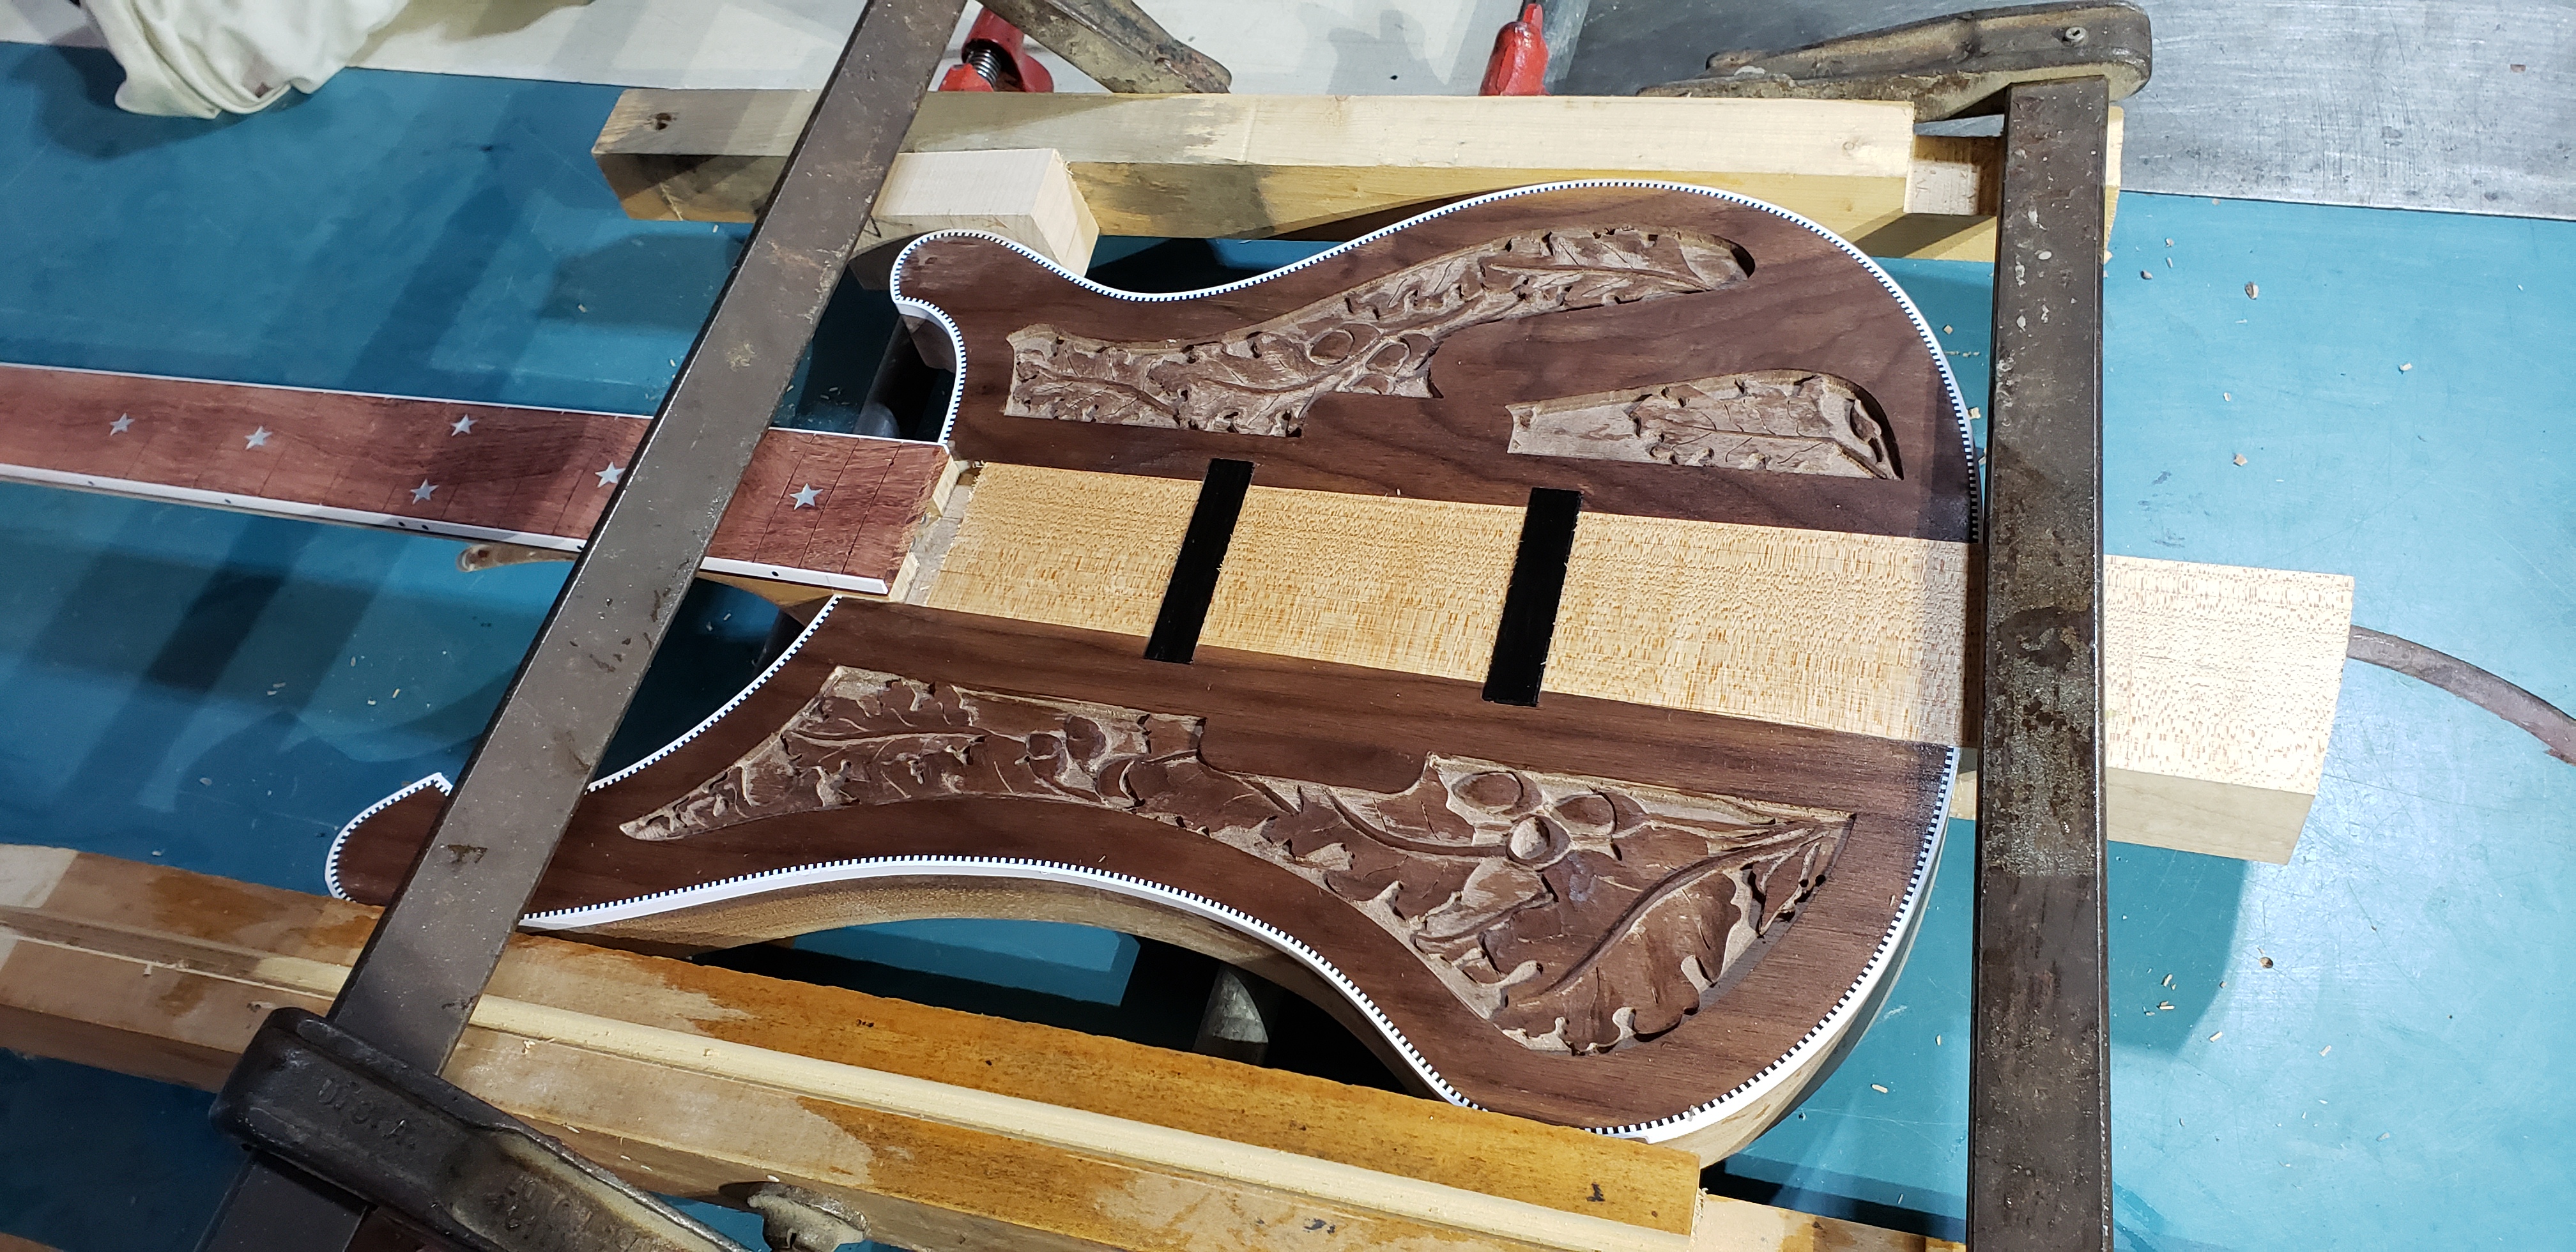
Wings glued on. The black pieces are 1/4" thick ebony scraps.....old fretboard blank cutoffs. I made little pocket routes for them right at the locations of where the pickup cavities will be. I did this as a way of keying the location of the wings on the neck shaft. Because the neck shaft is wedge shaped, I had to devise a stop method so the wings wouldn't "squirt" out when glue and clamping pressure was applied.
I will route right through the ebony scraps later when routing the pickup cavities.
Gluing the inside horn curve binding in. A heat gun is used to bend the binding for the tight bends around the horns. I use cotton twill tape pulled tight to hold the binding. The mitered joints at the horn tip are cut to fit perfectly....an acetone based glue is used.....this fuses that mitre together so the joint becomes invisible.
Scraping the binding.
Wings glued on. The black pieces are 1/4" thick ebony scraps.....old fretboard blank cutoffs. I made little pocket routes for them right at the locations of where the pickup cavities will be. I did this as a way of keying the location of the wings on the neck shaft. Because the neck shaft is wedge shaped, I had to devise a stop method so the wings wouldn't "squirt" out when glue and clamping pressure was applied.
I will route right through the ebony scraps later when routing the pickup cavities.
Attachments

Fascinating to watch you solve the same construction problems, but with different methods. I pinned the body wings to the neck beam with dowels, which also worked. I’ve been doing that on all my neck through builds. Looks like you are moving pretty quick, mine will be a full two year build by the time I’m done.
Just realized that I didn't get any pics of the neck carve. I guess I was probably too in the zone of that job to stop and think about pics.
I love the hand tool neck carve process. I use micrplanes. A flat one, curved and a round one. The best tool I've ever used for neck carves....especially in the transitions at either end of the neck carve.
I love the hand tool neck carve process. I use micrplanes. A flat one, curved and a round one. The best tool I've ever used for neck carves....especially in the transitions at either end of the neck carve.
I stole my son's Shinto rasp for this one. The coarse side is pretty much useless, but the Fine side does a decent job. I had to use my crappy half-round files for the neck and heel transitions though, then endless sanding. Been eyeing the Microplane (Stewmac?) files for a while, also some similar Iwazaki files. My problem is my inherent cheapskatery, I keep trying to make cheaper options work, usually with less than stellar results, which makes the whole process longer. I use the "facet" method for neck carves, at least it feels like I'm in control, but it's slow.

Microplane sells direct, though they have an atrocious case of "out of stock" on the wood-dorking side (and I don't see the "upgrade" surform replacement blades I think they used to make at all) - you can presumably use the ones they sell "for cheese" on wood, as I seem to recall they made them first for wood and then got "discovered" by the culinary folks.
Lee Valley also sells them if you don't love Stewmac's shipping fees.
Lee Valley also sells them if you don't love Stewmac's shipping fees.
Yeah it's a shame that its difficult to find the woodworking blades from microplane. I called them a couple of years ago because they did even have the one I like listed on their website. But they had them and they were happy to send them to me. The curved one loaded in the hacksaw frame is my favorite for the transition carves. It cuts across hard maple endgrain like cutting cheese. So fast, easily controllable and leaves such a smooth surface....it's amazing.
I had the neck carved from rough stock to finished in an hour.
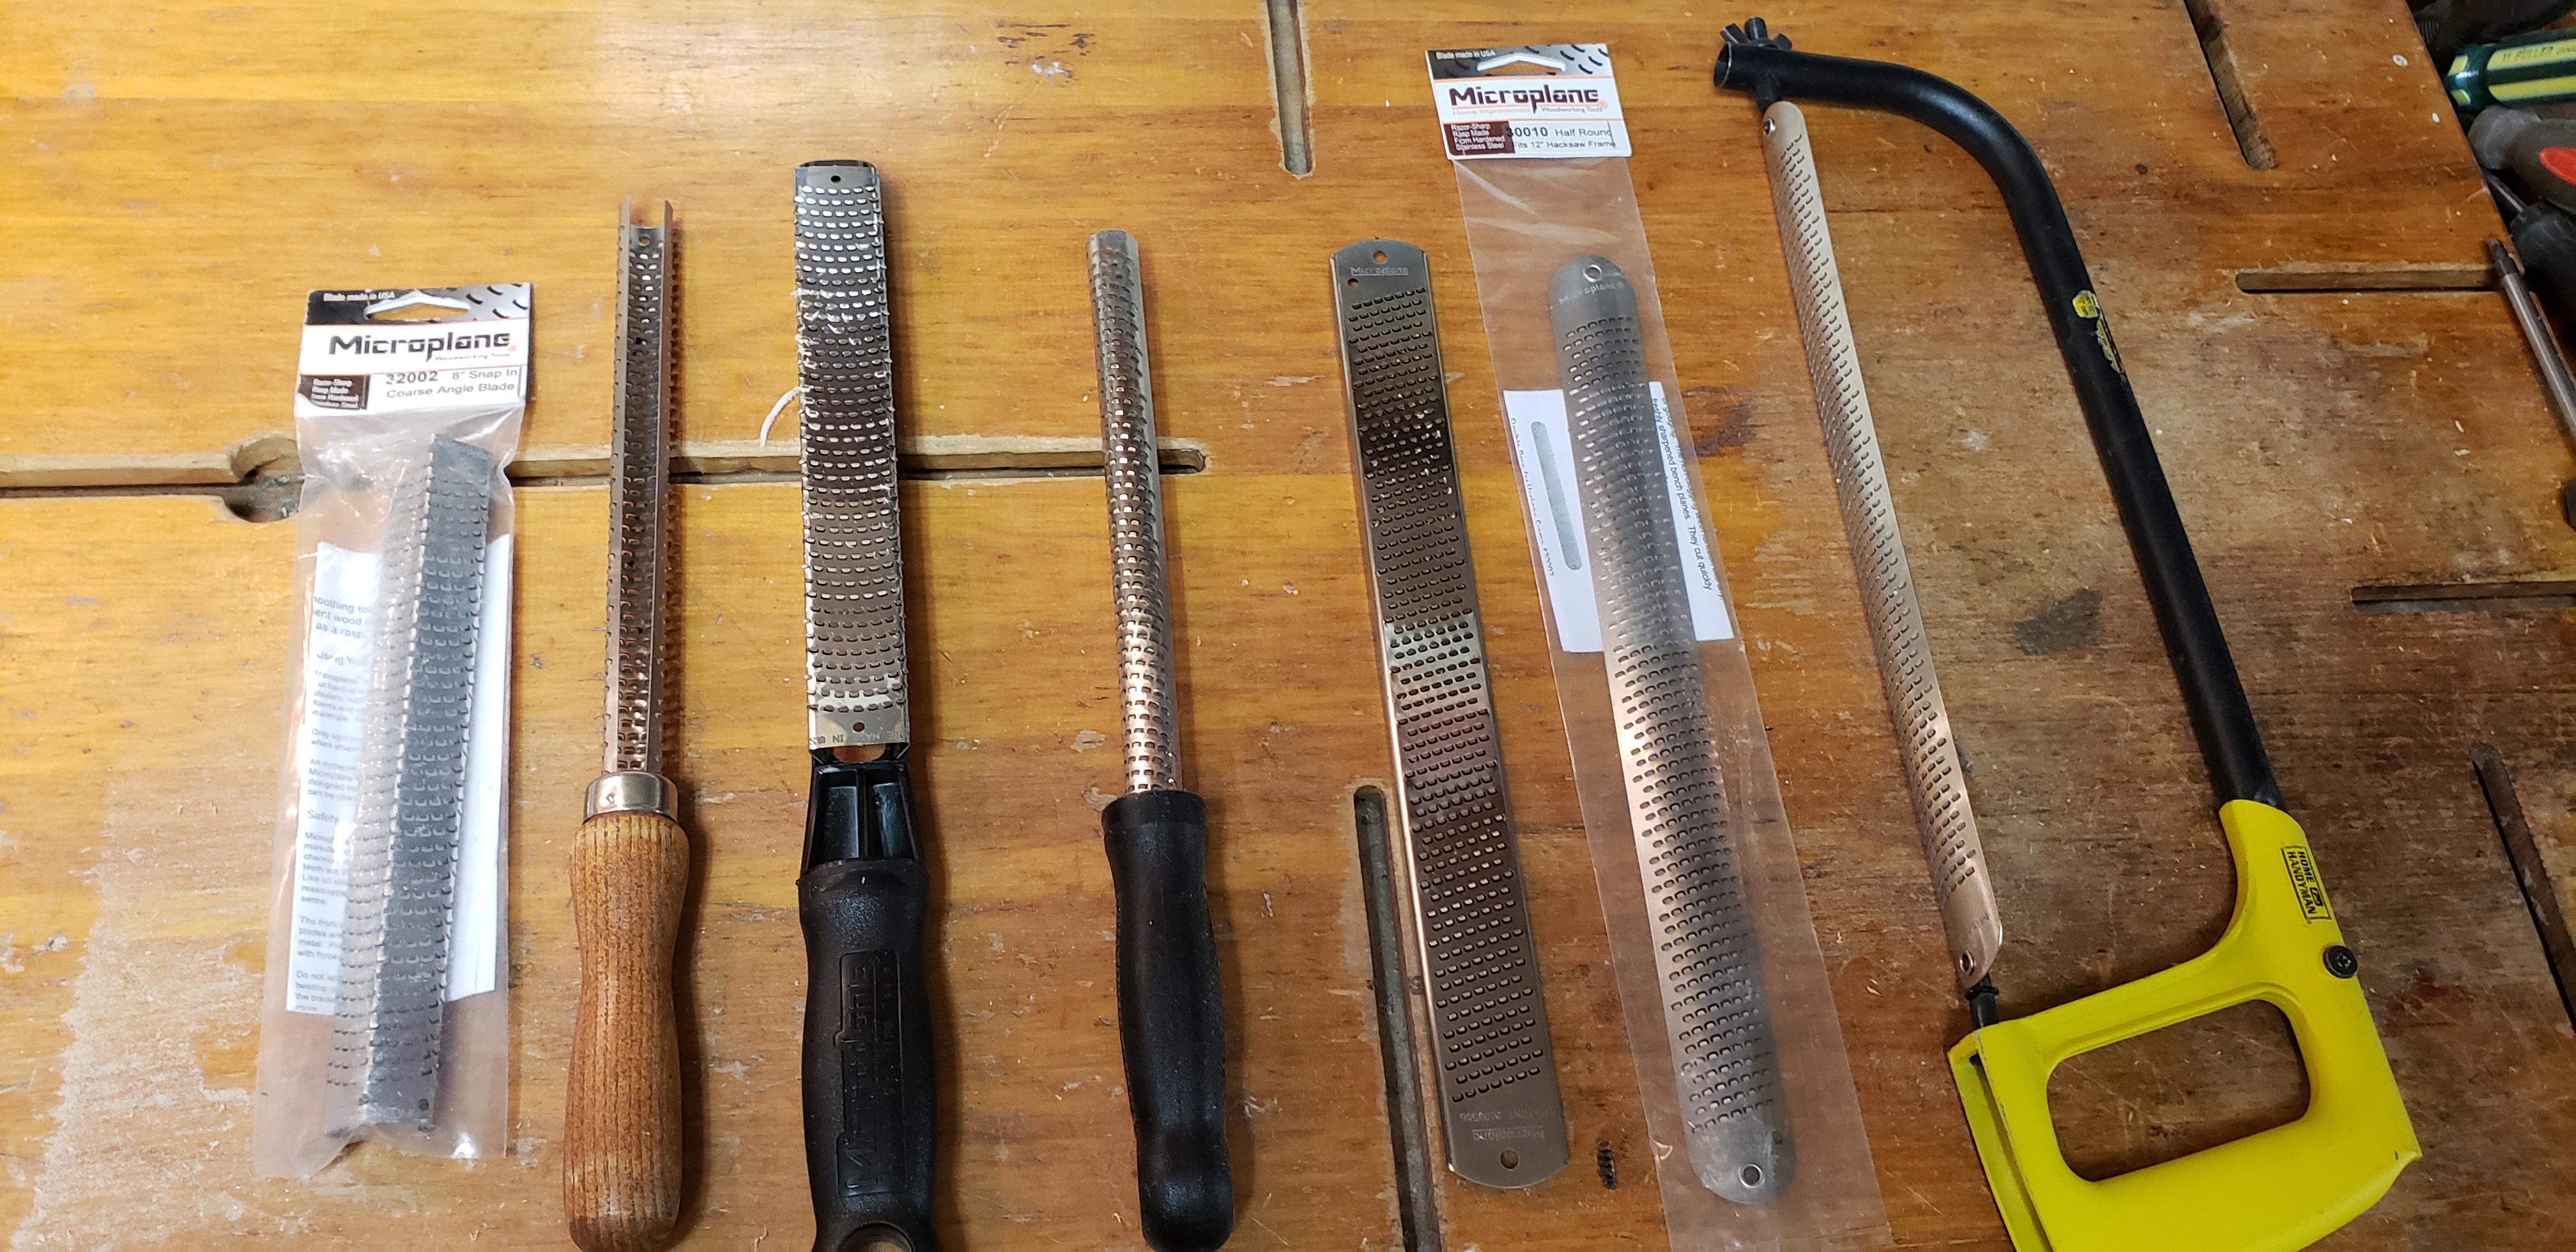
I had the neck carved from rough stock to finished in an hour.
Attachments

Hah! I have one of the flat micro-planes in my knife drawer, my wife bought it for stuff like zesting lemons, didn't know you could use them on wood (she'll shoot me). These "razor Files" on Stewmac get pretty good reviews, but the prices......
Razor Files - StewMac
Been looking at these Iwasaki files too
https://www.amazon.com/Iwasaki-File...prefix=iwazaki+half+round+file,aps,108&sr=8-7
Razor Files - StewMac
Been looking at these Iwasaki files too
https://www.amazon.com/Iwasaki-File...prefix=iwazaki+half+round+file,aps,108&sr=8-7
As an Amazon Associate, TalkBass may receive commissions from qualifying purchases made via links on this site.
Hah! I have one of the flat micro-planes in my knife drawer, my wife bought it for stuff like zesting lemons, didn't know you could use them on wood (she'll shoot me). These "razor Files" on Stewmac get pretty good reviews, but the prices......
Razor Files - StewMac
Been looking at these Iwasaki files too
https://www.amazon.com/Iwasaki-File-150mm-Half-Round-Fine/dp/B003EU3JAQ/ref=sr_1_7?crid=2HP1CM0OCF2JC&dib=eyJ2IjoiMSJ9._MHEraSgvND3QgplNmpUr0CuHmqCMkXET10o2VQkQduOKmFiGQoQBkVGoQ6xJDdOGLwFYNF5ZdzbTugKP2IMsDU96FqE-8YZX01D7VCqzFMfjd9shKUGq7df6GJUNIS-2V4cFMd8zt0CD1YYYql0RN843V0YaE4XOkvqIlL8CcmNKUh1u4iU1Ib9lkX6zIiXXvI3lBWdkv1eXIdu5O49RHox_bEIv6o9OK8WJiCostsPn0nFsjlkSQxry5PpOUz4f94dPNx94vrogaC6PswLzoZRIkHA3RYM5GsV_PWKD8w.sx58J-d6_k6YZYE33Hcx_9RmxbJ8a40yTE2ZQm-ZmkA&dib_tag=se&keywords=iwazaki+half+round+files&qid=1718214967&sprefix=iwazaki+half+round+file,aps,108&sr=8-7
The microplanes will smoke them all. The biggest advantage they have over the other razor file types is that they never clog. I discovered them the same way....my wife had one in the kitchen for grating and zesting.
As an Amazon Associate, TalkBass may receive commissions from qualifying purchases made via links on this site.
So , are they all designed to chuck into a hacksaw frame? That has some advantages, being adjustable tension.
Not all....3 different versions. You will see them in the pic I posted. One version is the hacksaw mount. Then there is the black plastic handle....that one has shorter snap-in blades. And 3rd is a handle with blades permanently mounted.So , are they all designed to chuck into a hacksaw frame? That has some advantages, being adjustable tension.

Yeah it's a shame that its difficult to find the woodworking blades from microplane. I called them a couple of years ago because they did even have the one I like listed on their website. But they had them and they were happy to send them to me. The curved one loaded in the hacksaw frame is my favorite for the transition carves. It cuts across hard maple endgrain like cutting cheese. So fast, easily controllable and leaves such a smooth surface....it's amazing.
I had the neck carved from rough stock to finished in an hour.
View attachment 5477042
I did not know the hacksaw frame one existed. Nice. I have one of the interchangeable blade ones. I wanna say 6” although it’s probably well past time for some new blades.

I have a microplane that I pull out and try every once in a while, and think "this thing doesn't do s***." I must have a dud.
The hacksaw version seems like the most practical, those blades are really thin metal, and easily “kinked”. Seems like the hacksaw frame would allow you to bear down pretty hard without bending the blade.
I have a microplane that I pull out and try every once in a while, and think "this thing doesn't do s***." I must have a dud.
Yes....must be a dud!
The hacksaw version seems like the most practical, those blades are really thin metal, and easily “kinked”. Seems like the hacksaw frame would allow you to bear down pretty hard without bending the blade.
it's funny you say that....because the hacksaw versions are the only ones that are easily kinked. But thats only if you don't install them in a hacksaw frame with tension. The others don't kink at all because they are formed with either folded edges or bent round.
I tried to find out, couldn't find anything. They only made something like 50 of the originals, so finding somebody who owns one is hard. I was origially going to do something simple like neck/bridge-middle/bridge, but ended up doing the 6 position Freeway switch, which has a lot more combinations. It works really well, and they have three different wiring schemes that cover about every combination I can imagine. I went for the one that allowed all three pickups on simulataneously, which as you can imagine, is a very "full" sound! @PaulBoyer literally wrote the Book on this stuff, if he doesn't know, I can't think who would. Maybe PM him?


