• TalkBass has been independent since 1998. Add your voice.
    Create a free account to reply to discussions, view embedded media, and browse with fewer display ads.
    Join freeLog in
    Want zero display ads or expanded classifieds tools? Compare plans.

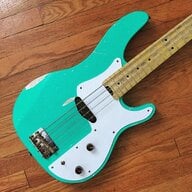
51' P / 68' Telecaster Bass

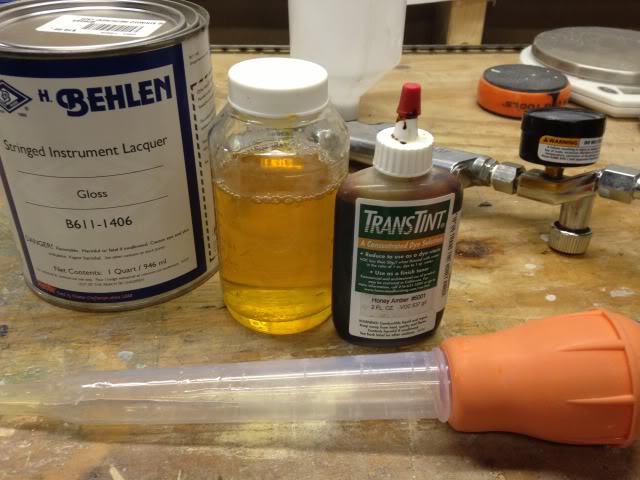
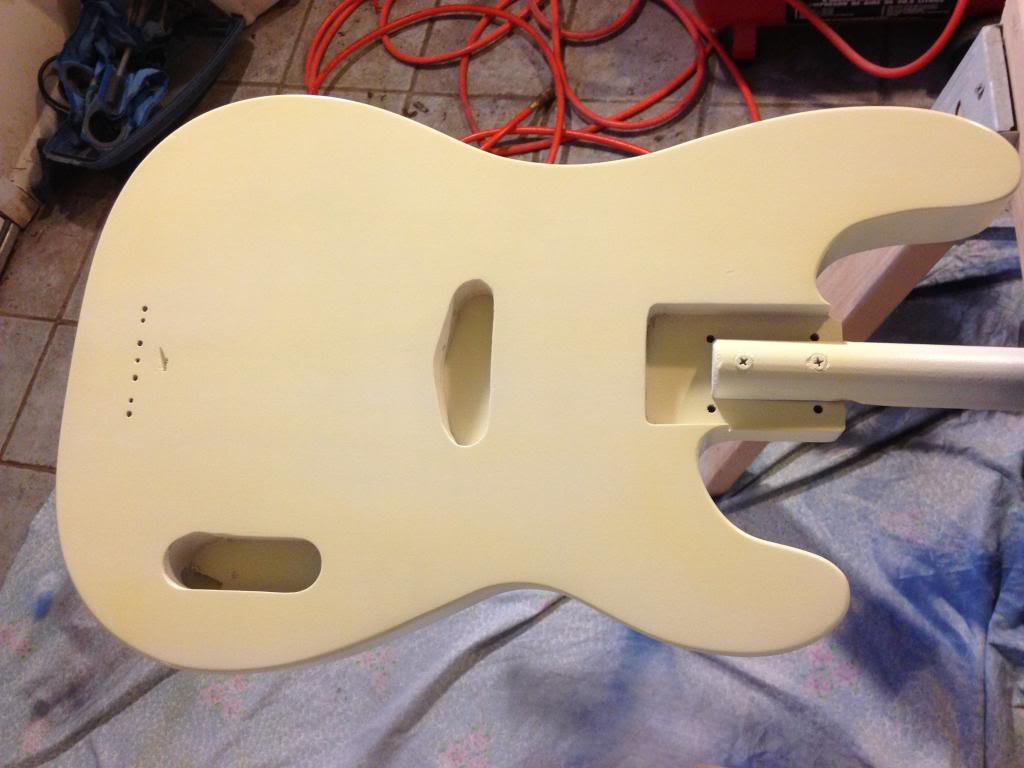
This is how I go from Bright White to Blond.

2oz Thinner, 3oz Lacquer, 1 drop TransTint Honey Amber
null_zps9d0df4ff.jpg


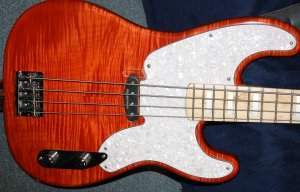
Many thin coats to slowly build up the color until I get this. i am pretty satisfied with the resulting blond.
null_zps4c293d0d.jpg

NICE! :eek:
 
Update. After potting and cooling for a full day the Ohms now read 9.35. Yep, that will do just fine.:hyper:

Well, build another pickup then. I've always wanted to do that & your pics were one of the most thoroughly documented pickup builds that I have seen. Thanks for taking the time to document it so well.
I am so behind on other stuff I am amazed I am getting this much done. I am even "multitasking" when I am posting here. It is amazing what you can get done on a conference call.

why not to do a split coil instead of stacked coil?
where did you get the 0.25" rod magnet?
very cool by the way!
The ¼ Alnico V rod is from Bunting Magnetics, the flatwork is from Mojo, and the wire is from Remington via eBay.

This is supposed to be a replica of a bass that didn't offer a split coil. But mostly, a single sounds very different from a split coil. I am trying to get as close to the sound of a single without the noise of a single.

Leo didn't start splitting the coils until 1957. He did so mostly because he learned the singles were blowing speakers which were under Fender warranty. (circa 1950's Fender amps) He found splitting the coils as a way to "tame" the pickup. Also the split coil offered hum-bucking but he was quiet about that since the humbucker patent was still active.


Well done at every turn, fully subscribed.

Thank you. I really appreciate it.

Awesome job......................

I want one of them pickups:smug::smug:

I can give you the directions to build the pickup-winder if you want. At the risk of upsetting the moderators I certainly could not offer to make one for you.:smug: But lets wait to see how it sounds before we call this one a success.:bassist:

I am very impressed! Great job with the pickup and tutorial!

Thank you. I have learned almost all that I know about building guitars from these types of forums. Documenting a build helps me keep track of everything I have going on. It also lets me give back a tiny bit that I have learned.
 
  • Like
Reactions: okabass
This is supposed to be a replica of a bass that didn't offer a split coil. But mostly, a single sounds very different from a split coil. I am trying to get as close to the sound of a single without the noise of a single.

Leo didn't start splitting the coils until 1957. He did so mostly because he learned the singles were blowing speakers which were under Fender warranty. (circa 1950's Fender amps) He found splitting the coils as a way to "tame" the pickup. Also the split coil offered hum-bucking but he was quiet about that since the humbucker patent was still active.

sorry, I didn't mean the standard split p that we all know. I meant something like Invalid Link Removed.

Invalid Link Removed
 
sorry, I didn't mean the standard split p that we all know. I meant something like Invalid Link Removed.

Invalid Link Removed

I have seen that and its a pretty cool design. But, It is still essentially the same as the traditional split coil. It's just dressed up like a single. Most importantly, it does not allow for the 60/40 split on wraps to achieve more single coil pinch.
 
I had to special order the bits for the tuners. The Bushing takes a 47/64" and the peg takes a 9/16".
null_zps7c82fe77.jpg


The 47/64" plunge is only as deep as the bushing requires. The tip is a 1/2" pilot. Would have been great if it was 9/16".
null_zps134ef63e.jpg


19/16" through the center.
null_zps817ad02d.jpg


And now everything fits.
null_zps2bc9764d.jpg


I have to wait for the lacquer to cure before I can finish the build. The neck will just get a few more coats of Tru-Oil.
 
I would be very interested in that.

My pickup winder is about as easy to make as they come.
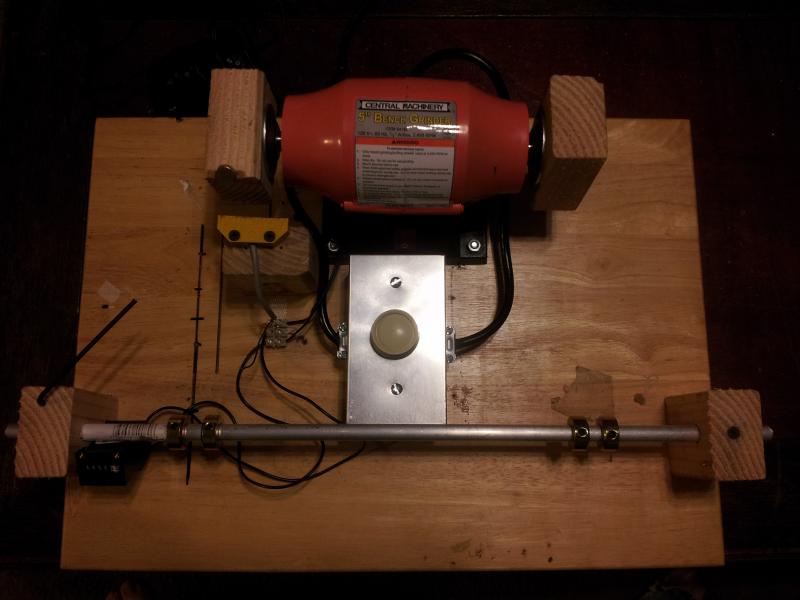
Winder3_zpsbf4e731b.jpg


Its just a cheap bench grinder with blocks mounted to either side. The bobbins attach with two sided tape. It is wired with a dimmer switch for speed control.

The counter is powered by a reed switch I got out of an actuator valve at work, but you can buy them anywhere.
 
  • Like
Reactions: Craig Bloxom
My pickup winder is about as easy to make as they come.

Winder3_zpsbf4e731b.jpg


Its just a cheap bench grinder with blocks mounted to either side. The bobbins attach with two sided tape. It is wired with a dimmer switch for speed control.

The counter is powered by a reed switch I got out of an actuator valve at work, but you can buy them anywhere.

That's cool. It looks simple enough even for a guy like me to build it too. May be a project for the winter months...I've been wanting to learn pickup making and that looks like it might be the trick.
 
That's cool. It looks simple enough even for a guy like me to build it too. May be a project for the winter months...I've been wanting to learn pickup making and that looks like it might be the trick.

Hopkins counter is cool as hell too. I do appreciate utilitarian stuff.

If you want simple, this one made from a Fishing Real is about the simplest;
DSC08484_zps751532a2.jpg


I have also seen several of them made out of Sewing Machines;
setup3.jpg


Pretty much all you need is the ability to spin the bobbin steadily and at a controlable rate of speed. You don't really even "need" a counter. What do you really care if it has 5,000 or 5,287 winds? (I care, but if we are talking low tech.) A counter is a luxury to have since all your really shooting for is a resistance number. You can just check the resistance periodically and stop when you get to what you think is the perfict Ohm reading. I don't want to do that, so I have a counter.

I wanted to build something that was reliable, and at least semi-professional looking. Plus, I had this blown amp siting around looking for a new purpose in life.

The raw parts cost me $64.96., Mostly on eBay and including all shipping;

Power Supply (CFM2005S - 24VDC) 25.31
Red Lion Controls CUB2 Counter 15.98
Motor (DC 24V 0.33A 1000RPM) 12.99
Pulse Width Modulator (Speed Controller) 10.99
Hall Sensor (785-SS451A) 3.68
Power Supply 5VDC (USB Phone Charger) 0.00
Switches 6.00
Magnet 1.00

Pickup%20Counter%20Power%20Supplies.jpg

I could have put it in anything. Maybe you can think of something even cooler. :cool:
If I had it to do over again, I would have mounted the spinning base on the left side so my right hand was free to flip knobs and turn dials without reaching over my work.

884CD335-BEE5-404B-8F9D-3A2EDE9C3BAA-3313-00000205D69B0161.jpg
 
  • Like
Reactions: Craig Bloxom
I love it! Very nicely done, Pat.

I've seen the sewing machines and the fishing reels before and I may go the route of the sewing machine. My wife sews and has a couple of them. Not sure if she would let me use one for this though. ;)

 
I love it! Very nicely done, Pat.

I've seen the sewing machines and the fishing reels before and I may go the route of the sewing machine. My wife sews and has a couple of them. Not sure if she would let me use one for this though. ;)
The upside is that you don't have to ruin the sewing machine. People have set calculators under the needle and lust put a stick in place of the needle that is just long enough to come down and hit the + key. enter +1 and then every time the "needle" plunges down it taps the + key, thus adding 1 every time.

When your done, remove all your stuff and its just a boaring old sewing machine again. :cool:
 
Finished up the neck today. I leveled and crowned the frets. They are nice and shiny. Those are not flat spots, just glair.
null_zps97c0f4c9.jpg


I installed the tuners. I did order flatheads to mount everything. But, I wish I had thought of ordering flat head screws for the tuner pegs. At least everything else will look period correct.
null_zps3d3ad9d9.jpg

null_zps6dbfa226.jpg


Now it's time to wet sand the body. Hours and hours of wet sanding. Bigtime fun!
null_zpse2da084a.jpg
 
  • Like
Reactions: Craig Bloxom