
• TalkBass has been independent since 1998. Add your voice.
    Create a free account to reply to discussions, view embedded media, and browse with fewer display ads.
    Join freeLog in
    Want zero display ads or expanded classifieds tools? Compare plans.

A Silk Purse from a Sow's Ear

Dec 31, 2007
1,725
2,306
Austin, TX
Any of you guys that have built more than a handful of basses know what it feels like to have that body or neck sitting around that you invested time and material into but just didnt turn out the way you wanted. It sits there constantly reminding you that you arent perfect. :crying:

Well frankly I'm not ready to believe that I'm not perfect so I decided to take drastic action. :bassist:

The instrument in question is a neck through 7 string guitar.
Its got a wenge body and neck, 28.5" scale and a beautiful madrone burl top.
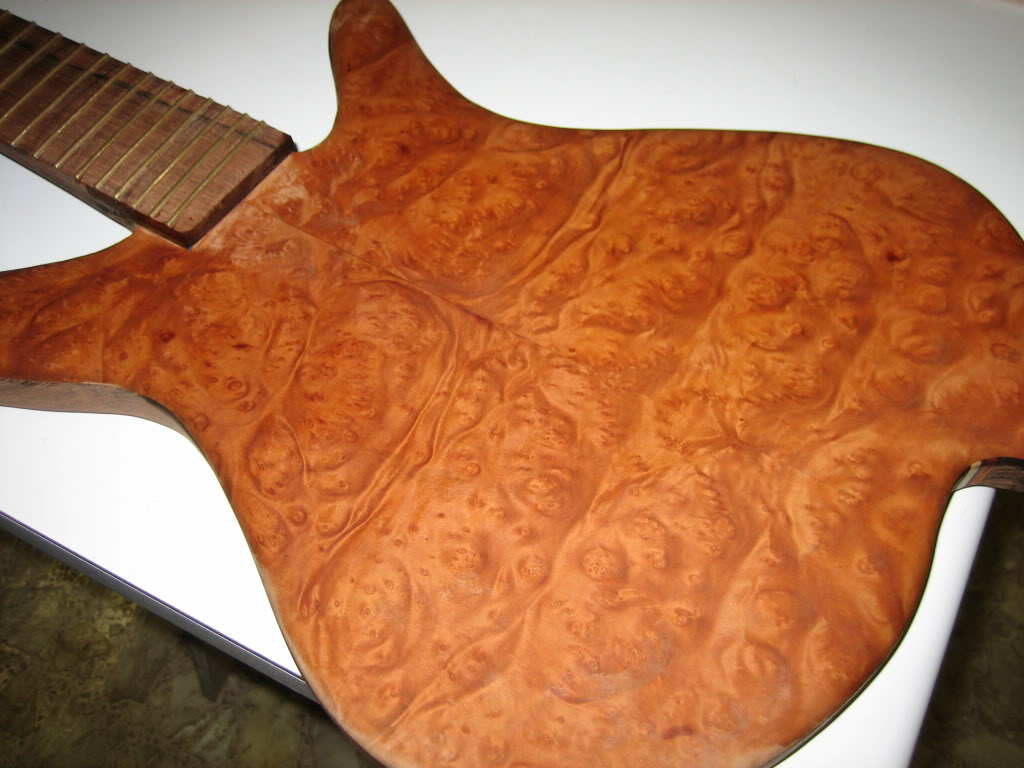

basspics026.jpg


Unfortunately the fingerboard height to the body is off, the shape is'nt quite right, the top seam is not perfect and several other things are off to the point that it just wasnt going to work out as built so it's been sitting in my shop taunting me for 2 years until I finally got tired of it's attitude and decided to show it who's boss.
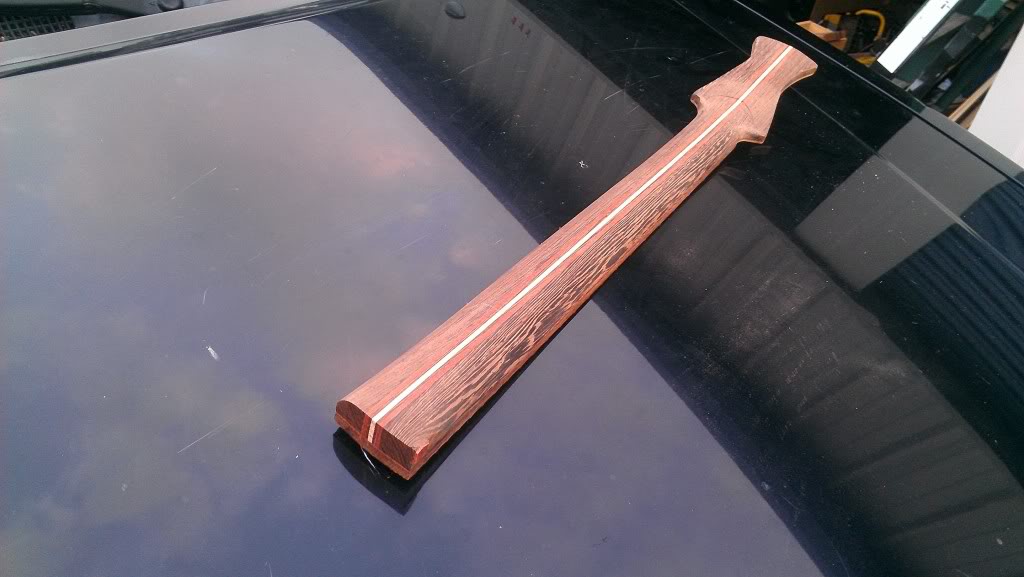
IMAG0184.jpg


Well, a few seconds with bandsaw took care of the attitude problem.:ninja:
I then picked a wenge/maple/bloodwood neck blank that has been sitting around because its just to small and narrow for a 34" 4 string and established a plan.
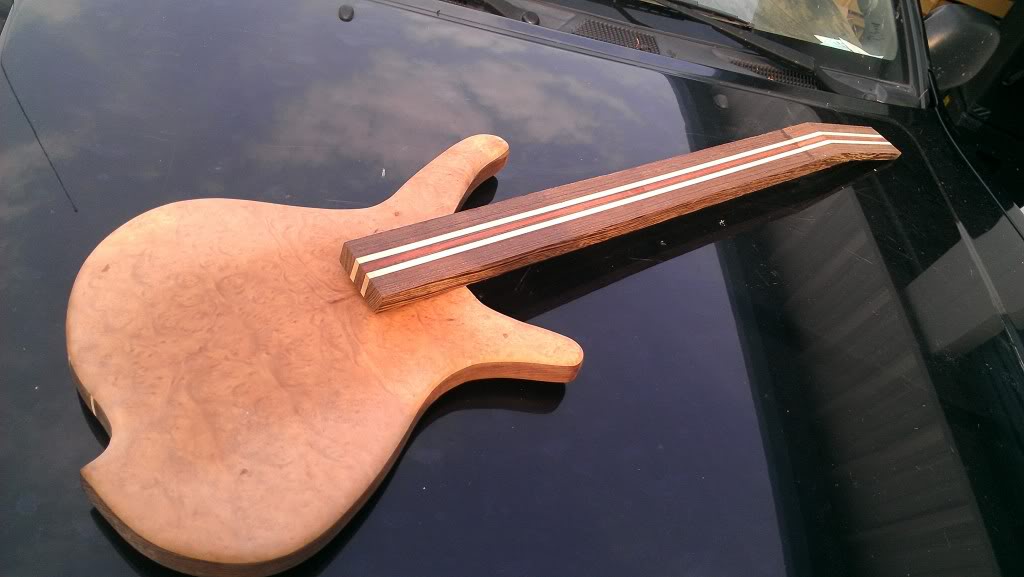
IMAG0074.jpg


The bass will be a 4 string 30" scale with either a bolt on or set neck. First thing to fix is the bad glue line in the madrone top. When I first made it the glue line was fine but I left it in my car on a hot summer day and the top seam split and left a small gap. I sawed the body in half down the seam of the top using the bandsaw and then jointed the 2 sides. I also removed about a half inch of width of the body in the process. With the wenge neck and body I want this bass to be as light and streamlined as I can. Once jointed the body is glued back together.
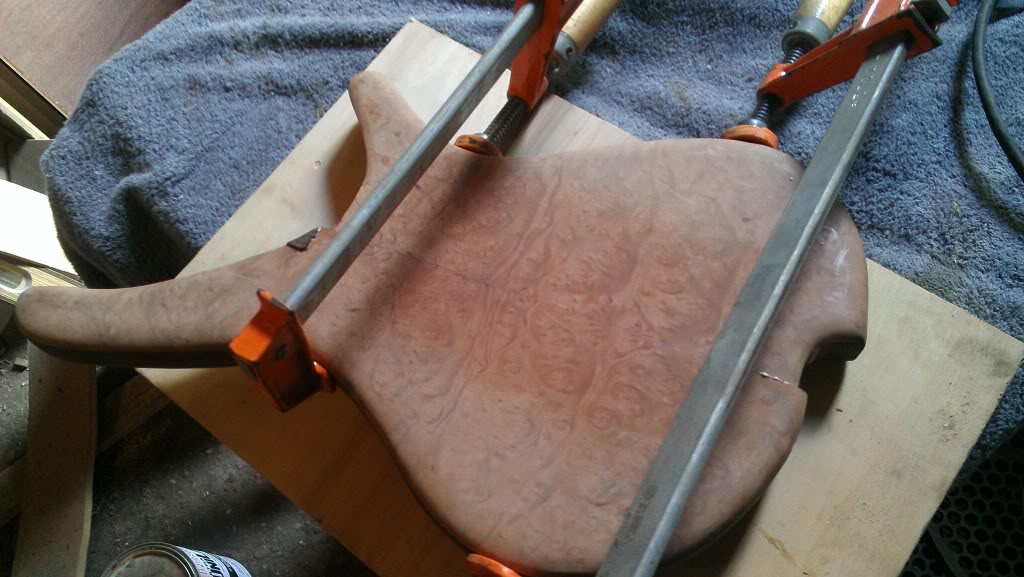
IMAG0085.jpg


As you can see the body has a madrone top, a wenge/maple/bloodwood core and a wenge back. The cover plate was cut from the back before it was glued to the body.
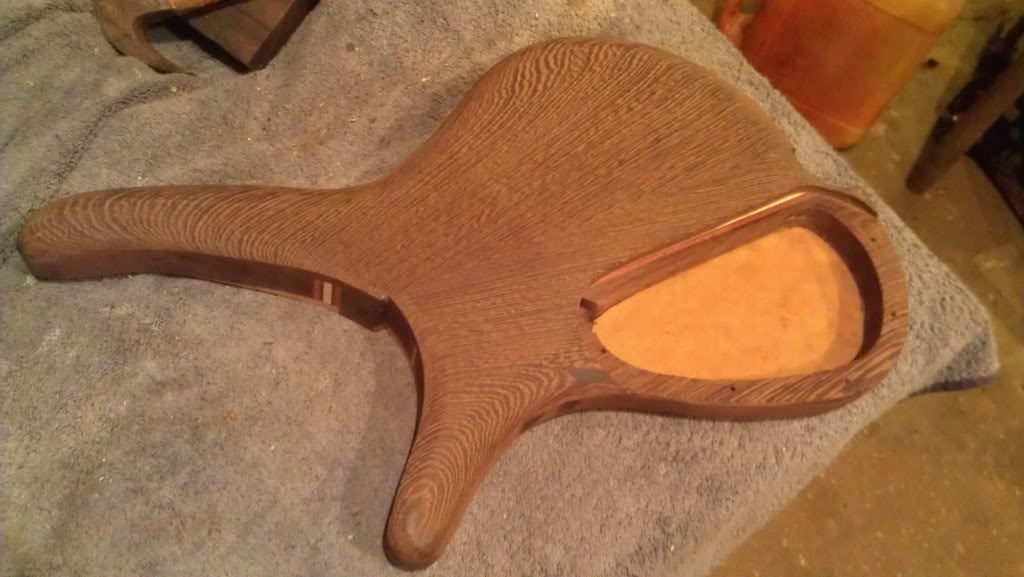
IMAG0093.jpg


After a little gentle persuasion from the belt sander the body arrives at a pretty workable shape. Next time we'll add a larger roundover to the body and probably work on the neck as well.
 
Last edited by a moderator:
JC, if you had heard the trash this thing was talking from the corner of the shop for the past 2 years you wouldnt feel bad at all. :smug: As a guitar it was a disaster but its going to redeem itself by being a killer little short scale.
 
I have all kinds of failed/unfinished projects, and random bass parts floating around my shop. Occasionally, some of those parts get together as a whole new project. There's definitely no reason to let that gorgeous wood go to waste. I'm looking forward to see how this one works out.
 
Next up the new body needs a new roundover. The orignal roundover was not big enough to show off the shape of the body so i'm going with a full 3/4 roundover.

First pass:

IMAG0100.jpg


IMAG0099.jpg


And after the final pass:

IMAG0103.jpg


A bit of sanding and we've got a reasonably attractive body.

IMAG0106.jpg


IMAG0105.jpg
 
Last edited by a moderator:
Next up it's a little quality time with my neck blank.

The truss slot needs to be routed before I glue the ears onto the headstock so I set the router up with a 1/4" bit and route the slot in 3 passes. A line is drawn on the fence where the cut ends and a line is drawn on the neck blank to know when to stop.

IMAG0109.jpg


IMAG0110.jpg


The next step is to glue on ears to allow the headstock to be wide enough. The ears are left over from cutting the scarf joint so they fit perfectly.

IMAG0115.jpg


IMAG0116.jpg


Once the ears are attached its time for the headplate veneer. I am using some madrone burl veneer on a eub so a piece of the scrap will go on the headstock. Instead of gluing and clamping it I'll use a clothes iron to attach it.

IMAG0118.jpg


First use a foam roller to roll an even amount of titebond II to the head and to the veneer. Let it sit 30 minutes or so till the glue is tacky but not wet. It should begin to look clear instead of milky. Place the veneer in place and turn the clothes iron high with no water or steam. The heat from the iron will flash the glue and it will stick immediately just as strong as if clamped for hours. You will probably get a small amount of burning on the surface but it doesnt go deep and sands out easily. The benefit is that if you have a bubble you missed you can come back later and repress it. It takes a little practice to get it right but it can be a very useful tool in your bag of tricks. I used this method to glue a sheet of veneer to an arched eub body and it worked great. But anyway, hear is the veneer after gluing.

IMAG0120.jpg


Now I can cut out the headstock shap and using a file clean away the veneer covering the truss rod access.

IMAG0122.jpg
 
Last edited by a moderator:
Next the taper is cut on the neck:

IMAG0170.jpg


And I can start on the fingerboard. It's a nice piece of ziricote and here it is attached to the slotting template. You can see the indexing pin in the board it sits against. That board slides in the miter slot of the tablesaw and as each slot is cut the templates slides down one position.

IMAG0139.jpg


IMAG0140.jpg


IMAG0142.jpg


The fingerboard is long enough so I slotted it to 29 frets. With a hipshot detuner it would be one note shy of the range of a six string.

Next the fingerboard is tapered to size so the veneer markers can be added.

IMAG0143.jpg
[/IMG]
 
Last edited by a moderator:
Being the pro that you are, you probably know about the bandsaw trick for a bad centre seam if you want to lose the minimum amount of wood.

For those who don't, you simply bandsaw along the seam and without touching the surfaces of the two pieces, glue them back together. As long as the width of the saw cut takes out the whole of the gap this can result in a join that is almost invisible.
 
Well I just spent an hour creating a nice post of all this stuff but my damn phone reset itself seconds before I posted it so you'll get the short version and you'll like it.

The fingerboard is tapered so I can install my veneer position markers. Using the slotting blade and miter slide I cut a reference line in the center of each marker.

IMAG0146.jpg


IMAG0149.jpg


Once the reference slots are cut its just a matter of widening the slots till the marker can slide in. The one dot frets (3,5,7 etc.) Get a simple white/black/white marker and the 12th and 24th get a more festive marker with bloodwood added in.

IMAG0151.jpg


IMAG0153.jpg


IMAG0156.jpg


Once the slots are cut the markers are glued in with CA glue and sanded flush and a piece of maple veneer is glued under the fingerboard because I can. Then Before gluing to the neck I add the cutout at the end of the fingerboard. Notice the "B" in the cutout.


IMAG0158.jpg


IMAG0162.jpg


IMAG0163.jpg


Finally the fingerboard is glued to the neck.

IMAG0166.jpg


IMAG0168.jpg
[/IMG]
 
Last edited by a moderator:
With the neck glued up it's time to radius the fingerboard. I like a compound radius and more and more I find myself using my jointer to make it. My jointer is an 8" Grizzly and has a Byrd spiral cutterhead. Its the most important tool in my shop. It can surface a piece of curly maple or a burl with zero tearout and I've even used it to thickness poplar veneer thats already glued to a headplate. I set it to a tiny depth of cut and work the board against it at the proper angle and create the radius as I go. Think of many small facets that widen as the neck widens. Once it's roughed out I can come back and sand the facets into one smooth radius. Notice the nut and bridge ends have distinctly different curves.

IMAG0171.jpg


IMAG0174.jpg


Next the frets are set and the open ends are sealed with CA glue.

IMAG0177.jpg


The ends are filed clean and then beveled smooth.

IMAG0189.jpg


Next time the neck pocket is cut. Thanks for checking in. :bassist:
 
Last edited by a moderator:
Being the pro that you are, you probably know about the bandsaw trick for a bad centre seam if you want to lose the minimum amount of wood.

For those who don't, you simply bandsaw along the seam and without touching the surfaces of the two pieces, glue them back together. As long as the width of the saw cut takes out the whole of the gap this can result in a join that is almost invisible.

Hi Dave,

I have never done this. However, I am assuming that you have to have your bandsaw really tuned up well, with the blade guides set rather tight for this to work well. Is this correct?

The reason I am asking is because a bandsawn kerf can be relatively uneven due to blade deflection on a poorly tuned saw, especially where there is a change in feed rate or direction or workpiece density, which would result in occasional gaps in the joint.

Just asking for a little clarification.

To the OP: sorry for the hijack, back to our regularly scheduled Silk Purse (which I am enjoying).....
 
Thanks Mike, I created them for last year's fretless 5 competition and it's become standard since then.

The next thing to do is route the neck pocket. The neck is layed on a piece of plywood and blocking is attached around it to create edge guides for the router. Here I drilled out a starting hole and cut the template on the router table.

IMAG0190.jpg


IMAG0191.jpg


The template is attached to the body with double sided tape and the pocket is routed out in 4 passes. After the last pass you can see the wire channels meant for the guitar pickups.

IMAG0193.jpg

IMAG0194.jpg


Next the square corners of the neck are rounded on the belt sander to fit the template and the neck slides in to a perfect tight fit. Aaaahhh... That feels nice. :cool:

IMAG0196.jpg
 
Last edited by a moderator:
Here's a little sneak peek of the finished product. As you can see in the second picture I'm using 3 bolts with metal inserts in the neck. If I find a perfect angle for the neck I may glue it as well and have a bolt on/set neck. Only time will tell...

IMAG0229.jpg


IMAG0261.jpg


So, it's not exactly what I would design from scratch but it's got a cool look and should be just perfect for some people. It would make a nice tenor bass tuned A D G C with a detuner on the A string. Hmmmm...
 
Last edited by a moderator:


