They are attached to hex nut bolts which will be flush with the back of the bass. Tighten the hex nut and it pulls them towards the back of the bass, tightening the string.

Enjoy the benefits of a premium membership!
Upgrade Account
-
TalkBass has been independent since 1998. Add your voice.
Create a free account to reply to discussions, view embedded media, and browse with fewer display ads.
Join free Log in
Want zero display ads or expanded classifieds tools? Compare plans.
You are using an out of date browser. It may not display this or other websites correctly.
You should upgrade or use an alternative browser.
You should upgrade or use an alternative browser.
Acoustic style bass build.
- Thread starter Ben Miller
- Start date
More options
Who Replied?If thats the way you're gonne tune it, you're gonne need to either pul the strings almost to tension to get them within tunability on those, or you'll need ALOT of travel on those bolts. Cool idea though. But why not just mount normal tuners to a tailpiece, like one found on an upright? Just angle them behind a tailpice and angle them backwards so they aren't visible from the front. I tried that on a POS guitar I built. Turned out fairly well.
I figured you could probably get them fairly tight to begin with and then you have three inches of bolt travel. Hopefully that will be good enough.
I mostly just wanted to try out this idea and what better bass to do it on?
I thought it would be a fairly easy headless tuning system to try with very little loss if it didn't end up working. This build is mostly just a big experiment for me in the first place cause it's my first acoustic. So why not throw in one more idea to try out at the same time?
I mostly just wanted to try out this idea and what better bass to do it on?
I thought it would be a fairly easy headless tuning system to try with very little loss if it didn't end up working. This build is mostly just a big experiment for me in the first place cause it's my first acoustic. So why not throw in one more idea to try out at the same time?
Got a little more work done yesterday.
The box now has corner block bracing. It will get trimmed down to size of course.
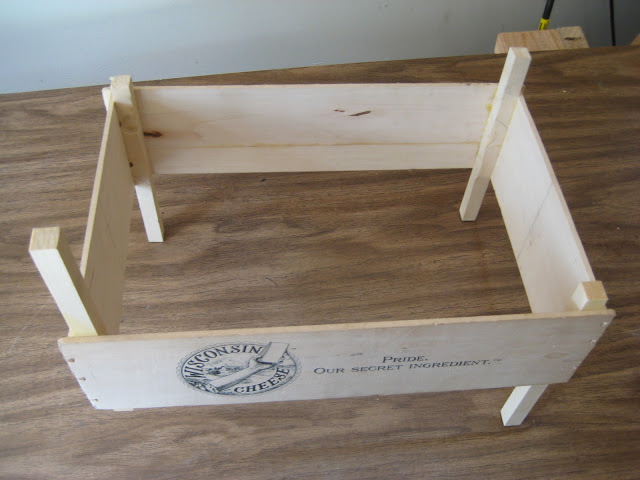
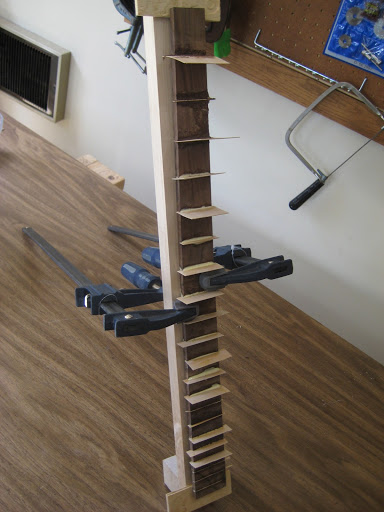
Also filled the fret slots with thin maple strips. haven't been able to sand it down or radius it to see the results yet.
I'll be traveling for the next couple of weeks so I won't be able to work on the build till then.
The box now has corner block bracing. It will get trimmed down to size of course.
Also filled the fret slots with thin maple strips. haven't been able to sand it down or radius it to see the results yet.
I'll be traveling for the next couple of weeks so I won't be able to work on the build till then.

Hey all. I started work again a couple of days ago. It has been going quite well and it's turning out nicely in my opinion. I cut the neck down to length and added the block at the head for the strings to anchor to. I also added maple dots and binding to the fretboard and then radiused it. I wasn't planning to bind the fretboard, but I wanted to try it 'cause I thought it would look cool with both maple binding and fret lines. On the twelfth fret-dot there is a little walnut dot inside the maple one instead of doing a two dot marker. I wasn't really sure about the single dot at first, but I quite like it now.
Hope you enjoy the pictures.
Fretboard with new lines and dots.
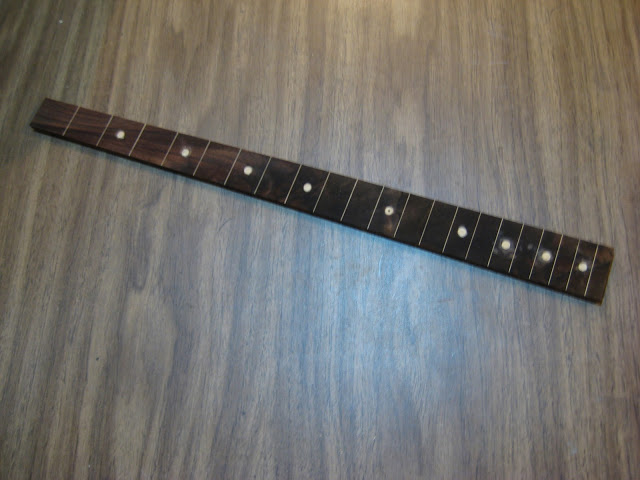
This was my first try at binding a fretboard. I wanted to try a one piece binding so I glued it at the bottom of the board first, and once that was dry I steam bent it around and glued it all up.
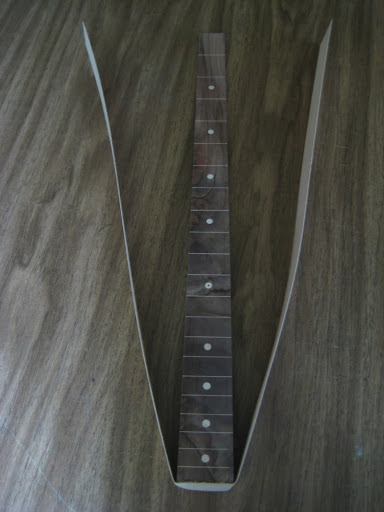
Gluing the sides of the binding.
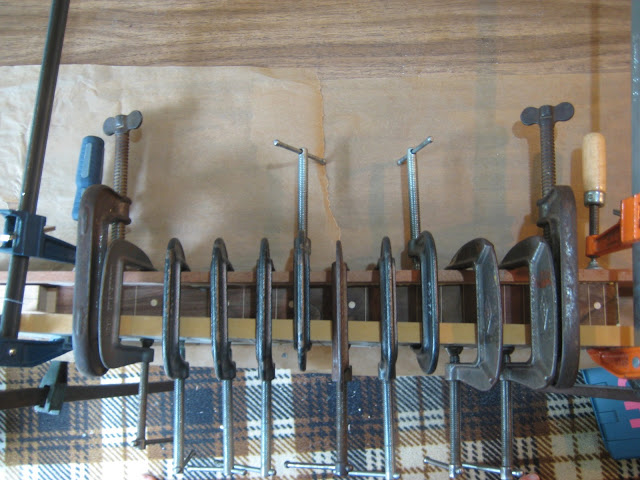
Here's the board all radiused and ready for gluing to the neck. I think it turned out pretty nice.

Getting the fretboard all glued up to the neck. You can never have too many clamps.
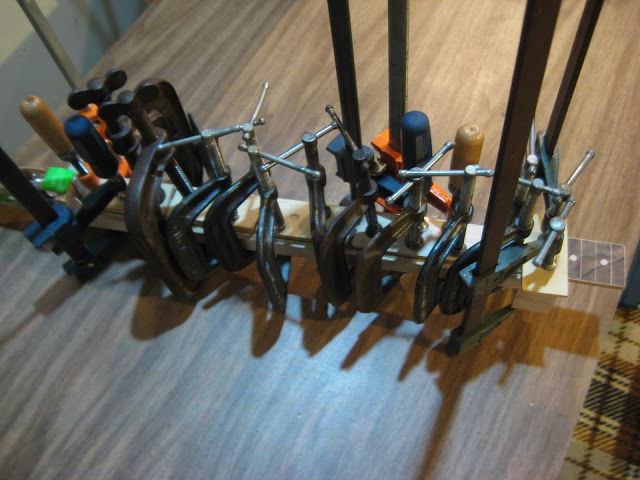
All finished gluing this morning. I really like the way it's turning out. I'm pretty glad I chose to put a maple binding on the fretboard and just a single twelfth fret-dot marker with the little walnut dot inside. Opinions, anyone?
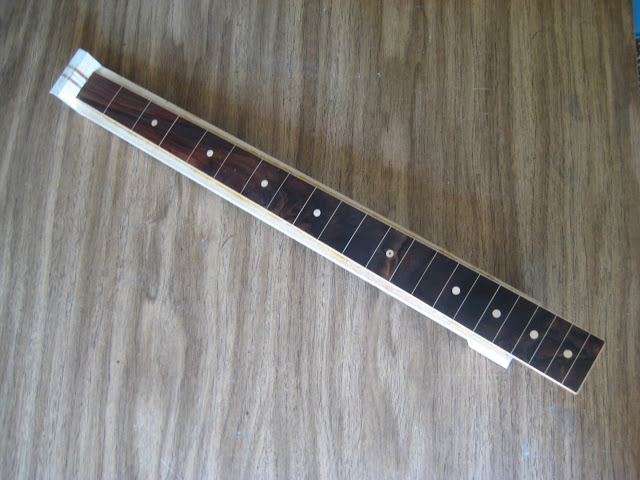
Hope you enjoy the pictures.
Fretboard with new lines and dots.
This was my first try at binding a fretboard. I wanted to try a one piece binding so I glued it at the bottom of the board first, and once that was dry I steam bent it around and glued it all up.
Gluing the sides of the binding.
Here's the board all radiused and ready for gluing to the neck. I think it turned out pretty nice.
Getting the fretboard all glued up to the neck. You can never have too many clamps.
All finished gluing this morning. I really like the way it's turning out. I'm pretty glad I chose to put a maple binding on the fretboard and just a single twelfth fret-dot marker with the little walnut dot inside. Opinions, anyone?
Hi.
Great build.
Especially the tuners, that's a great approach. The travel on "normal" headless tuner is about 1" IIRC, so You'll be fine.
I'm not a native speaker, so any jokes would probably just end up being embarassing .
.
As for the dot-markers, those do look classy, but wouldn't "offset" ones between the strings look more balanced? Now the middle string partially covers 'em, right?
Regards
Sam
Great build.
Especially the tuners, that's a great approach. The travel on "normal" headless tuner is about 1" IIRC, so You'll be fine.
I'm not a native speaker, so any jokes would probably just end up being embarassing
.As for the dot-markers, those do look classy, but wouldn't "offset" ones between the strings look more balanced? Now the middle string partially covers 'em, right?
Regards
Sam
Thanks T-bird.
I'm hopeful for the tuners.
Well I hadn't even thought of the strings covering the dots unfortunately, but you are quite right. I think they should still be good enough though because I'm planning to use clear weed-whacker style strings.
I'm hopeful for the tuners.
Well I hadn't even thought of the strings covering the dots unfortunately, but you are quite right. I think they should still be good enough though because I'm planning to use clear weed-whacker style strings.

I'm pretty glad I chose to put a maple binding on the fretboard and just a single twelfth fret-dot marker with the little walnut dot inside. Opinions, anyone?
I like. Pretty neck. Good design choices.
FWIW, from the player's point of view the dots won't appear directly behind the middle string.
Thanks Ruckus. You are quite right.
Thanks Steve. I did think of that. Hopefully that, along with clear strings, will still look pretty good.
Thanks Steve. I did think of that. Hopefully that, along with clear strings, will still look pretty good.

This is definitely one of the cooler builds I've seen on tb. And probably the first RRB (retracted range bass) builds chronicled here.
 I'm really happy with how it's turning out.
I've been working a lot in the last few days. It all seems to be going really well. Hope you like it.
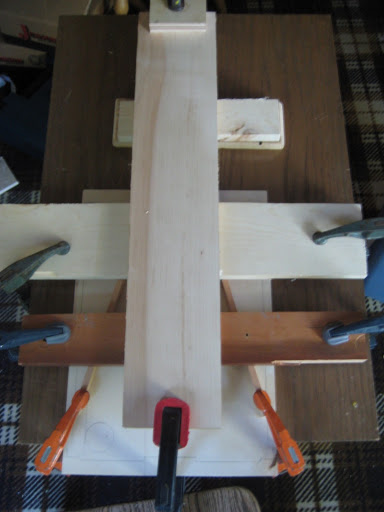
Gluing up the two thin back braces. May add some more braces if it seems necessary.
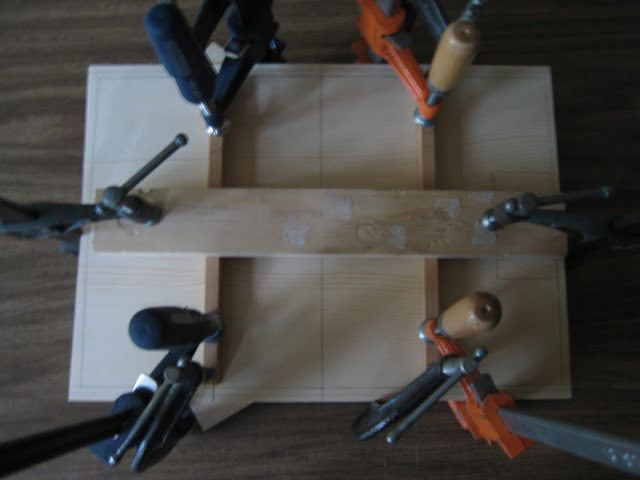
My attempt at gluing on all the top bracing at once. It did end up working quite well though, so I'm happy with it.
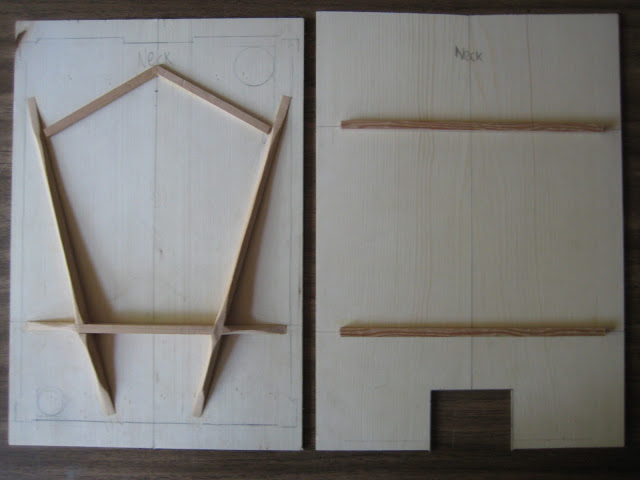
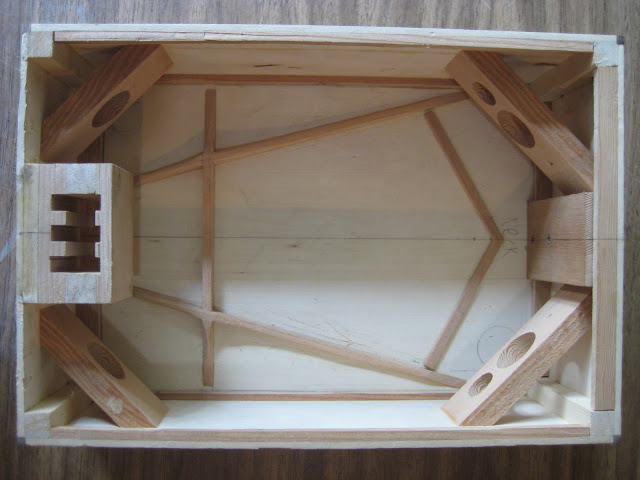
Here are the front and back with all their bracings. The front has a funny kite shaped bracing which I'm hopeful will work well. It feels pretty solid and yet still has room to move and flex inside the bracing. I haven't done any bracing before so I mostly just guessed on positioning. Thoughts?
Got the lining and the neck-block glued up as well. It's starting to really look like the inside of an instrument.
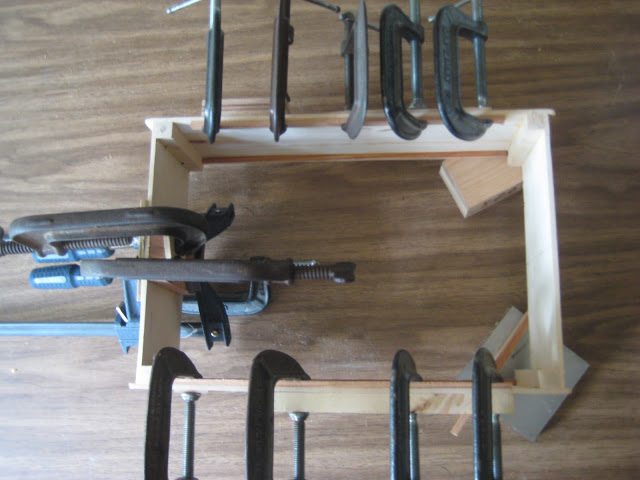
Instead of having just roughly glued up corners, I decided that I wanted to have walnut corner blocks to make it look a bit nicer and also match the walnut binding. So I routed out along all the corners.
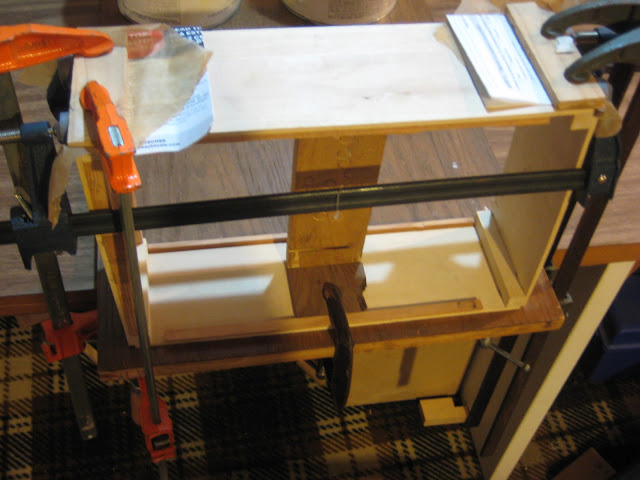
My clamping arrangement for gluing in the corner blocks. Worked pretty well.
All glued in and trimmed down flush. I'm quite happy with how it looks.
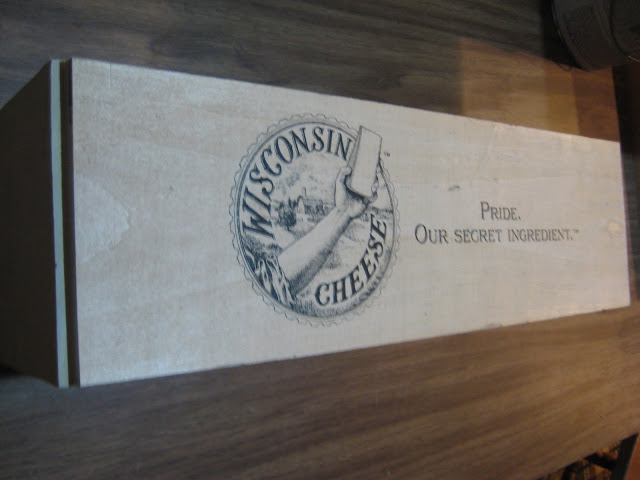
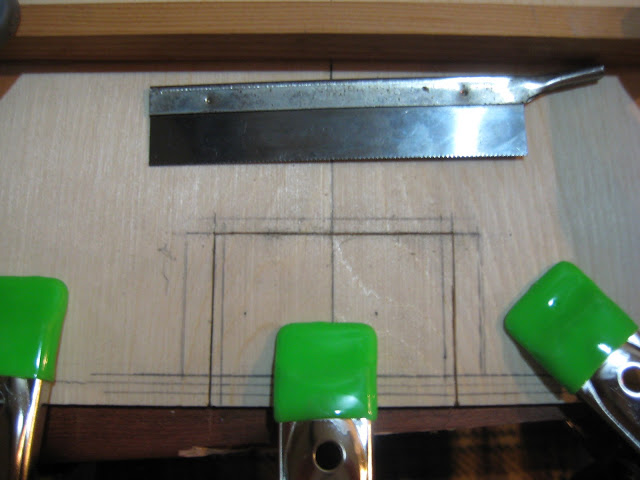
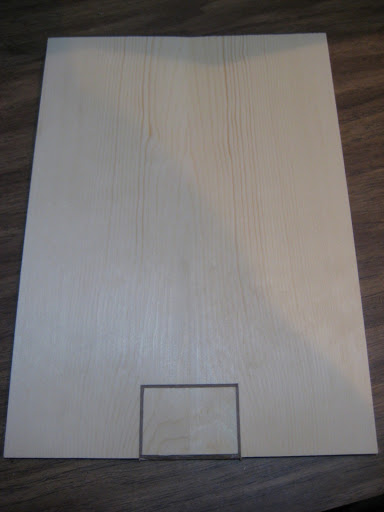
I decided that for the tuner cover in the back, I wanted to cut out the cover directly from the back piece in such a way that would let me bind it with walnut and then put it back in so that you could see all of the grain lines. Instead of just using a walnut piece for the cover.
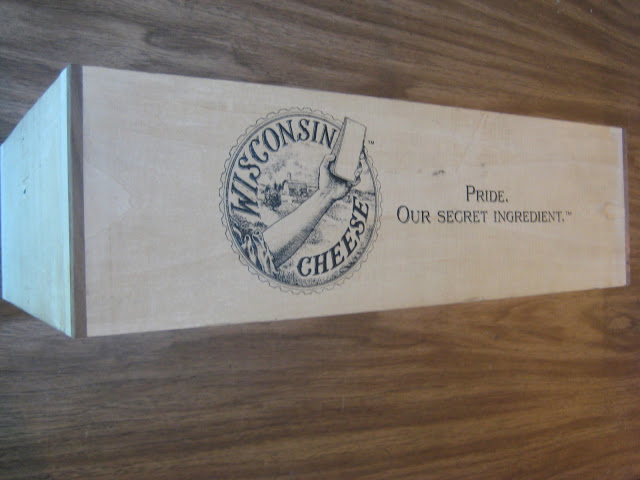
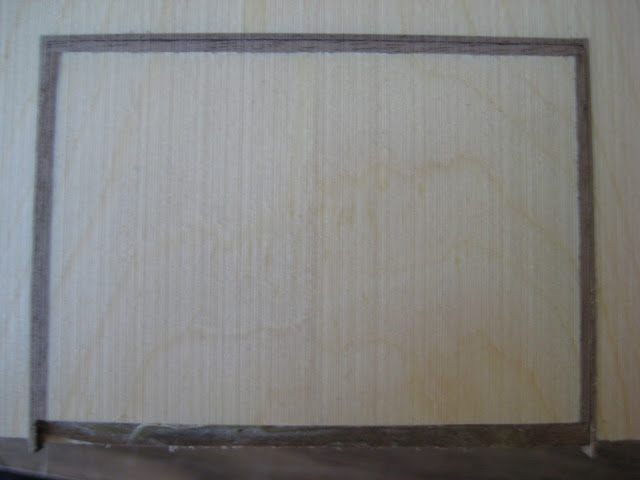
Got it all bound up. It ended up working much better than I had hoped. There will be three holes for the tuners(bolts) to go through in the cover. The reason that there needs to be a cover for the strings to go through (instead of just going through the back directly) is so that you can take the tuners out and change the strings. As well as any other maintenance that might be needed in the future.
Here's a close up shot of the tuner cover. I'm very happy with how well this part came out.
Glued up a bridge blank. Not exactly sure what the bridge will end up looking like just yet.
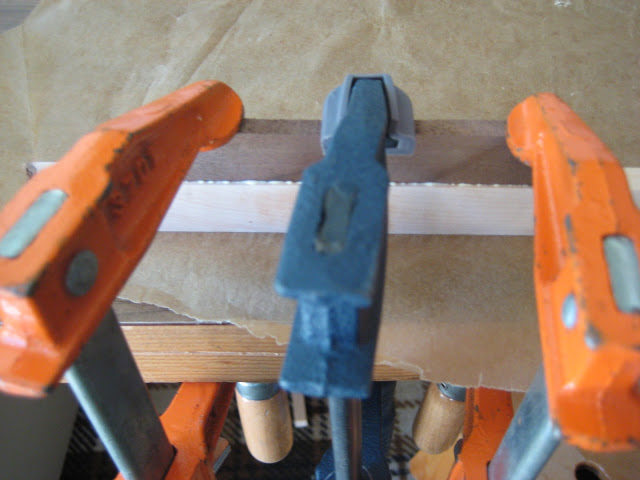
Gluing up the two thin back braces. May add some more braces if it seems necessary.
My attempt at gluing on all the top bracing at once.
It did end up working quite well though, so I'm happy with it.Here are the front and back with all their bracings. The front has a funny kite shaped bracing which I'm hopeful will work well. It feels pretty solid and yet still has room to move and flex inside the bracing. I haven't done any bracing before so I mostly just guessed on positioning. Thoughts?
Got the lining and the neck-block glued up as well. It's starting to really look like the inside of an instrument.
Instead of having just roughly glued up corners, I decided that I wanted to have walnut corner blocks to make it look a bit nicer and also match the walnut binding. So I routed out along all the corners.
My clamping arrangement for gluing in the corner blocks. Worked pretty well.
All glued in and trimmed down flush. I'm quite happy with how it looks.
I decided that for the tuner cover in the back, I wanted to cut out the cover directly from the back piece in such a way that would let me bind it with walnut and then put it back in so that you could see all of the grain lines. Instead of just using a walnut piece for the cover.
Got it all bound up. It ended up working much better than I had hoped. There will be three holes for the tuners(bolts) to go through in the cover. The reason that there needs to be a cover for the strings to go through (instead of just going through the back directly) is so that you can take the tuners out and change the strings. As well as any other maintenance that might be needed in the future.
Here's a close up shot of the tuner cover. I'm very happy with how well this part came out.
Glued up a bridge blank. Not exactly sure what the bridge will end up looking like just yet.


Work has been going well. It's just been a little slow. I've been working on mostly just small details and less obvious things. Trying to figure out how exactly to make the headless system work. I'll try to get some good pictures taken and posted soon.
Thanks Spas.
Hey all.
Sorry for the lack of updates. There have been a few build issues as well as an otherwise very busy life getting in the way.
Here are the most recent progress photos.
The top has been glued on as well as some extra corner bracings. I thought it might need the extra strength because of all the pull on the neck and sides from the heavy gauge strings.
Routed all along the top for binding.
Glued some walnut binding all around the top.
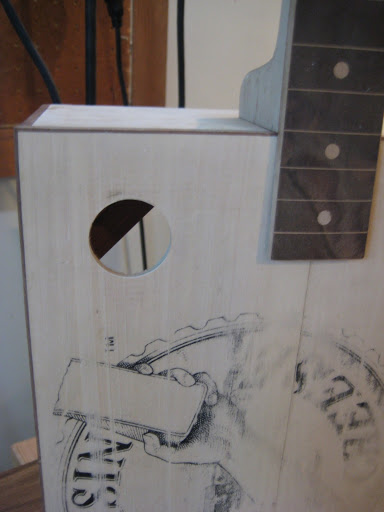
Drilled a small sound hole. There will likely be another one in the lower right corner as well.
Once again many apologies for the lack of updates and slow progress on this build.
Unfortunately I won't be able to do any more on the bass until early September.
Hope you all enjoy the build so far and continue to do so once I start working again.
Hey all.
Sorry for the lack of updates. There have been a few build issues as well as an otherwise very busy life getting in the way.
Here are the most recent progress photos.
The top has been glued on as well as some extra corner bracings. I thought it might need the extra strength because of all the pull on the neck and sides from the heavy gauge strings.
Routed all along the top for binding.
Glued some walnut binding all around the top.
Drilled a small sound hole. There will likely be another one in the lower right corner as well.
Once again many apologies for the lack of updates and slow progress on this build.
Unfortunately I won't be able to do any more on the bass until early September.
Hope you all enjoy the build so far and continue to do so once I start working again.


