• TalkBass has been independent since 1998. Add your voice.
    Create a free account to reply to discussions, view embedded media, and browse with fewer display ads.
    Join freeLog in
    Want zero display ads or expanded classifieds tools? Compare plans.

Adding gold flake/sparkle to an already good translucent finish practical?

Speedbird

Supporting Member
Jul 10, 2000
287
357
Virginia
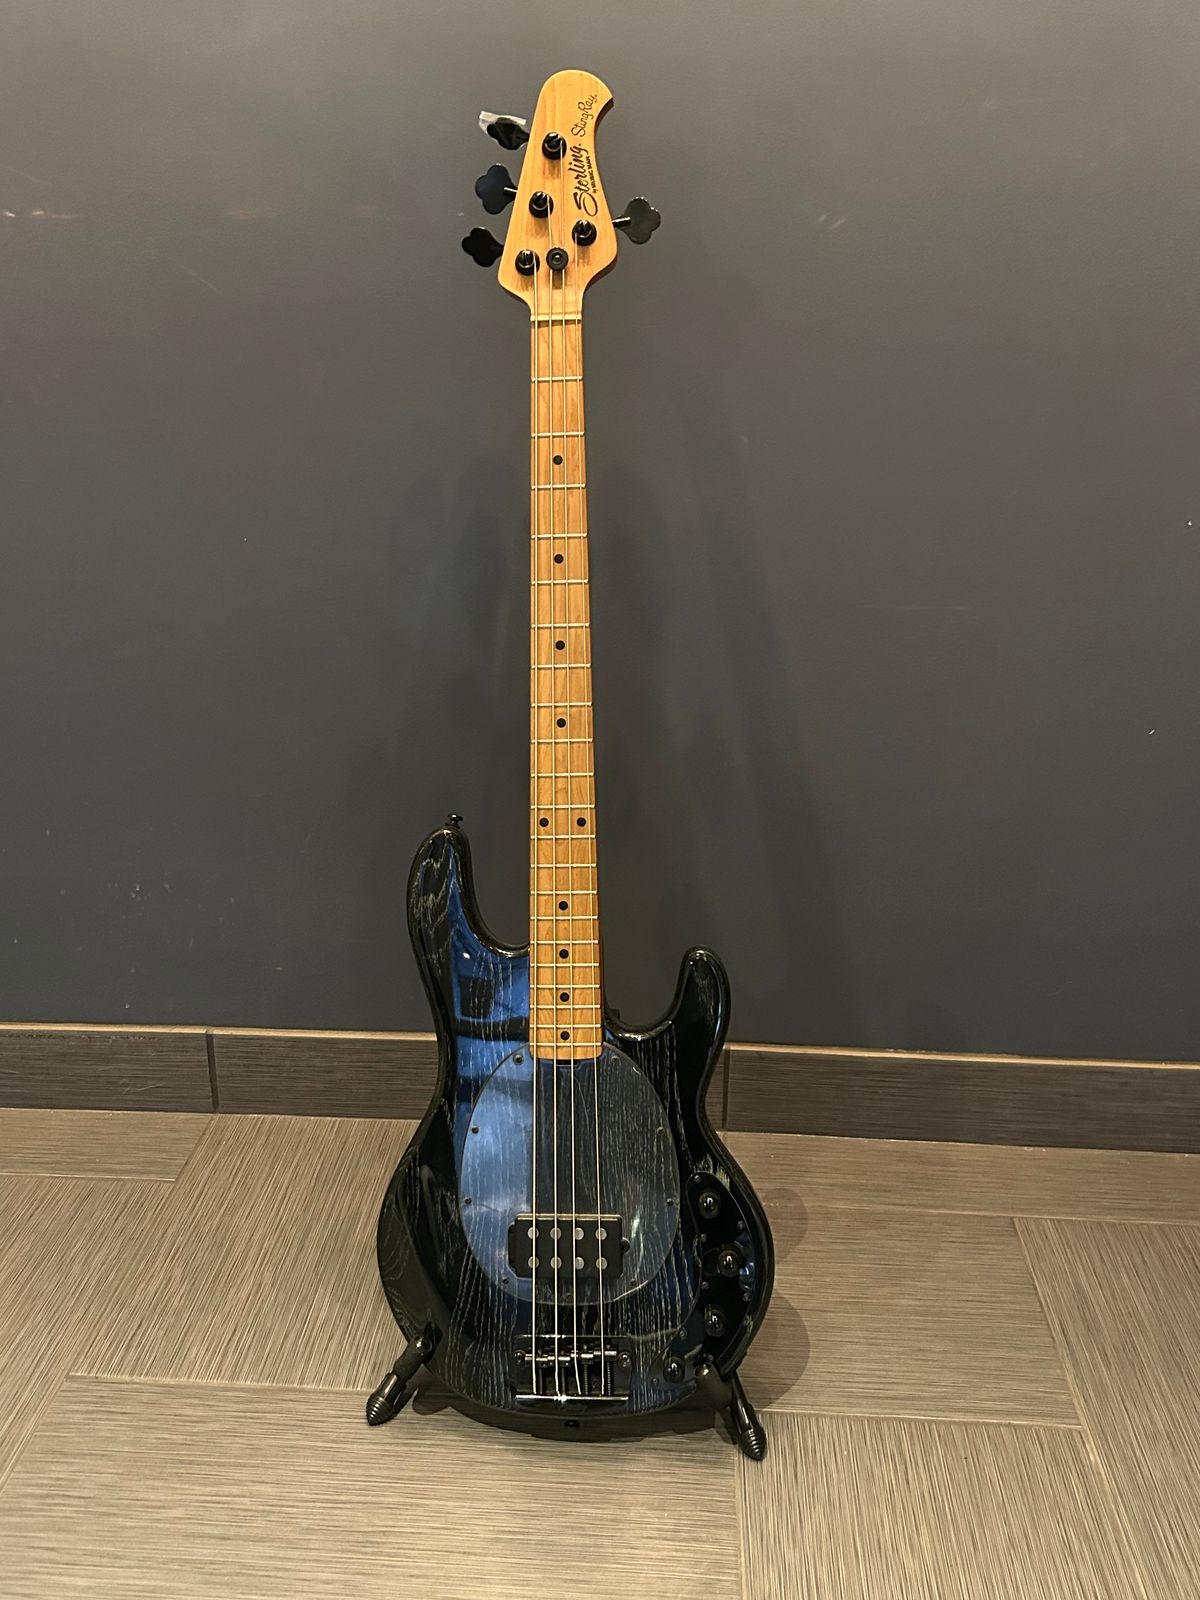
I had been lusting for a Stingray in "Jackpot" black w/gold flake & gold hardware. Until last week when I was able to see hands on. The gold flake/sparkle was just too subtle. If it were ~2x I would have bought it.

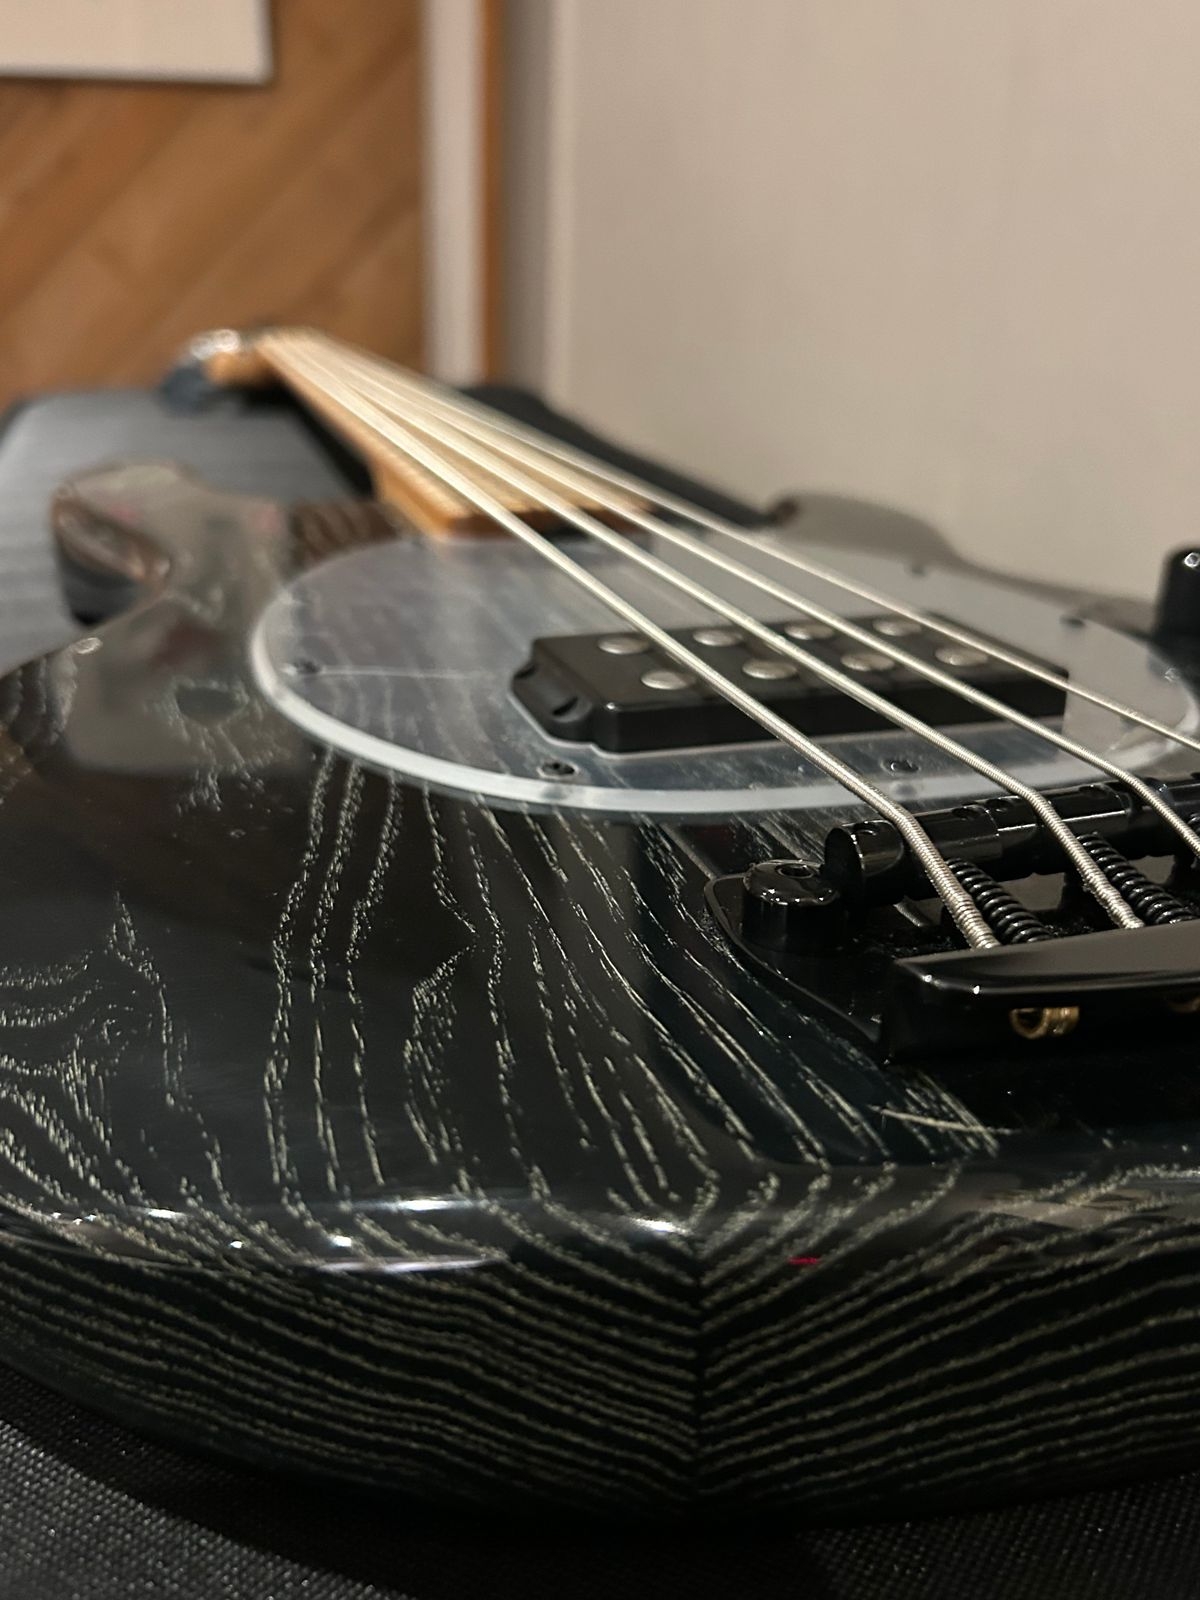
My question is, I found an interesting Sterling Stingray with a translucent gloss black finish... Would it be possible or practical to strip off all the hardware and stuff and take it to a guy; have gold sparkle overlaid, then high gloss of some type and reassemble?

Would it just look like ass or cost too much? I don't want to do anything to hurt the tone or playability. Any referrals? I guess I could shop around auto body painters, but fear they would either be too expensive or have a process that ends up unplayable or negatively impacts the tone. pictures below. Thanks in advance

IMG_2485.JPG


IMG_2484.JPG


t59xqg5dtvrrrolqvttt.jpg
 
Last edited:
It's common to use black as a base coat prior to shooting metal flake. Though that's solid black, not so sure how that would work with the ceruse grain fill finish. As the post above says, the end finish would likely be very thick (metal flake finishes have to be relatively thick in order to bury the flake as it looks really bad if they get sanded through in the sanding/polishing stage). Essentially you'll have one extra layer - the clear that's already on the existing finish - and it would look very busy with the ceruse and flake. If I was doing it, I'd probably strip the body, sealer, black, flake (in clear carrier) and clear. If the bass was plain black, I'd consider doing it how you suggest.
 
You'd need to strip all the poly and paint, get it to bare wood.
Mixing unknown paints and finishes are a sure way to failure.
Then you'll need to fill the pores, and repaint with your new sparkly paint.
Oh yeah then you'll need a good clearcoat to protect it.

This will be a good amount of manual labor, so keep that in mind if it's all worth it.
 
It’s probably going to cost more than the bass itself to have it refinished.
What's pictured is not a SUB, (it has the higher level bridge) a 2-300 difference, but I don't think the ceruse (which I think is nice) is what was being referred too...the 2nd pic is a "subtle" flake, actually looks like the night sky (which I think is cool too), but who knows what the op meant?
This isn't helpful, but there are so many gorgeous basses available at every price that I never think of repainting one, I expect a new color to teach Me about it's virtues and liabilities. (I will change a preamp or other playing/sound aspect)
 
  • Like
Reactions: Speedbird
I think you could add a dusting of gold sparkle, then add clear and buff it out. It is a very large amount of work to do it right, but I think it could be done. The fella to ask is @JIO who has done stuff like like a number of times.
 
  • Like
Reactions: JIO and Dynacord
It’s doable certainly. Someone else doing it is going to cost a bit just because of the prep and, as mentioned, the sparkle or flake will take more than a little clear coat, sanding and buffing if you want a mirror flat final finish. I know JIO has used Rustoleum glitter blast over different color coats to good effect. If you look up a couple of his threads you’ll see that process. Again though if you want a smooth final finish, particularly with spray cans it’s going to take a decent amount of clear to be able to bury the glitter. As mentioned there is also the possibility of whatever finish you’re using not getting along with the existing paint. I’ve had that happen a couple of times and it’s discouraging.
 
It’s doable certainly. Someone else doing it is going to cost a bit just because of the prep and, as mentioned, the sparkle or flake will take more than a little clear coat, sanding and buffing if you want a mirror flat final finish. I know JIO has used Rustoleum glitter blast over different color coats to good effect. If you look up a couple of his threads you’ll see that process. Again though if you want a smooth final finish, particularly with spray cans it’s going to take a decent amount of clear to be able to bury the glitter. As mentioned there is also the possibility of whatever finish you’re using not getting along with the existing paint. I’ve had that happen a couple of times and it’s discouraging.

Yeah, I'd test some finish in the neck pocket or a cavity first - though I've oversprayed several bodies without issue as most of the poly finishes are pretty forgiving with other finishes (a lot of factory Fenders are nitro over poly basecoat) but prep is key. Going to want to rough up the finish a bit and clean with solvent and tack cloth. Previous waxes, silicone polish, etc residue can totally mess it up.
 
  • Like
Reactions: JIO and Reedt2000
It appears from your close up pic that the clear-coat has been 'leveled', meaning the grain has been filled in. From your imagined pic the flakes appear very fine. As was mentioned, I have successfully 'dusted' finishes with various glitter products, most recently Montana rattle-cans. They are sold on-line but I buy mine locally at Blicks art store here in SF. I think what you wish to do is completely doable as Matt said and as long as you follow a few rules you'll be successful.

First, I would remove everything from the body. I would then tape off the neck pocket and control & pu cavities. Then I would use a brown Scotch pad (or a generic one found in a paint store) to dull the gloss evenly. It doesn't require much work - just needs to be consistently dulled. It will not 'scratch' the surface as long as you don't rub too hard. Once dulled, use alcohol to clean the surface of dust with a cotton cloth. With glitter-dusting you need to spray above the body laying flat letting the flakes settle on the body. The Montana spray is an acrylic lacquer and will not cause problems interfacing with the factory clear coat as long as you keep it minimal. As in, don't concern yourself with building up the clear vehicle - just focus on the flakes. It doesn't take much to get an acceptable result. Spray with sweeping motion about 6" above the body. It 'drys' instantly, so spray until you like the way it looks but don't overdue it. A warm sunny, wind-free day is best for quick drying/curing. Spraying the front side first*, also overlap the side but don't spray directly at the sides. You just want a graduated amount of sparkles and you'll do the same when shooting the back side. That way there isn't a build up on the sides.

Once done - allow a few hrs (what's advised on the product) before clear coating. You actually could stop because of the gloss clear vehicle, or shoot satin clear if that's your preference. The tiny flakes minimally applied create a very minimal texture so if you want 'glass smooth' - that's another level of skill. Truthfully - it's so minimal it's nearly flat. With heavier 'flake' finishes, one needs to bury the flakes in clear so they are under the top, which is then leveled and buffed. I wouldn't advise taking that on unless you are well versed in doing so.

Be aware that the tiny flakes can float everywhere in the vicinity, so you need a windless area/situation to minimize over-spray. I use a large square of cardboard with a 'lazy-Susan'** as a spin-able base for the body. This way, you stand in one spot and slowly spin the body while spraying.

* because there are cavity interruptions, you can get the hang of application before shooting the uninterrupted backside.

** I bought mine years ago in a thrift-store
1776016687918.jpeg


examples:

Montana Hologram glitter w/satin clear-coat. Note: this finish is deliberately textured incorporating a craquelure technique.

1776015770816.jpeg

1776017244056.jpeg

1776015795809.jpeg

This one is using gold "Glitter Blast" (found in HW stores) over orange. More concentrated coverage and a satin lacquer clear coat.
1776015972607.jpeg

A few more with "Glitter Blast" -
1776016141075.jpeg

1776016245109.jpeg

1776016311316.jpeg

1776016377994.jpeg
 
Last edited:
BTW that's not translucent. It was first painted black (over ash most likely) without grain filler, then sprayed white, then the white lightly sanded off to reveal the black below but leaving the white in the grain, and then clear over that.
Yes, translucent is semi-transparent or 'fogged' (allows light to pass through - think stained-glass). Technically the clear-coat is transparent as you can clearly see the grain through the clear-coat.
 
  • Like
Reactions: Dynacord
It appears from your close up pic that the clear-coat has been 'leveled', meaning the grain has been filled in. From your imagined pic the flakes appear very fine. As was mentioned, I have successfully 'dusted' finishes with various glitter products, most recently Montana rattle-cans. They are sold on-line but I buy mine locally at Blicks art store here in SF. I think what you wish to do is completely doable as Matt said and as long as you follow a few rules you'll be successful.

First, I would remove everything from the body. I would then tape off the neck pocket and control & pu cavities. Then I would use a brown Scotch pad (or a generic one found in a paint store) to dull the gloss evenly. It doesn't require much work - just needs to be consistently dulled. It will not 'scratch' the surface as long as you don't rub too hard. Once dulled, use alcohol to clean the surface of dust with a cotton cloth. With glitter-dusting you need to spray above the body laying flat letting the flakes settle on the body. The Montana spray is an acrylic lacquer and will not cause problems interfacing with the factory clear coat as long as you keep it minimal. As in, don't concern yourself with building up the clear vehicle - just focus on the flakes. It doesn't take much to get an acceptable result. Spray with sweeping motion about 6" above the body. It 'drys' instantly, so spray until you like the way it looks but don't overdue it. A warm sunny, wind-free day is best for quick drying/curing. Spraying the front side first*, also overlap the side but don't spray directly at the sides. You just want a graduated amount of sparkles and you'll do the same when shooting the back side. That way there isn't a build up on the sides.

Once done - allow a few hrs (what's advised on the product) before clear coating. You actually could stop because of the gloss clear vehicle, or shoot satin clear if that's your preference. The tiny flakes minimally applied create a very minimal texture so if you want 'glass smooth' - that's another level of skill. Truthfully - it's so minimal it's nearly flat. With heavier 'flake' finishes, one needs to bury the flakes in clear so they are under the top, which is then leveled and buffed. I wouldn't advise taking that on unless you are well versed in doing so.

Be aware that the tiny flakes can float everywhere in the vicinity, so you need a windless area/situation to minimize over-spray. I use a large square of cardboard with a 'lazy-Susan'** as a spin-able base for the body. This way, you stand in one spot and slowly spin the body while spraying.

* because there are cavity interruptions, you can get the hang of application before shooting the uninterrupted backside.

** I bought mine years ago in a trift-store
View attachment 7472887

examples:

Montana Hologram glitter w/satin clear-coat. Note: this finish is deliberately textured incorporating a craquelure technique.

View attachment 7472875
View attachment 7472894
View attachment 7472876
This one is using gold "Glitter Blast" (found in HW stores) over orange. More concentrated coverage and a satin lacquer clear coat.
View attachment 7472877
A few more with "Glitter Blast" -
View attachment 7472878
View attachment 7472879
View attachment 7472881
View attachment 7472882

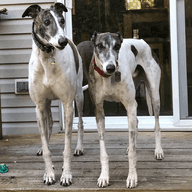
All very good info. One detail that I think really makes the OP's "Jackpot" finish work is how it looks like a starry night sky. To do this, I'd really want to mix flake sizes (looks good even on full sparkle jobs as well) but, so far as I know, that would mean having to use a spray gun rather than rattle cans.

BTW have you tried the Roth Flake Rattle Bombs? I'd be curious to but haven't been able to find over here (I have something similar from the UK which is more like medium flake - has specific spray nozzles with the cans to accommodate the flake size - still not large flake like the dune buggy stuff).

 
  • Like
Reactions: JIO
All very good info. One detail that I think really makes the OP's "Jackpot" finish work is how it looks like a starry night sky. To do this, I'd really want to mix flake sizes (looks good even on full sparkle jobs as well) but, so far as I know, that would mean having to use a spray gun rather than rattle cans.

BTW have you tried the Roth Flake Rattle Bombs? I'd be curious to but haven't been able to find over here (I have something similar from the UK which is more like medium flake - has specific spray nozzles with the cans to accommodate the flake size - still not large flake like the dune buggy stuff).

I only use the tiny particle glitter/flake. The only 'big flake' finish I have was done by glitter-finish pro Marty Bell. I'm not set up and frankly don't want to be set-up to do that sort of finish. I'll check out Roth. Montana has 'flat' exit nozzles (can be used vertically or horizontally) -
 
  • Like
Reactions: Dynacord
This weekend, I’m giving this recipe a try on a $50 bass. The video did a good job persuading me to give it a shot. 😀 He goes slowly through the process and truly uses only around $40 in easy to find supplies.


I've not used one brand (Rustolium) for each stage but after watching this I may eventually give it a try. At one time using hardware store rattle-cans was not ideal but paint technology has evolved to the point that these products, many times for automotive purposes will lead to a decent result. I'm especially interested in the 'filler-primer' and the 'triple thick glaze' product.

Do post your insights after using this system - YouTube vids always make things look easier/go smoother than doing it oneself. Good luck!
 

Latest posts