• TalkBass has been independent since 1998. Add your voice.
    Create a free account to reply to discussions, view embedded media, and browse with fewer display ads.
    Join freeLog in
    Want zero display ads or expanded classifieds tools? Compare plans.

Alembic Balance K "inspired" (semi-replica) build

Ok..that was a happy little "art walk"....
But so far off topic it's not even funny. :confused:

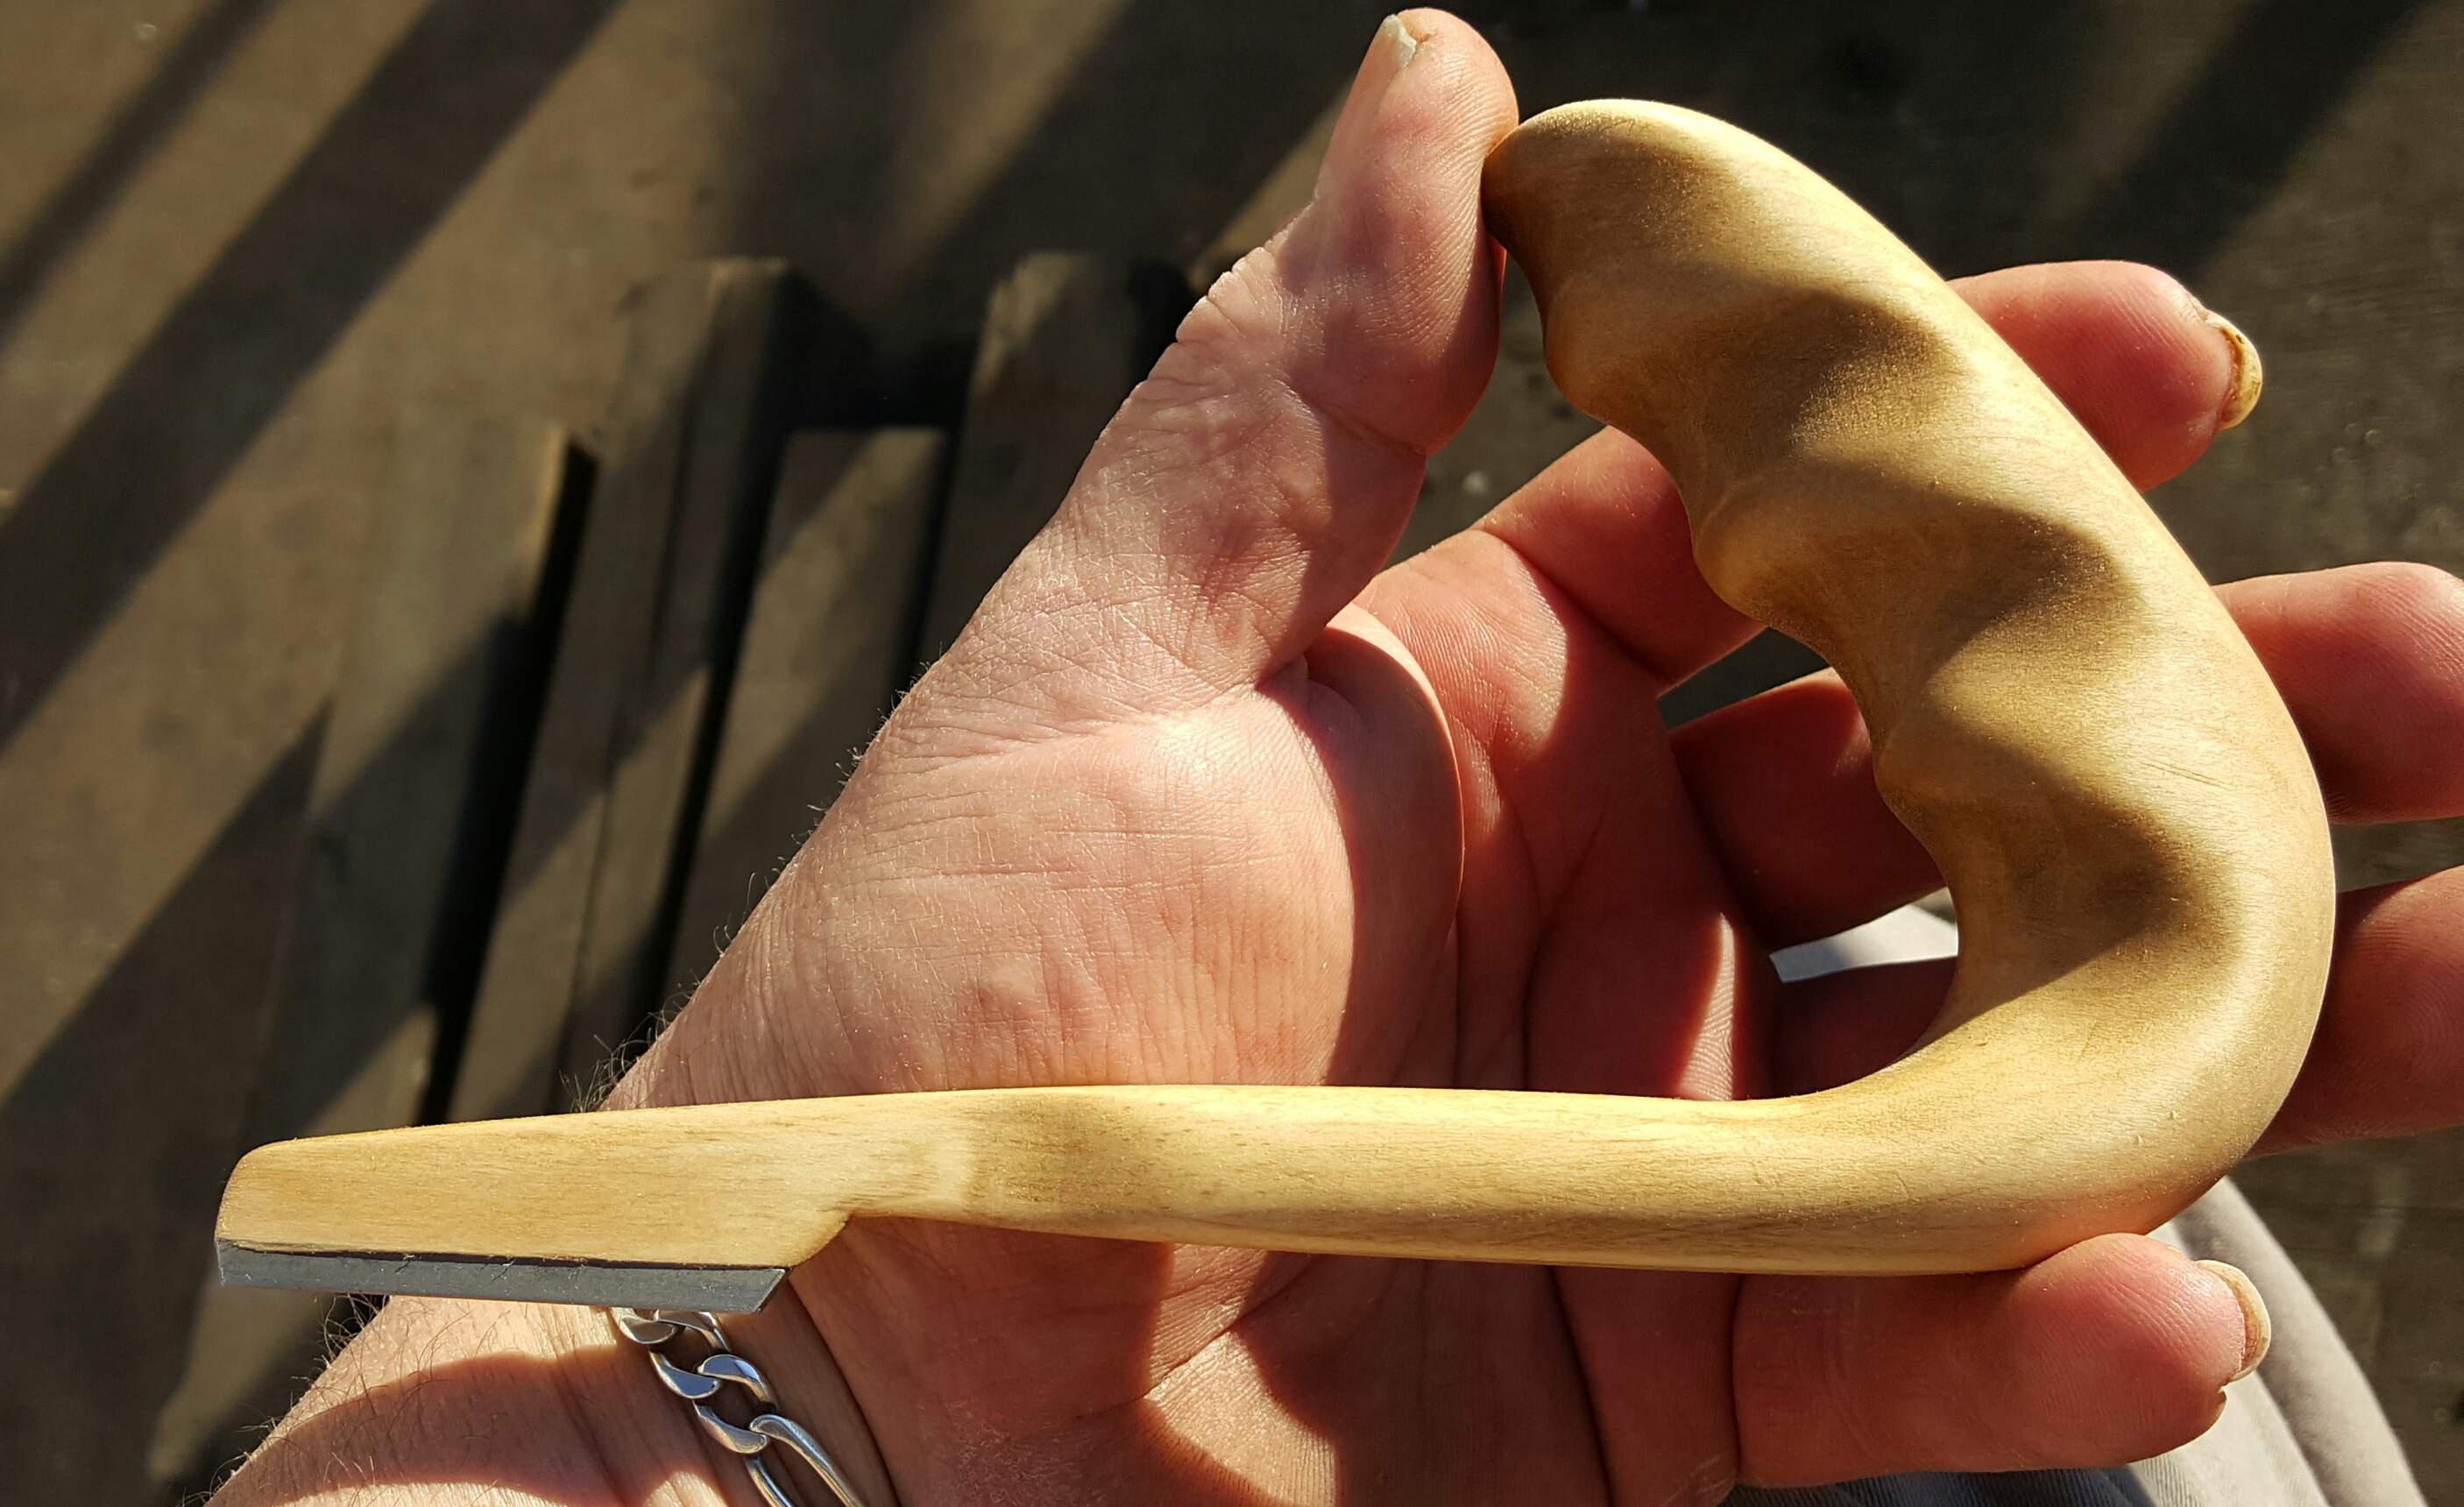
But i did carve something luthier related this morning....
My new fret crowning file::)
20160121_083530-1.jpg
 
So with the frets in, & neck shaped, I figured I would go ahead and strap it up in the neck jig... Get the neck leveled up and do a preliminary fret dressing.

Even though, the main purpose of the neck jig, is to be able to recreate conditions/effects of string tension, without strings on.
So at this point, it's just a nice place to support the neck- flat &stable.
without the body/upper horn in the way... it will be much easier to file the higher frets, and fret ends.
Hopefully this initial fret dressing is adequate & I don't have to do it again. But if not....I will;)
20160121_152325.jpg

This neck / fretboard started out its life dead flat... but I am doing a little experiment for my own hopeful, eventual perfectionism.
As this is my bass, I can
I sanded a little anti-'skijump" fallaway into the board itself (very little)... from about the 15-16th fret to the end...prior to installing frets.
With the rest of the frets leveled, the frets from about the 19th to the 21st showed less and less removal, and 22 - 24 were untouched.
After applying 3 layers of masking tape on top of the 17th fret, and removing half the sandpaper from my leveling beam to ride atop the tape... I was able to level out the last of the frets quite easily & quickly.
You know how when something just feels "right"?
We'll see when I get the strings on....;)
 
  • Like
Reactions: JayVek-72
Rock
So you fretted the fingerboard before you carved the neck back, which is my plan too. I don't know why some people carve first, seems like the neck could flex as you are pounding frets into it. I will follow your lead in leaving the body wings unglued until I've got everything else done on the neck beam. I read the tool description of the neck leveling jig on Stewmac, not sure I get the idea. Are you shooting for an absolutely straight and level neck for fret leveling in the jig, or somehow creating relief to mimic what will happen under string tension? It seems counterintuitive to level frets dead straight when it immediately becomes moot when the neck bows under string tension. I admit my understanding of fret leveling theory is murky at best, having never done it.
 
Rock
So you fretted the fingerboard before you carved the neck back, which is my plan too. I don't know why some people carve first, seems like the neck could flex as you are pounding frets into it. I will follow your lead in leaving the body wings unglued until I've got everything else done on the neck beam. I read the tool description of the neck leveling jig on Stewmac, not sure I get the idea. Are you shooting for an absolutely straight and level neck for fret leveling in the jig, or somehow creating relief to mimic what will happen under string tension? It seems counterintuitive to level frets dead straight when it immediately becomes moot when the neck bows under string tension. I admit my understanding of fret leveling theory is murky at best, having never done it.
I would be happy to share my limited knowledge of the theory behind the Erlewine neck jig.
But I'm @ work now & have to do it later.

Suffice to say, In this scenario I just described, I am not truly using it "correctly".
Or at least not to the full functionality relating to the theory of the physics of the.....thing:wacky:
 
  • Like
Reactions: Gilmourisgod
@Gilmourisgod: here's a vid and a seperate link that illustrate the concepts:


The inside scoop on the neck jig - Strange Guitarworks

Thanks Wraub, that clears SOME of my mental fog. I can see how that would work by replicating the conditions of an existing instrument under string tension, but how it can best be used for NEW instruments is not fitting in my tiny brain. Until a neck is strung, how do you know how much it will bow? It's like an algebra problem with three variables, string tension, amount of neck relief, and fret height, and I SUCK at algebra. Curious to see how Rock uses his version of this jig when he's not busy making a living instead of answering Noob questions. My plan (based on limited skills) for my Hossenfeffer 4001 clone was to fret the fingerboard off the neck beam, which allows me to use a caul instead of hammering, get the neck beam as close to perfectly dead straight and flat as possible, glue on the fingerboard, get it dead flat again with DA trussrod, and then level frets with a very straight and flat old cast aluminum level I have with PSA paper stuck on it. Once strung up, I can dial in relief with the trussrod. Anything fundamentally wrong with this approach?
 
  • Like
Reactions: wraub
How do you know how much bow you need until the frets are leveled, relief is unique to every bass isn't it? I know there are ballpark values for string height above frets at various points, then adjust to suit playing style. The whole process seems kind of "Chicken and Egg" to me, which comes first? Again, excuse my ignorance, what seems obvious to some is still Greek to me!
 
I am far from an expert, and there is some minimal adjustment range, but if you set the neck relief to where it should be on the jig, it will be close enough for the adjustment range once strung. All that said, I have never used a jig for setting up my basses and instead make it flat end to end and then adjust frets or fingerboard as needed once they are strung up - less precise, but it works.
 
I think the idea is to set the neck jig to the amount of bow you want in the neck, then once it's strung up you adjust the truss rod for that much bow.
Nah man,...sounds kinda like a dog chasing his tail.:p
(...Sorry, :whistle: that wasnt cool.)

I should have explained it better,
It took me a while to wrap my head around it also but I think I understand it now.

The whole idea of the jig is to be able to recreate the effects of string tension.... with the strings off.
When you surface the frets you not only want to have the neck flat....but flat, as if with string tension.
So you say, ***? ....flat is flat! Right? No
Ok...here is as close as I can come to justification of this jig...

So when you straighten the neck with the truss rod, with the strings OFF.... the entire neck is flat.

When you straighten the neck with the truss rod, wth the strings ON... the neck is flat, for the most part, but flexes forward slightly, ...except for the "heel" end attached to the body, where the last few frets are. Hence the illusive "ski jump"

You want to recreate the same conditions created by string tension.
You can do that fairly accuratly with the jig by not only supporting the neck in the same place, but also pushing forward on the top of the headstock, whilst pulling back just above the nut with the strap.

So that is why,... since I am choosing to dress the frets before I'm able to put strings on... (for easier access ).... I sanded a bit of fall away into the last few frets ...in anticipation of most of the neck flexing forward, but staying put where it gets thick. (At the heel, by the body)

Hope I made some sense of it there:)
@Gilmourisgod
 
Last edited:
  • Like
Reactions: wraub
right, I wasn't thinking all the way through (i.e. the supported part of the neck not flexing), thanks. In any event you are using the jig to approximate the neck with strings on, even though there are no strings on it and doing your fret work at that time rather than with the strings in the way.
 
So,....I re-crowned all my frets yesterday after work.
Yeah. ...ALL ....in about 2 hours
Which was a surprise to me how much easier it was than my last fret job:)
(Especially since they are SS this time)

It WAS due to the fact that I had unencumbered access to all the frets, AND the neck was solidly supported in the jig, at a nice working height.
AND
NOT
because of my new concave crowning file insert I carved the handle for, that I was so proud of a few posts back......oh hell no :rollno:
That thing is a P O S :spit:

I used it on 1 fret and immediately understood why guys have stated they prefer a nice 3 sided file with safety ground corners.
And mine is not even a "nice" file!
Just a somewhat cheap Stanley fine cut:
20160122_155722-1.jpg
 
Last edited:
LOL, its funny you got to this point because when you posted the beautiful carved handled tool above, I thought "that looks awesome but I wouldn't use it". Pretty much for the same reasons you just discovered... :D
Yeah...well.....live and learn.:meh:

Hey, ....at least it will look cool hanging on the wall....right?:cool:
 
I'm subbed on this thread but for fun while my daughter is behind wheel driving back from the blizzard in NYC i went through this entire thread and this build in unbelievable. Pure unadulterated don't let the spouse see it bass porn. Can't wait for the next post from Rock.
Hey, thanks man!!
 
So, I like a nice straight string pull from nut to tuner....hence the v-shape of my headstock....
I made this one a little bigger than the last, obviously cause it's a 5 string.
So I had to re-dux the hole layout....
No big deal right?
20160130_154123-1-1.jpg

Thing is....as I was measuring, positioning...lining up etc... I had this instant stress knot in the pit of my stomach.
Why you might ask? .... (or you might not) IDK:unsure:

The other day.... I got a bit...well.... 'carried away' with a certain bevel-ish transition kinda feature between my volute....and headstock .
And now....it's sorta feels like it might have been....too............


20160129_162201.jpg

FFFEEEEWWW:rolleyes: ....just made it!......er...um... yeah,... I planned it that way! !;):smug: