

 yes, another one. Hi, I've posted here but this is my first build. Inspired by several custom basses I've had made, and by all the pics on TB and all the luthiers and builders here I finally went and started my first....and second lol....builds. I have thought about the details for years. Going over it until I hit something I thought I wouldn't know how or be able to do. Then I would come here and find the answer and/or go over it in my head or on paper until I felt I now had that taken care of also. And just moved on, in my head, like that.
 Then I got a Wishbass. Now, I always liked neck-thru. And when I saw how simply the wish was put together( I mean that in a good way ) I said, " I can do this ". The Wish came unfinished. That can be taken 2 ways. You choose. But I will say I had to shape the neck and level the fingerboard. So I got some practice there. And it came out great and is a great playing and sounding fretless.
And so, I went online and found some wood and started my own. I had no clamps, jig saw, router, planes, or just about anything else, but I got those things and followed my plans and have gotten to this point so far.
I have made quite a few mistakes, but nothing I could not recover from.( and most importantly learn from ) and I think it is going to be solid and should be a good player.
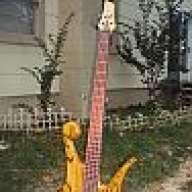
the neck is one piece yellowheart
body wings are canarywood
fb is bloodwood
bridge and nut will be pink ivory
34"
4 string fretless
oil/wax finish
red sperzel machine heads/tuners
got the wood and cut to dimensions needed
no jointer so all joint planed by hand, lot's of work for the novice like me, glued up blocks of wood then cut out basic shape ( first mistake, maybe first )
routed slots for carbon fiber rods and truss ros and epoxied/siliconed them in
glued on fb after getting neck taper and fb taper pretty close
started rounding over body with 1/2" round over router bit and files and sandpaper. then slimmed down the back of the neck simply by cutting it down with jig saw, then started shaping it, slowly
wanted open headstock( ala wish, and others ) and wanted it a little different
I made yellowheart pup cover and cavity cover and had David @ SGD put a dualcoil in the shell I made and I just got it back . I will post pics of it soon.
Thats it so far and will stay updated on it now. hopefully won't be too long to finish.
Comments welcome, but please don't be too harsh, I'm a vigin