
Enjoy the benefits of a premium membership!
Upgrade Account
-
TalkBass has been independent since 1998. Add your voice.
Create a free account to reply to discussions, view embedded media, and browse with fewer display ads.
Join free Log in
Want zero display ads or expanded classifieds tools? Compare plans.
You are using an out of date browser. It may not display this or other websites correctly.
You should upgrade or use an alternative browser.
You should upgrade or use an alternative browser.
Andy Zoldo custom bass build underway
- Thread starter Macrocosmcwh
- Start date
More options
Who Replied?


 Hoping for new pictures today! =)
I just heard from Andy... No pictures today... He said I might get some tomorrow after he frets the beast! Hahaha.... Anticipation is killing me!
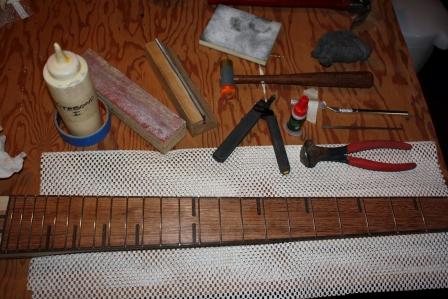
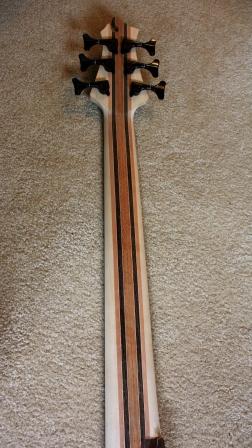
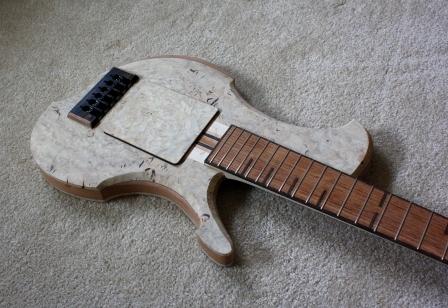
Well as noted, I have some pictures as of about 10 minutes ago. The natives (kids) are getting restless so pardon the rushed post. The neck is fretted, but I still need to level and dress the frets, maybe tonight once the kids are sleeping. The truss rod cover is still pretty rough, and just setting in place for now, but I thought that it was a good visual. The first pictures are just the tools I use for fretting including a fret wire bender that I made with some roller blade wheel bearings. Works like a champ, and cost about $5. Anyway, here are the pictures.




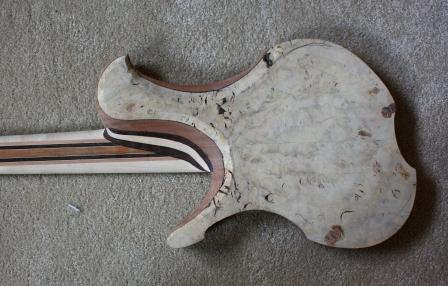
There has been a good amount of progress since this last post. I was able to get the neck glued in place as well as getting the frets all dressed. I got a good amount of the heel transition carved, but there still is some work to be done along with filling in some more voids in the burl. Some will get carved out as well as routed out, so thats a good thing. I also got the recess routed for the bridge as well as routed the cavity for the pickup housing. I still have to drill the holes for the string through portion of the body and counterbore the ferrules. The control cavity still needs to be routed and more carving will be taking place. I also need to get going on the headstock inlay. By the end of next week it should be all ready for final sanding and prepwork. Here are some of the pictures. Sorry again for the lack of working photos, maybe I will get some when I start on the inlay since that will be done at home. Enjoy.
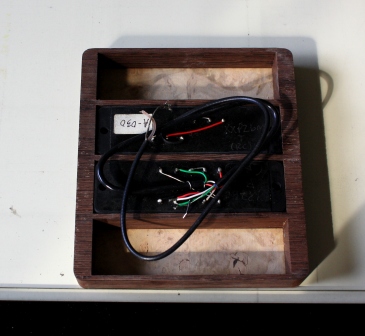
Here is the pickup housing back:


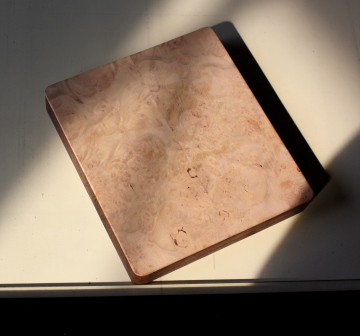
With a different configuration:
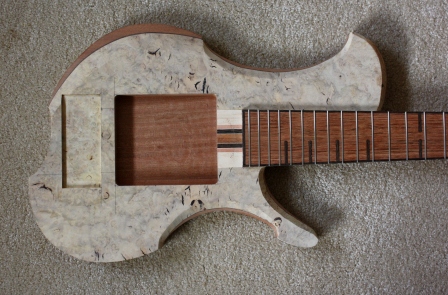
Cavities all routed:
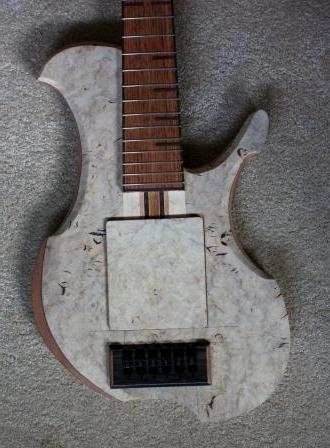
Some carving on top to get an idea of where the bass is going:
Back carving:


Here is the pickup housing back:
With a different configuration:
Cavities all routed:
Some carving on top to get an idea of where the bass is going:
Back carving:
Nice reveal! =) Looking good Andy.... Cant wait!!!! I am dying to see what it will look like with some color and the clearcoat on it! =) Super excited! Shouldn't be long!!!!

Man that's looking nice.
And macrocosmcwh is clearly on the hook now. Perfect time to jack up the price by about 500 bones...
lol!
And macrocosmcwh is clearly on the hook now. Perfect time to jack up the price by about 500 bones...
lol!
I could go for another 500 I can only hope that this bass will generate additional interest from others, and if not...well thats okay too. I do this for the joy of building, and one bass every few months is fine with me. As long as there's something new and interesting on the horizon, then I am a happy man.
I can only hope that this bass will generate additional interest from others, and if not...well thats okay too. I do this for the joy of building, and one bass every few months is fine with me. As long as there's something new and interesting on the horizon, then I am a happy man.
Andy, as long as you always have a little time to keep building basses for me... I am a happy camper!
I know that it has only been 2 days, so not a whole lot has been completed, but enough to show you guys. When Christian and I started talking about this bass, I brought up the idea of wooden knobs and he agreed. I was able to get a good jump on those today. They basically just need to be sanded and cleaned up a bit. I just used some of the cutoff scraps from the body and used those as the knobs. I planed the face down a bit to make the knobs more proportioned, and then took a 5/8 plug cutter to make the knobs. Drilling the holes for the pot shafts was a little more challenging. What I ended up doing was taking a forsner bit of the same diameter and drilling down into mdf about 1/2" deep, and kept that clamped to the drill press table. This ended up becoming my centering jig for the inner drilling of the shaft. I place the knobs upside down into the hole previously drilled and then proceeded to drill for the shaft. Worked out great. I think that I will use this process from here on out. This will probably not work on smooth shaft pots, since they would need a set screw, but that is something to consider. I also did some more carving on the bass. I am hoping that I will find the time this weekend to cut and inlay the headstock logo. Here are the pictures.
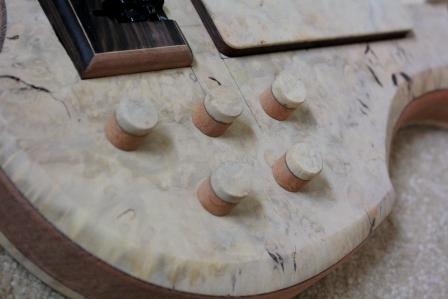
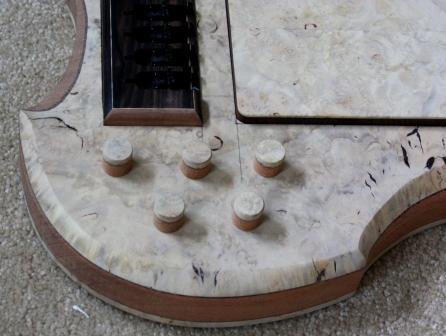

This is not the solidified layout for the knobs, just some placement to get an idea of how they will look.
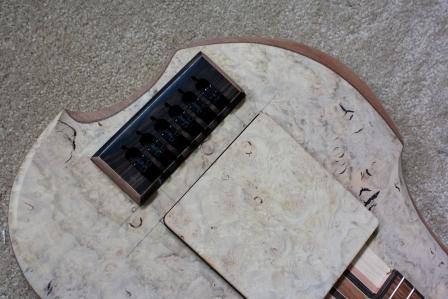
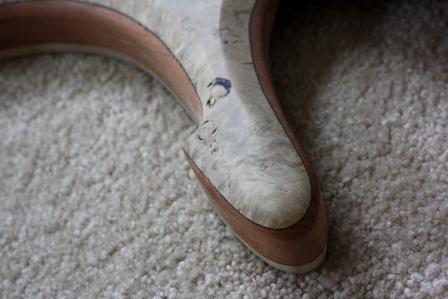
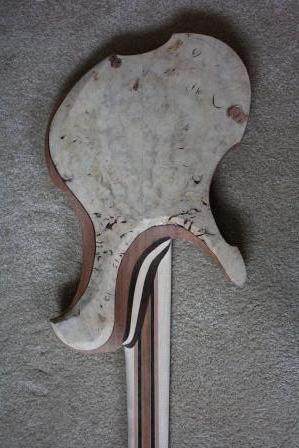
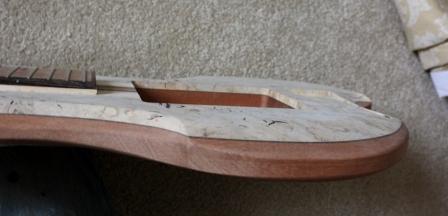
There is still a lot of carving, sanding, and feathering, but it is coming along really well and I am still super excited and happy with this bass. It may be hard to let this one go There is just a lot of new and different things that I haven't done in awhile, and some are completely new. Just a very fun bass to be making.
This is not the solidified layout for the knobs, just some placement to get an idea of how they will look.
There is still a lot of carving, sanding, and feathering, but it is coming along really well and I am still super excited and happy with this bass. It may be hard to let this one go
There is just a lot of new and different things that I haven't done in awhile, and some are completely new. Just a very fun bass to be making.
Geoff St. Germaine
Commercial User
- Aug 31, 2001
- 6,267
- 302
- Disclosures
- Owner - St. Germaine Guitars
Very, very nice! I really like the huge wood pickup shell. I did a large one on my last build that housed two EMG 45DC pickups. Seeing this, Simo's redwood bass and a Dingwall with a combo wood pickup cover/ramp, I'm planning something similar in a redwood burl topped bass I have in the works.
I think Andy's idea of "movable pickups" is killer. This way I can get many distinct sounds out of my bass, BRILLIANT!

I must say Andy, that the idea for swapping pickup positions is quite clever..!! If you don't mind me asking a basic question, how do you secure a pickup in one of they're cavities ? foam in the body cavity ?
You are exactly correct with the foam. The pickups are a tight enough fit that they just need a small amount of upward pressure to keep them secure. I use a pretty dense foam,and always have, and it works out great. This is the first time that I have tried the whole moveable pickup thing, and it seems like it will be a pretty cool feature.
Wow! That's one s/cut that I like! That h/stock design is r-r-really nice. You need to make that design yours. Legally.
Wow! That's one s/cut that I like! That h/stock design is r-r-really nice. You need to make that design yours. Legally.
Thank you!!!!! That means so much you said it!
 I could not have done it without Andy! he is such an artist!
EDIT:: the headstock is all Zoldos custom!!! And I agree.... Graceful and beautiful!!!!
This is definitely a design that will not be duplicated without Christians permission. I need to thank Christian again for all his wonderful input on this build. He has been more than helpful and has without a doubt guided most of this build. I do have to say that I was a little skeptical at first when he wanted to alter the origianl design, but I couldn't be more pleased with the way everything is turning out.
As for an update, the logo is all cut out and ready to be inlaid into the headstock. I will probably do that tomorrow, unless my son goes to sleep quickly tonight and I can sneak off into the basement for some late night inlaying. I really want to get it done so I can mark it off the list of things to do. Stay tuned, and thank you all for the compliments.
As for an update, the logo is all cut out and ready to be inlaid into the headstock. I will probably do that tomorrow, unless my son goes to sleep quickly tonight and I can sneak off into the basement for some late night inlaying. I really want to get it done so I can mark it off the list of things to do. Stay tuned, and thank you all for the compliments.
Andy.... With my background in business finance and sales an your gift in everything you touch.... This could be the beginning of something bigger than either of us may know.... Now if we can just get victor Wooten to play one...  we could charge as much as Fodera! Lol kidding.... I would never move to NY!! Arizona sure is a nice place to raise your family Andy! hint hint!
we could charge as much as Fodera! Lol kidding.... I would never move to NY!! Arizona sure is a nice place to raise your family Andy! hint hint!


