
Well as promised I have a few pictures to post and that will be about it until after the new year. I might post some pics of the Myrtle once it arrives, but that will be about it. Keep in mind too that it has only been 2 weeks since I started this build, so I think I am doing pretty good with a full time job and a few kids at home. I want to wish everyone a Merry Christmas in advance and a very happy and safe new year. And what do you know, Dec. 22 and were still here, so that's a very good thing. Okay, here are some pics.

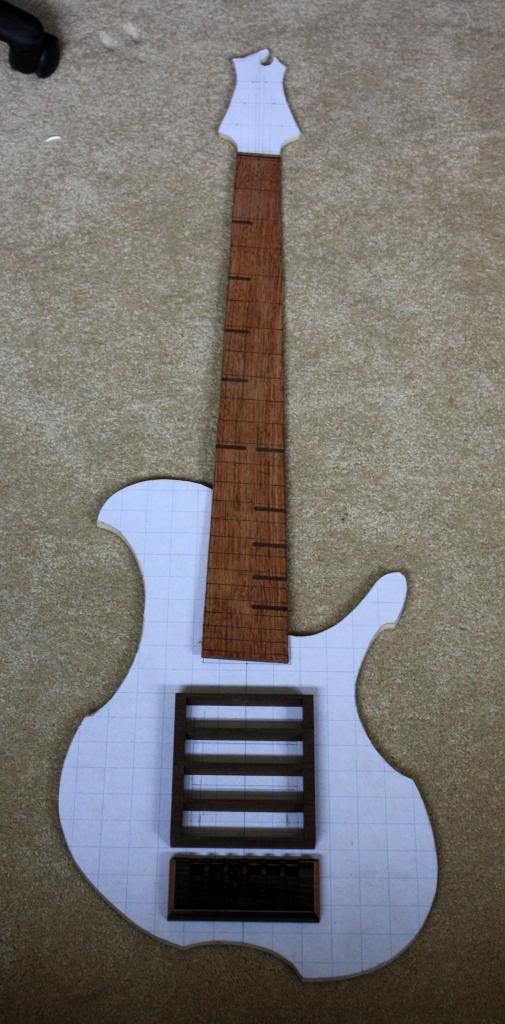
Body template w/ bridge and pickup housing skeleton on top of Sapele body core.


This is where the bridge sits right now. Holes are drilled for string through, and recesses are routed for strings to rest on and create angle to saddle.
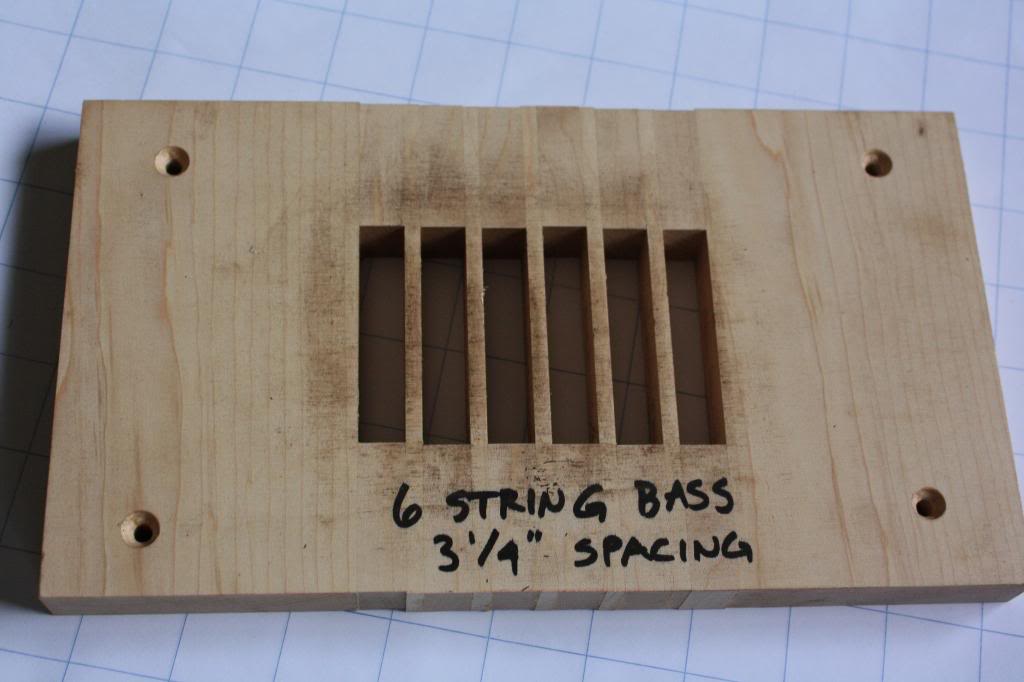


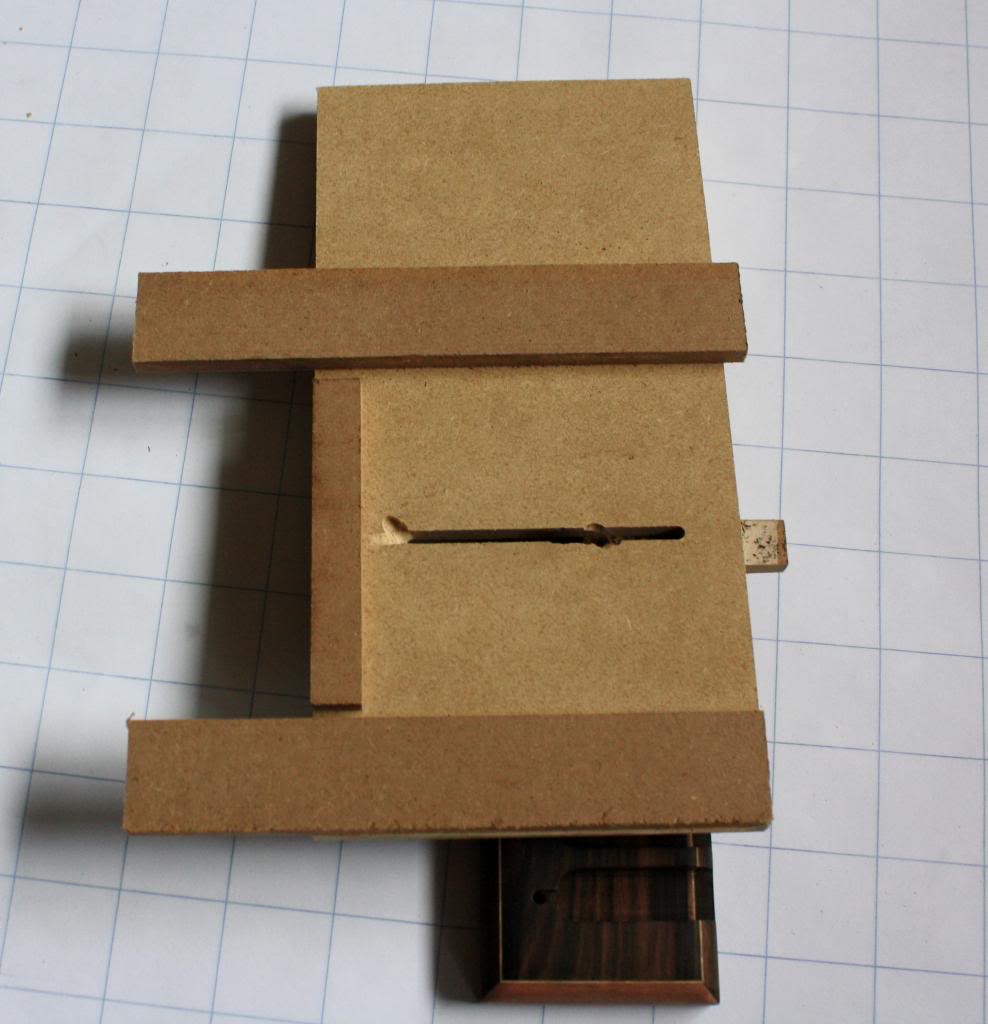
These are all the jigs that I built in order to create the bridge. The first one is what I used to route the saddle grooves. I just used a 3/8" template bit and set the depth to 5/16". It took a few passes since this bridge is so stinking hard. The other 3 show what I used to create the string recesses. It's basically just some guides and a stop used with a rigid trim router and an 1/8" bit. I hope this makes sense to everyone watching. I am not the best at explaining myself, but I know this and try to do my best.

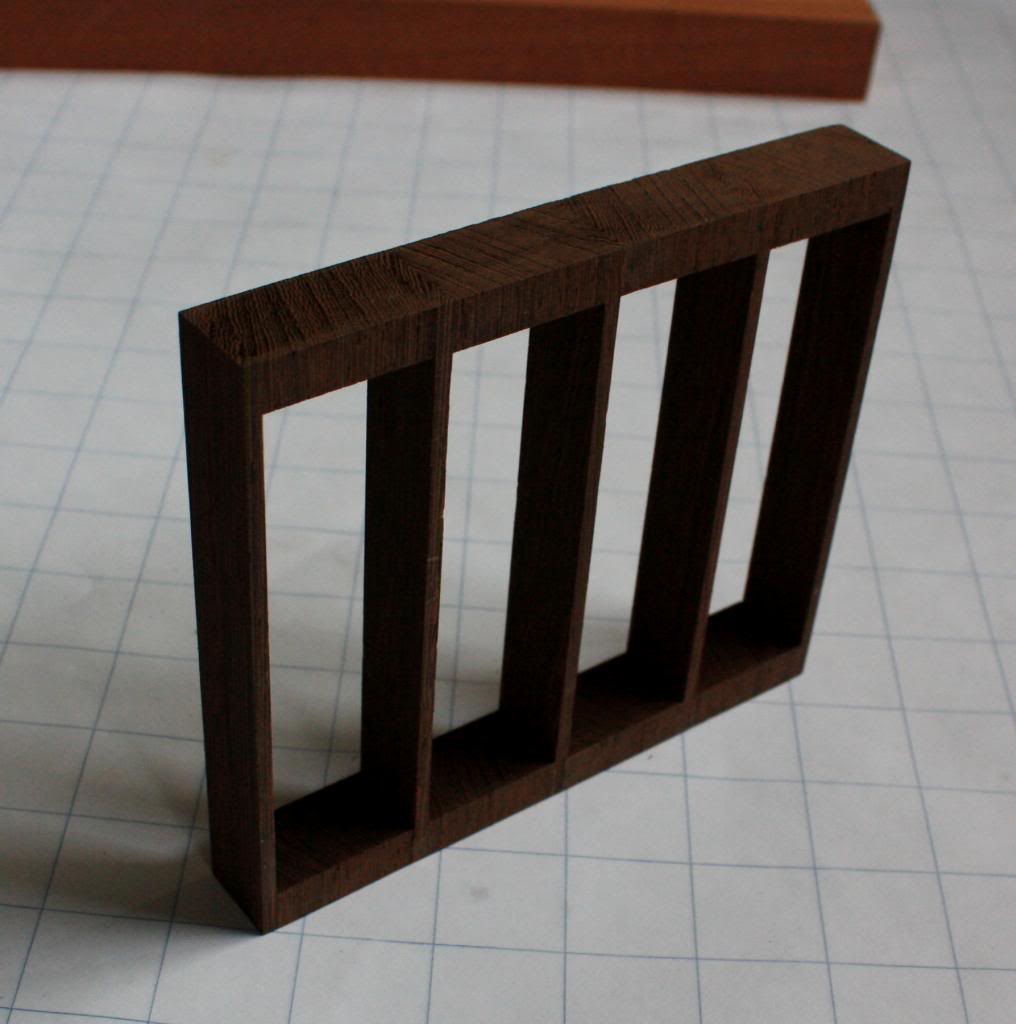
Here is where the pickup housing is at right now. I know that it looks different from the concept, but there is good reason. I had a slight oversight and ordered the wrong pickups originally. The spacing on the bart's j pickups were about 1mm too narrow above the bridge pickup. They probably would have worked, but if Christian is a hard player and caused the string to wander outside of the magnetic field, the sound would be just awful and I couldn't risk it. So instead of 5 compartments, we settled for 4 since the new pickups are a bit larger. I feel slightly embarrased for this, but it's not whether we fail or not, but how we recover.


I just wanted to show how this housing got glued up. Everything was cut long and then cut to size. But this sort of depicts how I arrived at the final product.

Just a picture of the body core blank. It's 1-1/4" thick right now, but will probably get sanded a little thinner. I want to see what thickness I can get the top and back. I want 5/16", so I might take the core down 1/8"

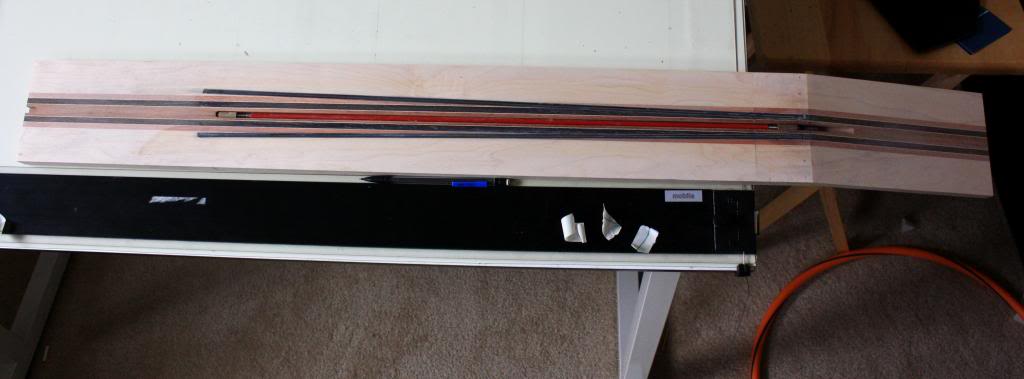
The neck with carbon fiber following the neck taper, and truss rod in place.
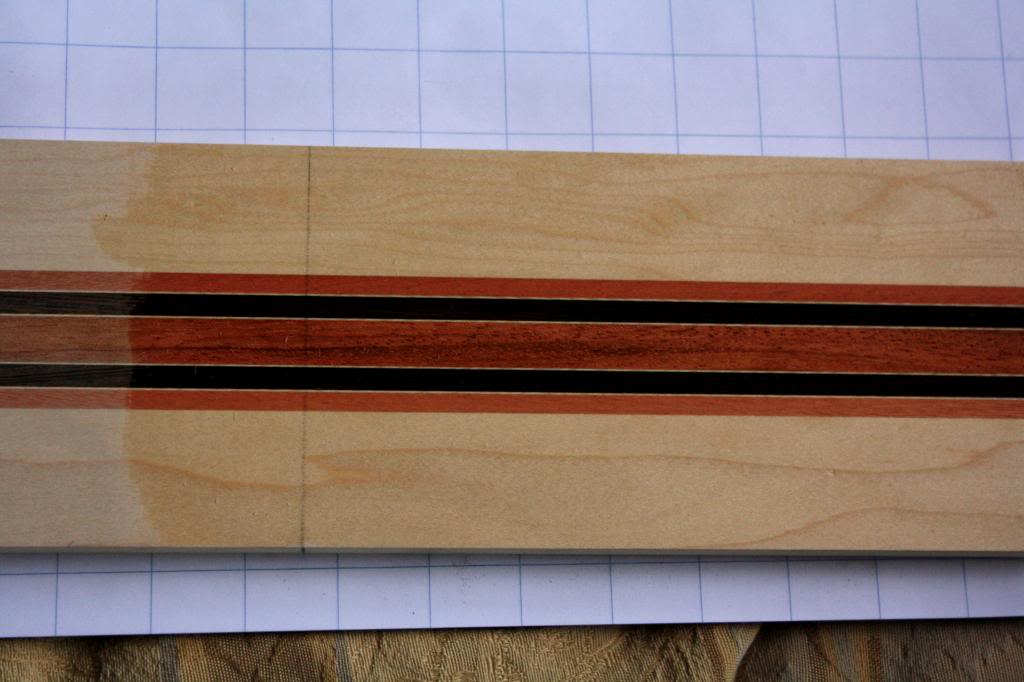
Just wanted to show neck wood contrast. This is just a water pop, and will be a lot more pronounced once the finish goes on, not to mention all the carving that will be taking place.
Well that's all that I have for today. I think that this bass is coming along nicely. Aside from the little pickup problem, everything is jsut going real smooth and that leaves me with a very comforting feeling. Some times things just work out like it was meant to be, and other times certain designs are very troublesome. Those are the ones that I realize probably weren't meant to happen. Again, have a very merry Christmas and Happy New Year.
Body template w/ bridge and pickup housing skeleton on top of Sapele body core.
This is where the bridge sits right now. Holes are drilled for string through, and recesses are routed for strings to rest on and create angle to saddle.
These are all the jigs that I built in order to create the bridge. The first one is what I used to route the saddle grooves. I just used a 3/8" template bit and set the depth to 5/16". It took a few passes since this bridge is so stinking hard. The other 3 show what I used to create the string recesses. It's basically just some guides and a stop used with a rigid trim router and an 1/8" bit. I hope this makes sense to everyone watching. I am not the best at explaining myself, but I know this and try to do my best.
Here is where the pickup housing is at right now. I know that it looks different from the concept, but there is good reason. I had a slight oversight and ordered the wrong pickups originally. The spacing on the bart's j pickups were about 1mm too narrow above the bridge pickup. They probably would have worked, but if Christian is a hard player and caused the string to wander outside of the magnetic field, the sound would be just awful and I couldn't risk it. So instead of 5 compartments, we settled for 4 since the new pickups are a bit larger. I feel slightly embarrased for this, but it's not whether we fail or not, but how we recover.
I just wanted to show how this housing got glued up. Everything was cut long and then cut to size. But this sort of depicts how I arrived at the final product.
Just a picture of the body core blank. It's 1-1/4" thick right now, but will probably get sanded a little thinner. I want to see what thickness I can get the top and back. I want 5/16", so I might take the core down 1/8"
The neck with carbon fiber following the neck taper, and truss rod in place.
Just wanted to show neck wood contrast. This is just a water pop, and will be a lot more pronounced once the finish goes on, not to mention all the carving that will be taking place.
Well that's all that I have for today. I think that this bass is coming along nicely. Aside from the little pickup problem, everything is jsut going real smooth and that leaves me with a very comforting feeling. Some times things just work out like it was meant to be, and other times certain designs are very troublesome. Those are the ones that I realize probably weren't meant to happen. Again, have a very merry Christmas and Happy New Year.



 . Anyway, here are the pictures of the burl in no particular order.
 just stopped by to see if there was anything new here! Could not help myself!


