• TalkBass has been independent since 1998. Add your voice.
    Create a free account to reply to discussions, view embedded media, and browse with fewer display ads.
    Join freeLog in
    Want zero display ads or expanded classifieds tools? Compare plans.

B15N style cab build

The idea for this, my first cab build, started whilst on holiday this summer, with too much time on my hands to mull over new 'projects', and with easy access to alcohol and the internet, I decided I needed a B15, the perfect partner for the '64 style P bass I made recently.

However, as with a genuine '64 P bass, I can't justify buying an original '64 Ampeg Fliptop, so I began to consider the alternatives, and in a bit of a deja-vu situation, the answer seemed to present itself.

Last year, whilst on holiday I missed out on a great deal on the Ampeg PF20t and PF50t, basically because I dithered instead of snatching one, and they went out of stock at this particular shop by the time I got home and got my arse in gear.
So, this year when I noticed a similar offer on the PF20t, I ordered one and delayed delivery till we got home.
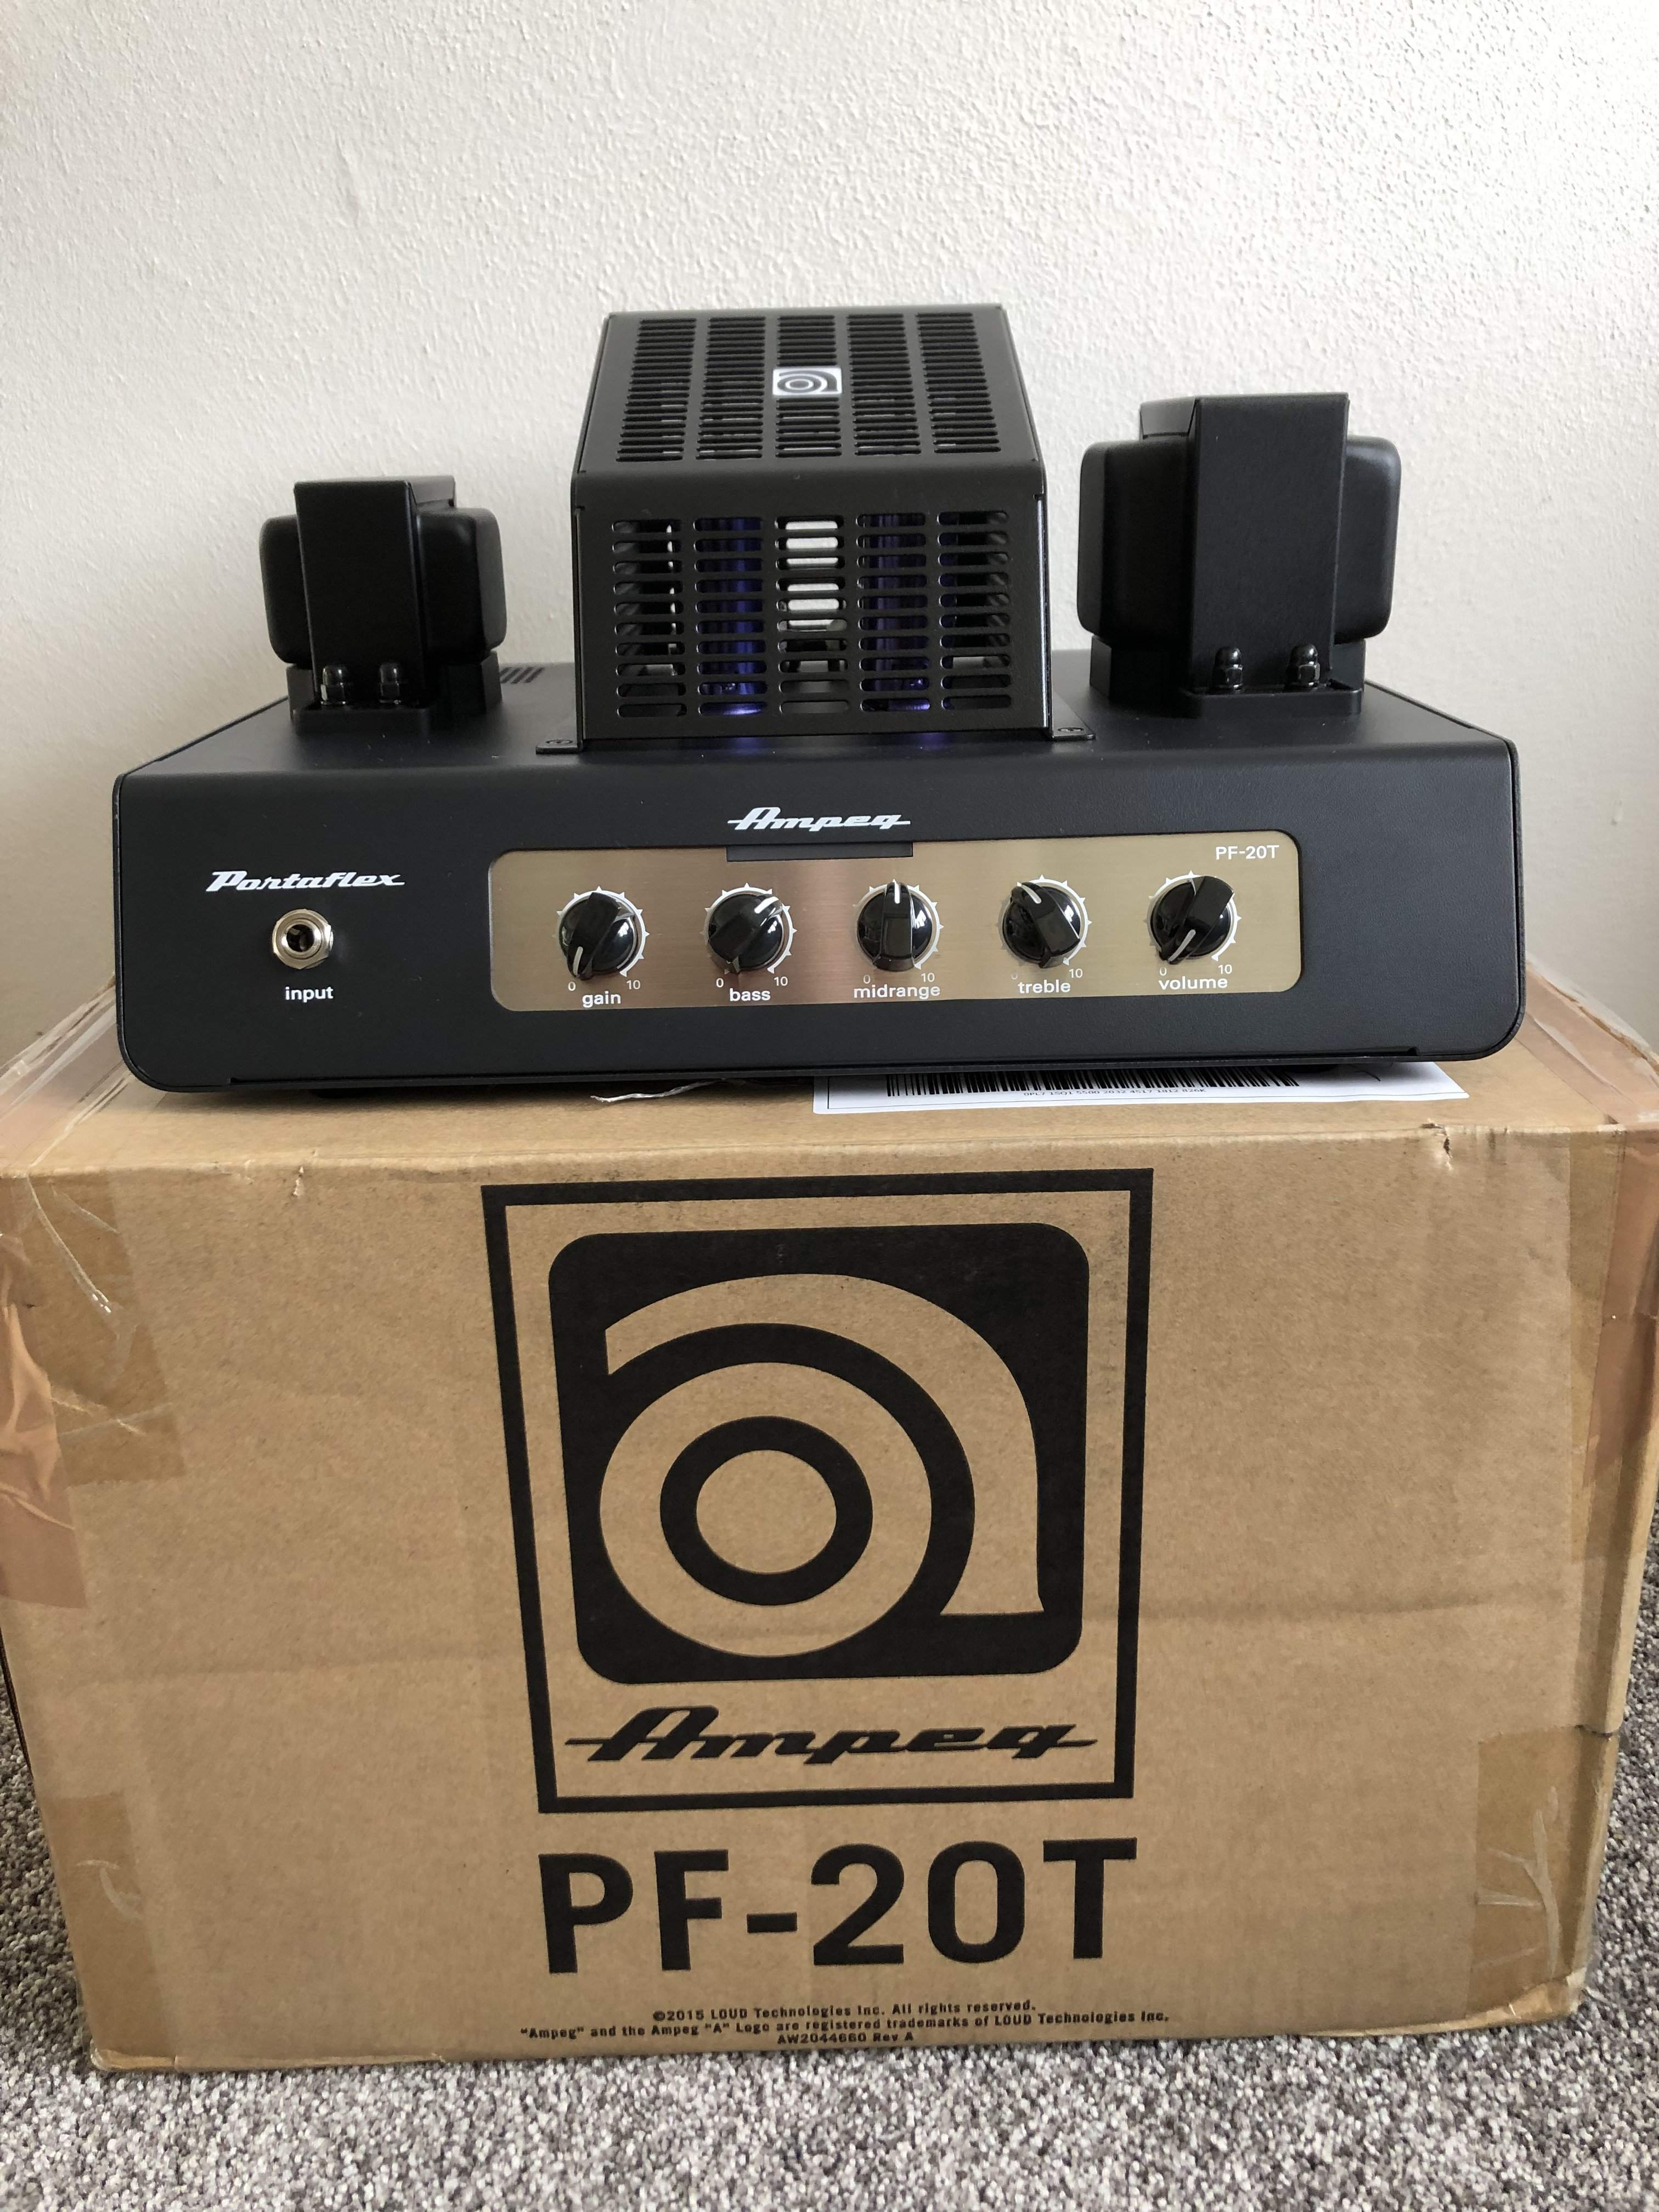
IMG_0497.JPG

This will suit my needs perfectly, I have never had a valve bass amp before, it's low power, intended for home practice and recording and you can plug it directly into a recording interface, without a speaker connected.

From what I read, the sound is reminiscent of a B15, and seemed to me to be the perfect alternative to shelling out on an original or a Heritage reissue, providing you can find one!

Then I began to ponder on the idea of building a cab like the infamous 'double baffle' cab from the early B15 fliptop combo's.

As you can imagine, there are a lot of references to the B15 on the internet, but surprisingly few people have properly documented any attempts at copying a cab or even restoring one, so getting anything more than the basic dimensions proved a bit tricky.

I found exploded diagrams of the cab design and the baffles on this site, and snippets of information from various sources, including Fliptop, who as you know, make reproduction cabs and restore original gear.
Ampeg Portaflex Double Baffle Cabinet.jpg

I had a fair bit of the drawings I needed, and enough reference photo's to have a go at 'reverse engineering' a cab, which after all will not be an exact copy of a flip top, when I received an offer of a complete set of plans for a B15N...…….result!

So, this is what I have in mind.
As I mentioned, I don't want or need the flip top arrangement on the top of the cab, this cab will be used for home practice and recording, so an authentic sounding and airtight cab will be better suited to my needs. The amp will be used a lot of the time, plugged into my recording interface and utilising the Two Notes cab sim, which has Ampeg models on it.

This will also (hopefully) make the cab build easier or more straightforward, as I have never made a cab before.

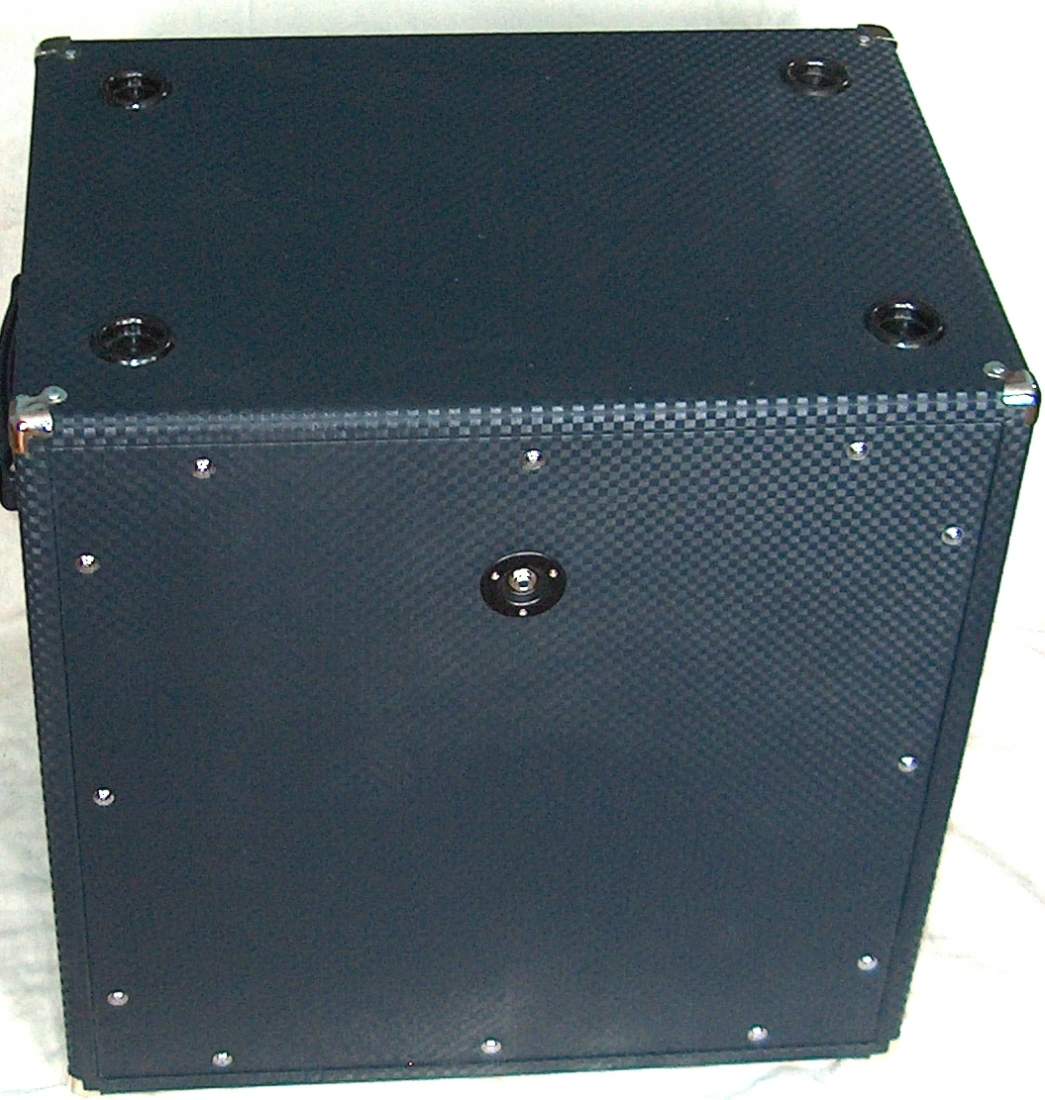
On the Fliptops website they offer an extension cab, which is pretty much exactly what I have in mind, with a solid top instead of the rotating tray thing, no wheels dolly on the bottom, and with a removable back for access to the speaker, but still retaining the characteristic double baffle design.
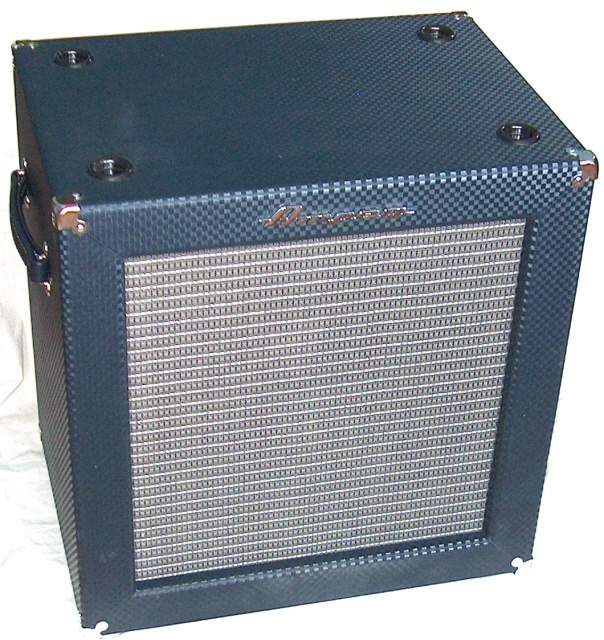
B15Extension cab.jpg

B15Extension cab rear.jpg

I found a local seller on Ebay, selling an Eminence Delta 15a, which is the replacement speaker recommended by Fliptops for the cabs they make, which incidentally start at around $500 plus shipping and import tax, so, obviously are a non starter for me. The Eminence seemingly sounds the closest to the original speakers.
Got the speaker for £10, I call that a bargain!
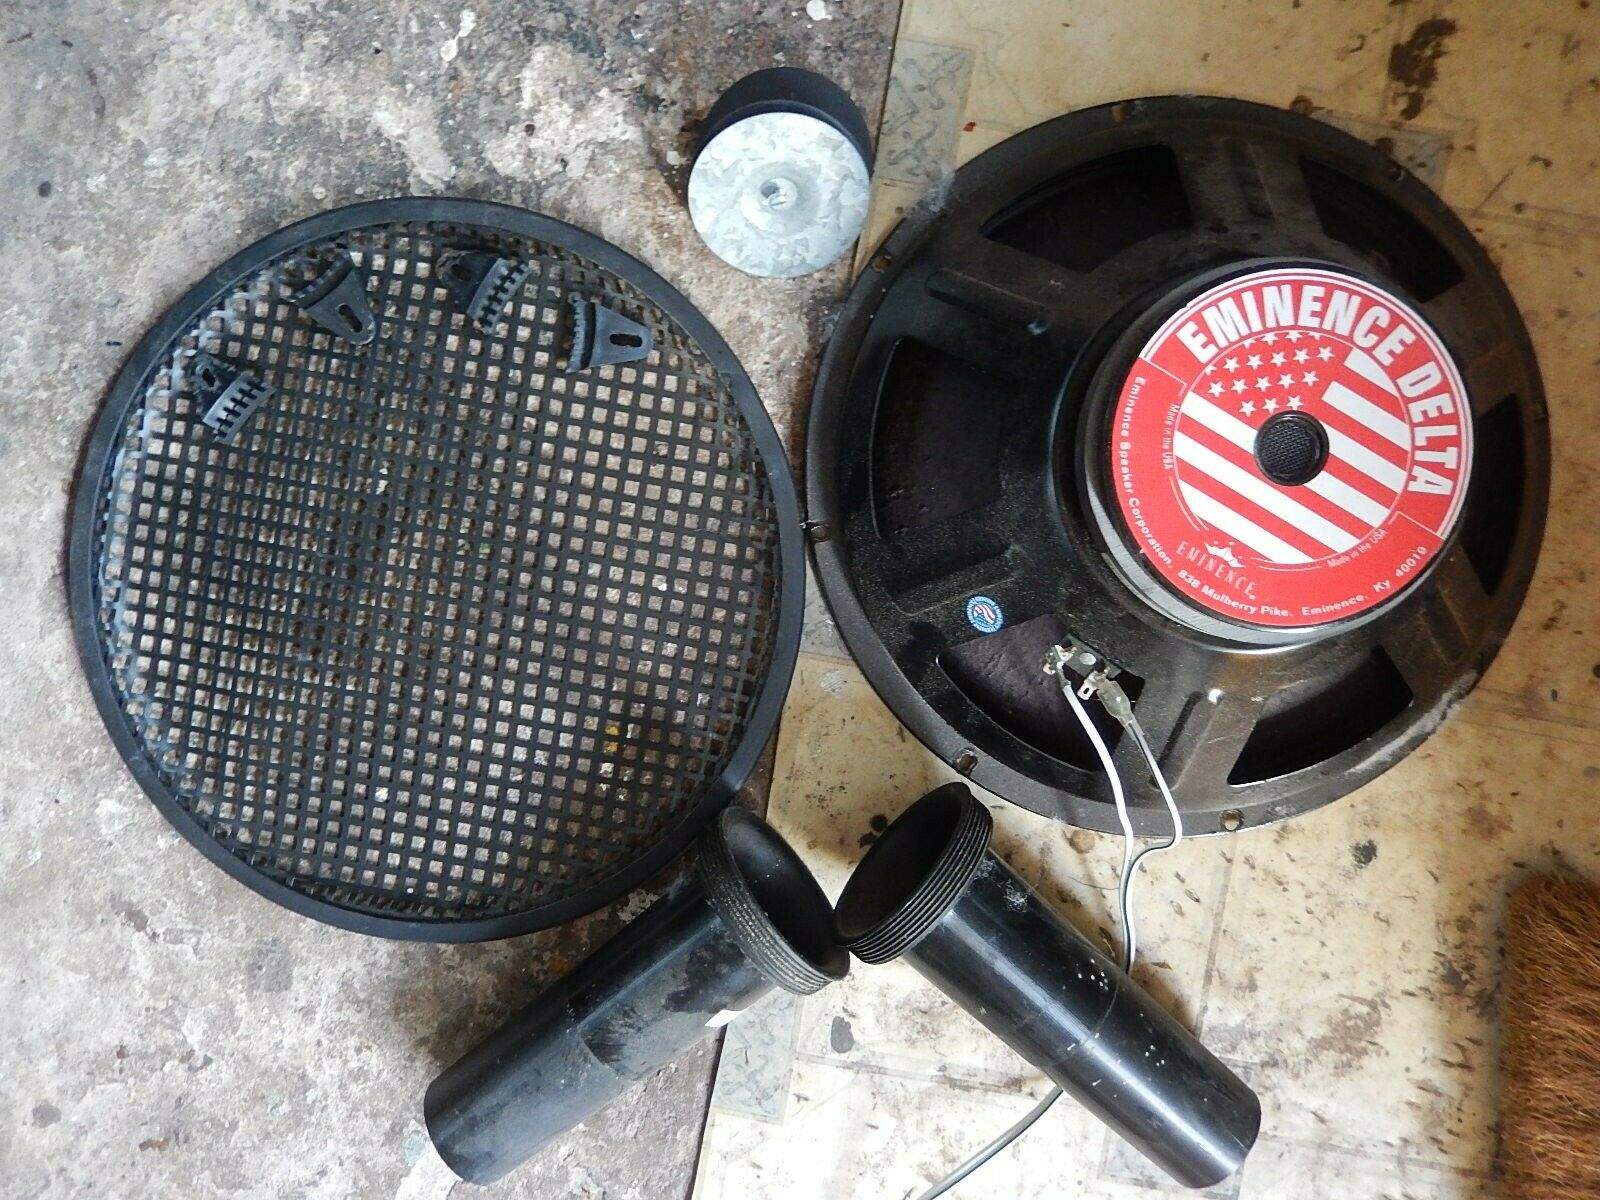
s-l1600.jpg
 
I got a couple of sheets of ply 1220x606 which fit perfectly into the back of a saloon car and left little wastage!
So, I did the speaker baffle first, need to do the spacer blocks and mounting bolts, and then grille cloth
IMG_3820.JPG

I have made the front facia thing, which is pretty much like a picture frame. My thinking behind doing that was, firstly it looked fairly easy to do, and most importantly, if I could get that fairly square, I could use it to help square up the sides of the cab when I glue it up.
Then I cut the four sides, which are all the same size as this cab won't have the flip top arrangement.

I don't have a dovetail jig, so I had intended to just do butt joints and add a square or triangular fillet strip to strengthen the joint, but then I found a clip on YouTube of this bloke who made a simple cheap jig for doing finger joints and thought it was exactly what I needed.

Here's the clip

Now, he used pine, both for the amp casing he made, and for the jig.

I couldn't find 18mm pine, so I had to use MDF, and the cab is plywood, which had a tendency to split little bits of the surface layer with the router, but even so, I have to say, it worked rather well, and will make for a neater, stronger joint, I'm sure.

Here's my MDF jig, not as tidy as pine and prone to splitting when the brackets were screwed on, but it did the job!
IMG_3789.JPG

IMG_3790 (2).JPG

IMG_3819.JPG

I then cut out the back panel and the inside baffle, which are just a couple of squares, and marked out the ports on the inside baffle.
Next step I got the cab glued, I found that using the front fascia part to help square it up made things a lot easier, otherwise I might have been experimenting with a rhombus shaped cab.

Not being a cabinet maker by trade, there was a bit of filling and sanding needed around the joints, but it's smooth now and all that will be hidden under the tolex later.

The main thing is, it feels rigid, it looks about right and it's square!
IMG_3837.JPG

IMG_3838.JPG

I also glued in the spacer bits, behind the front facia and the speaker mounting baffle glues in behind that next.
IMG_3829.JPG
 
Got the speaker baffle done
View attachment 3569075
I need to drill the holes for the front baffle to locate and hang, and I need to get some of those T-nut things for fitting the speaker, as that's what the bloke at Vintage Blue does, I thought I'd follow his example, he looks like he knows!

[This invalid link has been removed]
Looking great so far! And yes, Mark at Vintage Blue is definitely who should be your example. Fliptops builds a serviceable cab as well, but Mark's cabs are so much better built because he found ways they could be improved and did them.
 
When sizing your back panel, leave an allowance for two layers of vinyl and the adhesive. It should fit snugly enough that you can pop it in and out without damaging the vinyl. Not too tight, not too loose. Good to use a cup washer with a flat bottom.

You will need four approximately 2” x 1” x ⅜” thick blocks that separate the outer and inner baffles. The 2” longitudinal axis angles towards the center point of the baffle.
 
  • Like
Reactions: rubis and JimmyM
Looking great so far! And yes, Mark at Vintage Blue is definitely who should be your example. Fliptops builds a serviceable cab as well, but Mark's cabs are so much better built because he found ways they could be improved and did them.

Out of curiosity, I’m far more familiar with the sound of the late 60s/early 70s era B-15N cabs than I am the older double baffle variety. How do they compare as far as sound goes? I’m guessing they’re pretty close?
 
  • Like
Reactions: rubis
Out of curiosity, I’m far more familiar with the sound of the late 60s/early 70s era B-15N cabs than I am the older double baffle variety. How do they compare as far as sound goes? I’m guessing they’re pretty close?
I had a 77 B-15N with a 71 CTS and I have a 64 double baffle with a 66 Ampeg badged CTS and two repros with Delta 15a's, which sound identical to me. The 70's cab was darker on the top end and had a great but somewhat heavy low mid/midbass response, while the double baffle has more high end and is overall more even sounding, maybe slightly bigger in the high mids. I could get the 64 sounding like the 70's cab easily enough, but had some difficulty going vice versa, so I kept the 64.
 
Wow JimmyM, you are a lucky man to have owned all those cabs, and a genuinely informed opinion.
I hope I don’t offend anyone, particularly purists, with this build, as it won’t be a true Fliptop combo, although, as I understand, it’s possible to mount a PF20/50t on a tray and incorporate it into a portaflex style combo, but separates suit my needs better.
 
Looks like a really nice build. @beans-on-toast's advice about sizing the back to allow for the two layers of vinyl is sage advice...I've made this sort of mistake before, thinking the thickness of the vinyl is small enough to not need budgeting for. I'd make it an eighth-inch smaller all the way around, or, in other words, 1/4" smaller in each axis. and yes, use finish washers under the screws.

My other observation is that, as cool as the box joints are, they aren't really necessary; a butt joint with a cleat is sufficiently strong and rigid, presuming it is both glued and screwed. But they are very cool, and you did a good job on the execution. especially in fabricating your own jig. I'm looking forward to seeing how your project advances. Cheers.
 
Looks like a really nice build. @beans-on-toast's advice about sizing the back to allow for the two layers of vinyl is sage advice...I've made this sort of mistake before, thinking the thickness of the vinyl is small enough to not need budgeting for. I'd make it an eighth-inch smaller all the way around, or, in other words, 1/4" smaller in each axis. and yes, use finish washers under the screws.

My other observation is that, as cool as the box joints are, they aren't really necessary; a butt joint with a cleat is sufficiently strong and rigid, presuming it is both glued and screwed. But they are very cool, and you did a good job on the execution. especially in fabricating your own jig. I'm looking forward to seeing how your project advances. Cheers.

True what you are saying about butt joints. The original double baffle cabs had box joints so in that respect it’s authentic.

I would also countersink the jack dish so it’s flush with the surface. A minor detail but nice to see. Maybe even have a parallel wired ¼” and speakon dish for connecting a second cab. There are lots of options.
 
Wow JimmyM, you are a lucky man to have owned all those cabs, and a genuinely informed opinion.
I hope I don’t offend anyone, particularly purists, with this build, as it won’t be a true Fliptop combo, although, as I understand, it’s possible to mount a PF20/50t on a tray and incorporate it into a portaflex style combo, but separates suit my needs better.
Why should anyone be offended? Honestly, fliptop feature is my least favorite part of the Portaflex . Flipping those heads can be awkward and not fun on the back if you're not careful.
 
Why should anyone be offended? Honestly, fliptop feature is my least favorite part of the Portaflex . Flipping those heads can be awkward and not fun on the back if you're not careful.
Actually, I'm quite offended. ;) I'm with you in that the fliptop feature is my least favorite part of this design...I mean, it works, but it always seemed sub-optimal to me.

 
  • Like
Reactions: JimmyM and rubis
I thought the fliptop was a Amazing idea....but is also the downfall i guess as fas as leakage over time or clamps that rattle.

all of that has work arounds and new seals and tight fitting clamps.
I thought it was rather cool. and enjoy seeing repro cabs made with the woodworking and seal construction

I really like your design or fliptops design with a removable back, and allows a rear mounted speaker. same downfall it could eventually leak.
but if done well it really is no problem. I like and feel rear mounted drivers are better likewise love the look or a bunch of screws holding in the rear plate.

Midrange / highend response and clarity of a speakers cab is mainly the driver, midrange response can be improved with the box by lining the walls with poly batten.

Major effect a box will have have is its overall size and driver used. if the driver needs a larger airspace and is in a box that is too small. it will be bloomy or boomy.
probably 5 to 10 or more very classic 15" bass drivers you can use newer or older design. and all of them do extremly extremly well in 3 to 3.4 cubic feet tuned 40hz.

Its the only thing im curious about and wish someone would do a rice/salt test with the older Ampeg double baffle and actually confirm the resonant frequency or tuning frequency or Fb of that box.

My hunch tells me its pre TS design is rather high tuned at around 60 to 70hz
were a good tune for a 15" driver needs to be 40 to 45hz

ironically JBL always recommended 40hz tuning for 130 and 140 drivers. If you model those drivers in a modern TS modeling program. because of the unique mid response of those drivers. A auto alignment program will put them in a box that is too small, and tune to a ridiculous high tune like 70 hz

Ironically having a feeling that the double baffle Ampeg cabinets are tuned to 60 to 70 hz.
Id say a JBL 130 or a EV15L most likely the 2 best candidates to work in those boxes
 
  • Like
Reactions: rubis
Got the speaker baffle done
View attachment 3569075
I need to drill the holes for the front baffle to locate and hang, and I need to get some of those T-nut things for fitting the speaker, as that's what the bloke at Vintage Blue does, I thought I'd follow his example, he looks like he knows!

[This invalid link has been removed]

If it's not too late you may want to hold off on drilling those holes in the speaker baffle. I typically drill the holes in the grill baffle first and then, holding it in position, use that as a template to mark the hole locations on the speaker baffle. If you have drilled them already but haven't drilled the grill baffle yet you can do the opposite: hold it in position and mark the holes using the ones already drilled in the speaker baffle.

As a rule of thumb I allow 1/16" for two thicknesses of tolex. On your removable back that would be 1/16" for each of the four edges, meaning downsizing the back a minimum of 1/8" vertically and 1/8" horizontally, versus the (uncovered) opening. That minimum would result in a really tight fit so you would actually downsize more, depending on how much clearance you wanted to allow. The same consideration needs to be given to the final size of the grill baffle as well, to allow for the thickness of the grill cloth and the tolex on the face frame. In this case, however, a snug fit isn't such a bad thing.

Also, if it's not too late, you may want to mount the 4 spacer blocks to the back of the grill frame rather than to the front of the speaker baffle. The 2 photos below show how it was originally done by Ampeg:

IMG_2639.jpg
IMG_2638.jpg


The problem with this method is that as the studs on the grill were tightened the nut on the grill was pulled into the spacer block. Overall that's not a huge deal but that problem is eliminated by counter-boring the blocks and mounting them on the grill baffle instead:

Grill Baffle3.JPG


Jess Oliver made that suggestion to me back when I started building cabinets and it works well.

Good luck with you project!
 
Thank you very kindly for sharing your knowledge and improvements. I found a couple of previous threads on here where you had posted pics and advice and I’m planning to follow your lead (obviously ),
Thanks again to you, redbrangus and beans on toast for the reminder about allowing for tolex.
Thank you all for commenting and encouraging, most welcome..... this is turning into an Oscars’ speech ...I better clear off and make some coffee !
Good day to you all !