
If you remove the carpet, my vote is also for DuraTex. Easy to apply and very nice looking it’s done. I’m doing a cabinet later this month.Here ya' go... they sell it by the yard. CARP-2 Bag end Deep Red Carpet, 1 square yard, bag end part
Like somebody already posted, call them for advice. They have always been very helpful when I needed anything.

Enjoy the benefits of a premium membership!
Upgrade Account
-
TalkBass has been independent since 1998. Add your voice.
Create a free account to reply to discussions, view embedded media, and browse with fewer display ads.
Join free Log in
Want zero display ads or expanded classifieds tools? Compare plans.
You are using an out of date browser. It may not display this or other websites correctly.
You should upgrade or use an alternative browser.
You should upgrade or use an alternative browser.
Bag End Carpet
- Thread starter pacetownsley
- Start date
More options
Who Replied?
(Insert funk finger commercial here)Good luck, watch out for your fingers. They are only partially replaceable...


Well, things are coming along pretty well. The $60 steamer I got from AmaXon worked pretty well. It wasn't very messy and the carpet came off readily but it would be a lot easier if you had a friend pull the carpeting while you steam it. As you can see in the pics there will be a good deal of glue left on the cab after it's stripped - no getting around it. The cab really wasn't exposed to too much moisture during the process which I was really glad about. I didn't want the batting inside to get soaked and have that take a week to dry out. It took me about two days to get the sanding after removing the carpeting and that's probably about the amount of time you'll want the cab to dry since the glue will kind of reactivate after being hit with the steam. Once it was completely dry again I went at it with a reasonably sized belt sander and 80 grit paper. In the places where the glue is a lot more present there will be times when the glue will "ball up" kind of under the sanding belt. At times like that roll the excess glue off with you hand and continue to sand. The 80 grit worked pretty well, and remember - sand paper is cheaper than your time! When a belt becomes less effective - replace it. I used about 4 or 5 belts of sandpaper for the whole thing and some parts were a good deal more difficult than others due to the amount of glue used. Take your time - it'll all come off eventually. Clamp the cab to a bench and let the sander do the work. Don't try to muscle it. The carpet initially wrapped around the front edge of the cab and when it came off it only left a little carpet and glue residue on the inner lip of the cab. I thought that this would be a minor issue since the inner edge will be mostly hidden by the grille when it's reassembled. But it's also possible it will need to be dealt with - which entails the grille stand-offs needing to be removed and the inner edge sanded as well. That'll be a bitch! The jury is currently out on that one (sigh~) I stuck the jack plate inside the cab under the batting so it wouldn't get caught up in the sander. After that was done I used a "straight" sander and hit it with 120 grit to smooth out the previous sander's artifacts and touch up the edges a little bit. I'm not sure at this point how I'm going to finish it off. I talked to a guy at a local Rhino Liner place that said he'd paint them for about $100. I say "them" because I've also got a Bag End Dx15 Deep Red to do as well and initially asked him about doing both. But since the weather is changing rapidly here in Michigan, and I have to do all this outside, I'm not sure if I'll get to the 15 before spring. We'll see. Now that I've done one the second will be a walk in the park! (Laughs)
Anyway, I've seen these cabs with a natural finish for a long time and I'm pretty sure they were also Deep Red covered cabs that someone stripped for some reason or another. But I also think I've seen Bag End selling natural finished cabs in the past - and they don't look bad. What I'd really like to do is get a "Deep Red" colored bed liner finish. Now that'd be cool. But there is also the thought that a truck bed liner finish will make the cab a LOT stiffer and I'm not sure if that's a good thing or not. Anyone with thought's on the matter is welcome to chime in. I'll continue adding to this thread as I progress. Stay tuned!
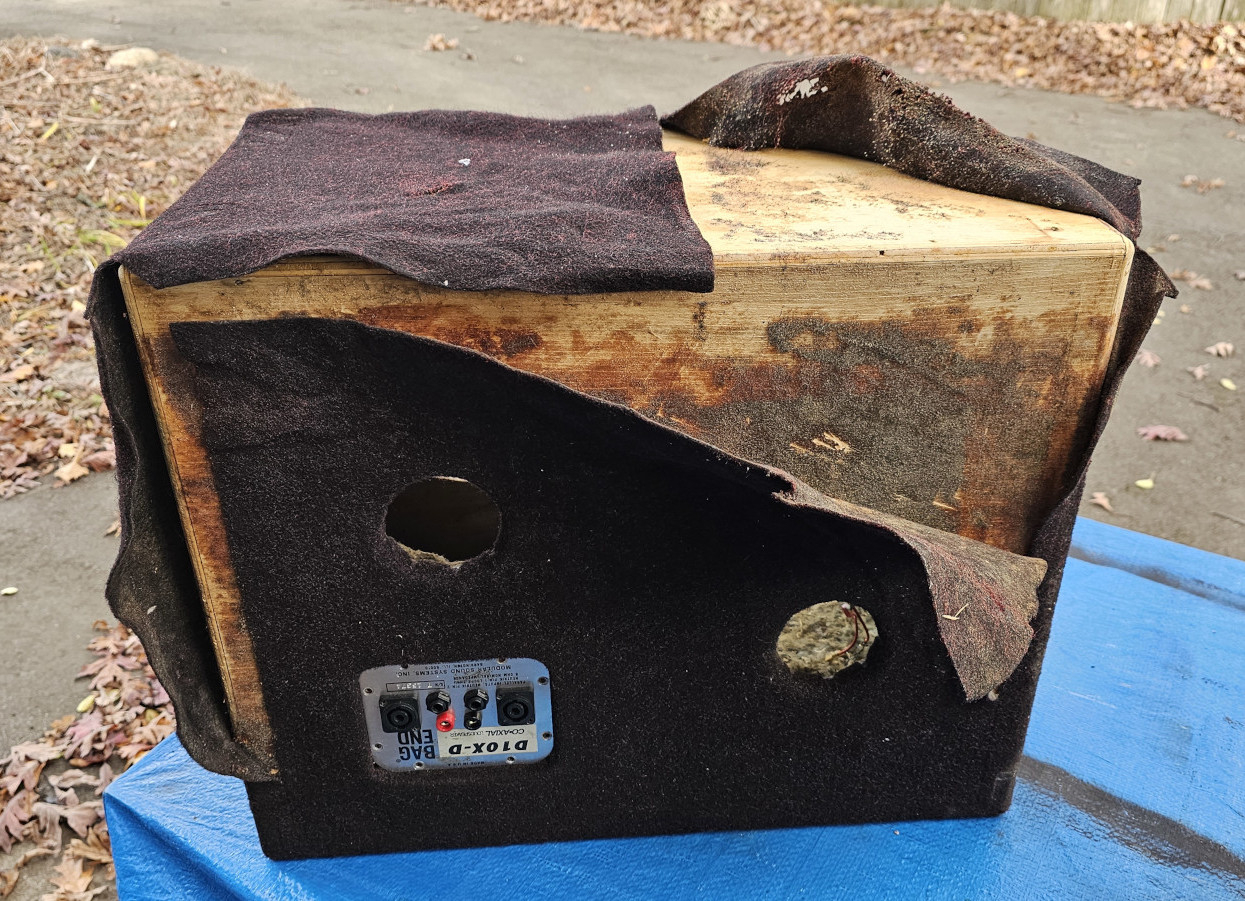
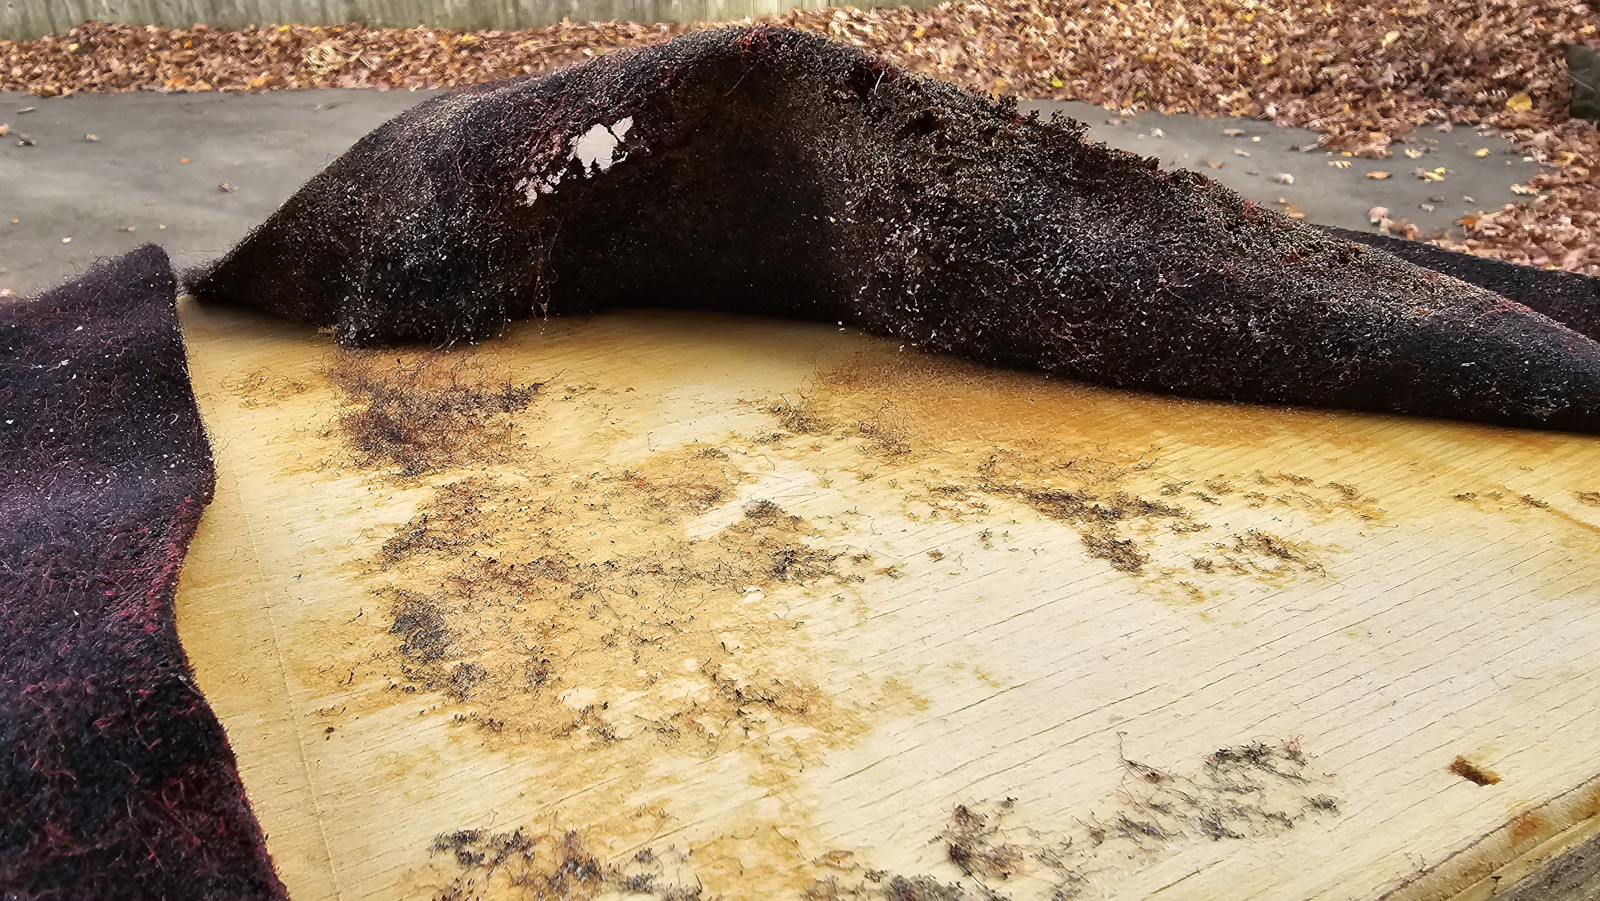
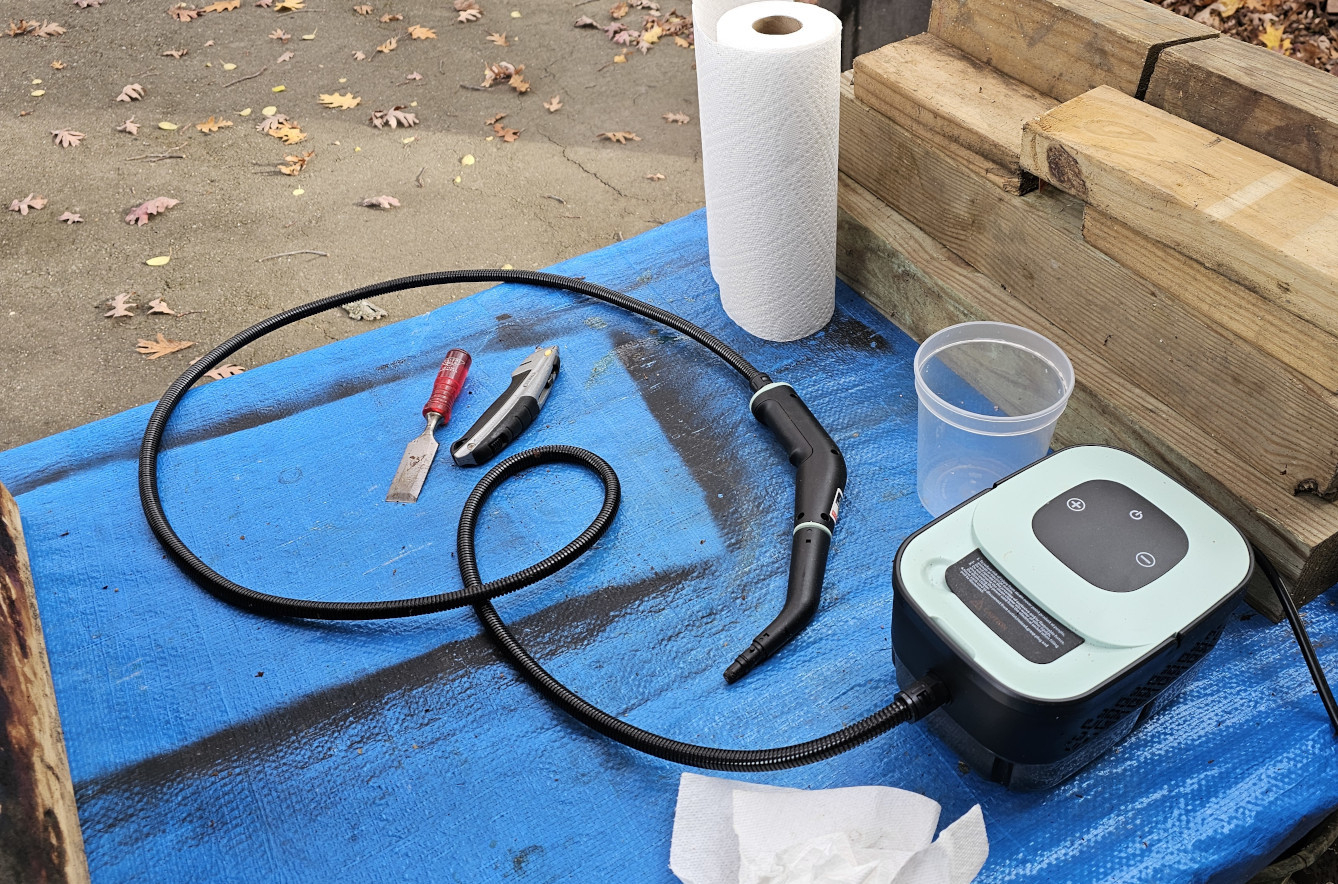
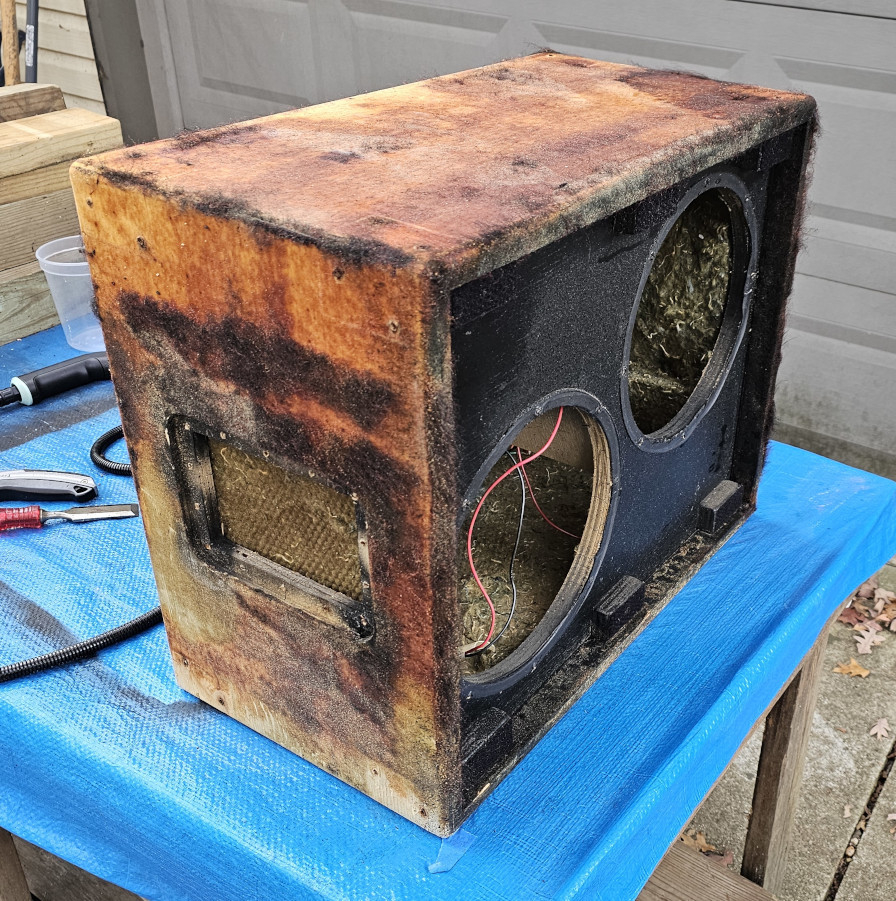
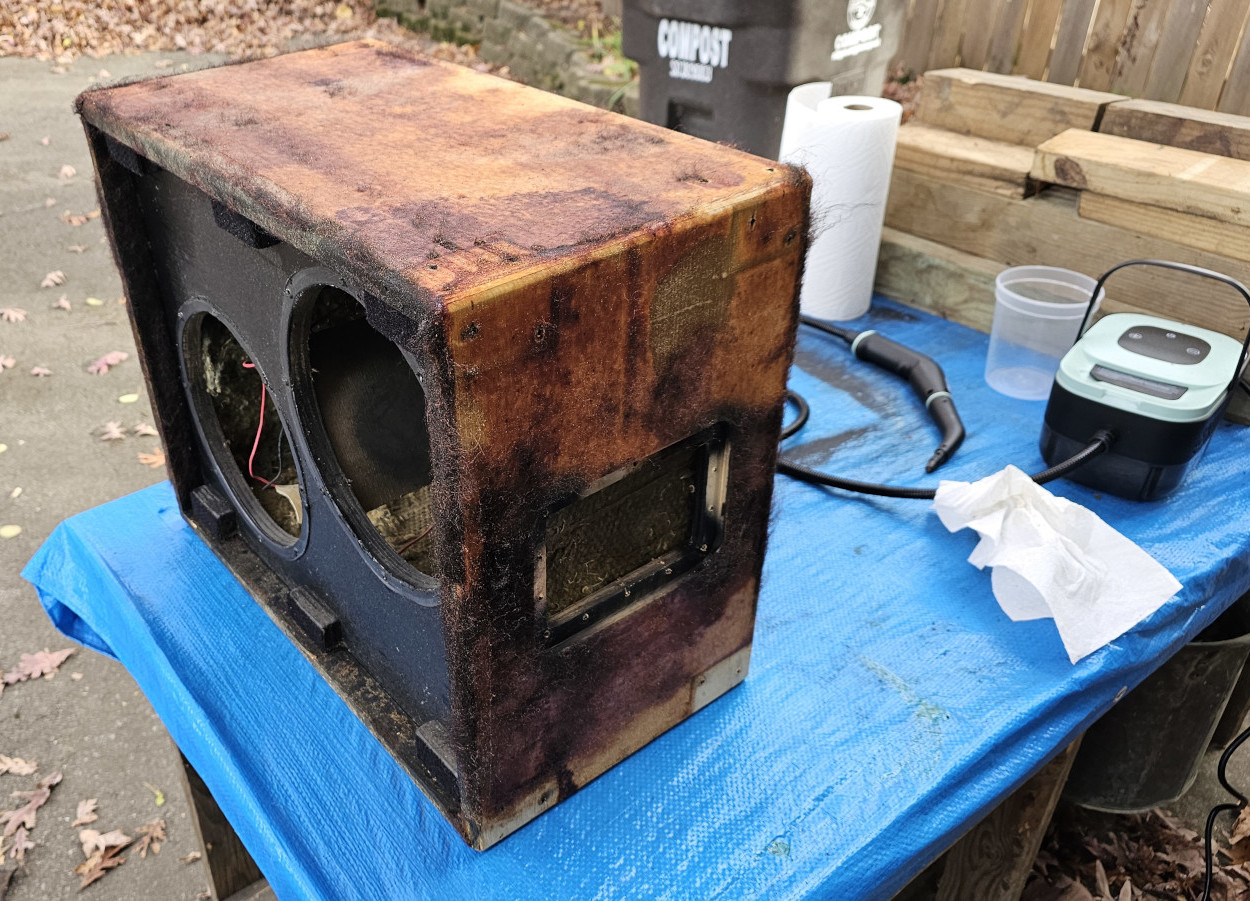
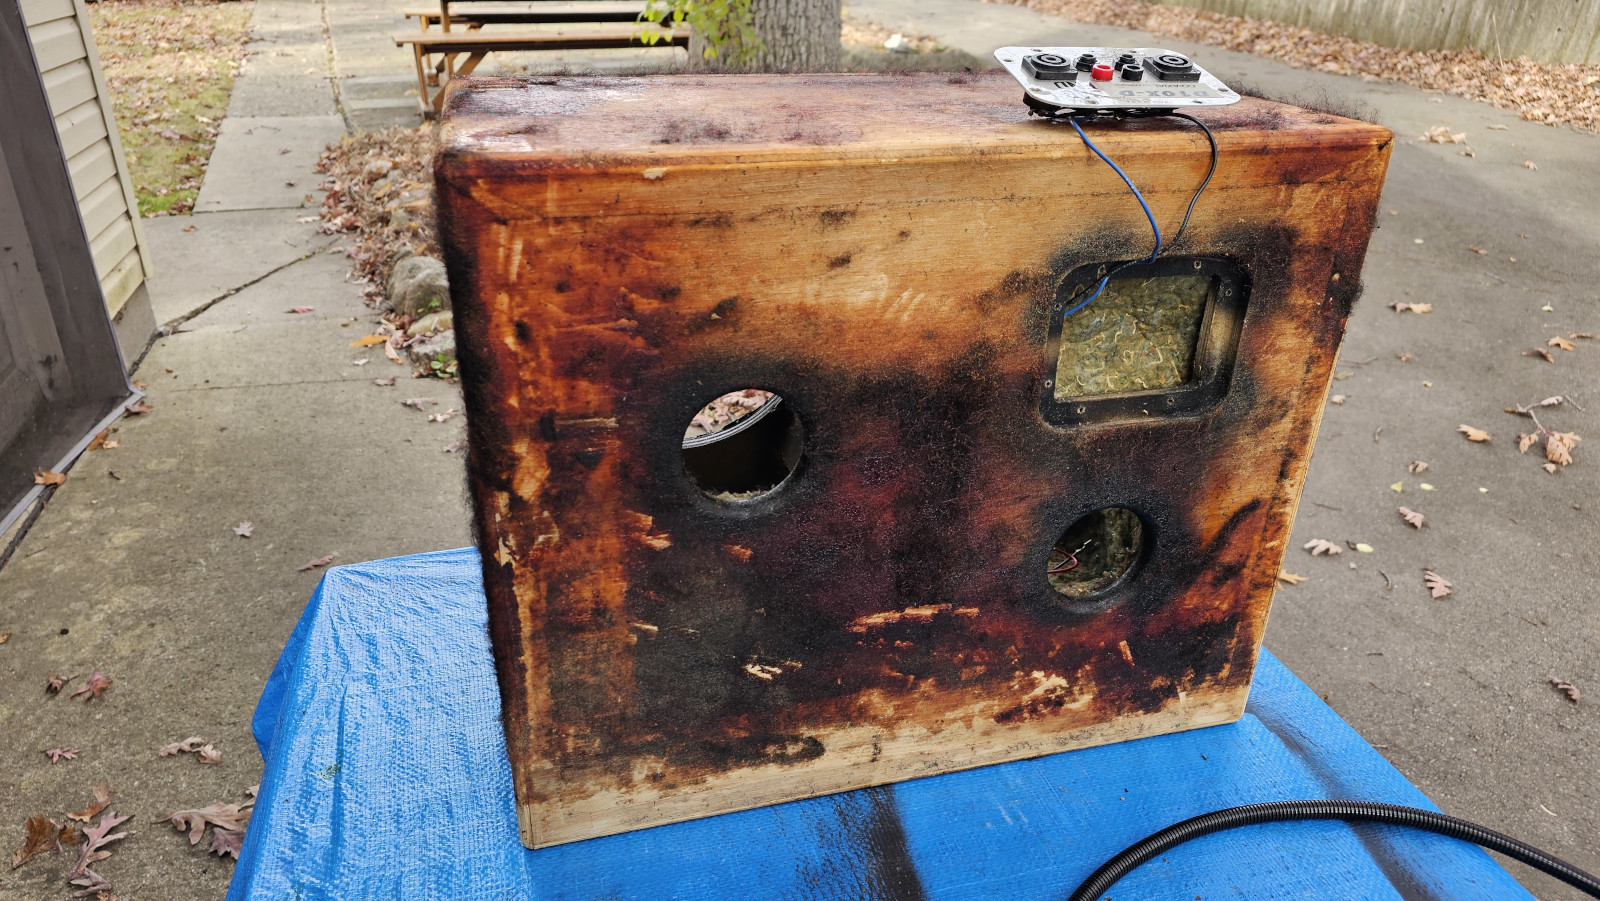
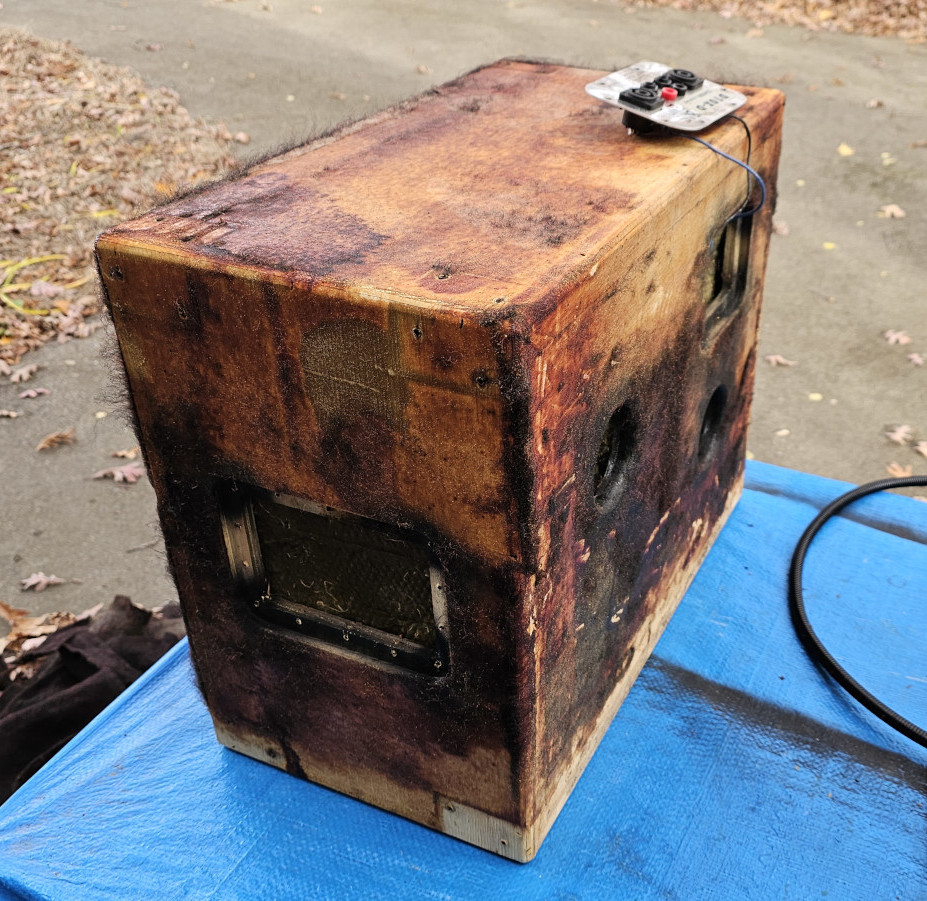
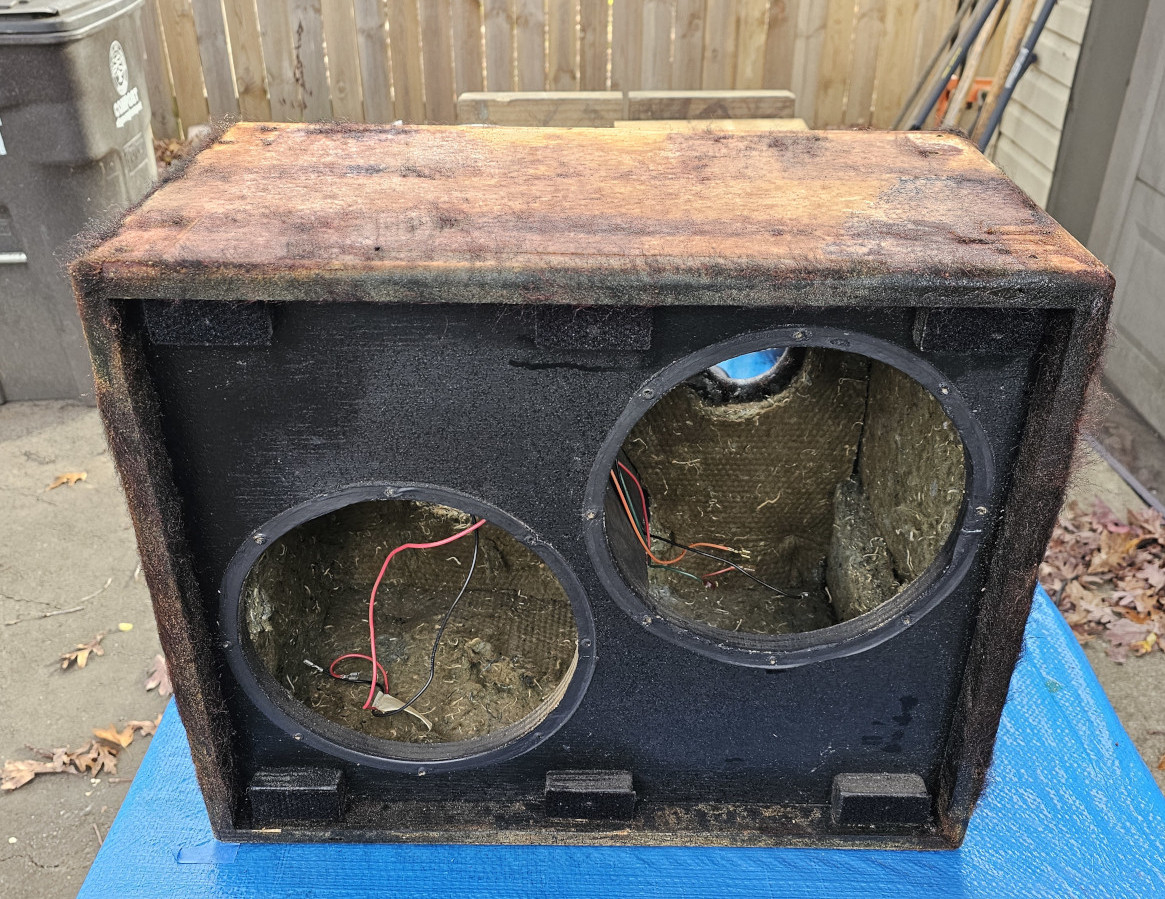
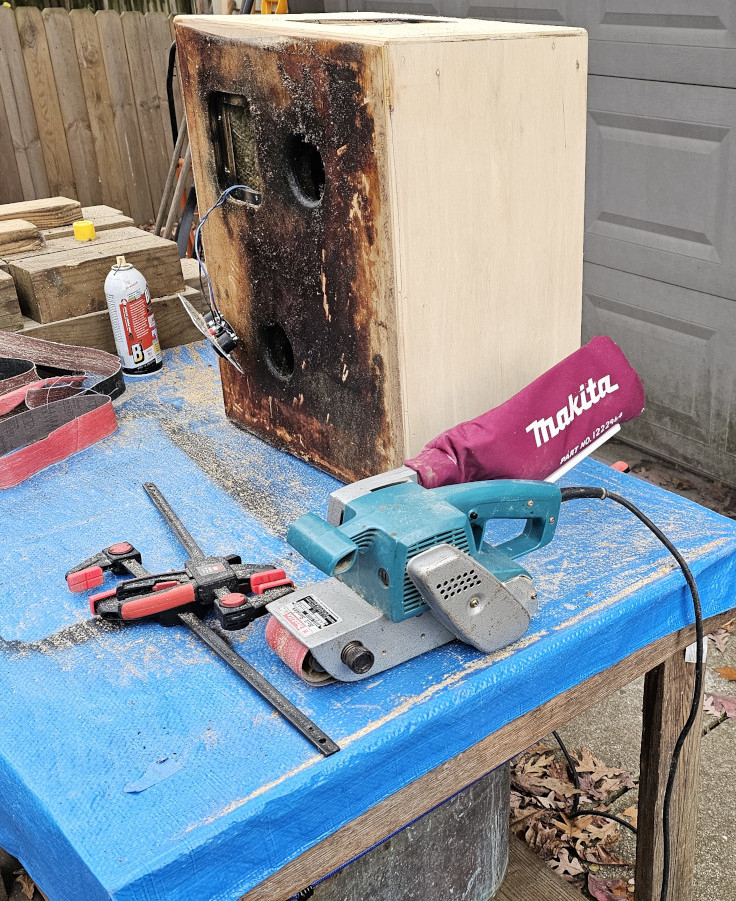
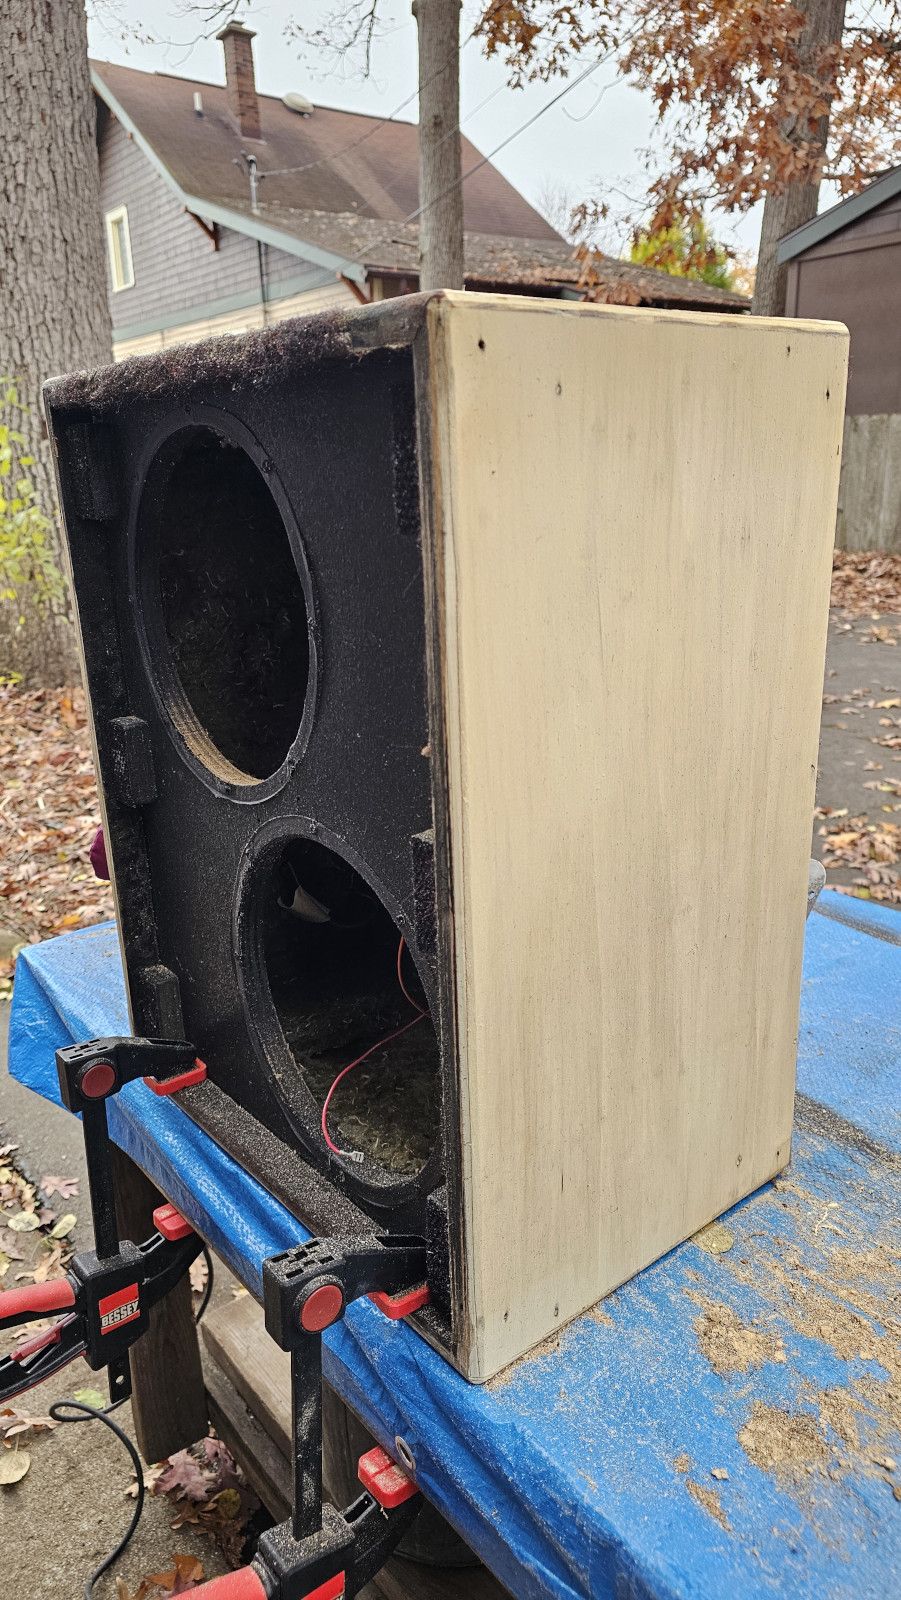
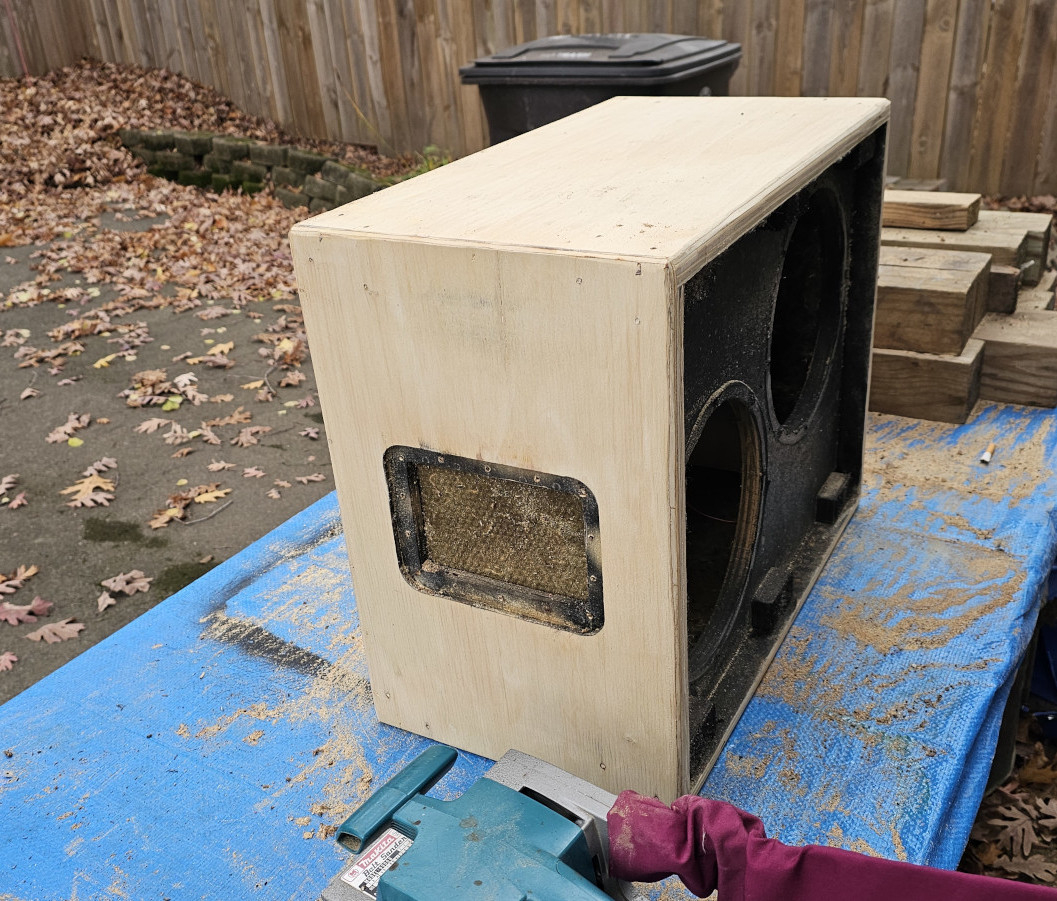
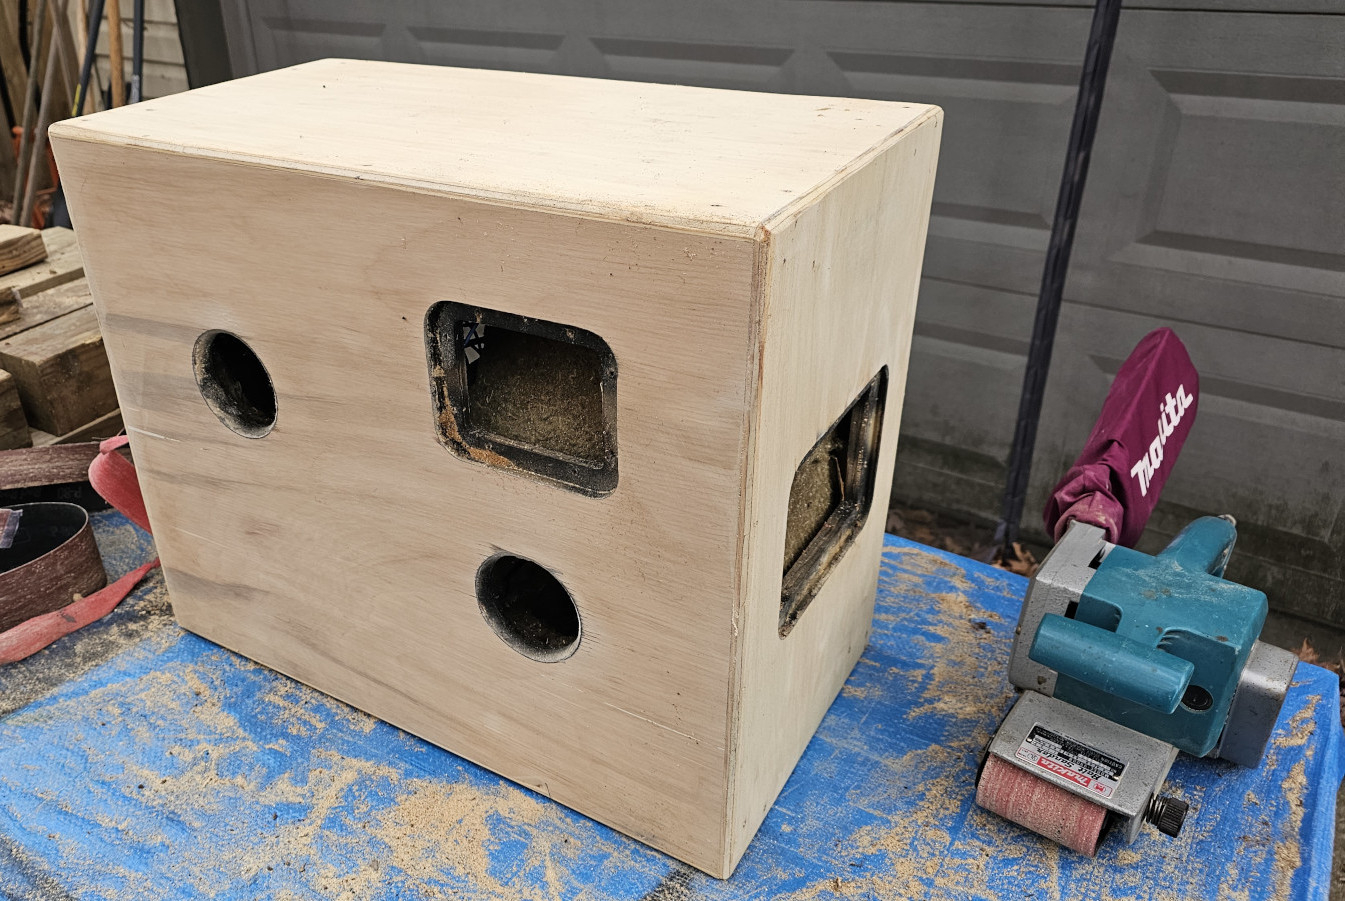
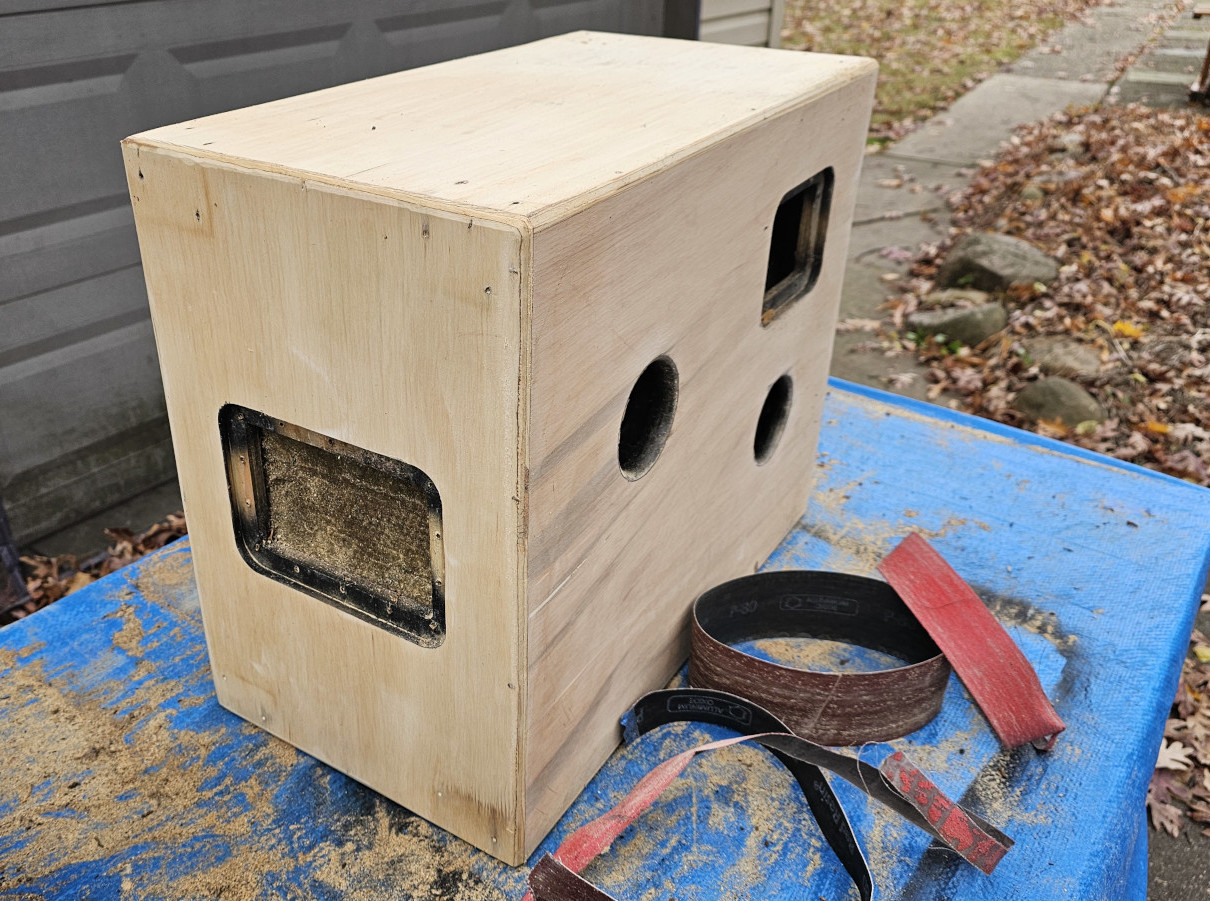
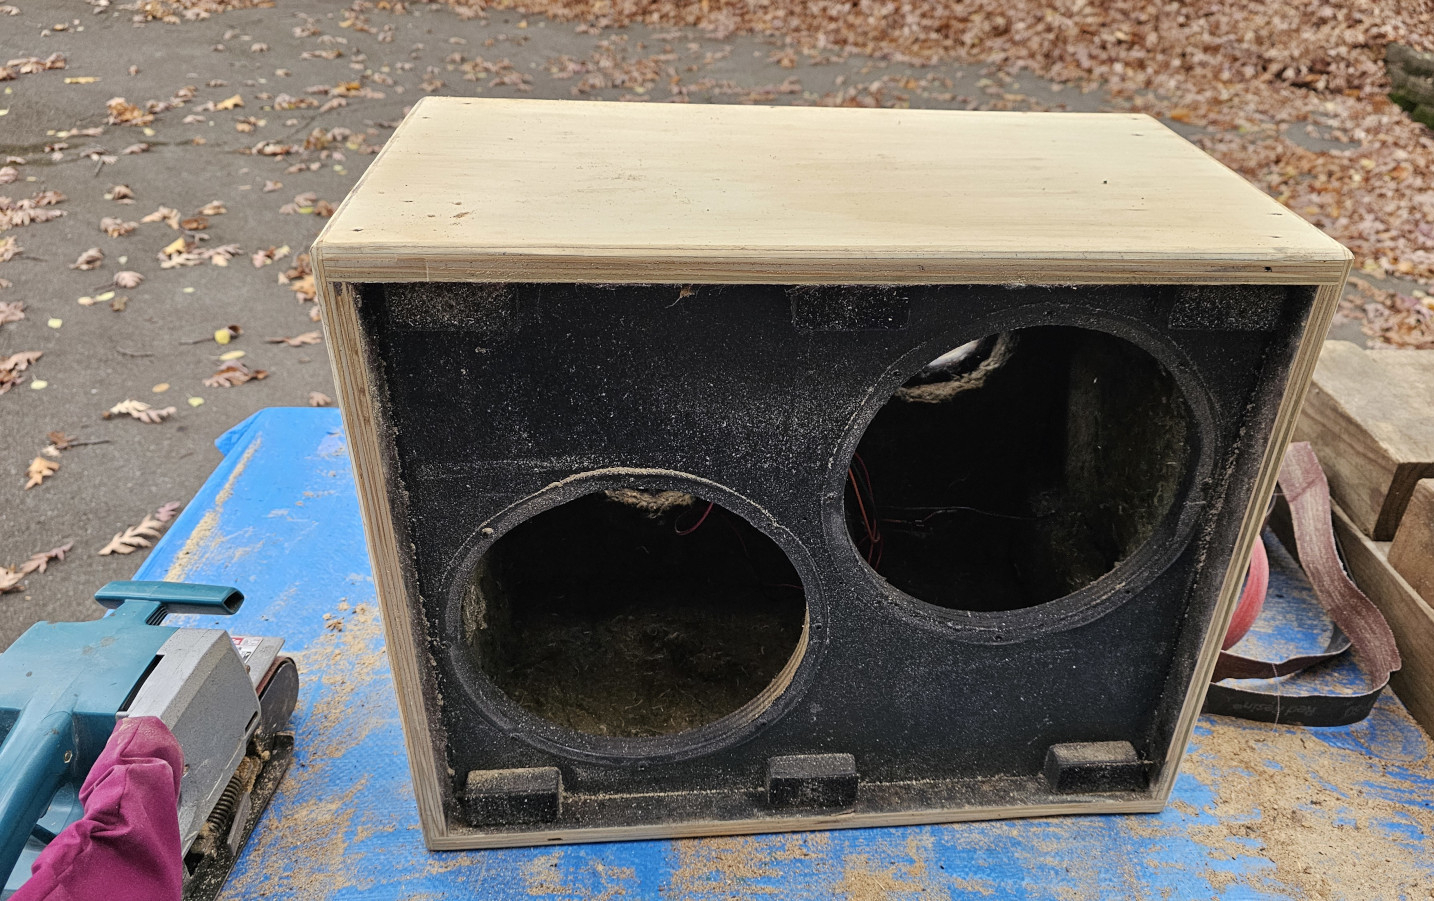
Anyway, I've seen these cabs with a natural finish for a long time and I'm pretty sure they were also Deep Red covered cabs that someone stripped for some reason or another. But I also think I've seen Bag End selling natural finished cabs in the past - and they don't look bad. What I'd really like to do is get a "Deep Red" colored bed liner finish. Now that'd be cool. But there is also the thought that a truck bed liner finish will make the cab a LOT stiffer and I'm not sure if that's a good thing or not. Anyone with thought's on the matter is welcome to chime in. I'll continue adding to this thread as I progress. Stay tuned!
Last edited:


- Feb 12, 2006
- 60,957
- 5
- 220,613
- Disclosures
- Development Engineer-Mesa Boogie, Development Engineer-Genzler (pedals), Product Support-Genz Benz
I’m exhausted just looking at it!
The natural birch finish was a factory option. Nobody in their right mind would attempt extracting a natural finish after being covered with carpet. It would be cheaper building a new cabinet.
The natural birch finish was a factory option. Nobody in their right mind would attempt extracting a natural finish after being covered with carpet. It would be cheaper building a new cabinet.

Way more work than one thinks, I painted cars for ten + years and did my 210 Eden cabinet years ago it’s way time consuming and I wouldn’t have attempted without any prior knowledge of what I was getting into.Im sure the BE is pretty similar.Looking good though 

With the wood that clean you probably could get a decent natural finish on it. You’ve already done the hard work, stain and poly over this would be fairly easy.
You mentioned the liner already and stiffness, with that 3/4” plywood I can’t imagine that it’s moving as it is, or that a different outer coating will affect the tone in any way.
You mentioned the liner already and stiffness, with that 3/4” plywood I can’t imagine that it’s moving as it is, or that a different outer coating will affect the tone in any way.
- Feb 12, 2006
- 60,957
- 5
- 220,613
- Disclosures
- Development Engineer-Mesa Boogie, Development Engineer-Genzler (pedals), Product Support-Genz Benz
I’ll bet the wood isn’t flat with all the sanding that was needed to remove the glue… you just can’t see the blemishes yet. Naturally finish will highlight those blemishes IME.
(Insert funk finger commercial here)
Well, I do have an Music Man 3EQ, like the one Tony's playing, but I'll leave that particular style to Tony. I remember back in '96 waiting for Peter Gabriel's "So" album to come out, I was as impressed with Tony's bass playing then as I am now. He's super solid!
You are correct. Although the straight sanding with 120 grit did a world of good. If I had taken a bit more time the artifacts of the belt sander would have been less over all. The fact that there is a bit of unevenness here and there is one of the detractors for a natural finish.I’ll bet the wood isn’t flat with all the sanding that was needed to remove the glue… you just can’t see the blemishes yet. Naturally finish will highlight those blemishes IME.
Thanks for your opinion. To be honest, I'm headed that way. It'll look nice with a "pro" finish I think.With the wood that clean you probably could get a decent natural finish on it. You’ve already done the hard work, stain and poly over this would be fairly easy.
You mentioned the liner already and stiffness, with that 3/4” plywood I can’t imagine that it’s moving as it is, or that a different outer coating will affect the tone in any way.
The scale is indeed tipping in that direction. If I do I'll probably hold off until the spring to do the 15". The jury is still out on that one. But now that I've done one the second will definitely be a bit easier.If you remove the carpet, my vote is also for DuraTex. Easy to apply and very nice looking it’s done. I’m doing a cabinet later this month.

I've had good success with the Duratex. Here's an SWR Goliath II that I repaired many years ago....hence the terrible cell phone pics. Turned out very nice IMO.
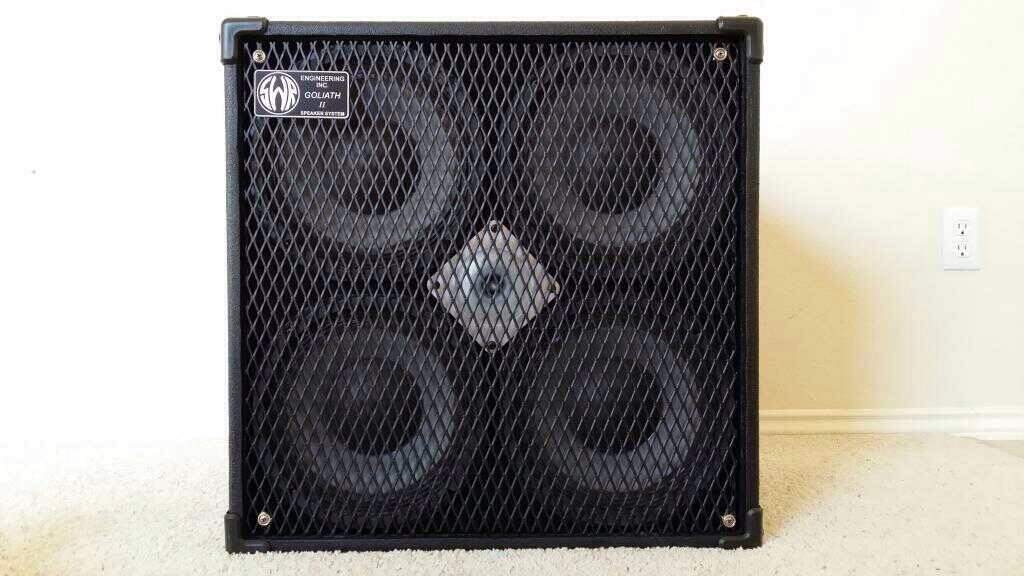
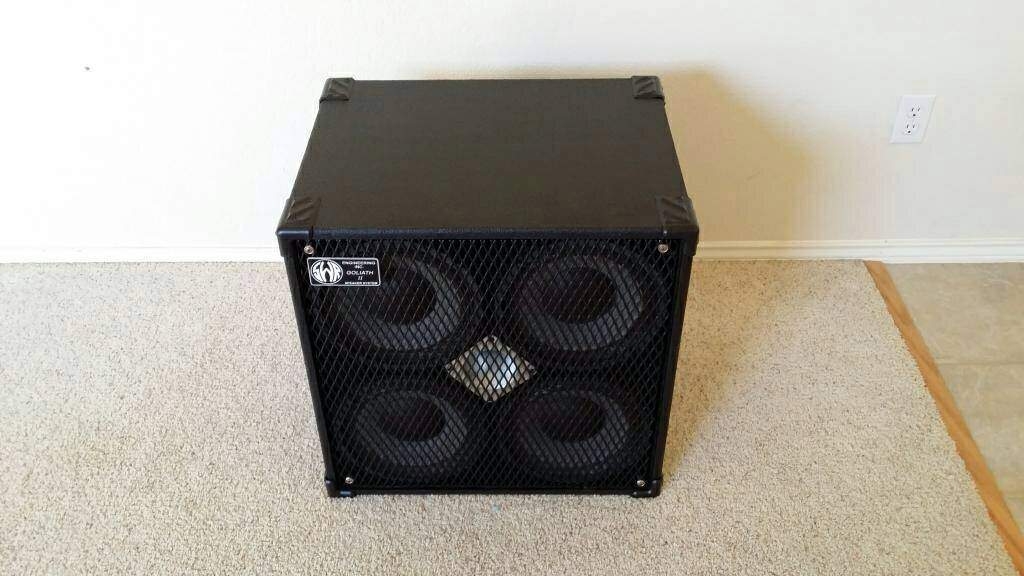

$100 will get you a gallon of Duratex. More than enough for both cabs to get a nice coating.
Duratex is so mild to work with, you can apply it indoors. There’s no odor or fumes. Your roller and tools clean up with warm water and soap.
You’ll quickly get the hang of the texture with the roller.
That cab looks great, ready for rolling!
Duratex is so mild to work with, you can apply it indoors. There’s no odor or fumes. Your roller and tools clean up with warm water and soap.
You’ll quickly get the hang of the texture with the roller.
That cab looks great, ready for rolling!
Does the finish have that spiky, prickly, pointed kind-of finish? You know - kind-of like sand paper? That, I don't want! : )$100 will get you a gallon of Duratex. More than enough for both cabs to get a nice coating.
Duratex is so mild to work with, you can apply it indoors. There’s no odor or fumes. Your roller and tools clean up with warm water and soap.
You’ll quickly get the hang of the texture with the roller.
That cab looks great, ready for rolling!
It does look pretty smooth in the pic on the website tho....
Last edited:
When I looked at the inner edge of the cab I realized that I needed to go all the way on this. So off came the grille stand-offs and I'll sand the inner edge so the new finish can go all the way to the bezel. The stand-offs have one staple through the middle and a bit of glue where the stand-off sits on the bezel. A sharp blow on a work chisel (..don't use your good chisel set) to carefully separate the stand-off from the bezel along the top edge and slowly work underneath it with the beveled edge of the chisel against the speaker bezel and they come right off. Next is, you guessed it, the sander - but there will be not a trace of the original Deep Red carpeting when I'm through. The bezel will of course have to be painted again in the end. No prob.
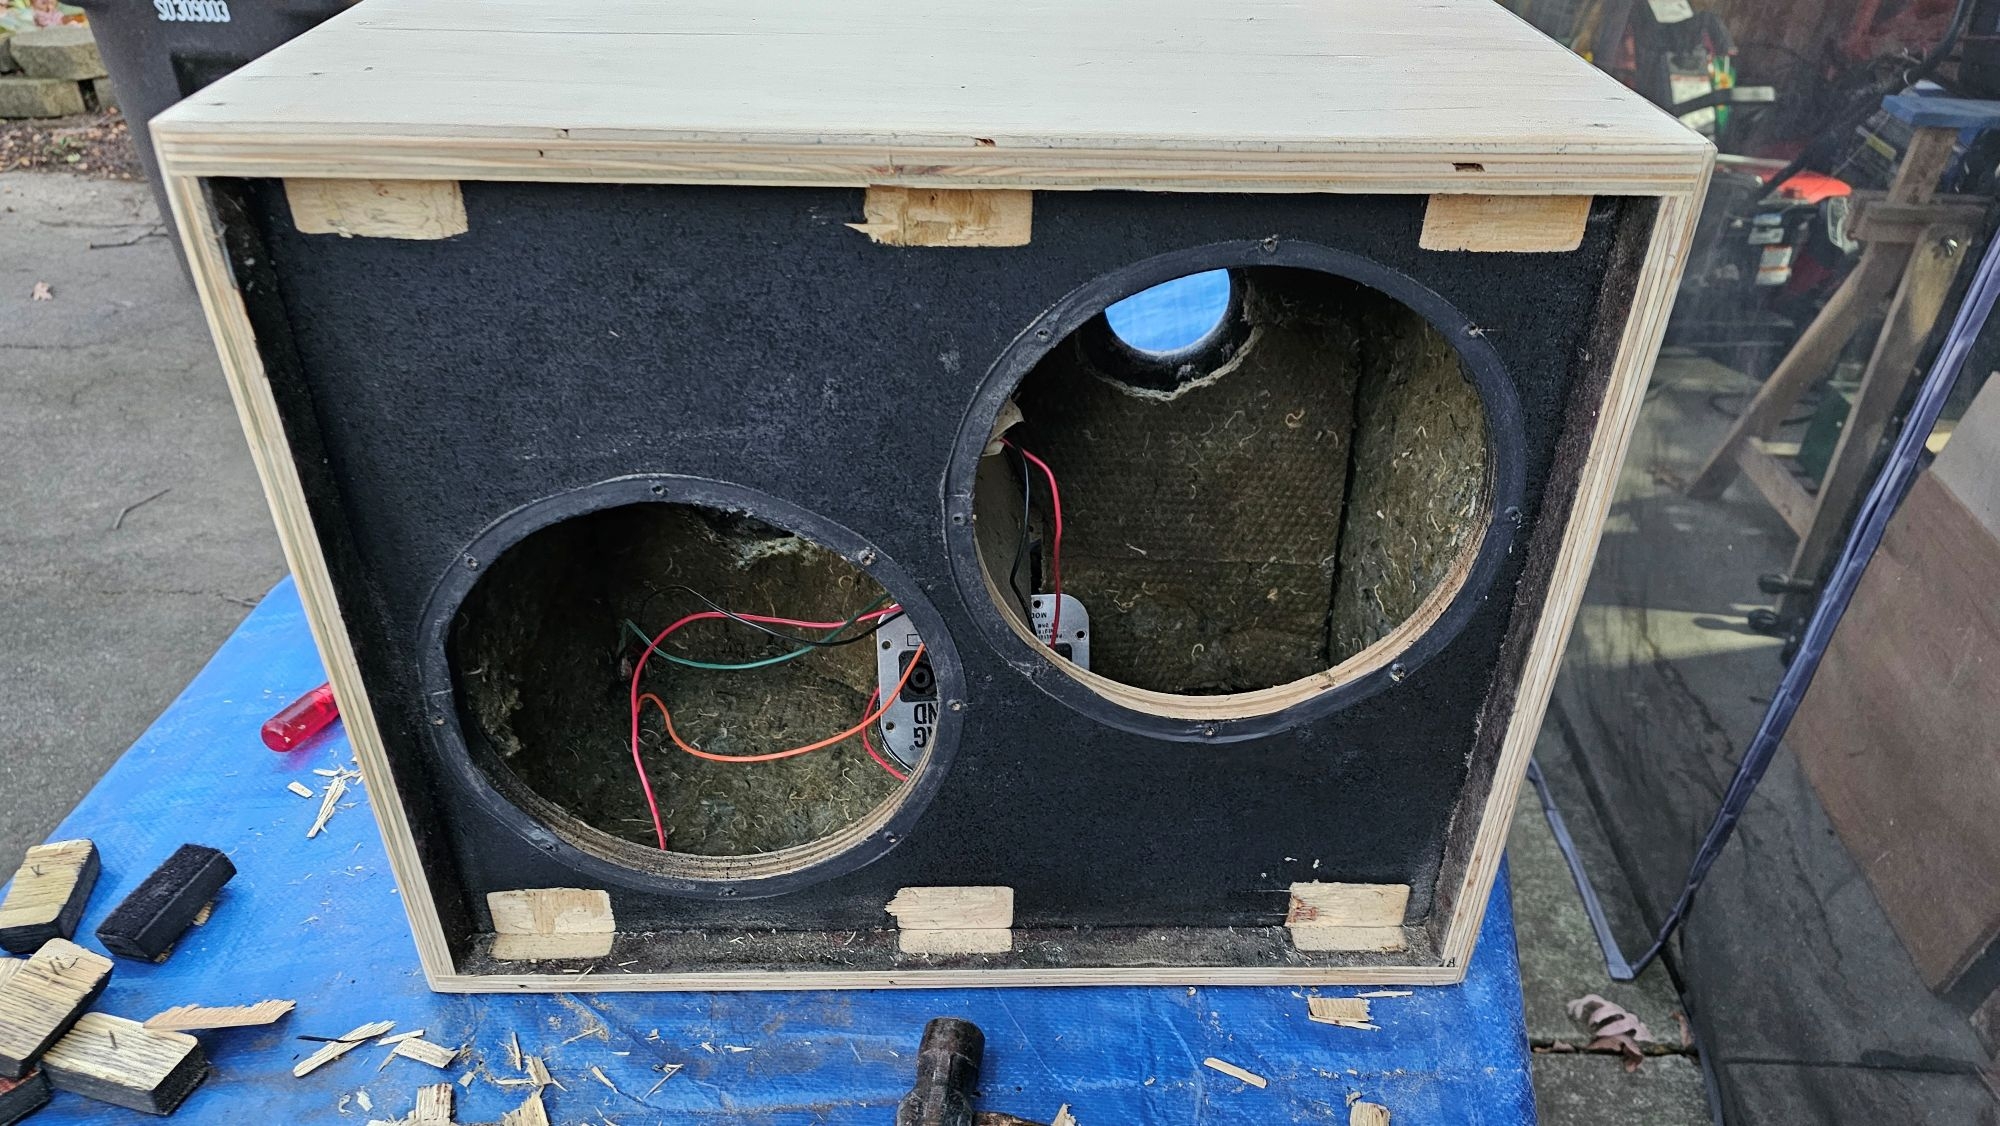
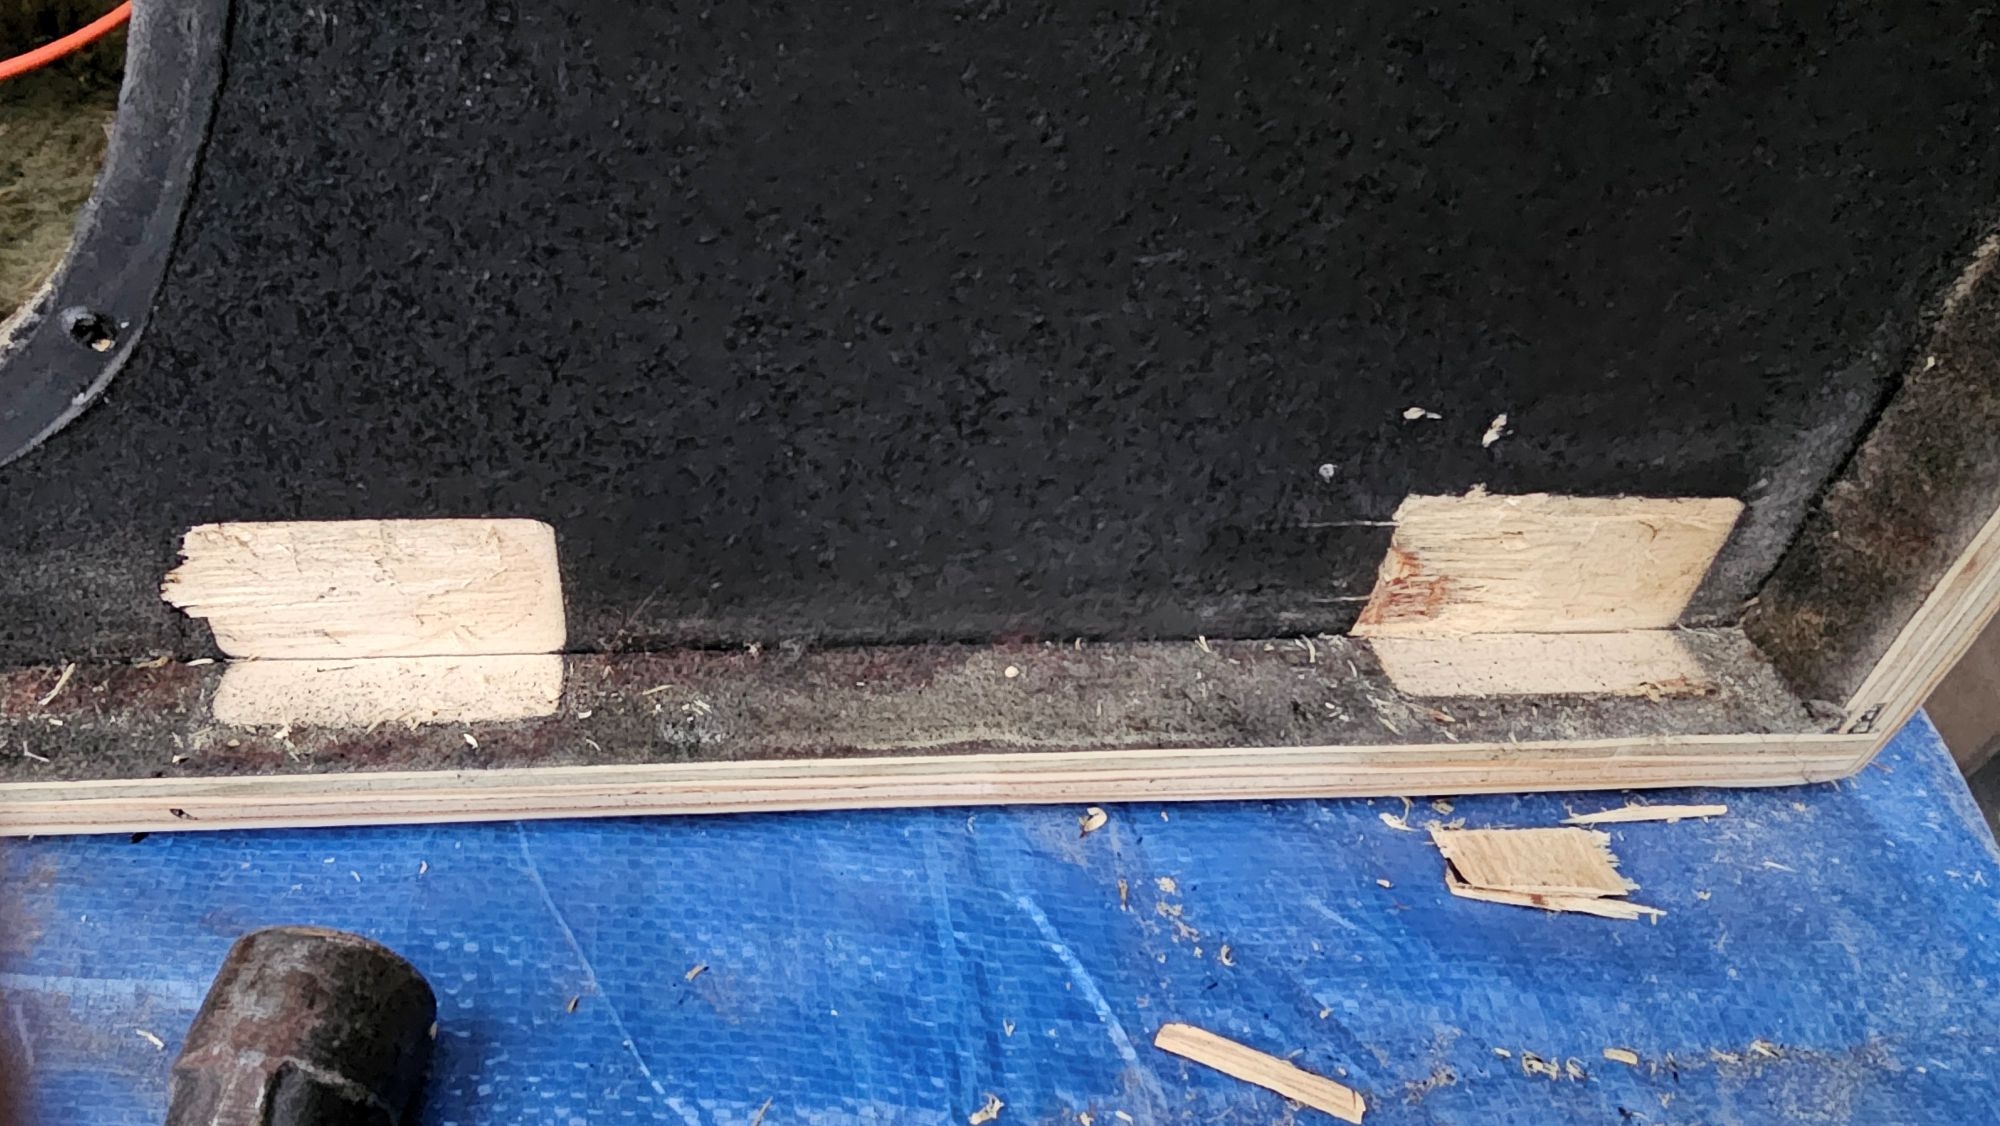
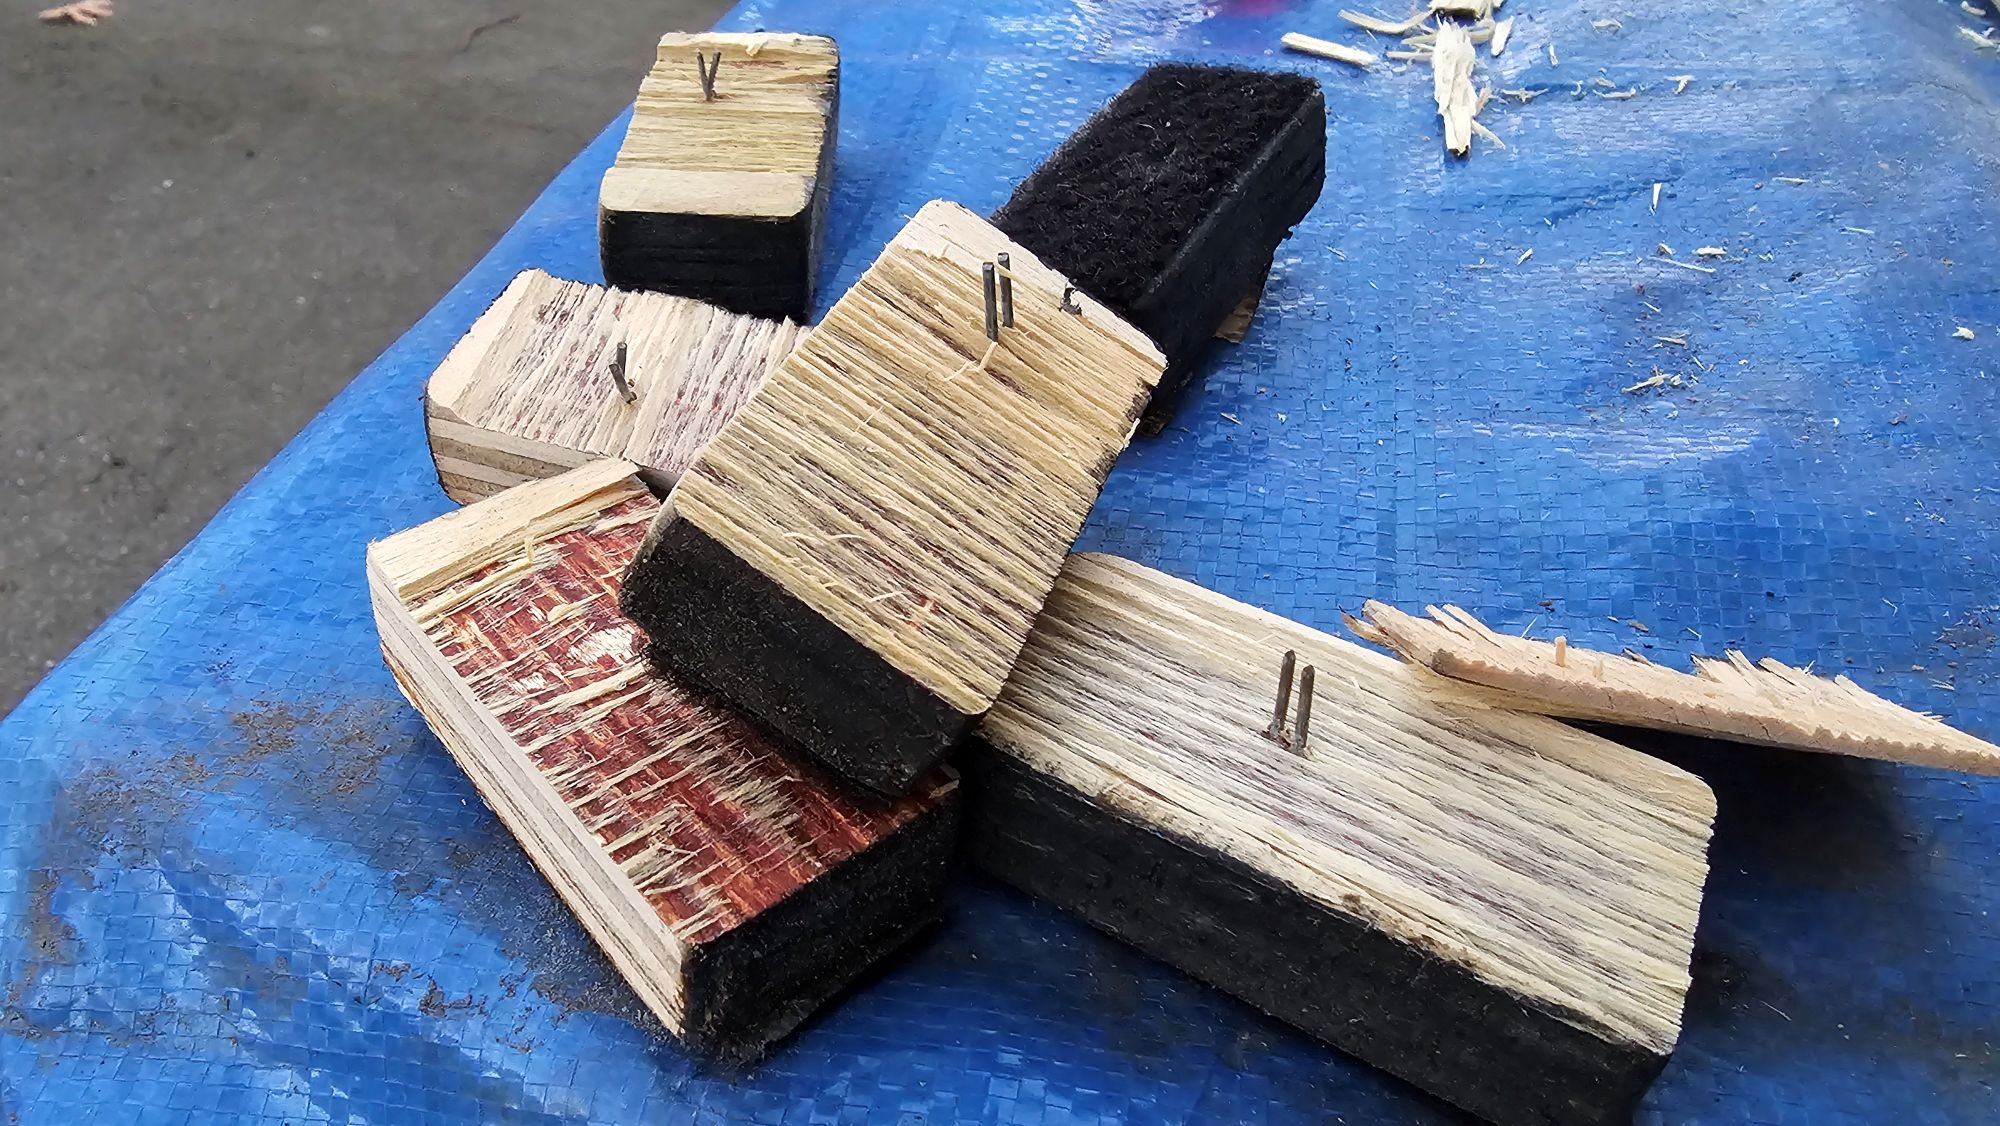
- Feb 12, 2006
- 60,957
- 5
- 220,613
- Disclosures
- Development Engineer-Mesa Boogie, Development Engineer-Genzler (pedals), Product Support-Genz Benz
It doesn’t have to be rough texture, it can be fairly smooth. Depends on the roller and how much you create texture with more rolling.
If it’s too rough, you can knock it down with sand paper. And roll it some more with a less textured roller.
You get the hang of it pretty quick. You’ll be doing multiple coats over a few days.
It dries fairly quickly, especially if you do it in a warm space. Once dry to the touch it’s ready for recoat. In the summer, that’s just an hour or two.
I just put the roller in a baggie between coats.
If a cab gets dinged or scratched, you can just roll on more. A gallon goes a very, very long way. I did multiple Greenboy’s builds with a gallon and still had left over.
It’s very stable in the bucket for years.
I can’t say enough good things about Duratex.
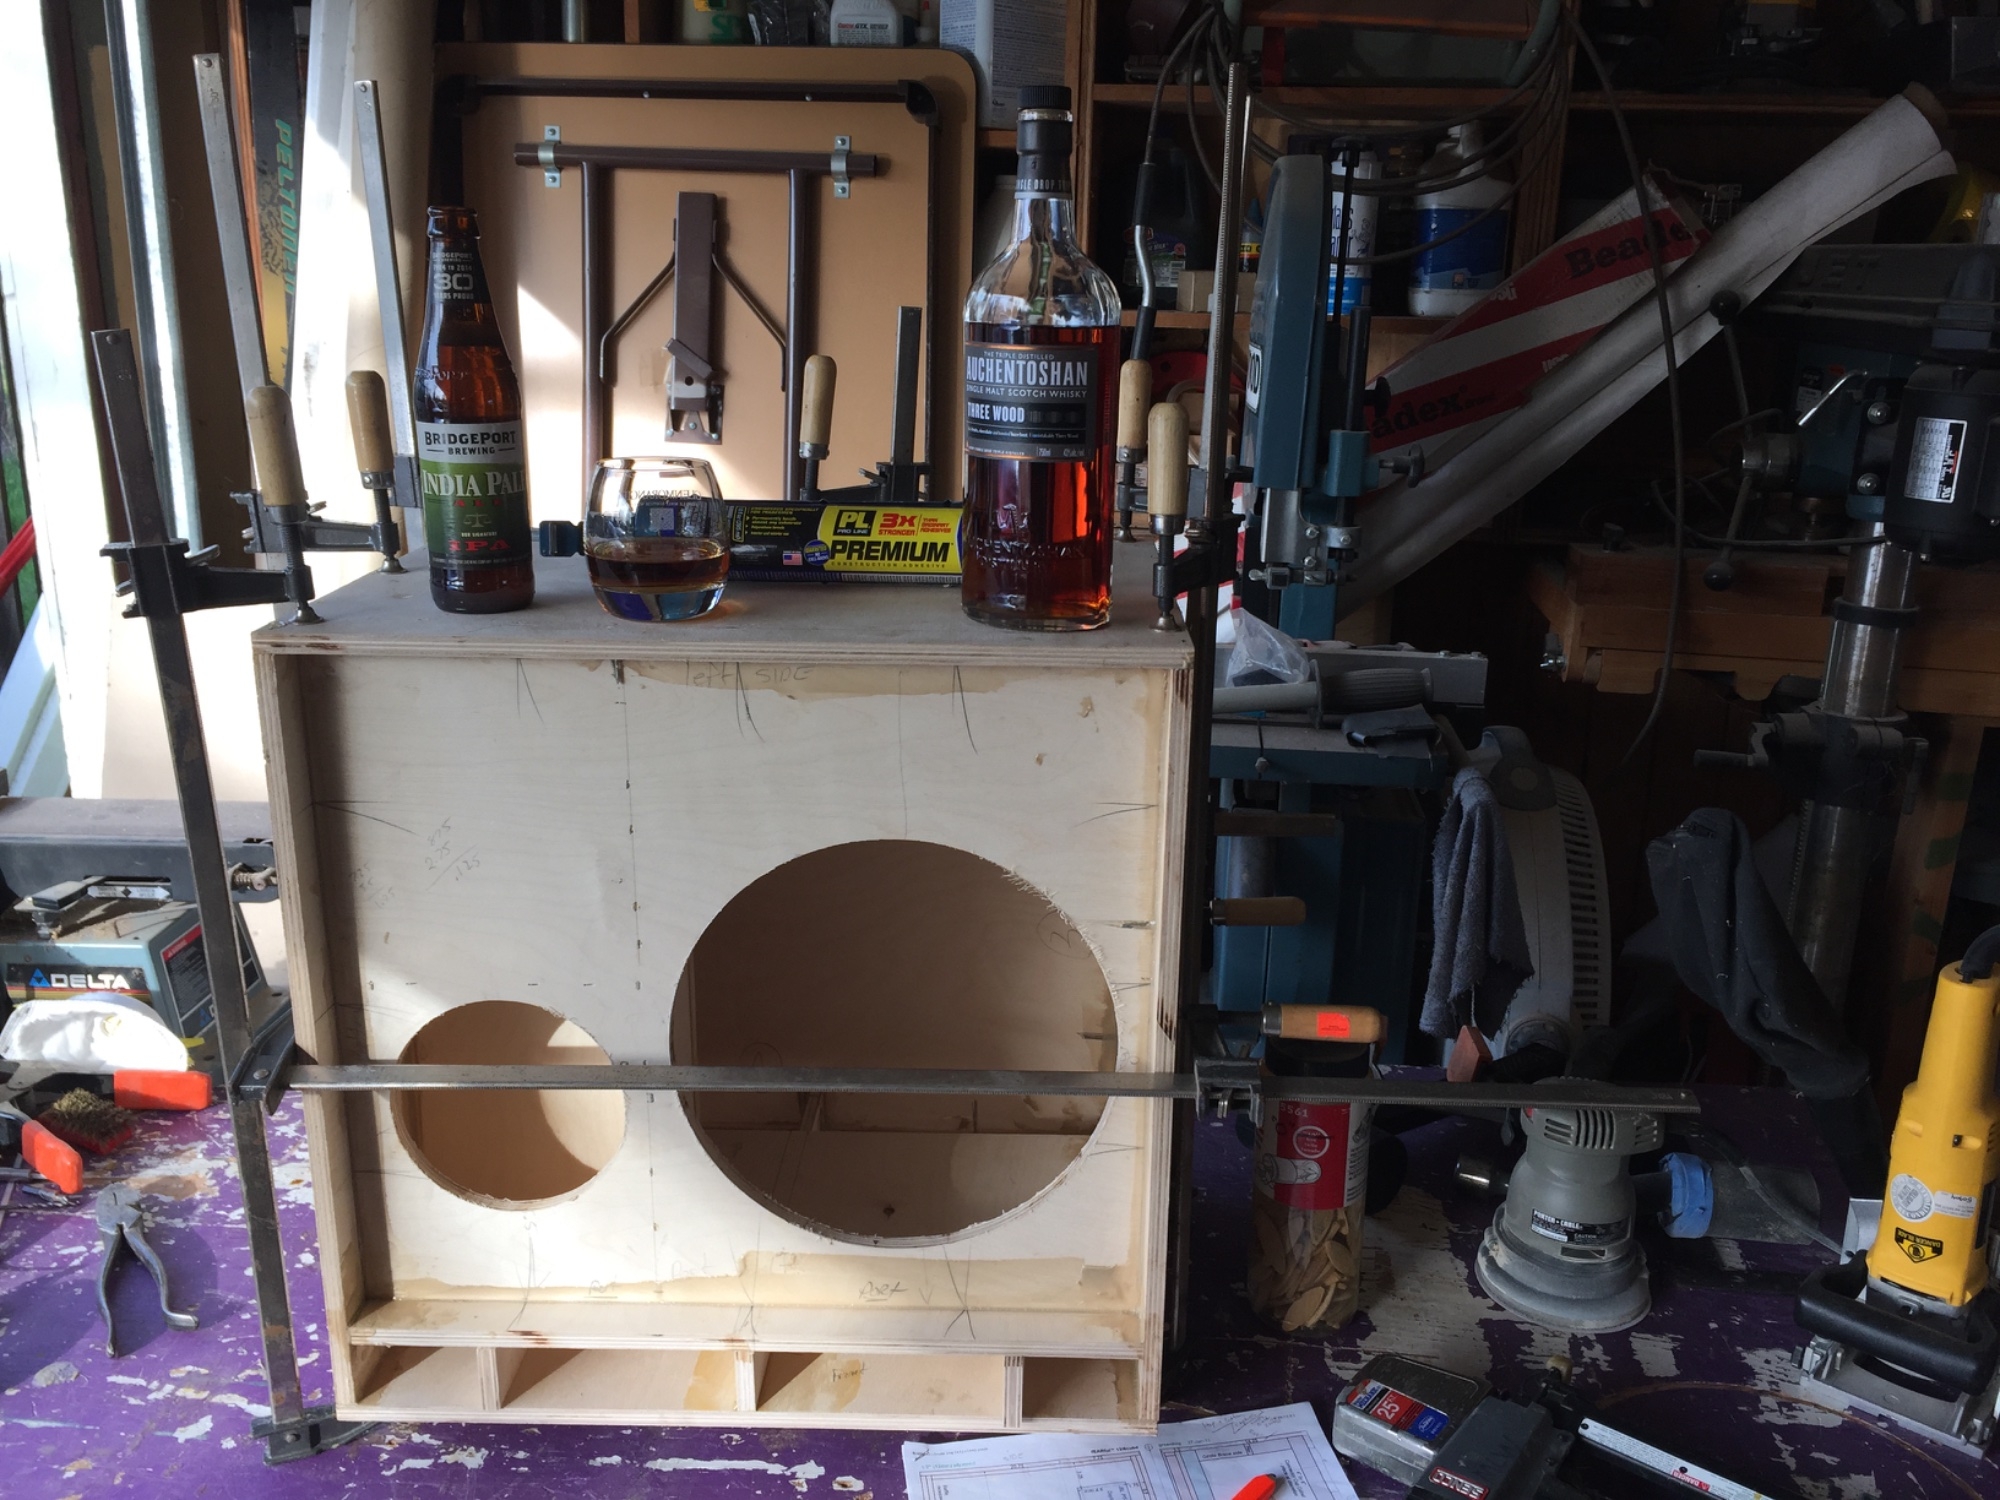
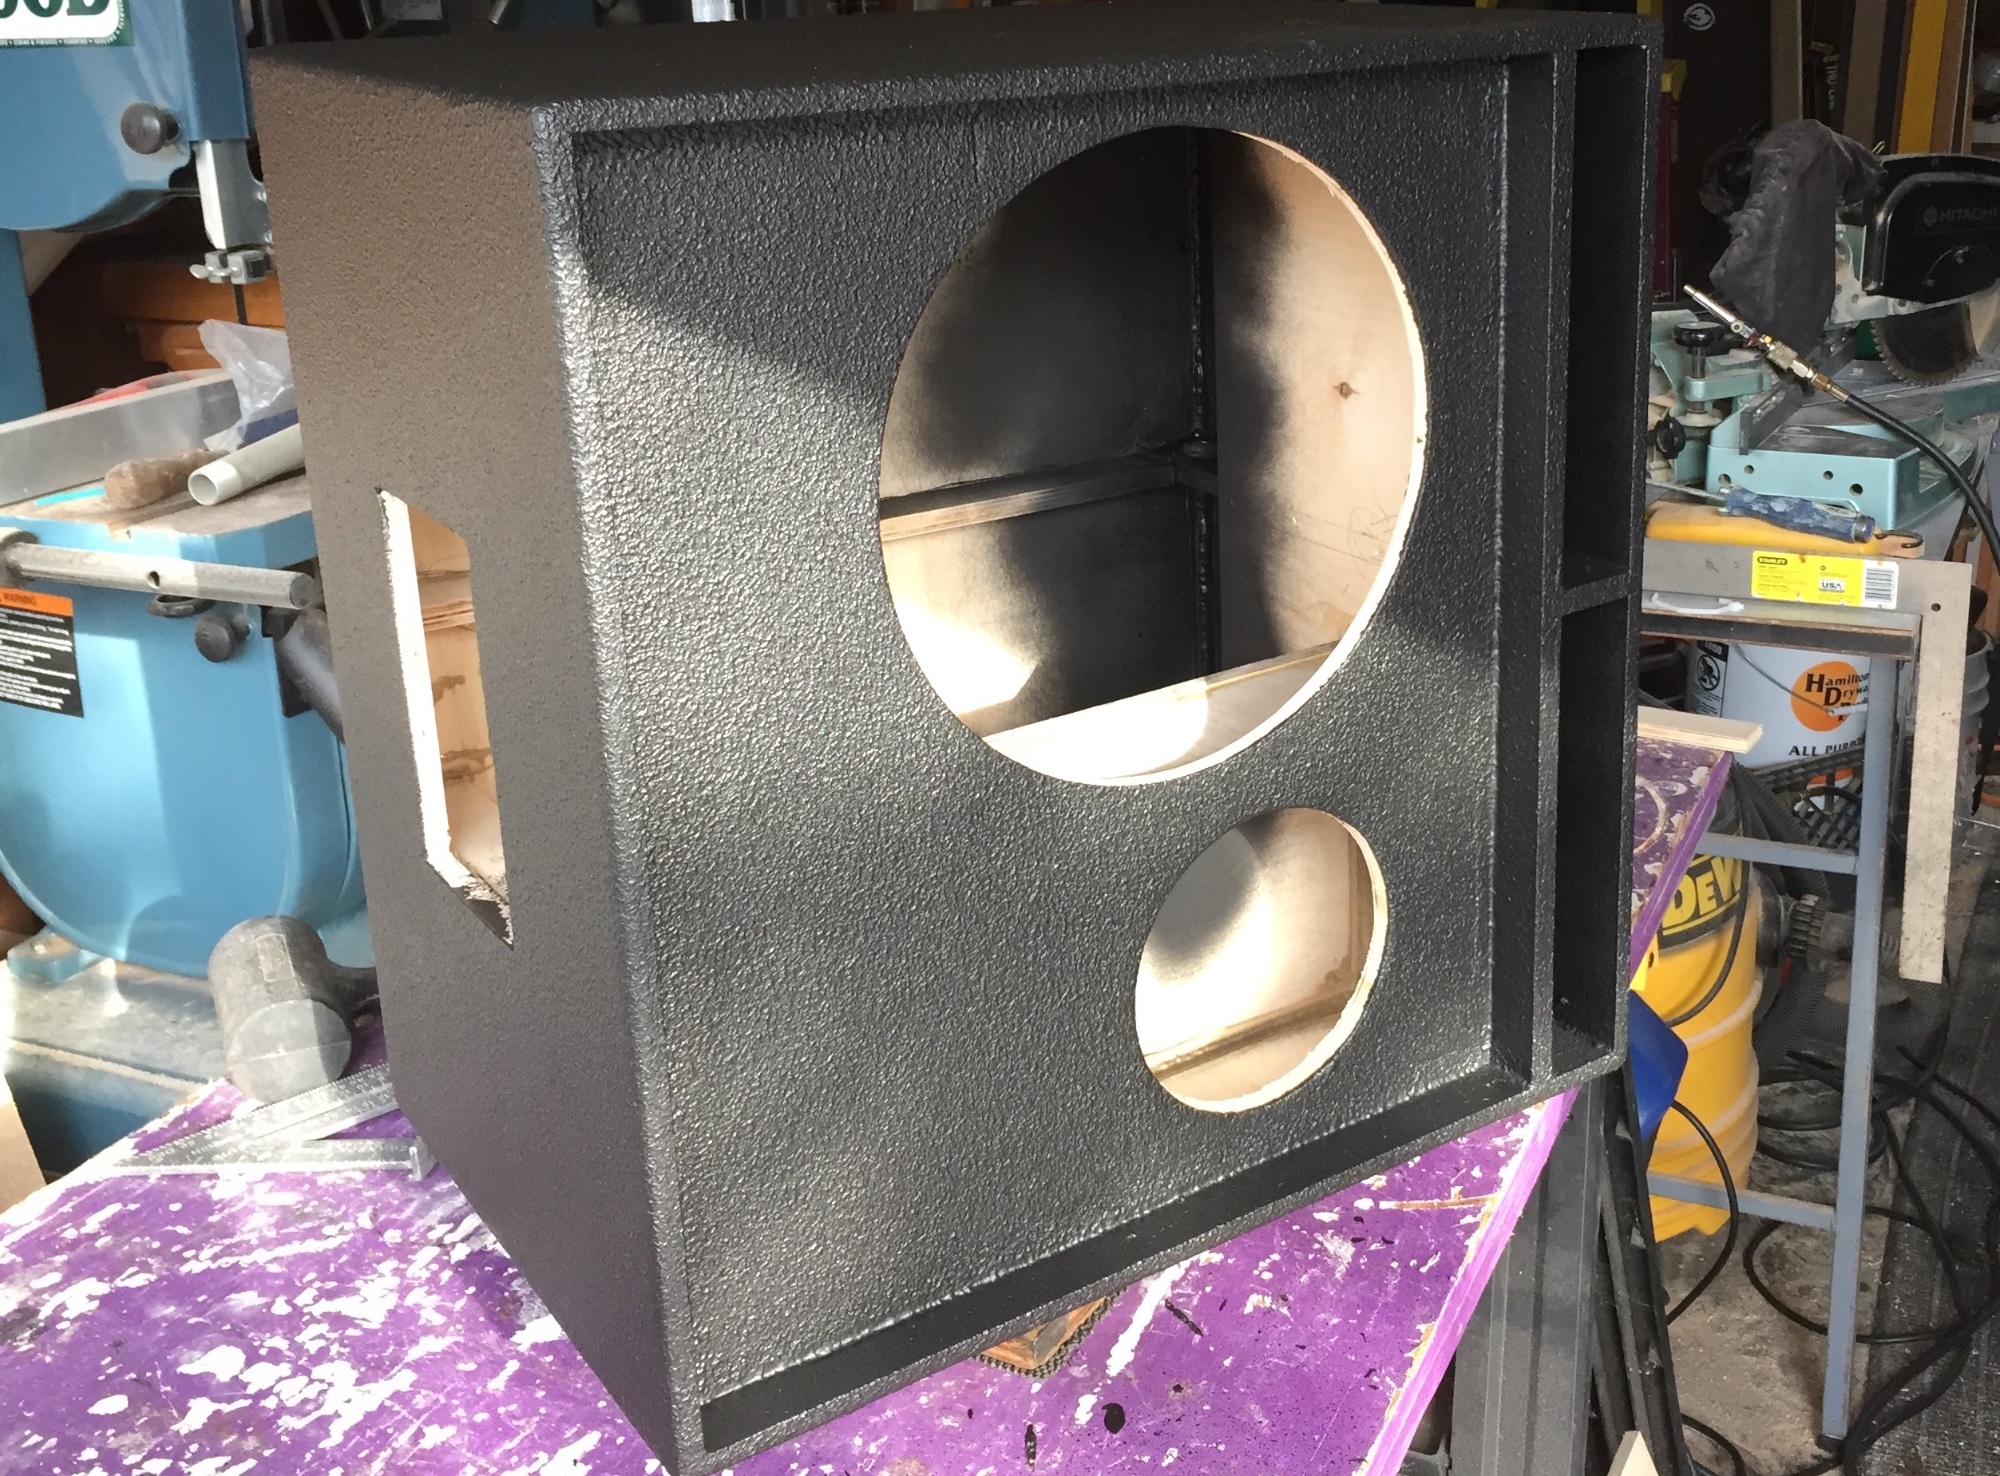
I roll it on the baffles as well.
Check the Duratex website, I think you can order colors and white.
If it’s too rough, you can knock it down with sand paper. And roll it some more with a less textured roller.
You get the hang of it pretty quick. You’ll be doing multiple coats over a few days.
It dries fairly quickly, especially if you do it in a warm space. Once dry to the touch it’s ready for recoat. In the summer, that’s just an hour or two.
I just put the roller in a baggie between coats.
If a cab gets dinged or scratched, you can just roll on more. A gallon goes a very, very long way. I did multiple Greenboy’s builds with a gallon and still had left over.
It’s very stable in the bucket for years.
I can’t say enough good things about Duratex.
I roll it on the baffles as well.
Check the Duratex website, I think you can order colors and white.
Last edited:
Also depends somewhat with the roller (nap) you use.Does the finish have that spiky, prickly, pointed kind-of finish? You know - kind-of like sand paper? That, I don't want! : )
It does look pretty smooth in the pic on the website tho....
Well folks, I finally got around to finishing the BagEnd D10X-D 2x10 cab. I went with the Duratex coating as some had recommended and it came out fab.
The stuff is easy to work with, dries quickly, doesn't smell, and although it's "water repellent", is water based - so clean up is a breeze. I did several coats in an afternoon with about a 30 min wait between coats. It dries that fast! They say it takes up to 3 days to completely cure and I'd have to agree, but I had no problem moving it around and doing a bit of touch up here and there throughout the process. Now that I've finished the 2x10 I'll get after the 1x15 sometime in the relatively near future.
I suspect that that will go much faster now that I know what I'm dealing with. For instance - I'll probably use an orbital sander instead of a belt sander next time. (Note to self: get 3 - 5 packs of disks) It'll be less abusive to the wood most likely. The finish on the 2x10 came out pretty nice but there was one artifact of the belt sander that didn't show up until I was doing the finish. Nothing nasty - just a small line on top. I'd say the whole thing is definitely worth doing if your cab's carpeting is getting unacceptably janky. Thanks to all who sent me opinions, images and they're experience with cab coatings. I couldn't (wouldn't) have done it without you. And yes, it still sounds great!
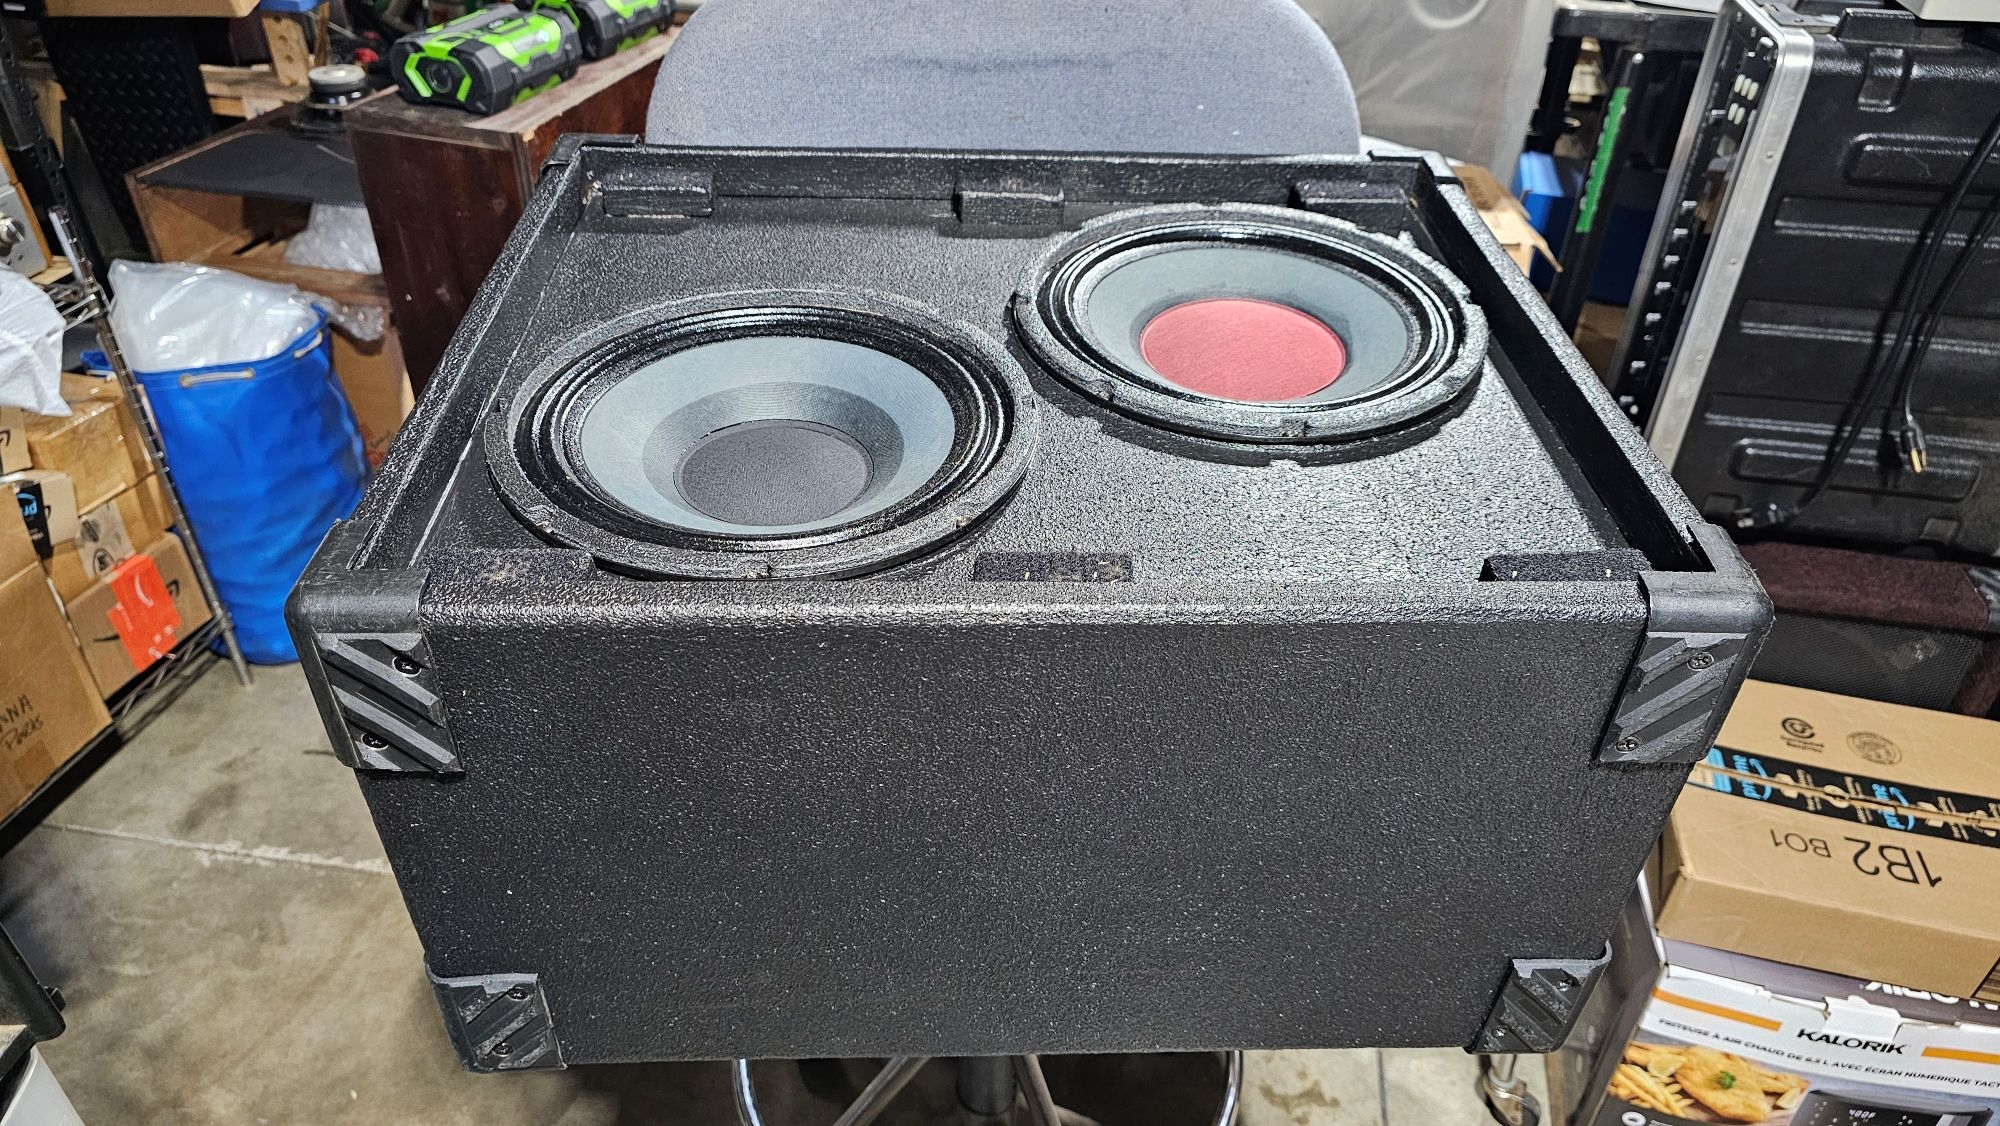
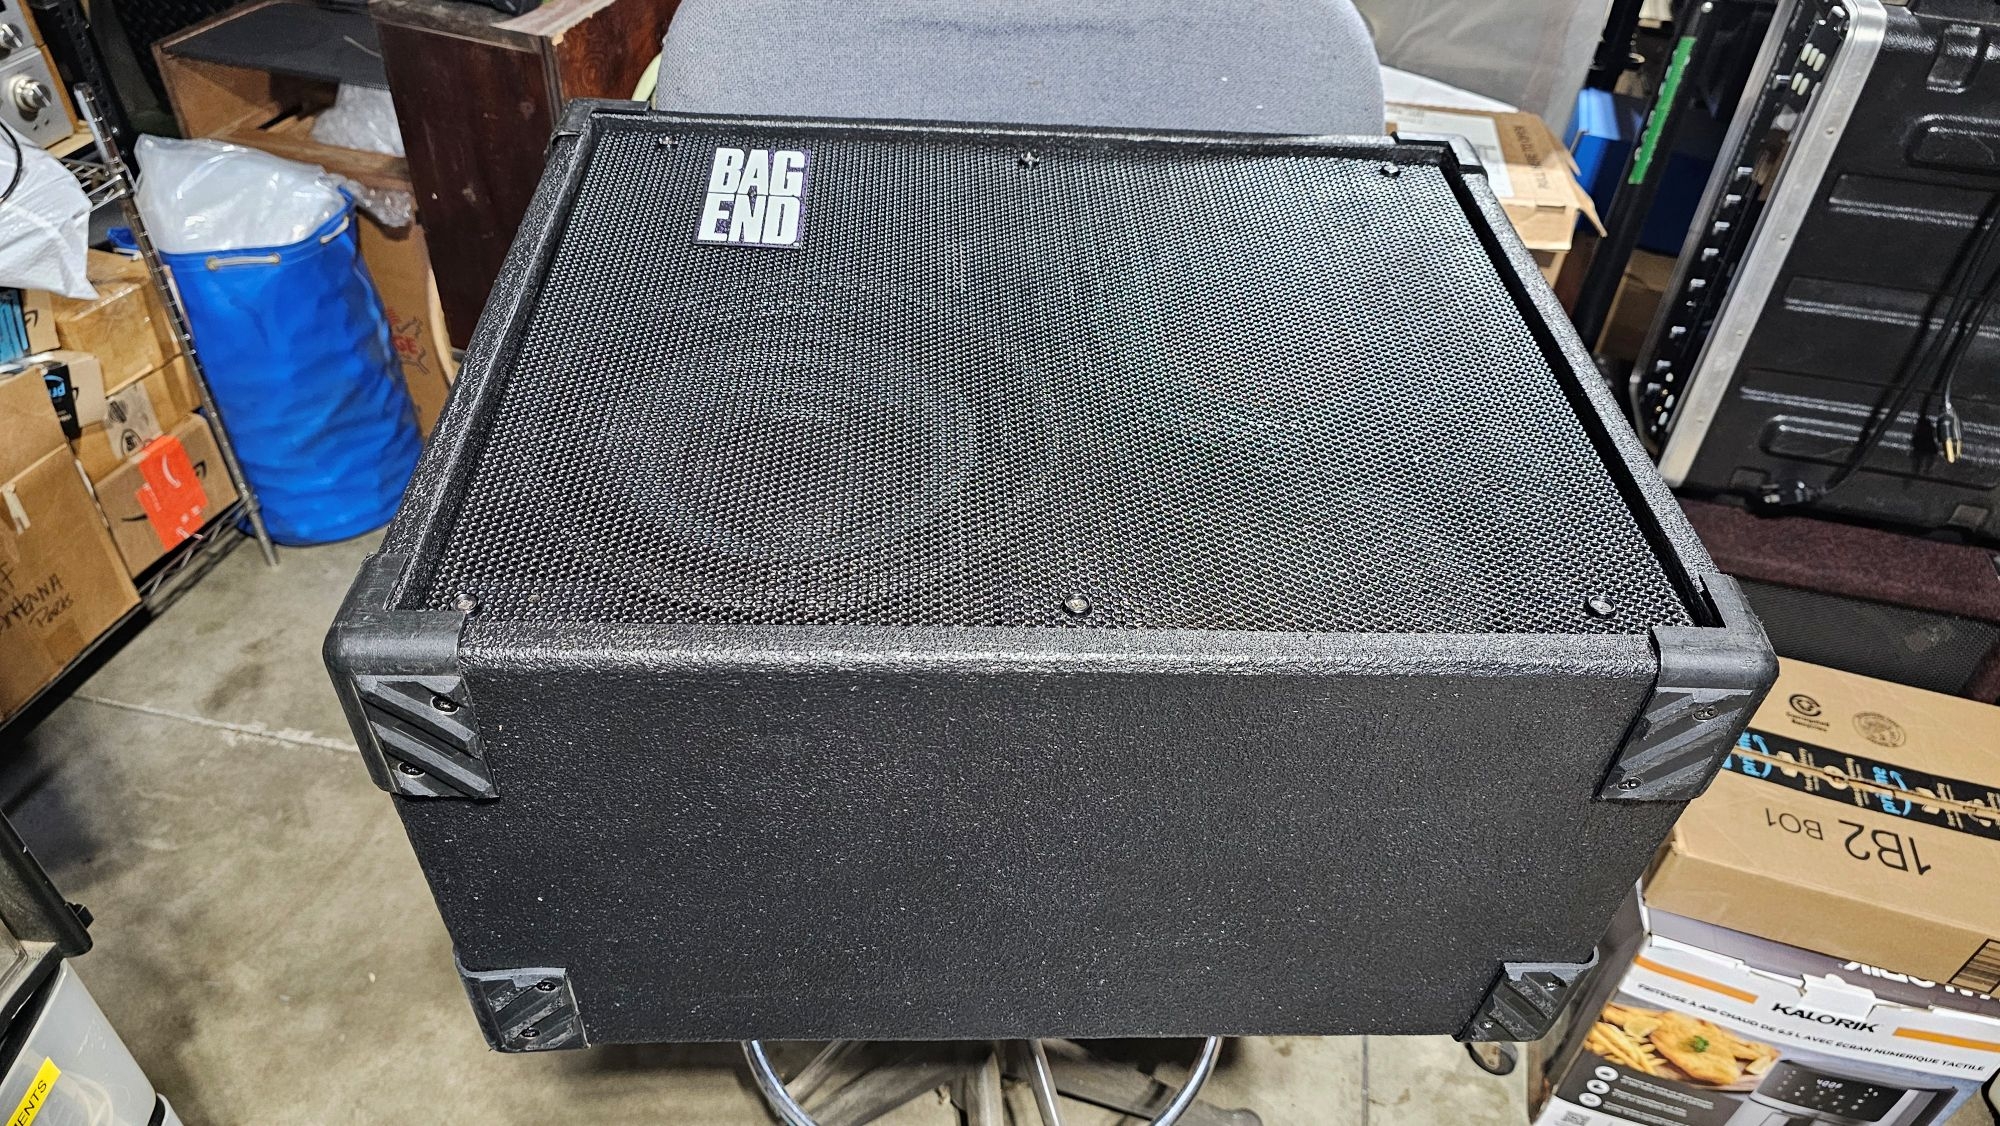
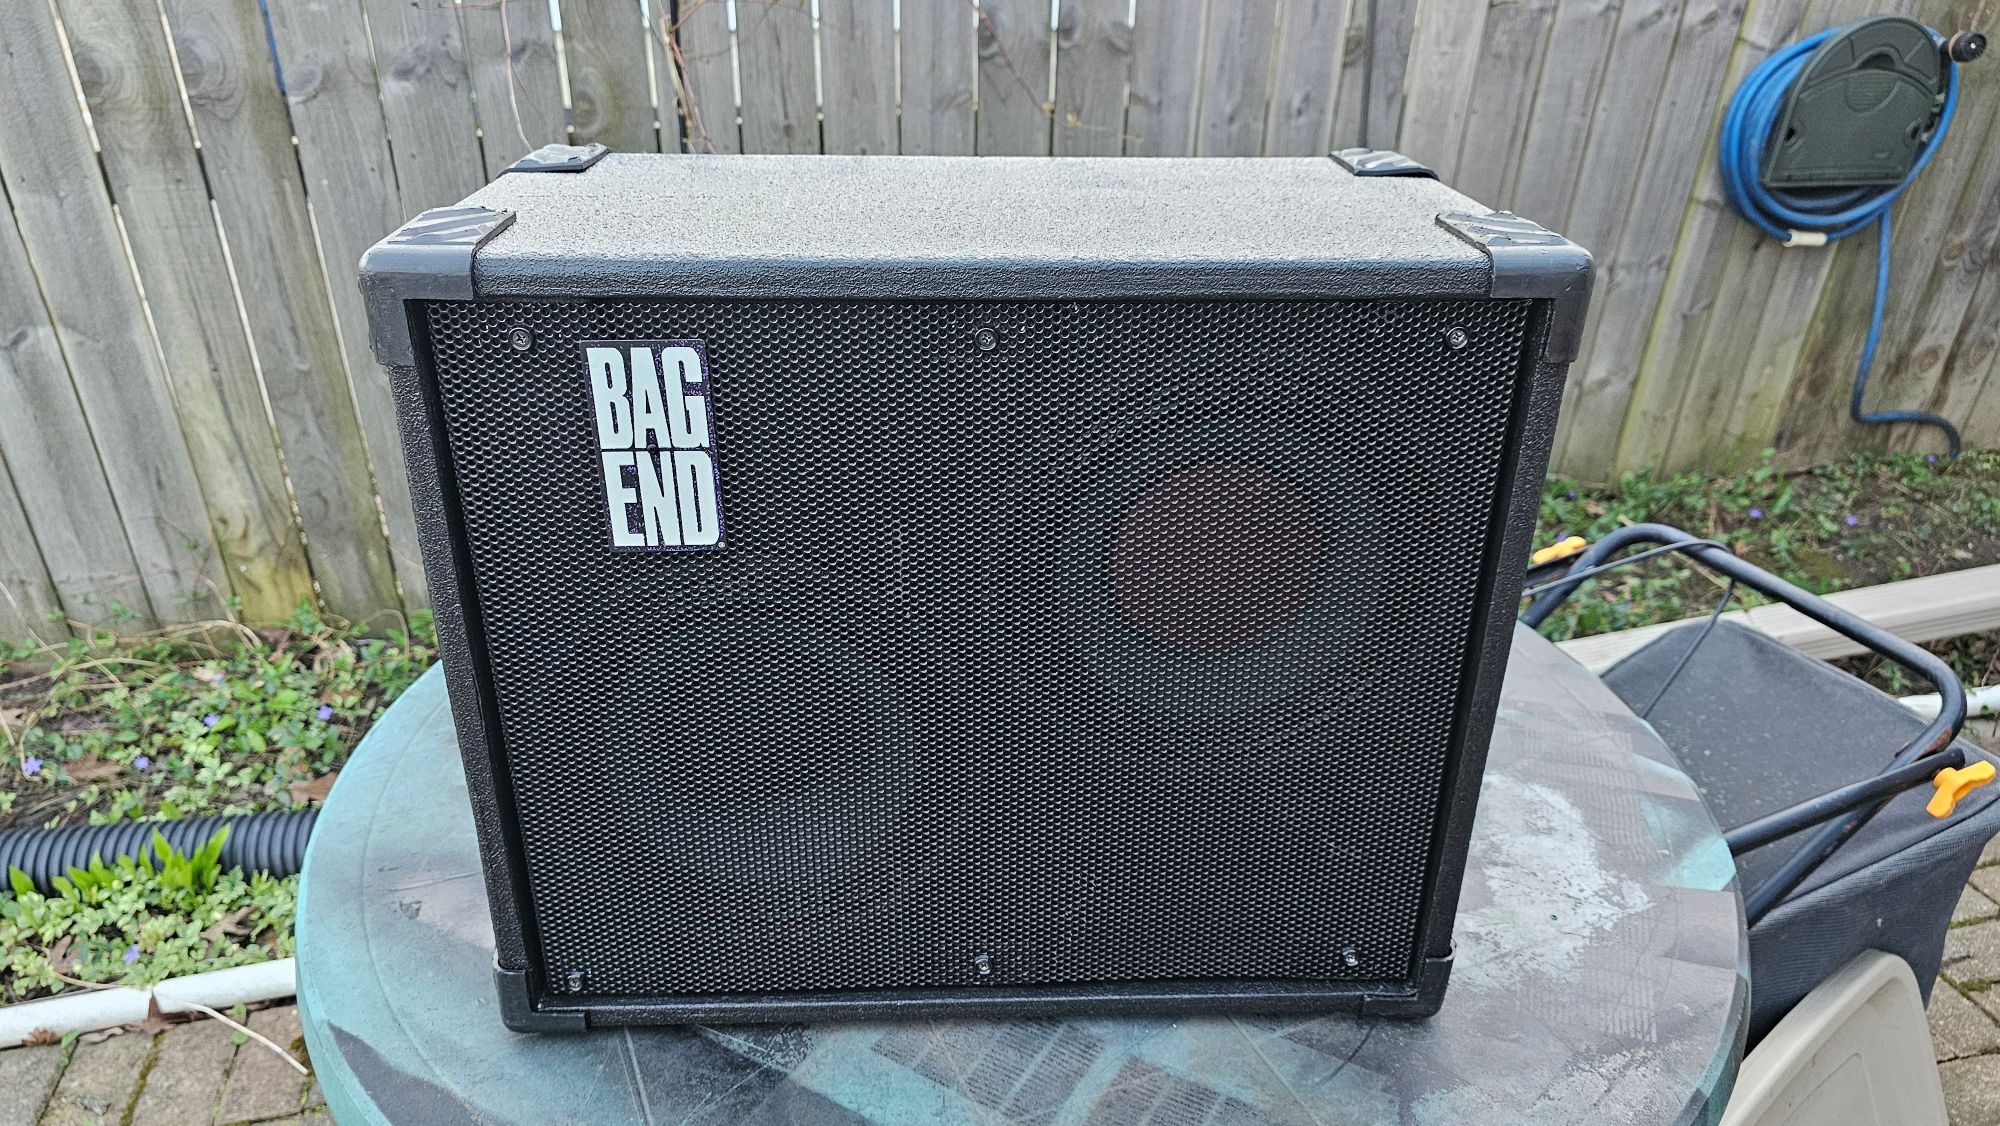
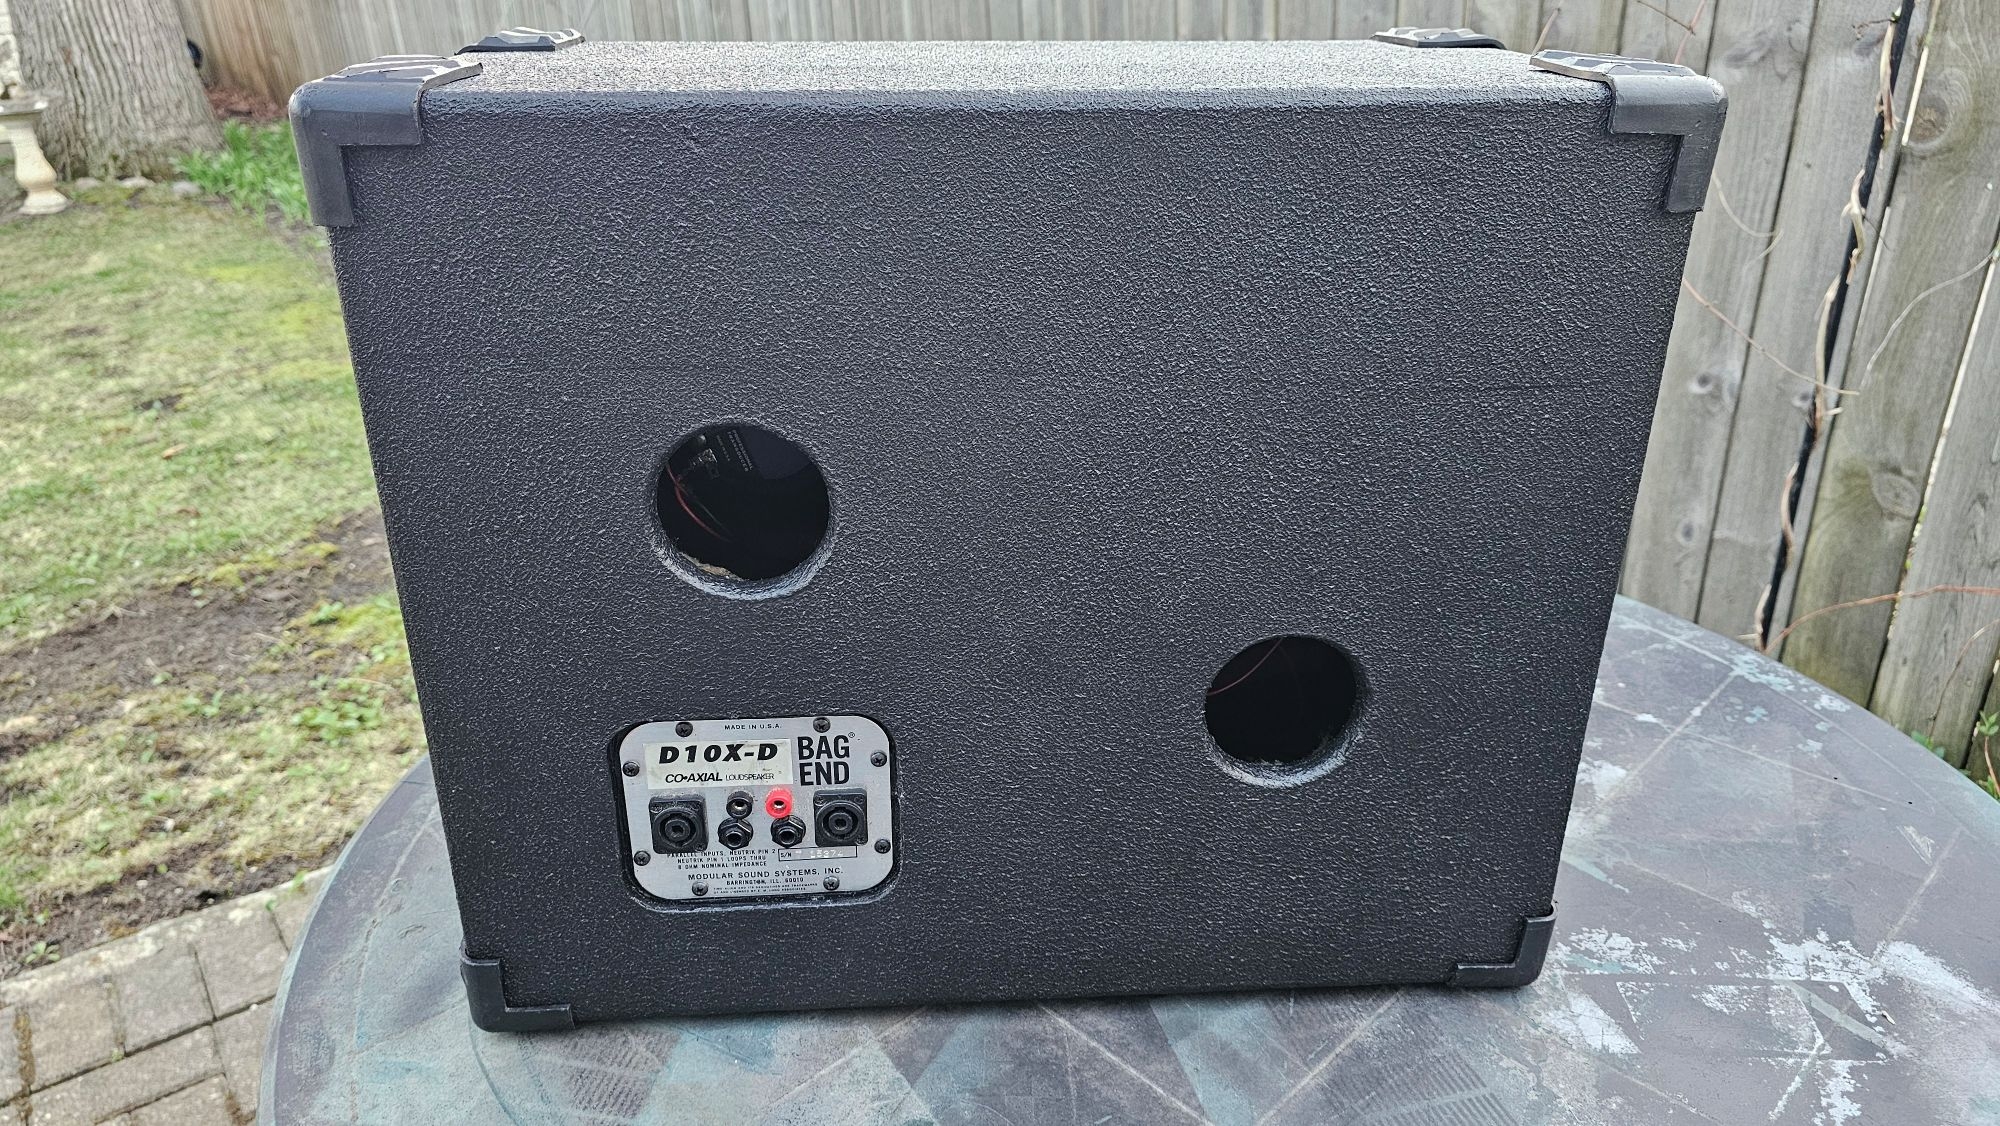
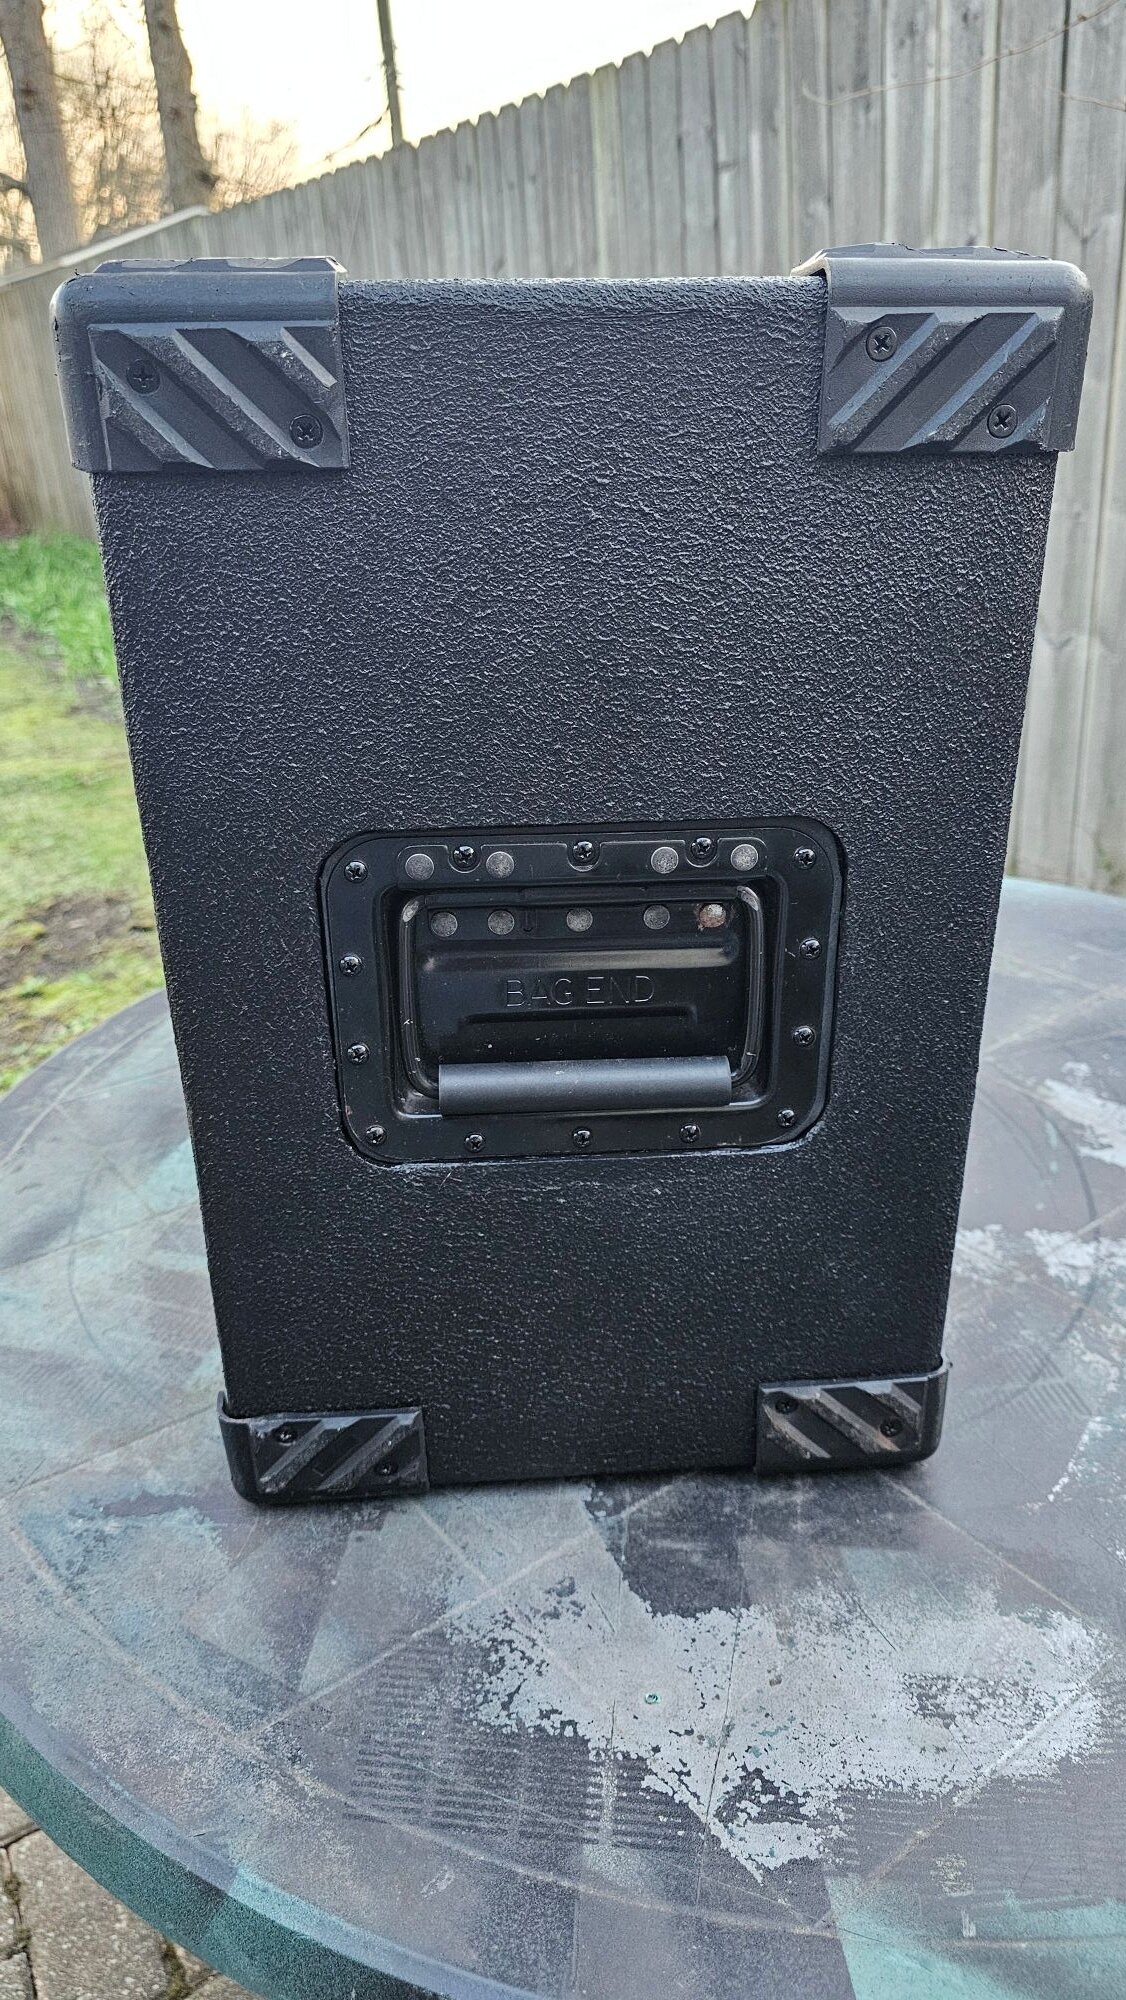
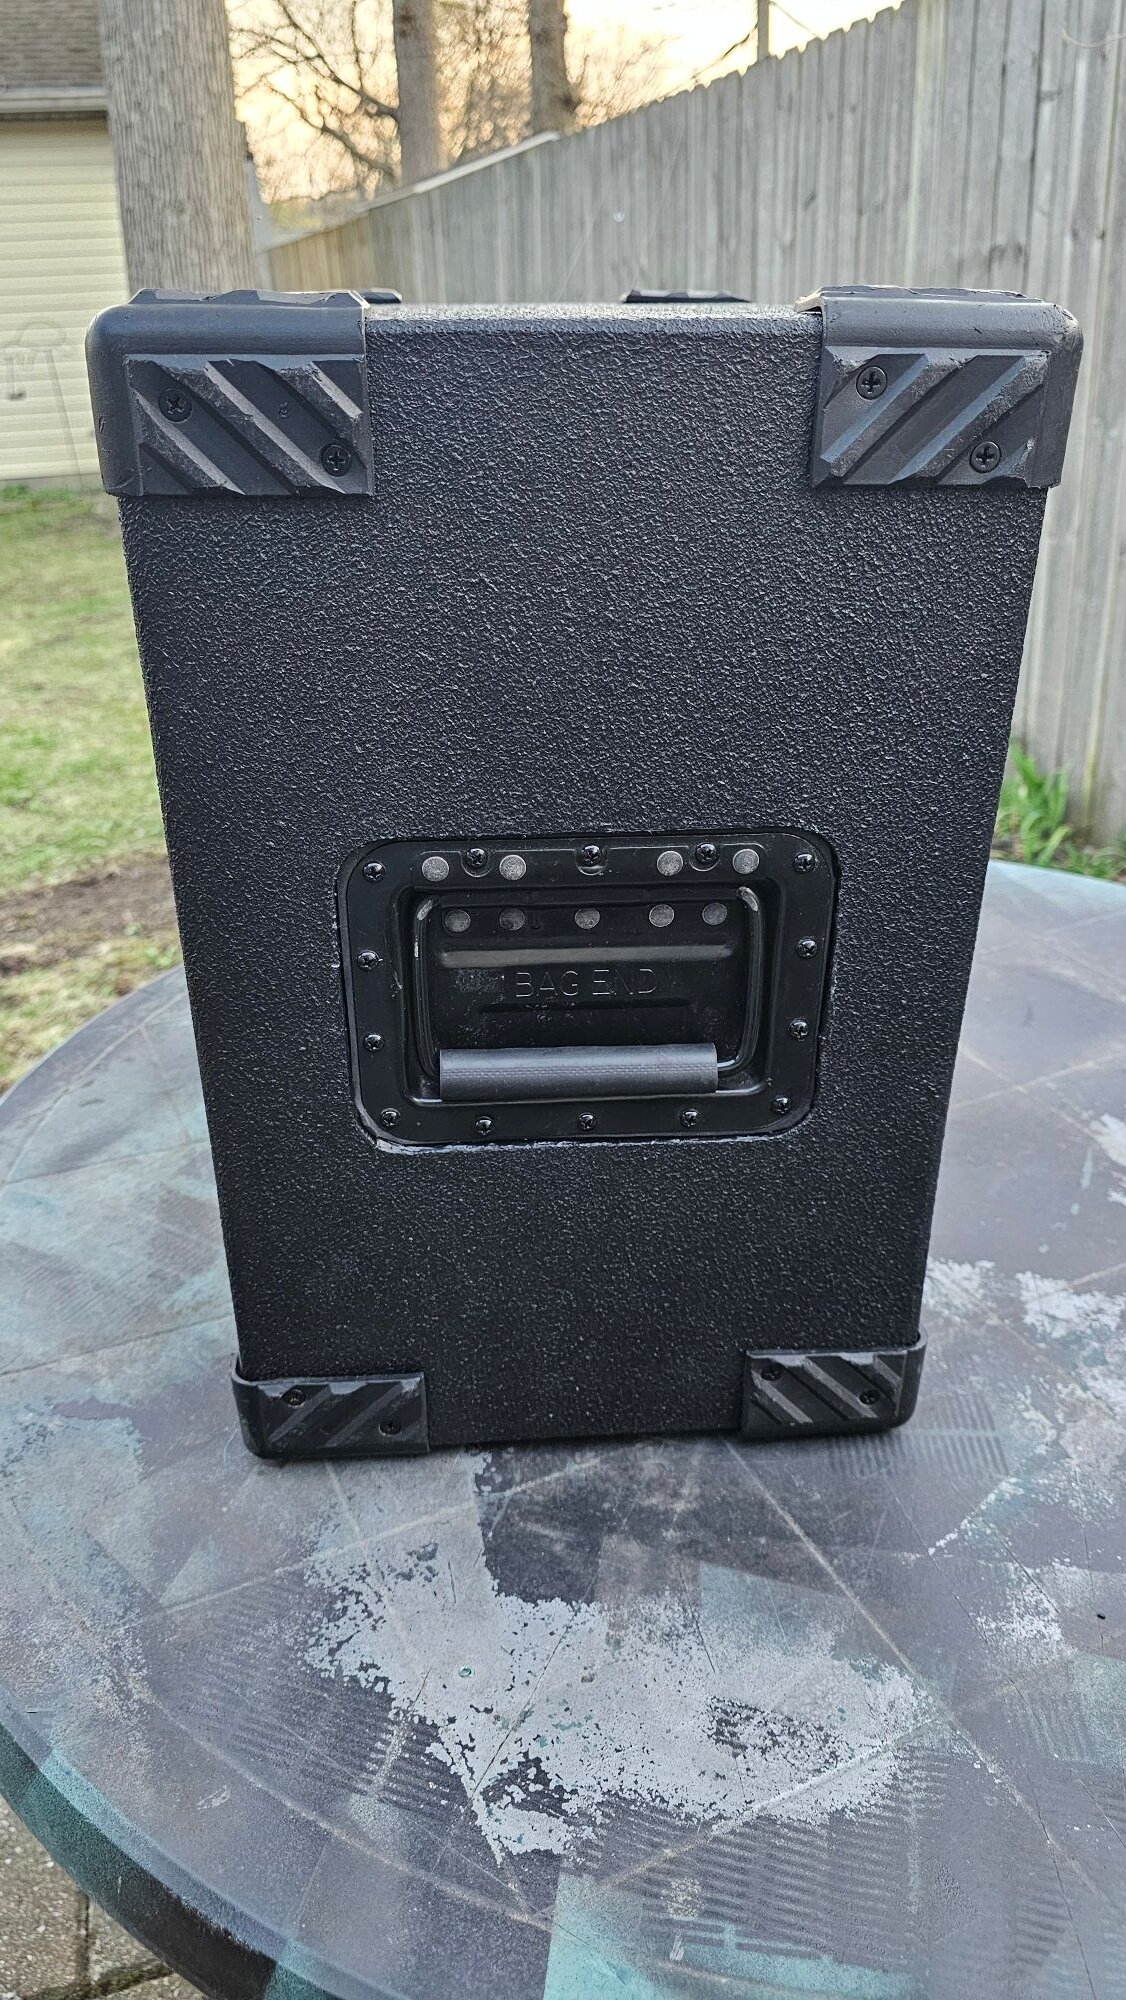
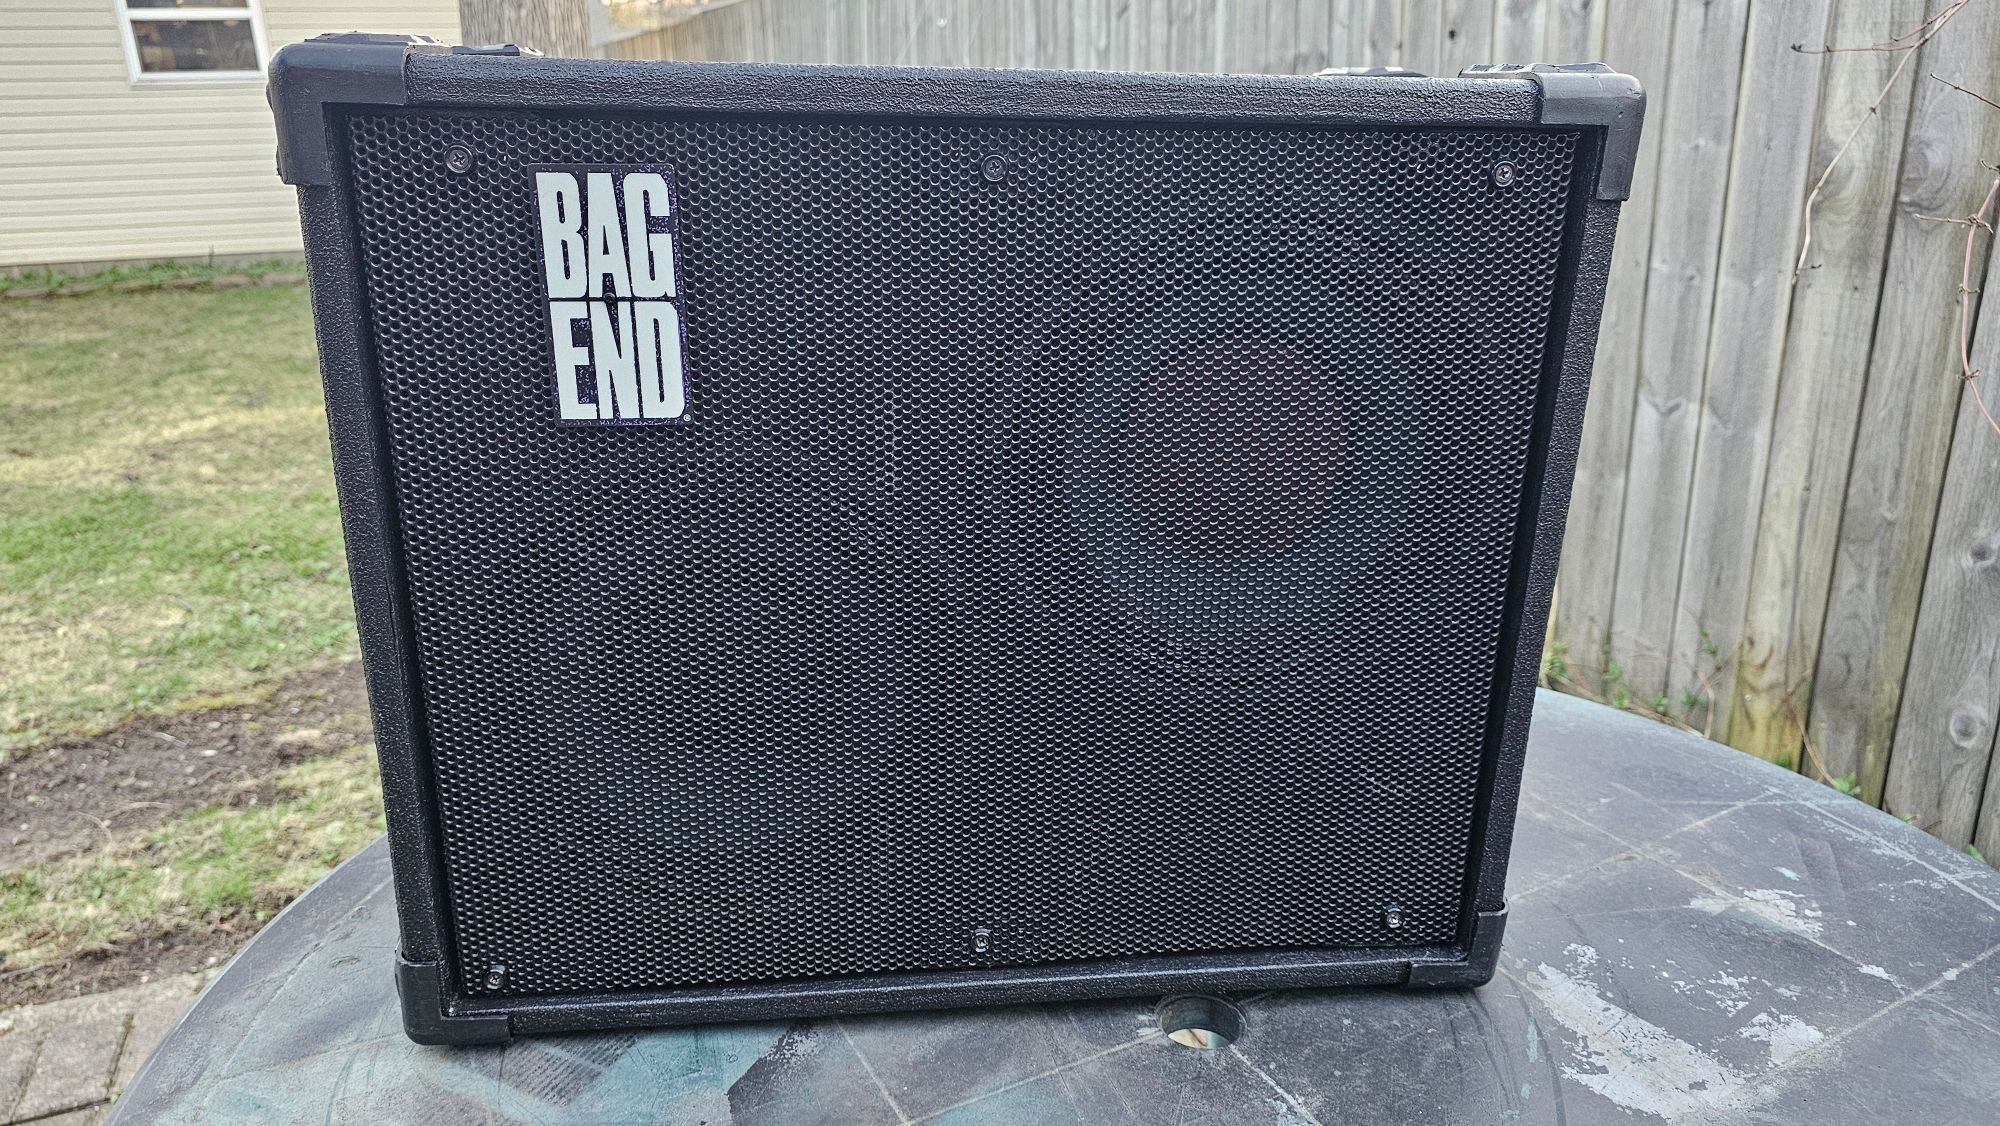
The stuff is easy to work with, dries quickly, doesn't smell, and although it's "water repellent", is water based - so clean up is a breeze. I did several coats in an afternoon with about a 30 min wait between coats. It dries that fast! They say it takes up to 3 days to completely cure and I'd have to agree, but I had no problem moving it around and doing a bit of touch up here and there throughout the process. Now that I've finished the 2x10 I'll get after the 1x15 sometime in the relatively near future.
I suspect that that will go much faster now that I know what I'm dealing with. For instance - I'll probably use an orbital sander instead of a belt sander next time. (Note to self: get 3 - 5 packs of disks) It'll be less abusive to the wood most likely. The finish on the 2x10 came out pretty nice but there was one artifact of the belt sander that didn't show up until I was doing the finish. Nothing nasty - just a small line on top. I'd say the whole thing is definitely worth doing if your cab's carpeting is getting unacceptably janky. Thanks to all who sent me opinions, images and they're experience with cab coatings. I couldn't (wouldn't) have done it without you. And yes, it still sounds great!
Last edited:
When I sasw the belt sander I wasFor instance - I'll probably use an orbital sander instead of a belt sander next time. (Note to self: get 3 - 5 packs of disks) It'll be less abusive to the wood most likely.

I've been working in a production workshop doing the sanding on luxury doors for yachts, of course it was veneers on them but ONLY orbital sanders were allowed, The first day I had to do this it was damn hard and long, 2 passes at 80 then 125 grit. Belt sanding works for parquet flooring renovation, and in that case I've been renting a standing floor belt sander like that one, I've renovated a whole table tennis gym floor filled with 4 tables with it in only half a day !
Latest posts
-

-
 Future Impact now available!! WAS: deep impact reissue!!! interested?
- Latest: Andras Szalay
-

-

