
@John_Nicholas - sorry, maybe I lost track of the photos and/or the conversation. I had thought that there was an implication being made that the cracked, spot welded black rods in your photos were equivalent to the rods bitterroot sell, that was the point I was trying to disagree with, since the black rods in those photos seem pretty clearly different in construction and quality from the bitterroot rods. I agree with you that the cracked spot welded black rods are essentially garbage!

Enjoy the benefits of a premium membership!
Upgrade Account
-
TalkBass has been independent since 1998. Add your voice.
Create a free account to reply to discussions, view embedded media, and browse with fewer display ads.
Join free Log in
Want zero display ads or expanded classifieds tools? Compare plans.
You are using an out of date browser. It may not display this or other websites correctly.
You should upgrade or use an alternative browser.
You should upgrade or use an alternative browser.
Best Quality DA Truss Rod?
- Thread starter Gilmourisgod
- Start date
More options
Who Replied?

I've started to exclusively use the blue wrapped rods as well. I like that the wrap keeps the rod from vibrating against itself and I especially like that the nut is contained in a sleeve. I stopped using the low profile LMI rods after one malfunctioned in a 6 string neck. The nut bound against the inside of the slot and stopped turning. It ended up requiring an entirely new neck before it was all said and done. Since then I've installed at least 15 of the blue wrapped rods with no issue.
I'm impressed with the strength and ease of adjustment these rods offer. I use one truss rod and two carbon fiber bars in all of my necks no matter the string count. Ive used them in multiple 6 strings, a 7 string, and even a 10 string (5 string with Octave string) and the rods still turn smoothly with full adjustment.
I could see the larger nut assembly being a pain for basses with the adjustment in the headstock because of the visible nature of the headstock access. I prefer heel adjusted rods because the install is cleaner and I don't like routing a channel through the weakest point in the neck under the nut.
I'm impressed with the strength and ease of adjustment these rods offer. I use one truss rod and two carbon fiber bars in all of my necks no matter the string count. Ive used them in multiple 6 strings, a 7 string, and even a 10 string (5 string with Octave string) and the rods still turn smoothly with full adjustment.
I could see the larger nut assembly being a pain for basses with the adjustment in the headstock because of the visible nature of the headstock access. I prefer heel adjusted rods because the install is cleaner and I don't like routing a channel through the weakest point in the neck under the nut.
Last edited:

Their is another aspect where these rods differ that bears discussion: replacing a broken one. Im agonizing over heel vs headstock adjust on a build in design now. On the typical blue and black wrapped rods by Bitteroot or BBG, the adjuster part of the rod increases from 1/4" slot requirement to around 3/8" wide, and part of the rod is below the plane of the adjuster, which effectively locks the rod in place. In the case of either headstock or heel adjust, you'd have to remove the fingerboard to replace. Some of the newer DA variants maintain the same slot dimension all the way through, in which case the slot cut for the adjuster could just be continued out until it "daylights" out the headstock as it angles downward. That means a long TRC, but that seems like a decent tradeoff for a replaceable rod.
Short of extending the rod pocket right into the pickup routes, i dont see any obvious way to make a heel adjust rod removable, but maybe its been done somehow? It seems like even that would require bending the rod upward as you removed it. I cant see it working at all on a big spoke heel adjuster.
The old Rickenbacker "hairpin" rods were thin (and fragile) enough to be pulled out through the headstock, but i cant think of any other production basses where that was possible. They otherwise werent great rods, as they tended to to fail at the nut end, but at least they could be fixed. Common machine wisdom is that everything breaks, and it seems absurd that removing the fingerboard, often damaging or destroying it in the process, is the only viable replacement option for most rods.
Short of extending the rod pocket right into the pickup routes, i dont see any obvious way to make a heel adjust rod removable, but maybe its been done somehow? It seems like even that would require bending the rod upward as you removed it. I cant see it working at all on a big spoke heel adjuster.
The old Rickenbacker "hairpin" rods were thin (and fragile) enough to be pulled out through the headstock, but i cant think of any other production basses where that was possible. They otherwise werent great rods, as they tended to to fail at the nut end, but at least they could be fixed. Common machine wisdom is that everything breaks, and it seems absurd that removing the fingerboard, often damaging or destroying it in the process, is the only viable replacement option for most rods.

Their is another aspect where these rods differ that bears discussion: replacing a broken one. Im agonizing over heel vs headstock adjust on a build in design now. On the typical blue and black wrapped rods by Bitteroot or BBG, the adjuster part of the rod increases from 1/4" slot requirement to around 3/8" wide, and part of the rod is below the plane of the adjuster, which effectively locks the rod in place. In the case of either headstock or heel adjust, you'd have to remove the fingerboard to replace. Some of the newer DA variants maintain the same slot dimension all the way through, in which case the slot cut for the adjuster could just be continued out until it "daylights" out the headstock as it angles downward. That means a long TRC, but that seems like a decent tradeoff for a replaceable rod.
Short of extending the rod pocket right into the pickup routes, i dont see any obvious way to make a heel adjust rod removable, but maybe its been done somehow? It seems like even that would require bending the rod upward as you removed it. I cant see it working at all on a big spoke heel adjuster.
The old Rickenbacker "hairpin" rods were thin (and fragile) enough to be pulled out through the headstock, but i cant think of any other production basses where that was possible. They otherwise werent great rods, as they tended to to fail at the nut end, but at least they could be fixed. Common machine wisdom is that everything breaks, and it seems absurd that removing the fingerboard, often damaging or destroying it in the process, is the only viable replacement option for most rods.
I'm in total agreement with your thoughts on this. The mechanics of the rods do make it easier to change out a rod much easier than the original actual truss rods that were anchored at the heel, often with a bend in the rod which was inserted in a 90 degree hole before the fret board was glued on.
The small cross-section of the rod channel, relative to other rods which require larger adjustment cavity areas, are ideal in keeping as much of the wood as possible at the critical portion of the neck to headstock transition where breaks are frequently seen.
If the neck is removable (for any type of instrument) then it's simple to design the instrument so it can be adjusted at the heel end. I planned my heel adjust rods to stop just slightly recessed from the end and installed with a small rectangle of wood glued into the channel to lock the rod in position. This filler piece can be easily popped out with a small chisel should the rod ever need to be replaced.
Some bass designs that don't have room to accommodate an adjustment wrench pocket between the end of the neck and the first pickup route would need a different solution to the problem, of course.
Another "fine point" in the rod installation process is the need to slightly deepen the channel where the adjustment nut resides.
Big B pointed out a non-functioning rod that was most likely due to not providing a slight bit of clearance in this area. Rods where the barrel of the adjustment nut doesn't have a bit of free clearance to the channel can bind against the channel when they are tightened because the rod actually "bows" a small amount. This can angle the barrel adjuster just enough to bind against the channel. In extreme cases the weld holding the barrel nut in place could break from this side force against it.
I mention this because it's easy for someone new to the function of these rods to overlook this small but critical step in the installation of a rod. Sometimes those of us who have been working with instruments a long time don't give a second thought to doing these little steps, but someone less experienced might not know this.
Last edited:

Wow, last three posts!!!
I’m so glad this thread/conversation went deeper into this level of detail! I feel better equipped for my next neck which will be a heel adjust and that end of the neck will get a longer end that goes right to the front pickup route (like a F bass BN)
Happy building folks!
I’m so glad this thread/conversation went deeper into this level of detail! I feel better equipped for my next neck which will be a heel adjust and that end of the neck will get a longer end that goes right to the front pickup route (like a F bass BN)
Happy building folks!
As far as removal goes I find the blue wrapped rods are the easiest to get out as long as the neck is removable. This is what my routes look like before the fingerboard is glued on.
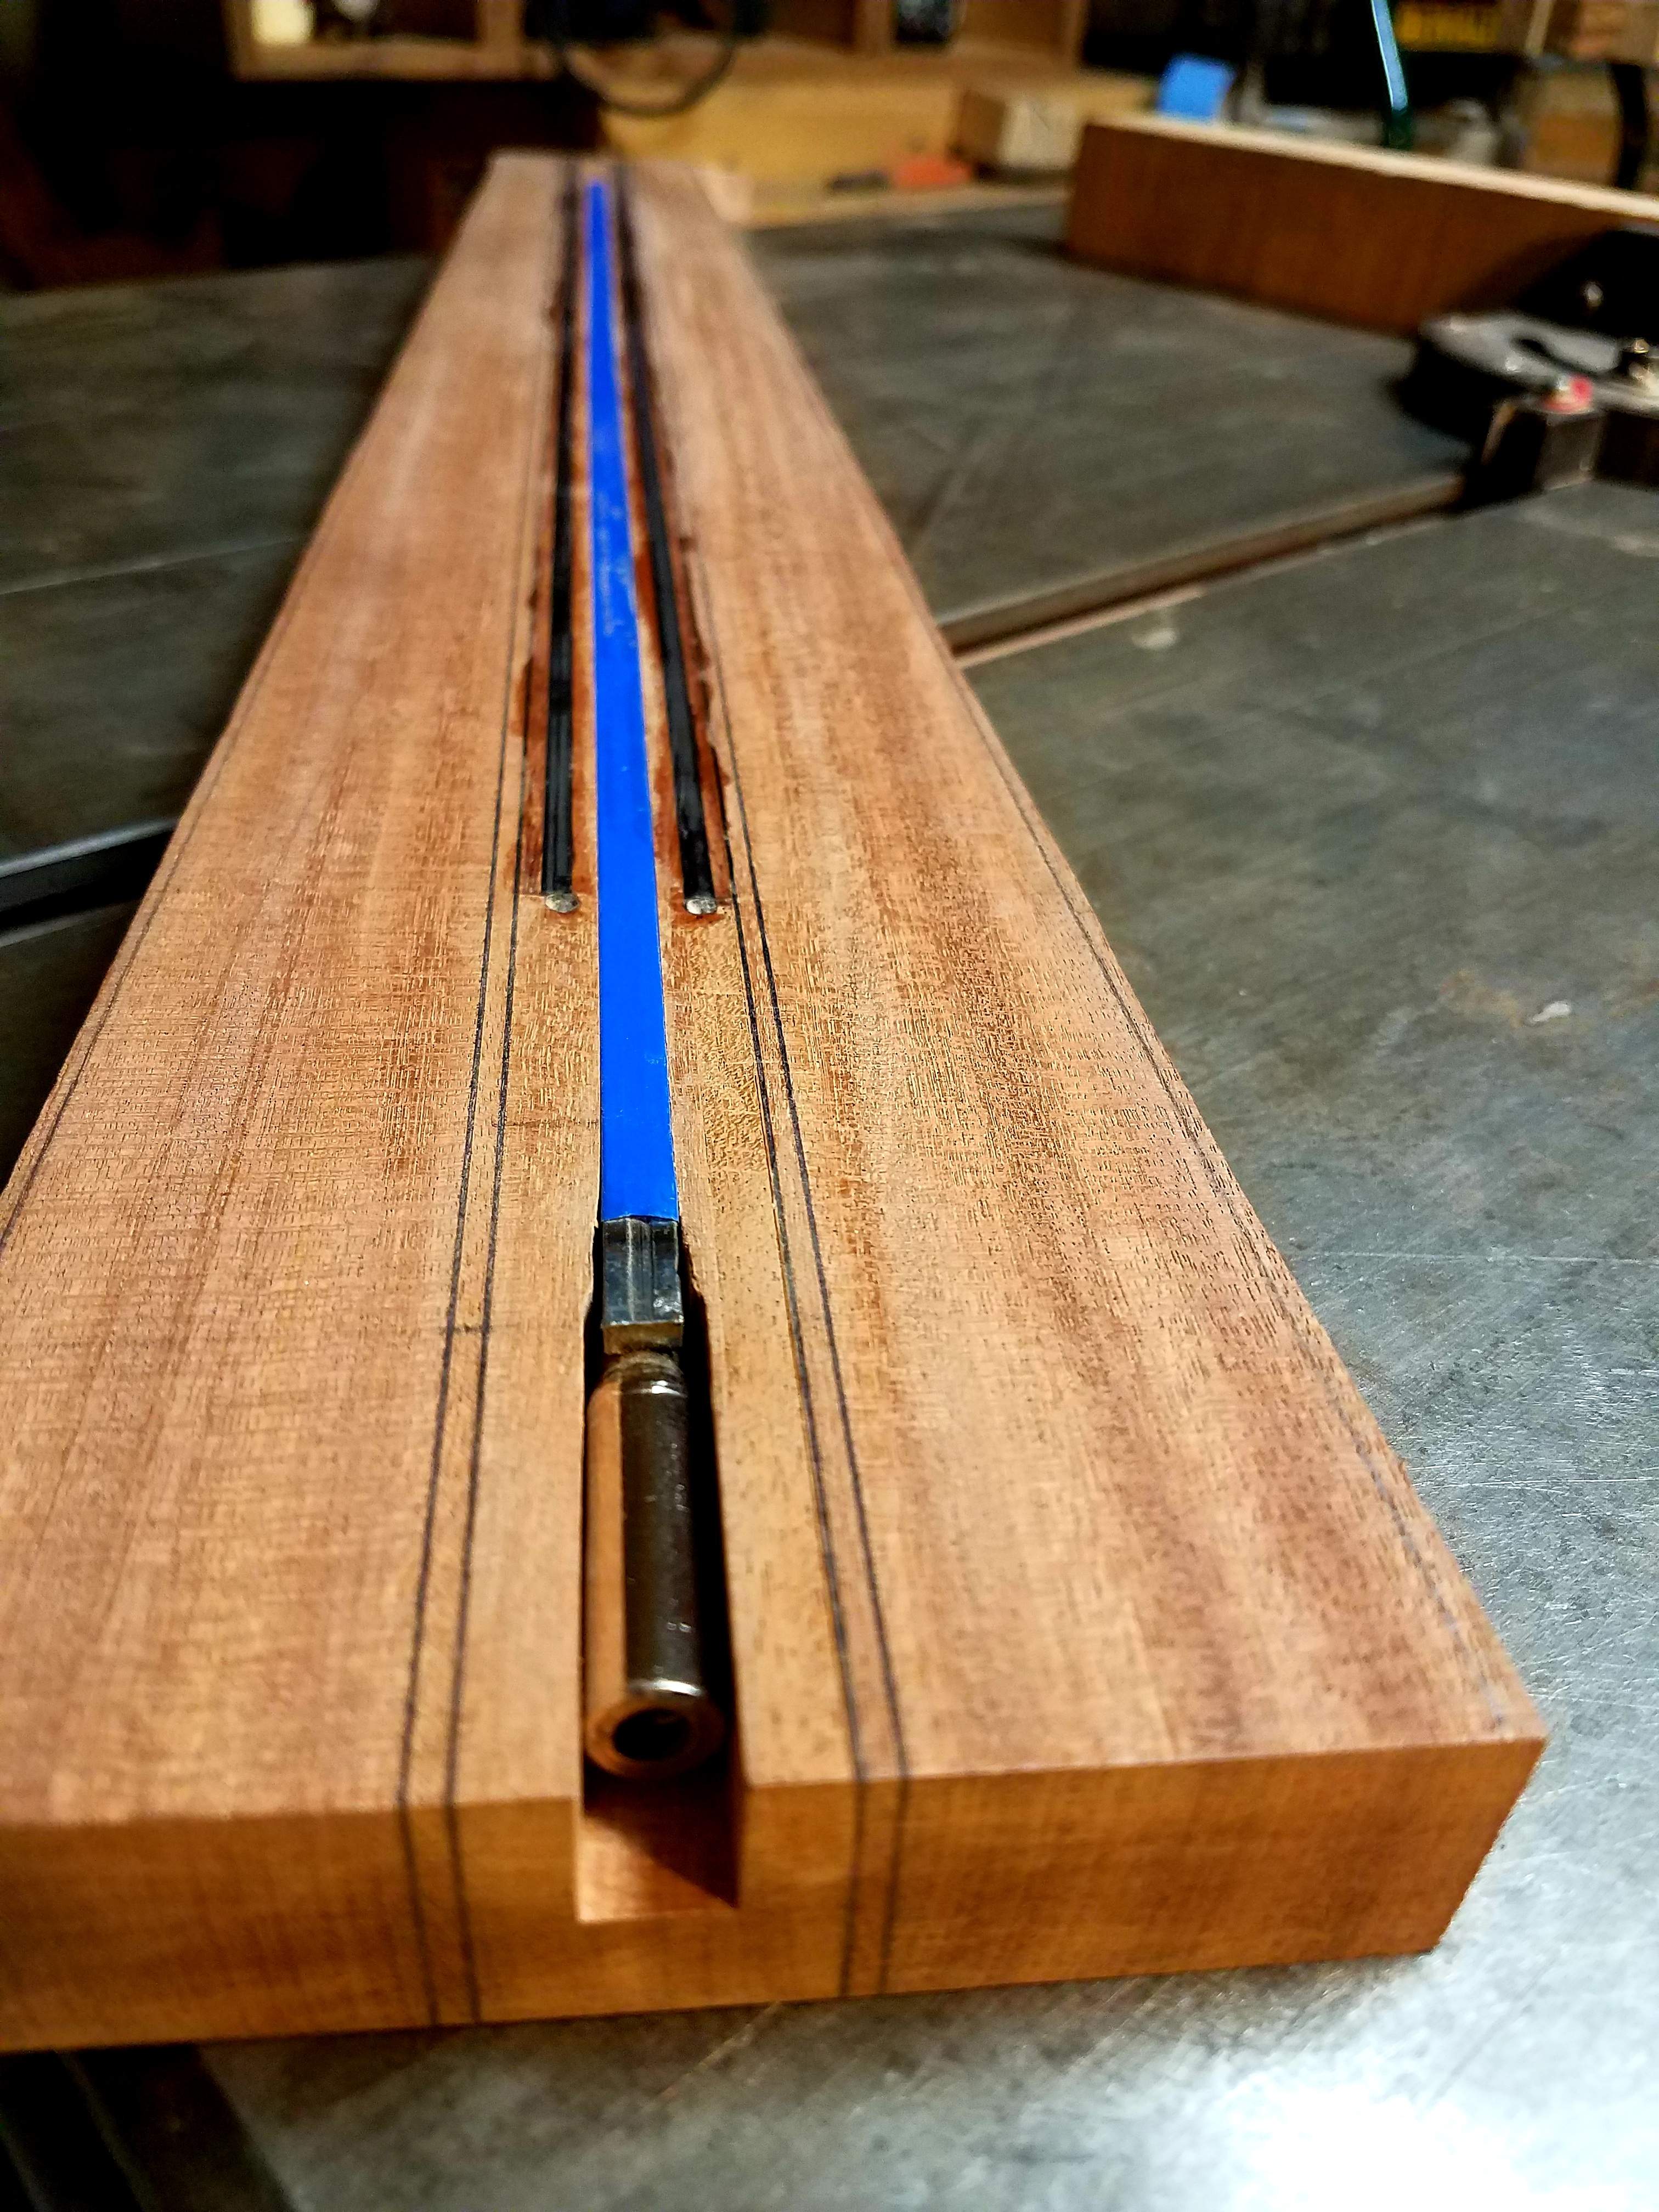
Since the large end is facing the heel the rod slides out without too much effort. You just have to make sure when you glue on the fingerboard that you don't let excess glue get into the truss rod slot and trap it in place.
I cut my truss rod slots so the rod sits just the tiniest bit below the face of the blank. This leaves enough slack to get the rod out and makes gluing the fingerboard flat much easier. If the rod sticks up in even one spot it can crack the fingerboard when you clamp and glue it to the neck.
I dont like the blue rods for headstock access because the nut and sleeve require so much wood to be routed out. This is an application where I would use the smaller profile LMI rods.
Since the large end is facing the heel the rod slides out without too much effort. You just have to make sure when you glue on the fingerboard that you don't let excess glue get into the truss rod slot and trap it in place.
I cut my truss rod slots so the rod sits just the tiniest bit below the face of the blank. This leaves enough slack to get the rod out and makes gluing the fingerboard flat much easier. If the rod sticks up in even one spot it can crack the fingerboard when you clamp and glue it to the neck.
I dont like the blue rods for headstock access because the nut and sleeve require so much wood to be routed out. This is an application where I would use the smaller profile LMI rods.
After some thought, I pulled the trigger on an LMI rod, I didn’t see enough difference between that and the Allied one to justify the $10 difference. I have an idea in mind that might make it removable with heel adjust, have to check the geometry with rod in hand.

Just to add more to the conversation, Allied Lutherie offers an ultralight truss rod installation tool.
Ultralight Trussrod Installation Tool
The idea is to glue on the fretboard with the tool installed removing the tool before the glue sets. You may have to do this more than once to make sure the channel is clear and clean, but the idea is to have a nice, clear and clean truss rod channel so that the truss rod can be easily installed or removed in the future.
Just to clarify, I do not own this tool, nor have I used one. Just sharing information I found on their site. It might be helpful to someone out there!
Ultralight Trussrod Installation Tool
The idea is to glue on the fretboard with the tool installed removing the tool before the glue sets. You may have to do this more than once to make sure the channel is clear and clean, but the idea is to have a nice, clear and clean truss rod channel so that the truss rod can be easily installed or removed in the future.
Just to clarify, I do not own this tool, nor have I used one. Just sharing information I found on their site. It might be helpful to someone out there!
I made a dedicated brass rod to clean the truss channel of excess glue. I "ramrod" a few small pieces of moistened paper towel through the channel to remove all excess squeeze out.
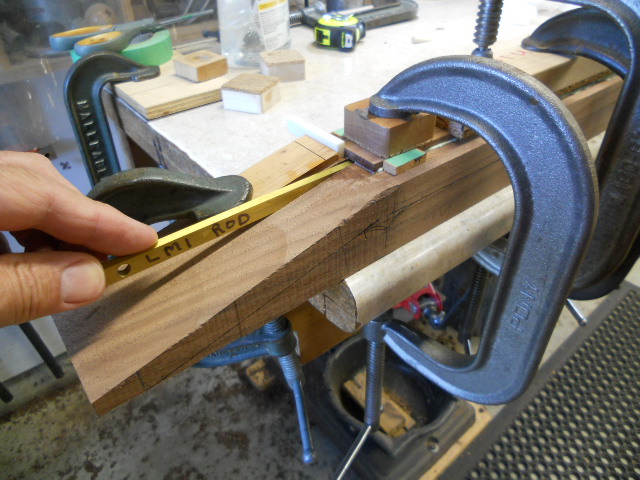
I've found best way to keep glue out of the channel is to use a roller to apply a thin layer of glue to the neck blank and not the fingerboard. Then I run a rag down the center of the slot to remove any glue that manages to get in. Before I put the fingerboard in place I run a finger down the slot, wiping an 1/8 or so area around it mostly clean of excess glue. This removes the glue that would squeeze into the slot once the fingerboard is clamped in place and by applying the glue to the blank the fingerboard surface above the rod remains free from glue as well. Just make sure you place the fingerboard accurately so you don't smear the glue by sliding it into position.
The Allied Lutherie DA Truss Rod arrived today. Well it was shipped from Vermont (One state over from New York) was in San Francisco the next night, then took two days to get to me.
This single truss rod cost more than the 5 packs of Bitterroot rods (guitar length) I've ordered in the past, so my expectations were pretty high for this custom made rod.
Allied Lutherie did not disappoint. First the packaging of the rod was excellent, even with it's extended tour of the USA, the box arrived in excellent shape. Even better it was packaged very cleverly.
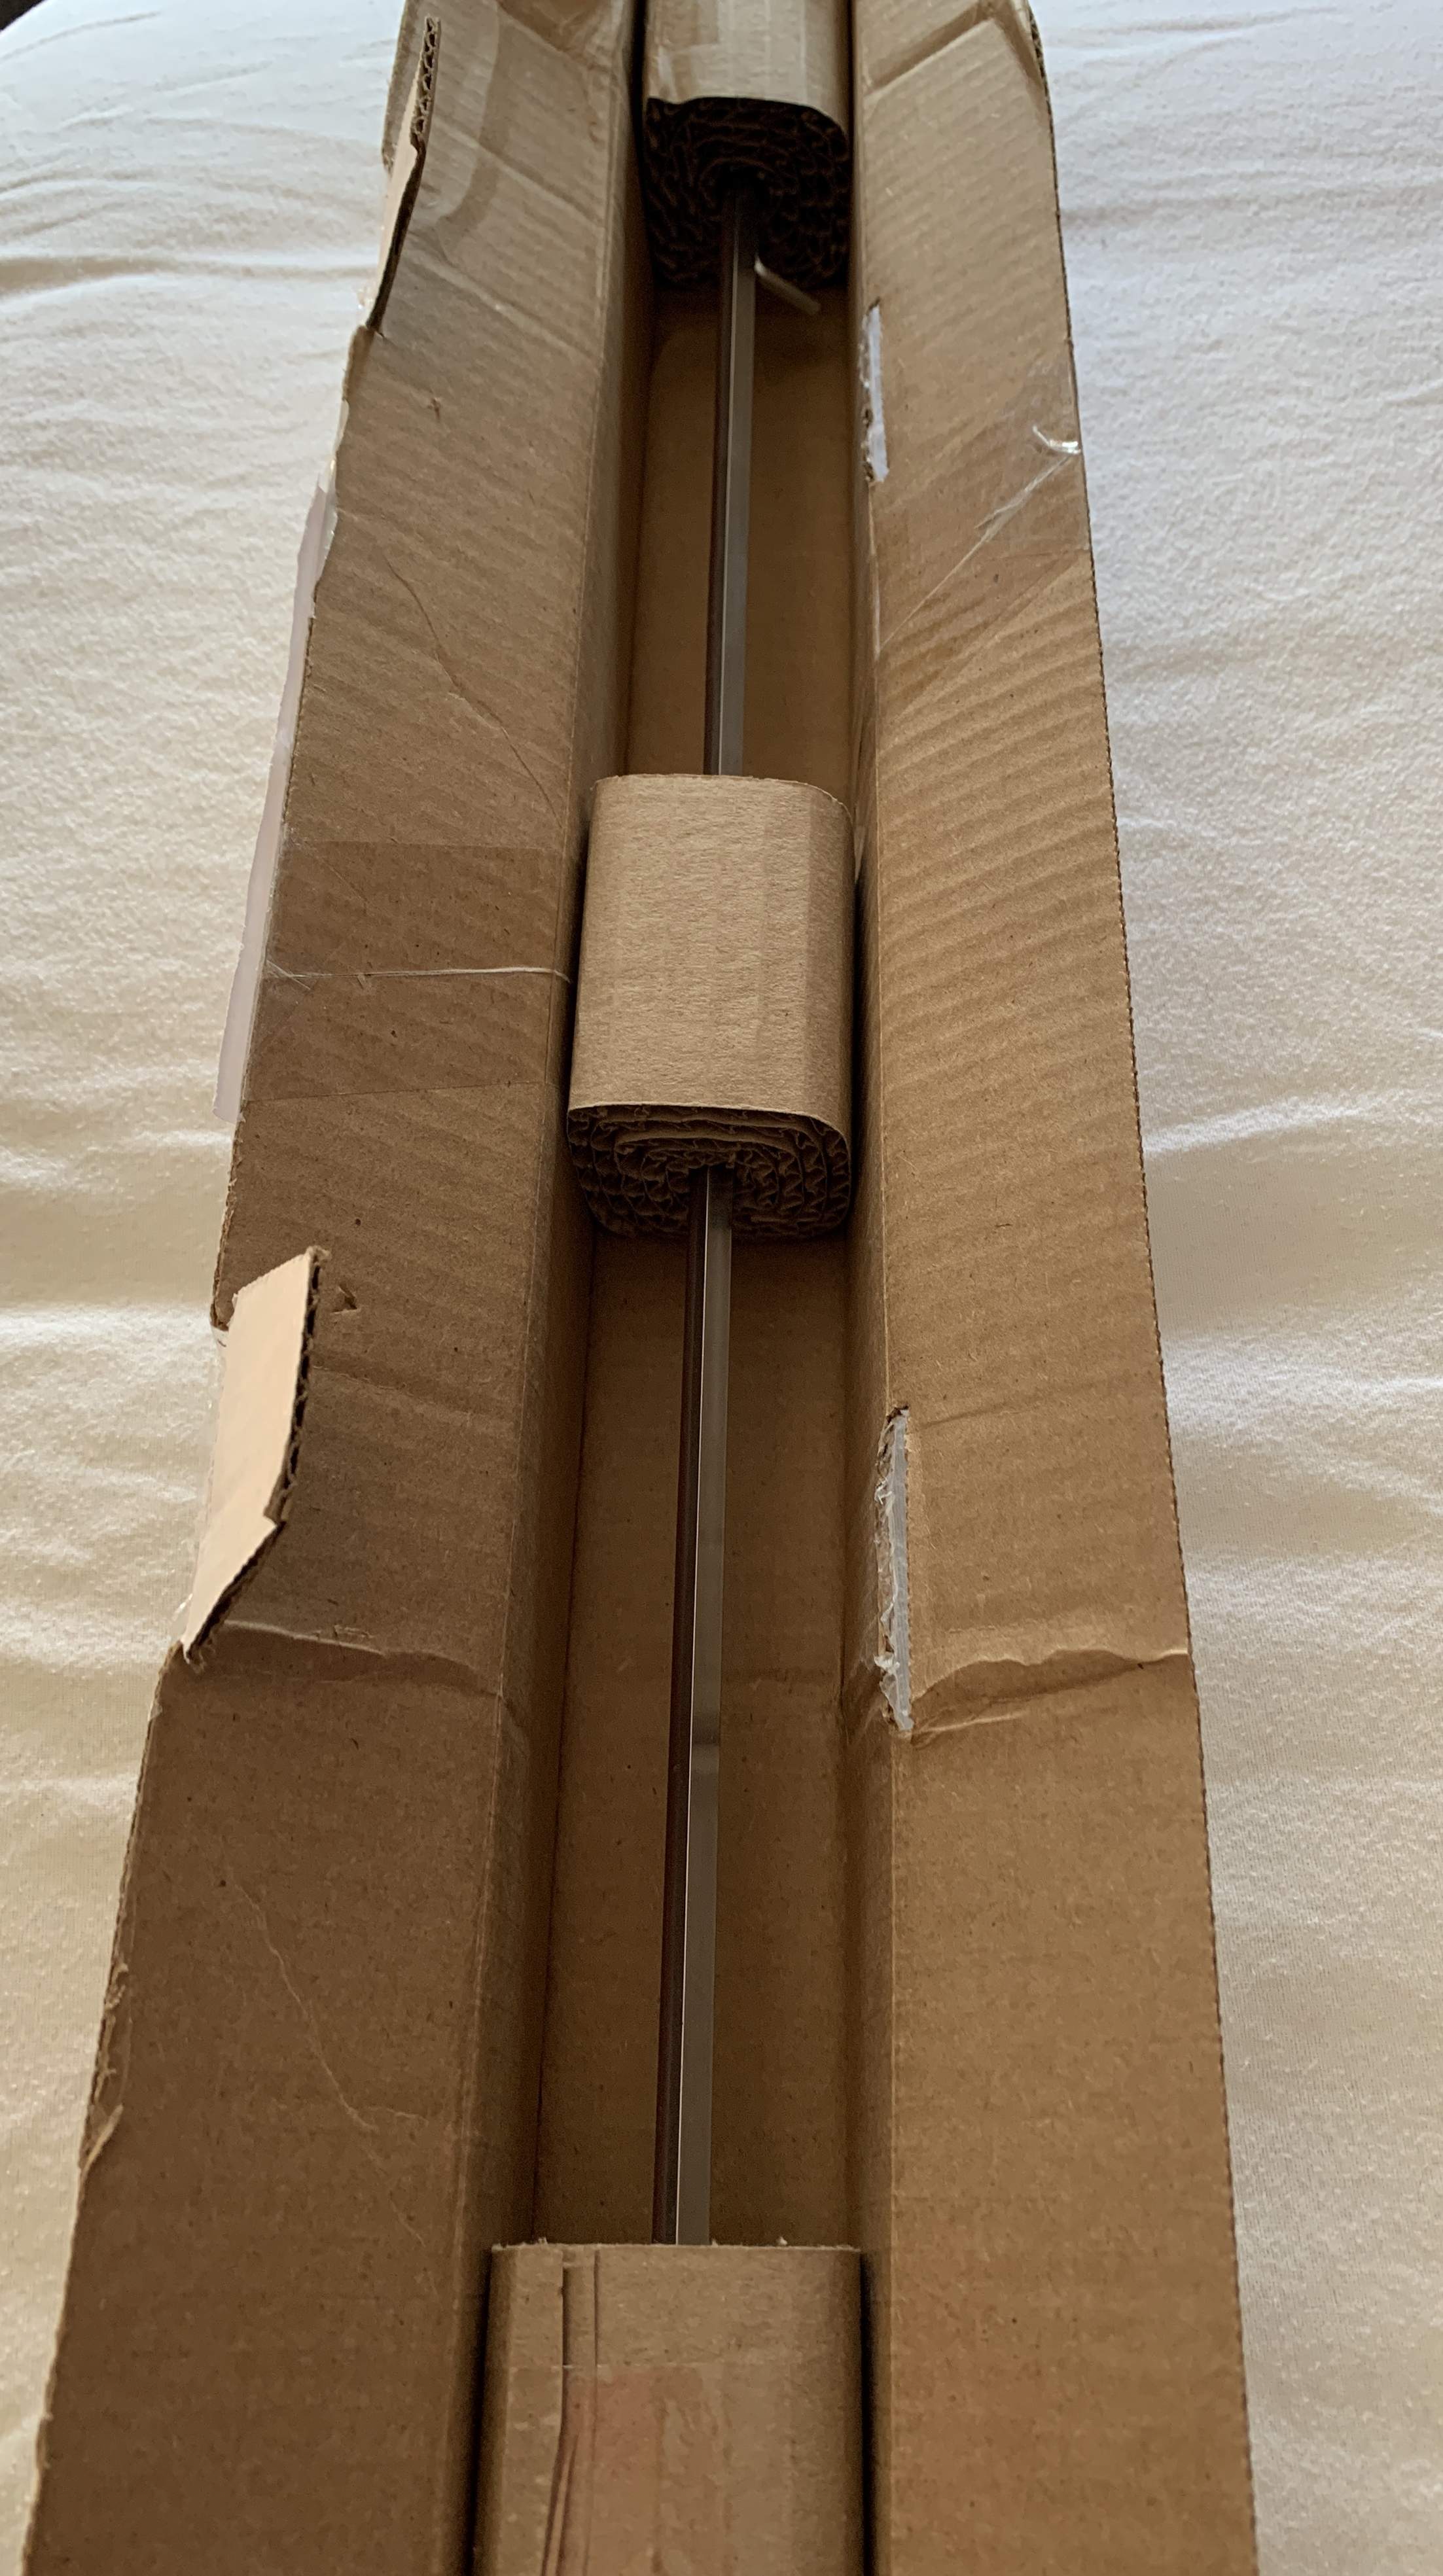
The great part is how beautiful this rod looks! I know, no one will ever see this once the fingerboard is glued onto the guitar, but after looking at the other rods purchased from other vendors, this is exceptional.
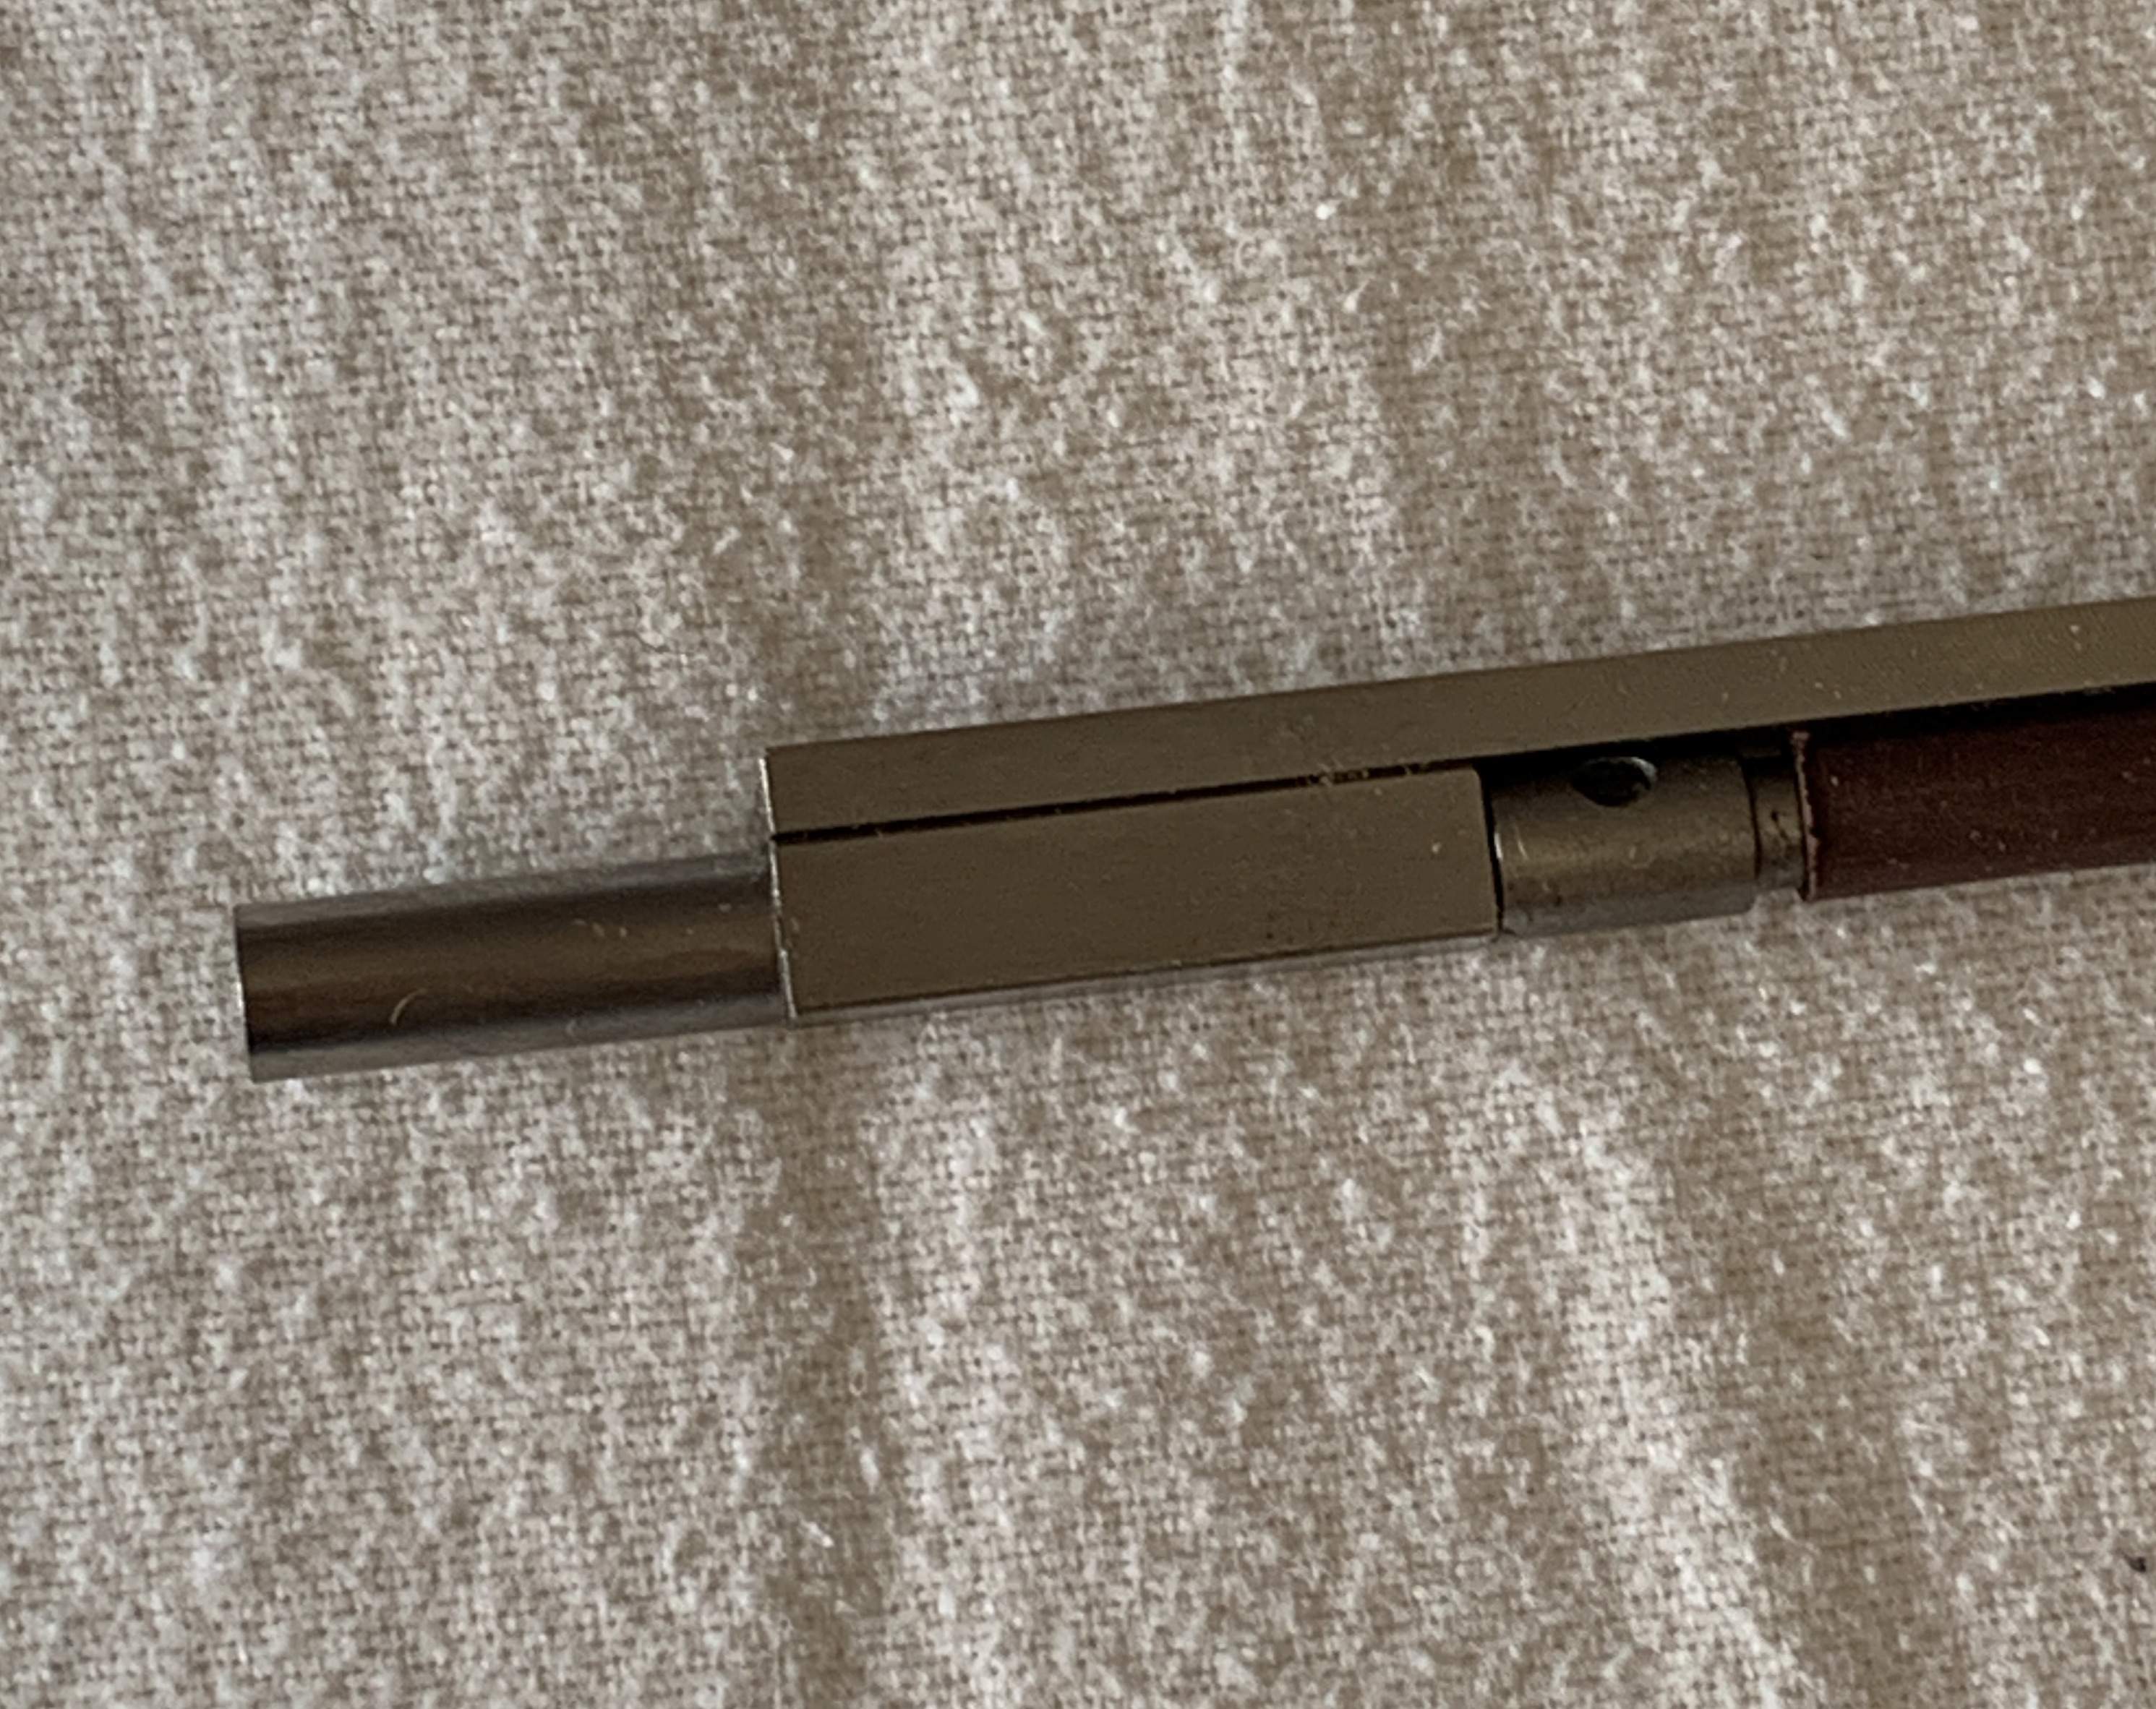
Instead of mild steel, this rod is made from Stainless. The blocks on either end are approximately 1 inch long, the nut is in line with the truss rod, so will not need any additional routing. Even better screwing the nut either way is buttery smooth!
Here are some photos.
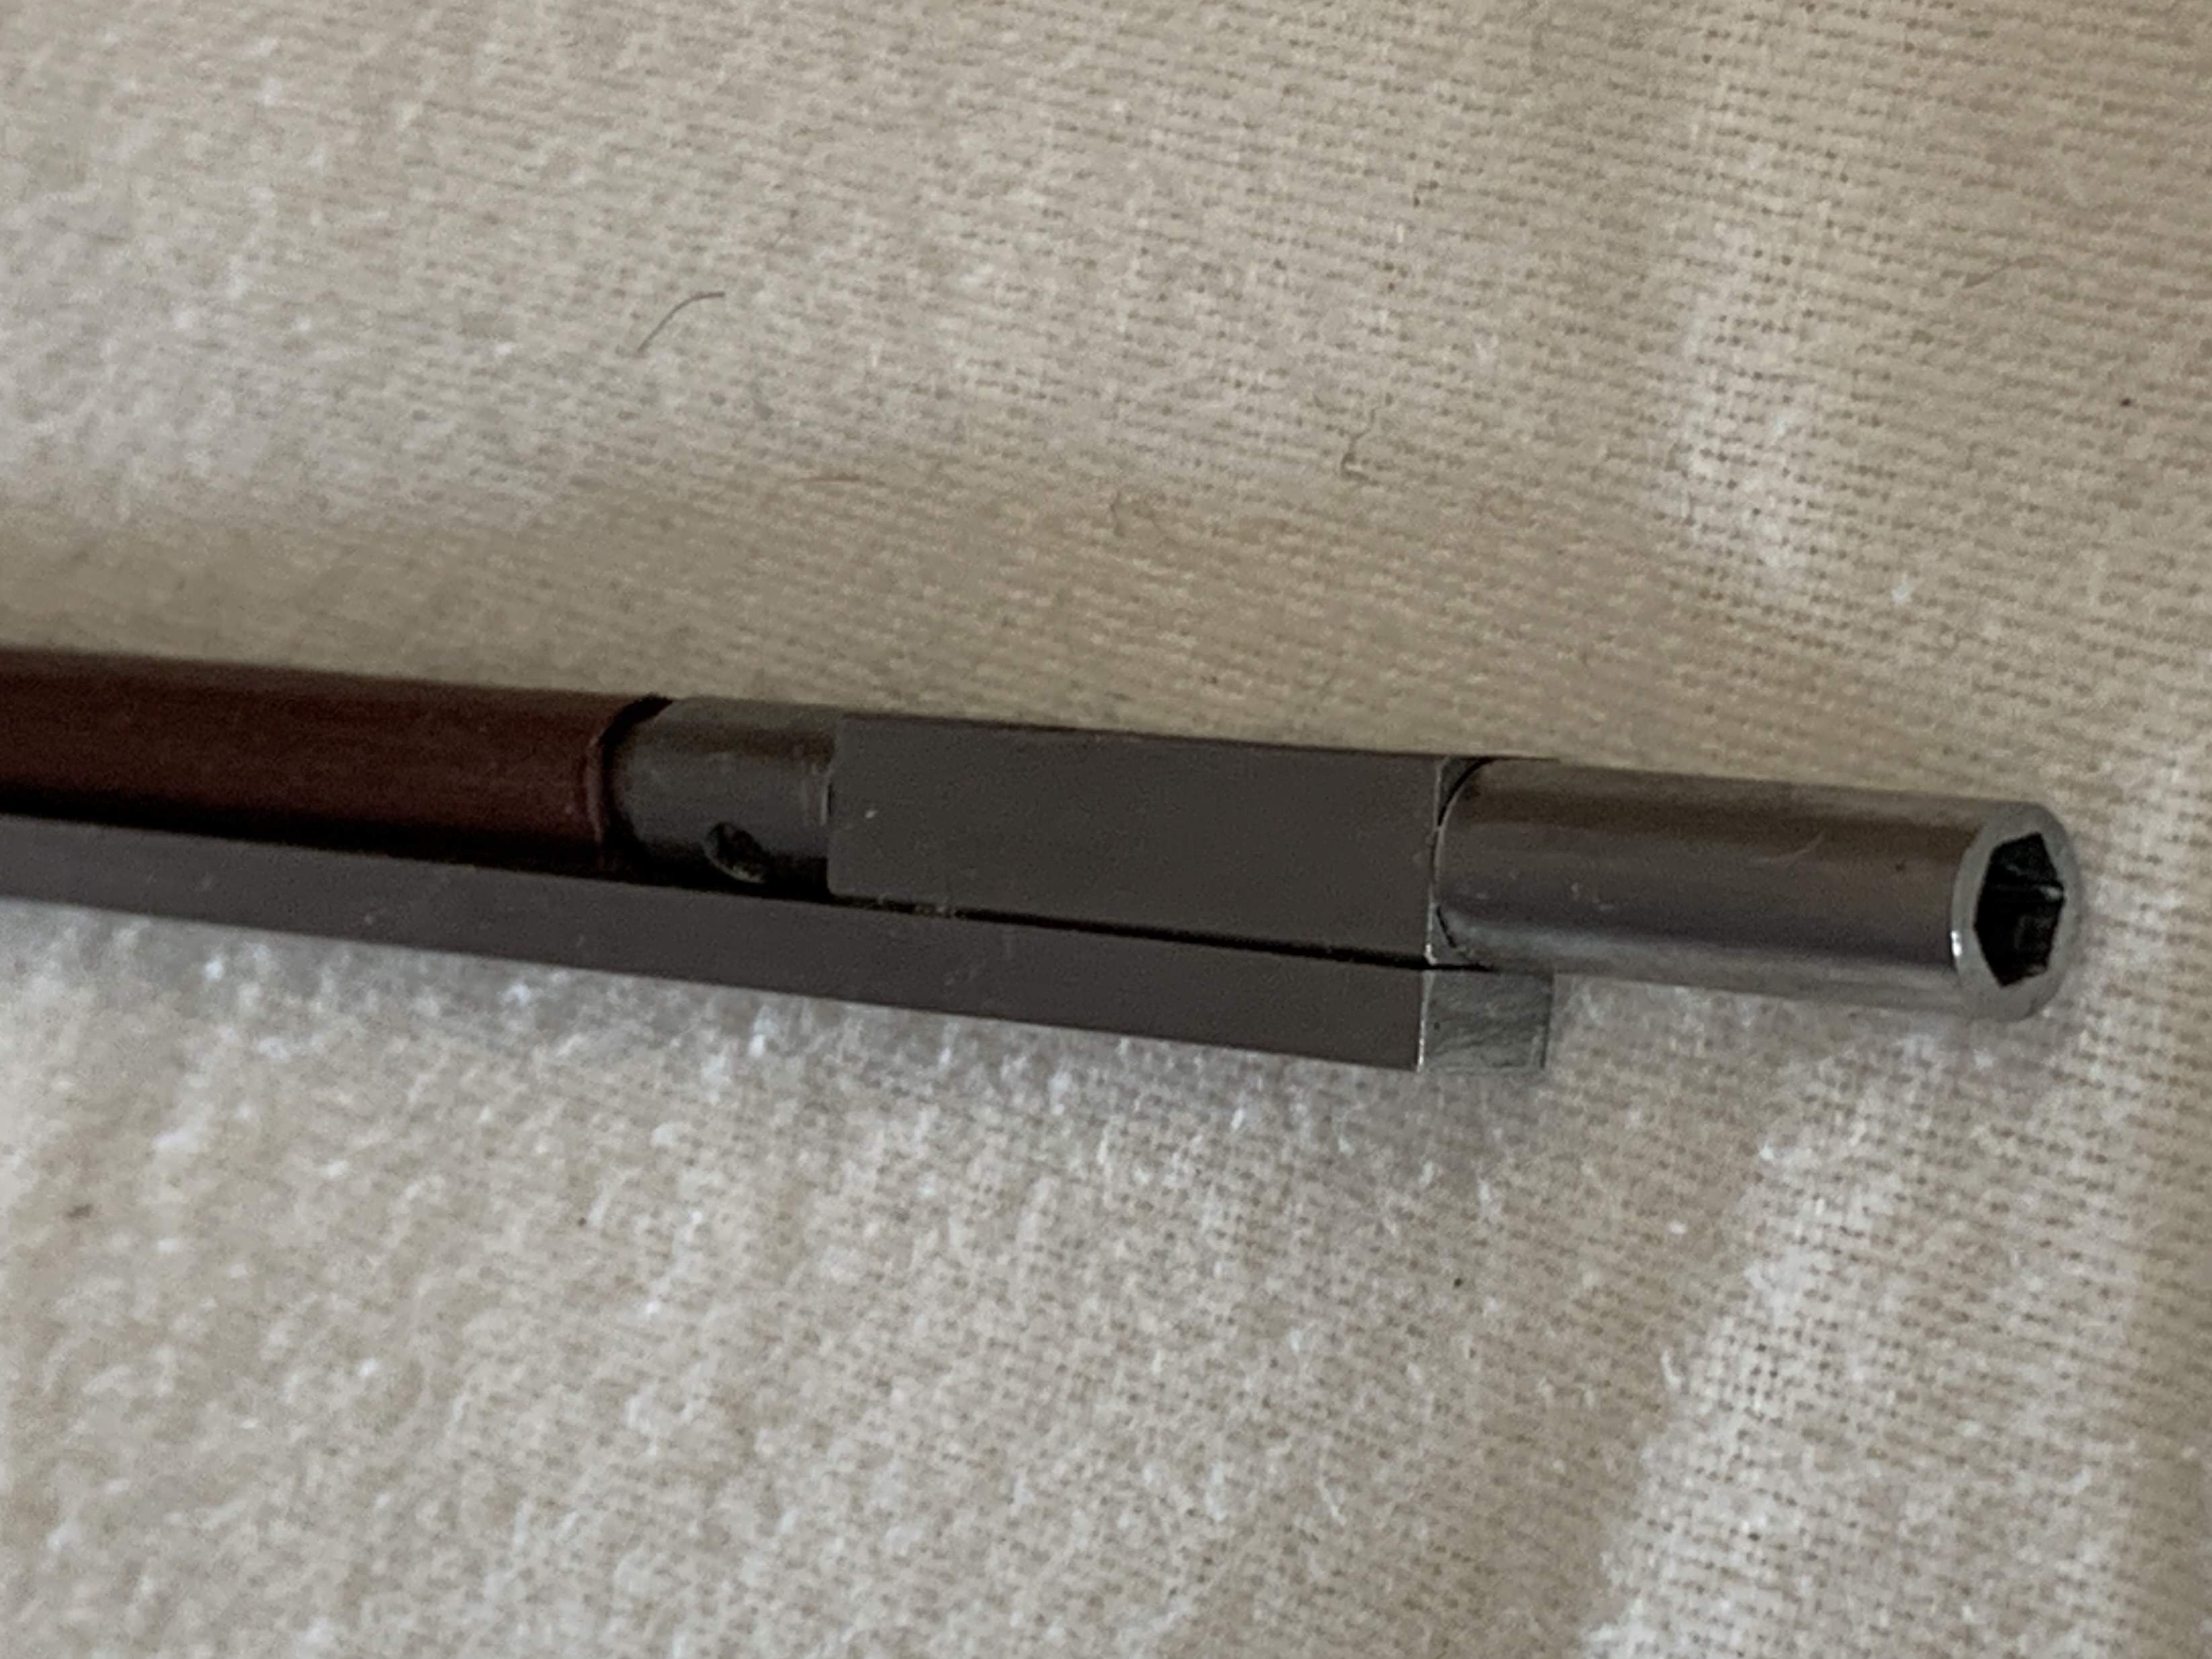
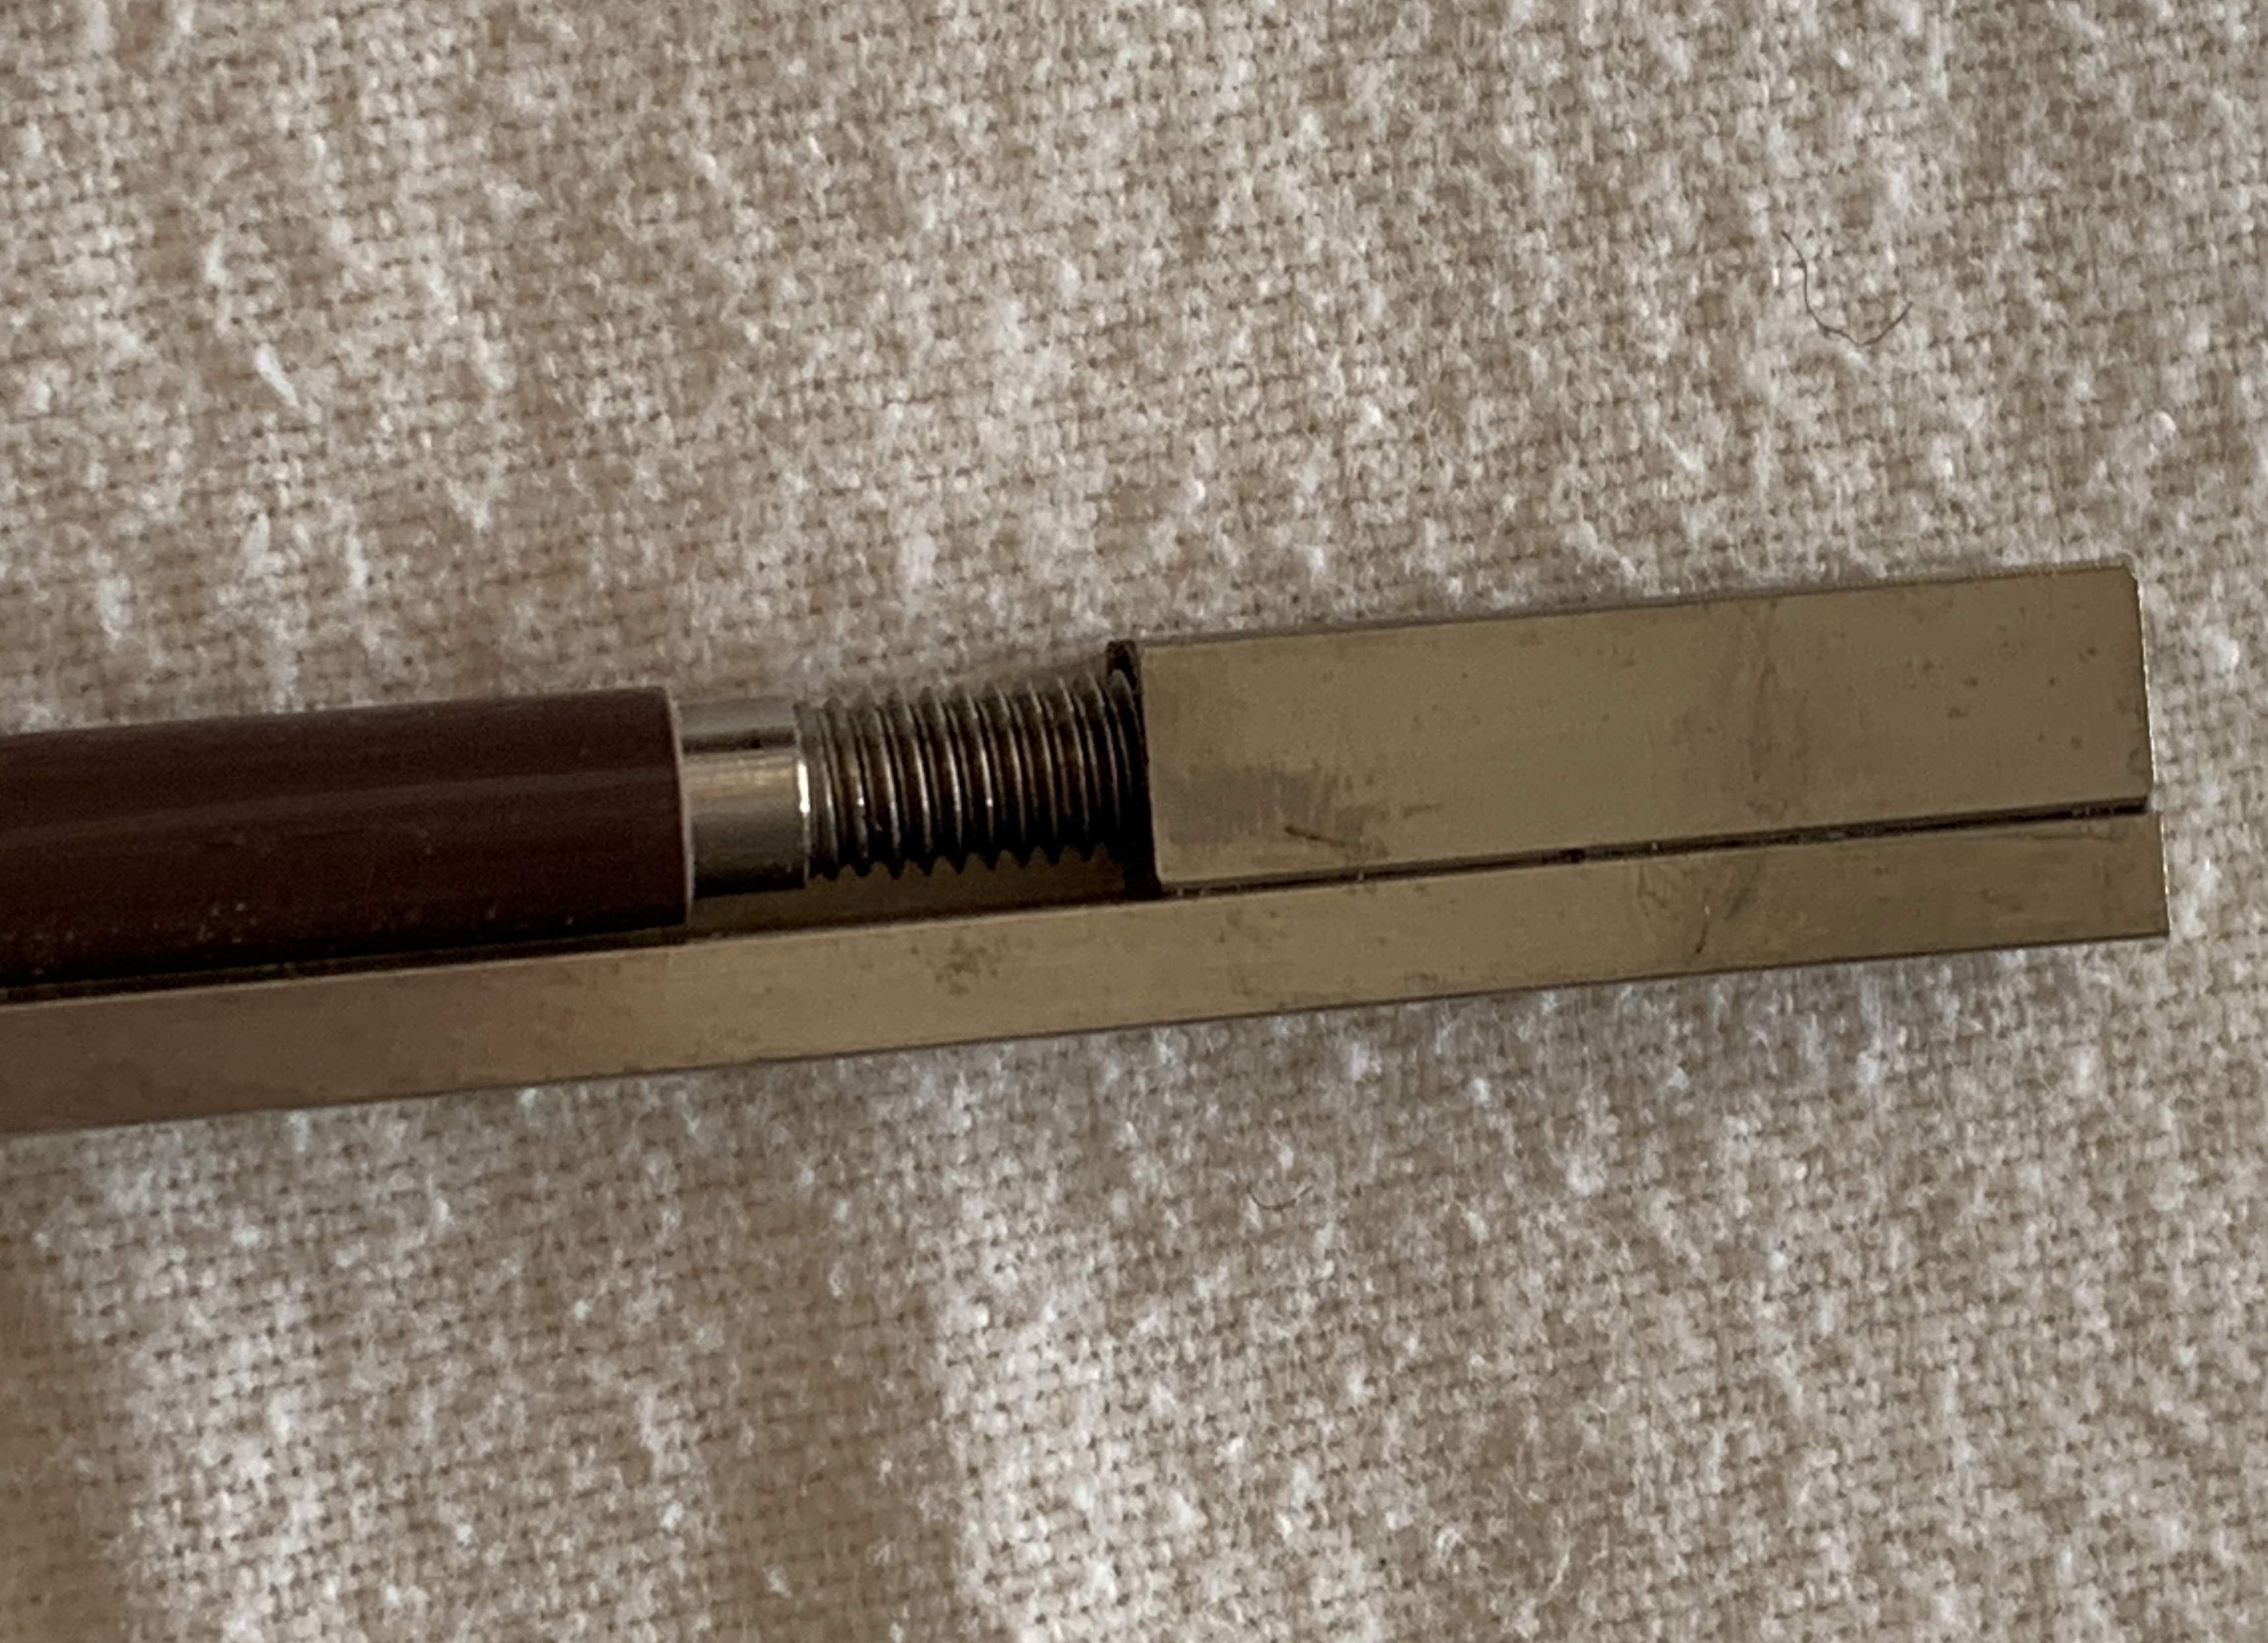
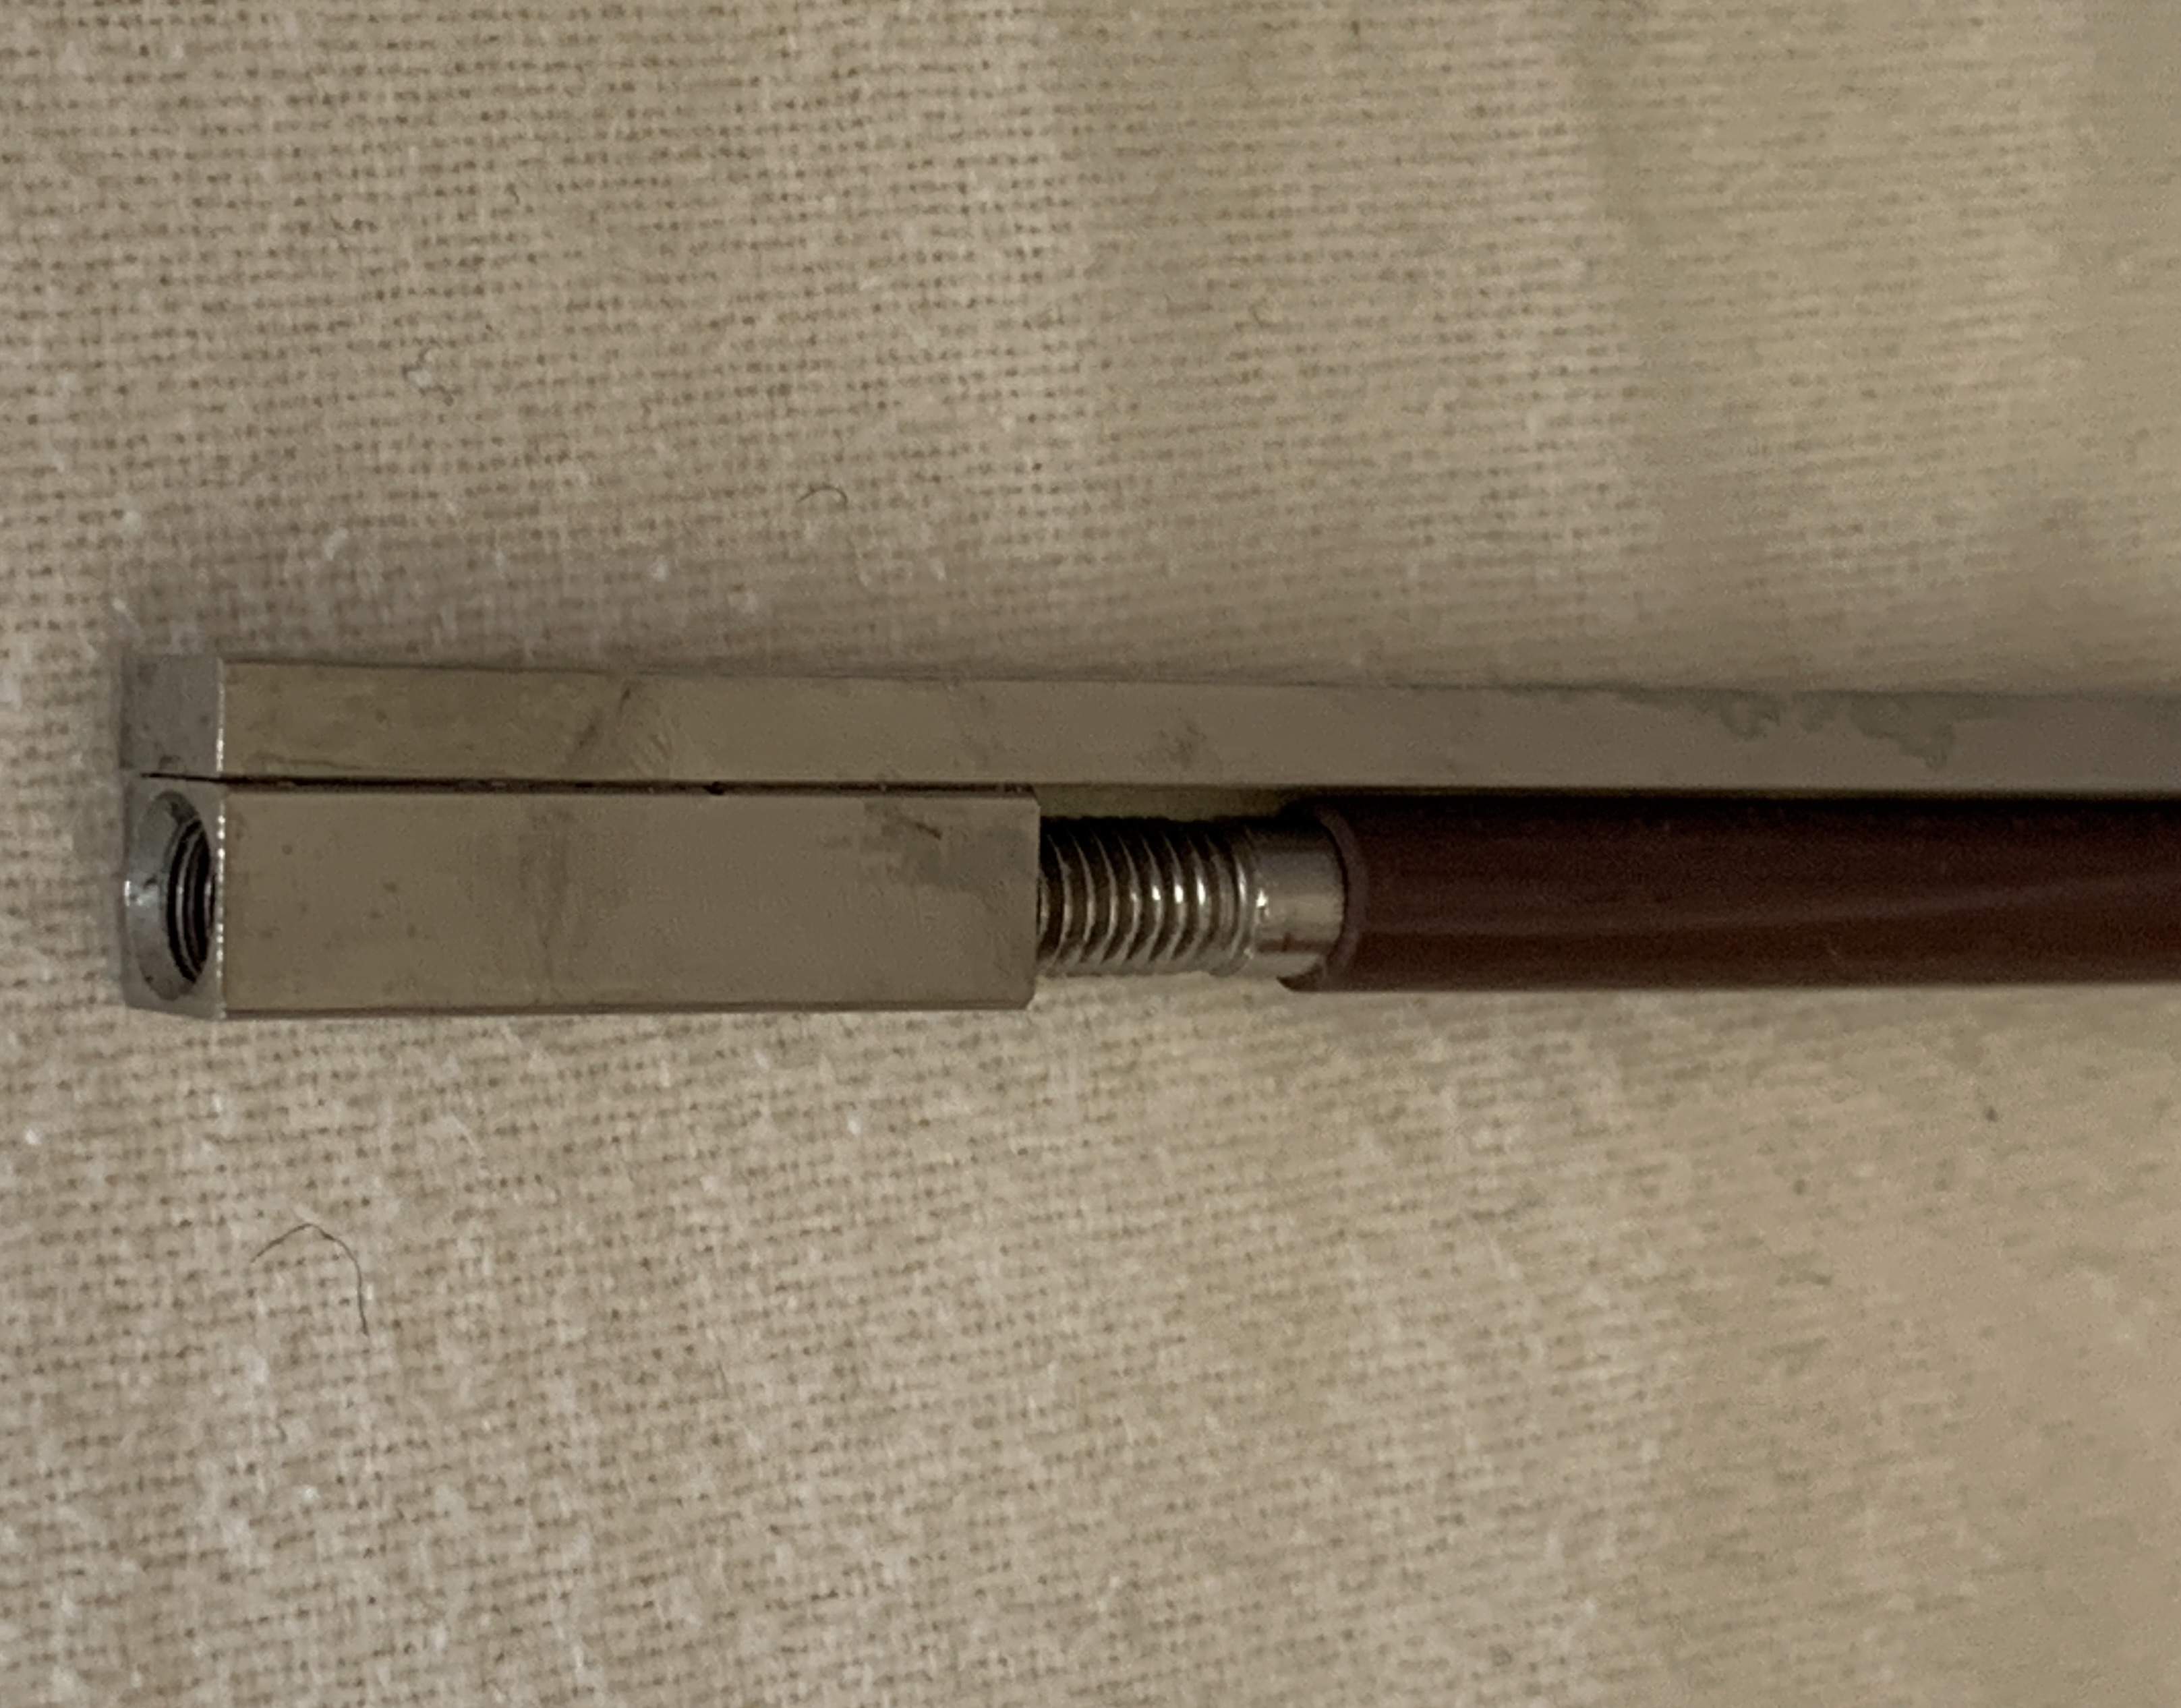
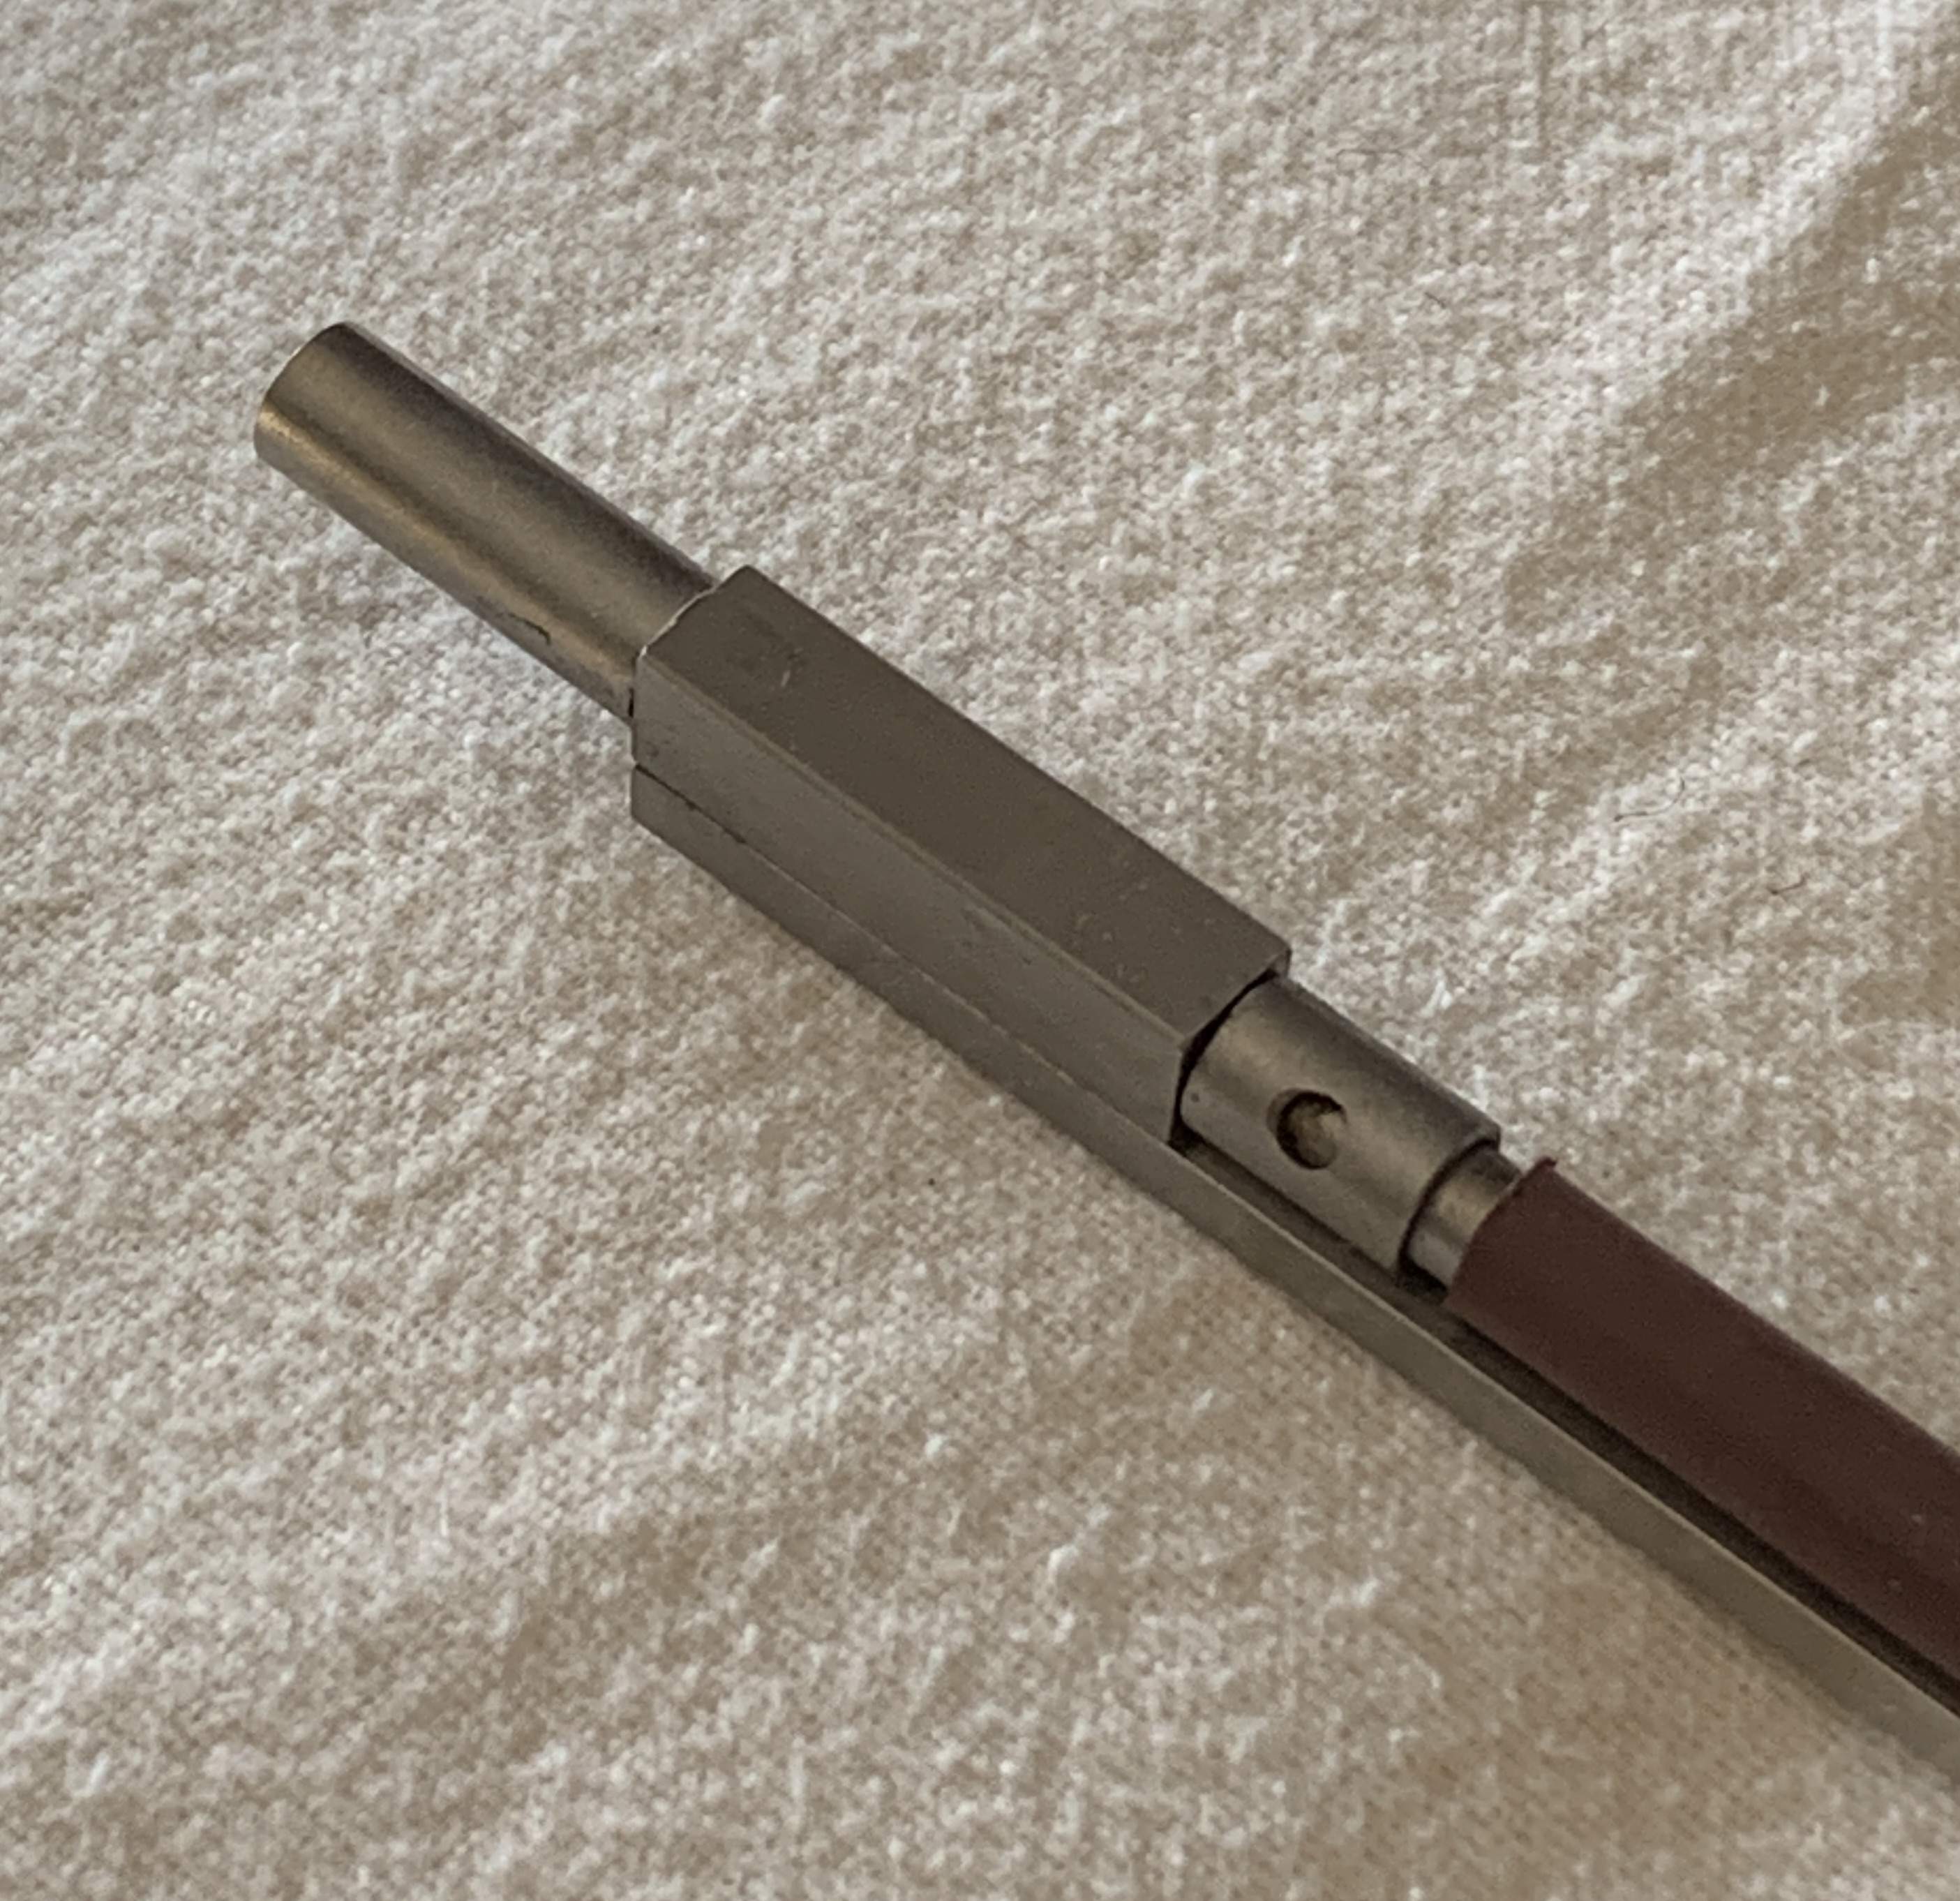
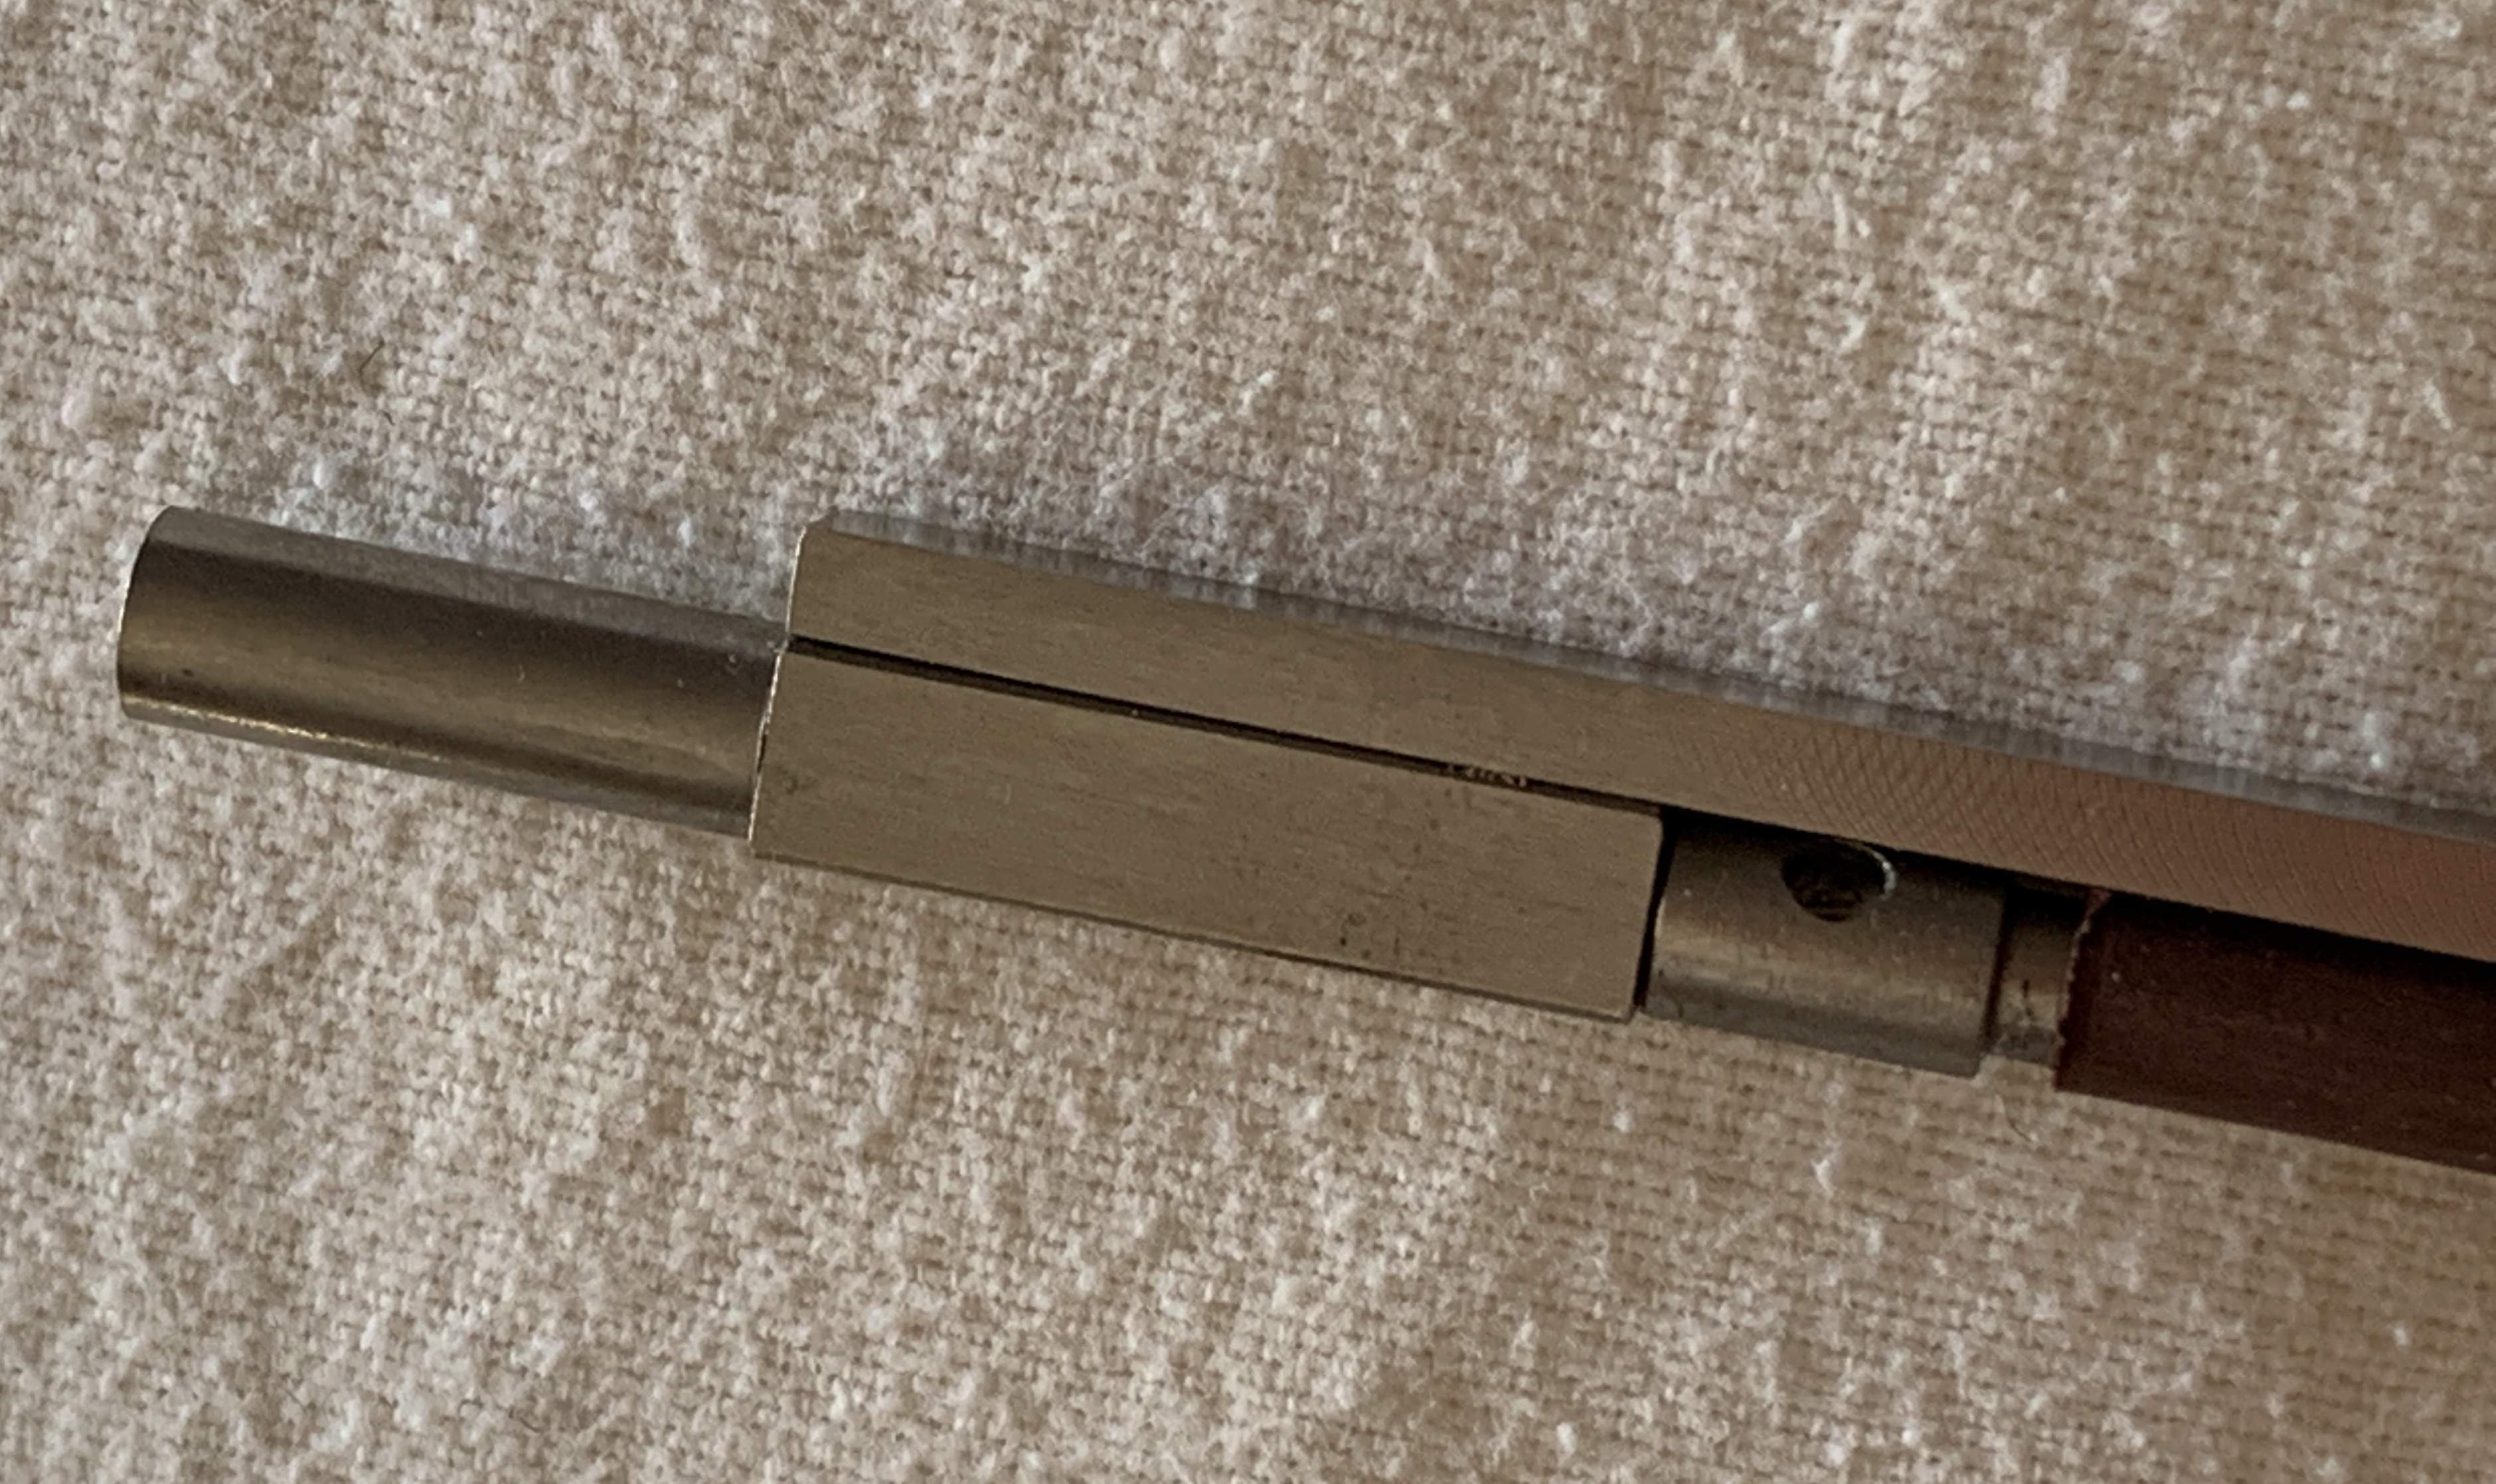
This single truss rod cost more than the 5 packs of Bitterroot rods (guitar length) I've ordered in the past, so my expectations were pretty high for this custom made rod.
Allied Lutherie did not disappoint. First the packaging of the rod was excellent, even with it's extended tour of the USA, the box arrived in excellent shape. Even better it was packaged very cleverly.
The great part is how beautiful this rod looks! I know, no one will ever see this once the fingerboard is glued onto the guitar, but after looking at the other rods purchased from other vendors, this is exceptional.
Instead of mild steel, this rod is made from Stainless. The blocks on either end are approximately 1 inch long, the nut is in line with the truss rod, so will not need any additional routing. Even better screwing the nut either way is buttery smooth!
Here are some photos.
I, too, JUST received an Allied Lutherie trussrod for the first time this past week. My experience was exactly the same. Great packaging, exceptional build quality (especially in comparison to the majority of other rods I've seen), and smooth functionality. Thanks to all who added to this eye-opening thread!

I was looking over the parts to build one of Bruce's rods and want to get a few happening. I've also noticed that Allied Lutherie has a "compression/tension" rod that appears to work similarly to @Bruce Johnson 's design, although it does not appear to get fully encased and bonded to the neck they way Bruce's does. I may order one to explore it.
That Allied rod belongs in a frame on the wall! Almost a shame to bury it inside a bass.
Dang that's nice! I went for an LMI rod, which seems like a step up from the Bitteroot or BBG rods, but nowhere near as slick as that Allied rod. I seem to recall reading that its OK to file the welds on the sides flush with the threaded block, but don't want to mess it up without confirming it. Anybody know if these are OK to file? otherwise the threaded blocks at both ends would have to be routed slightly wider than the 1/4" top strap width.
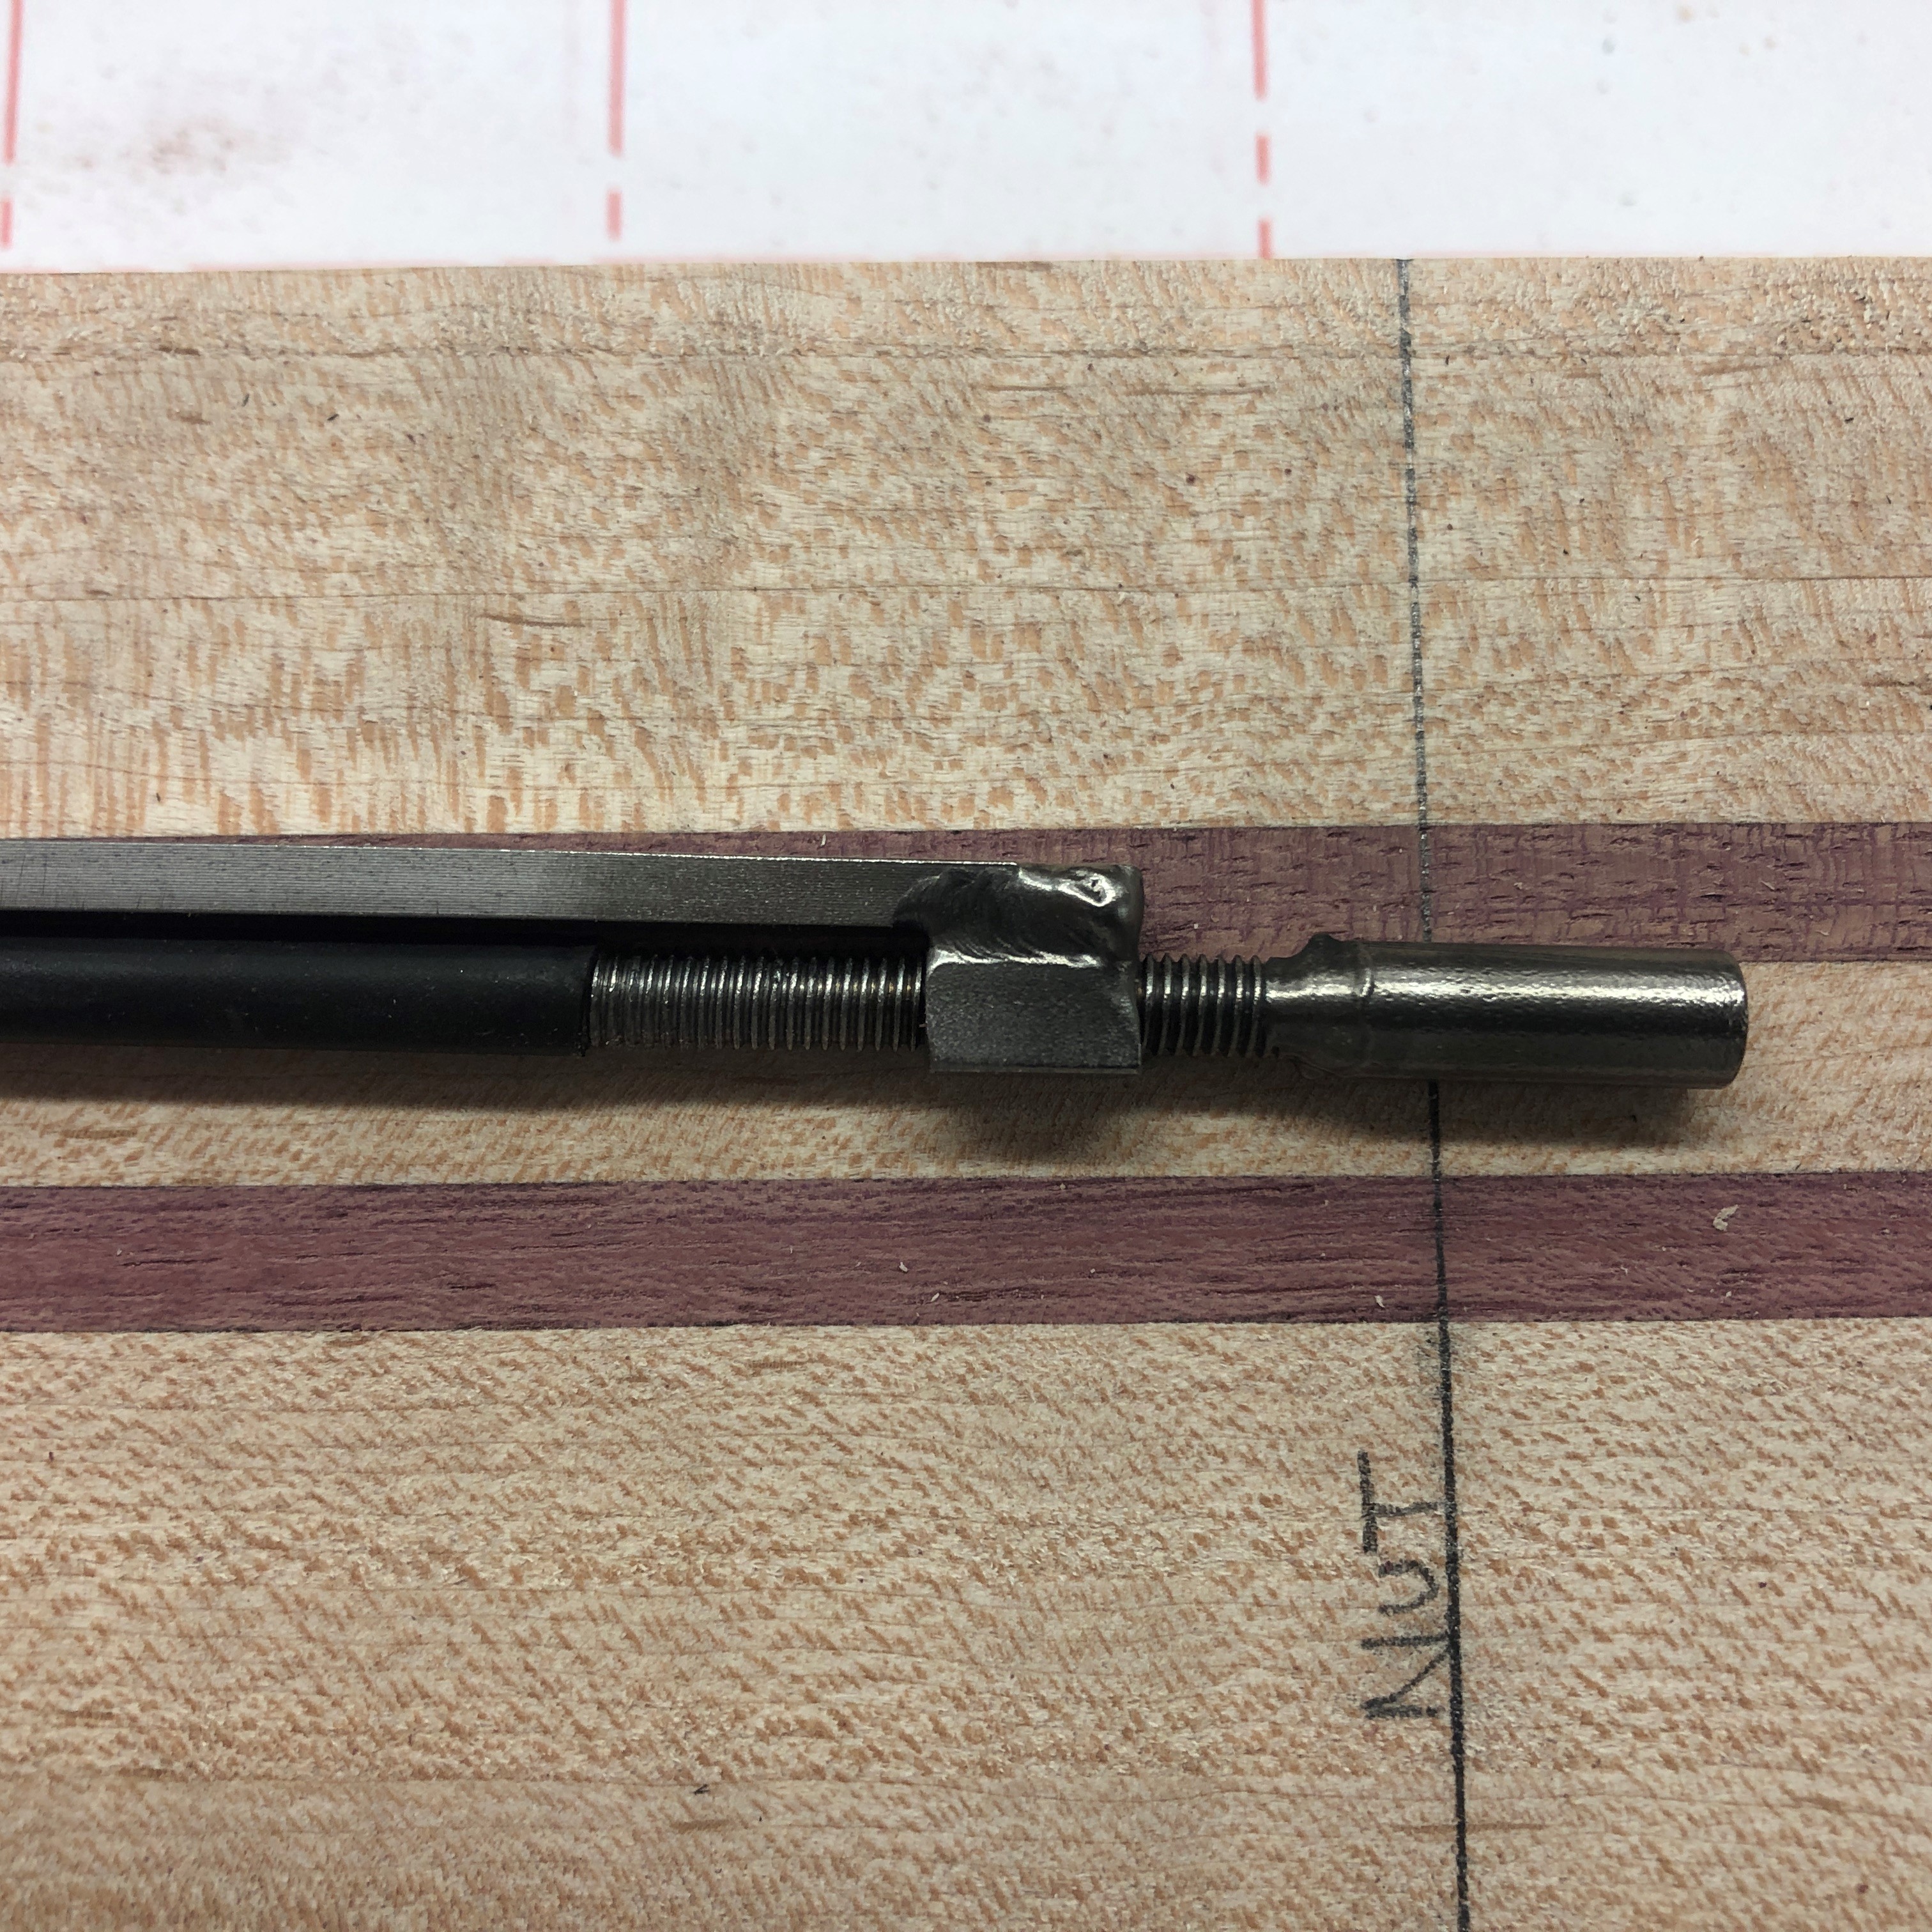
Edit: Found it on the LMI website, they do recommend filing the welds flush. Gonna cut this in tomorrow.
Truss rod double action welded, 22 3/4" x 3/8" (overall length 23 3/4")
Edit: Found it on the LMI website, they do recommend filing the welds flush. Gonna cut this in tomorrow.
Truss rod double action welded, 22 3/4" x 3/8" (overall length 23 3/4")
Last edited:
I file mine flush. The part of the weld that sticks up doesn't add any significant amount of strength. Just don't go wild with removing more material than what it takes to get it to that 1/4" width.Dang that's nice! I went for an LMI rod, which seems like a step up from the Bitteroot or BBG rods, nowhere near as slick as that Allied rod. I seem to recall reading that its OK to file the welds on the sides flush with the threaded block, but don't want to mess it up without confirming it. Anybody know if these are OK to file? otherwise the threaded blocks at both ends would have to be routed slightly wier than the 1/4" top strap width.
View attachment 4140394
I'm not sure I'm crazy about the stainless steel Allied rods. It looks like they are brazed, and I'm not sure that's the strongest option for connecting the threaded block and main section of the rod. That's just my gut reaction, though. They might be fine.
They look very similar to the rods offered by Mark Blanchard:
Blanchard Guitars- Custom Handmade Acoustic Guitars
Last edited:

I was looking over the parts to build one of Bruce's rods and want to get a few happening. I've also noticed that Allied Lutherie has a "compression/tension" rod that appears to work similarly to @Bruce Johnson 's design, although it does not appear to get fully encased and bonded to the neck they way Bruce's does. I may order one to explore it.
That looks pretty nice. It's not quite the same as mine. In their design, the whole rod rotates in opposing threads at each end. It has to be able to turn inside the tube. It would be risky to set it into a full bed of epoxy like I do. My rod doesn't rotate inside the neck; all the threading is done at the adjusting head end.
But, their design looks good and workable. You'd have to be careful with the geometry of the installation to get it to work right.
Is there a "correct" position for the adjuster nut relative to the headstock end? In other words, should the adjuster come as far out into the pitch of the headstock as it can without coming above it, or just so something like 1/8"-1/4" extend beyond the nut, so just the head of it is accessible inside the TRC pocket. Does it matter?

On the few headstock adjustable ones I've built I brought the end of the nut to just under the nut. But as long as the nut fits under the cover I'm sure you will be fine. Just make sure the wrench fits in the pocket.
For the blue wrapped dual action rods shown earlier, I tend to locate the front of the adjustment nut about 1/8" recessed past the fretboard face of the nut, if that makes sense. So on the finished instrument, it's fairly deep in. For this style rod, there's no real reason to have it far out as far as I'm aware, and recessing it like this means the access slot in the face of the headstock can be smaller, and you can in turn use a smaller cover. I've found that 3/4" of slot past the end of the nut is plenty to easily get the allen key in and out. I use truss rod covers with a 1/4" magnet to hold them in place, which is glued into the last 1/4" of the channel. So, I route the channel 1" past the end of the truss rod.


