
Enjoy the benefits of a premium membership!
Upgrade Account
-
TalkBass has been independent since 1998. Add your voice.
Create a free account to reply to discussions, view embedded media, and browse with fewer display ads.
Join free Log in
Want zero display ads or expanded classifieds tools? Compare plans.
You are using an out of date browser. It may not display this or other websites correctly.
You should upgrade or use an alternative browser.
You should upgrade or use an alternative browser.
Buckeye Redeemer DC for Redleg
- Thread starter scottyd
- Start date
More options
Who Replied?
Looking great! With as gorgeous as the top to this bass is, it's the laminate neck that really caught my eye. I love the way it looks.
RedLeg
Supporting Member
I got the idea for the wenge/zebrano from an early 90's warwick dolphin 7 piece neck with the same woods. I always dug the contrast.
Cant wait to see the transition block, it will be zebrano too ;]
Cant wait to see the transition block, it will be zebrano too ;]

I agree, Redleg made great choices on the wood combos.
Looking great! With as gorgeous as the top to this bass is, it's the laminate neck that really caught my eye. I love the way it looks.
I got the idea for the wenge/zebrano from an early 90's warwick dolphin 7 piece neck with the same woods. I always dug the contrast.
Cant wait to see the transition block, it will be zebrano too ;]
Very good call and I agree with you 100%. Killer contrast and I think I'll be "borrowing" your idea when I get my fretless 4 built.

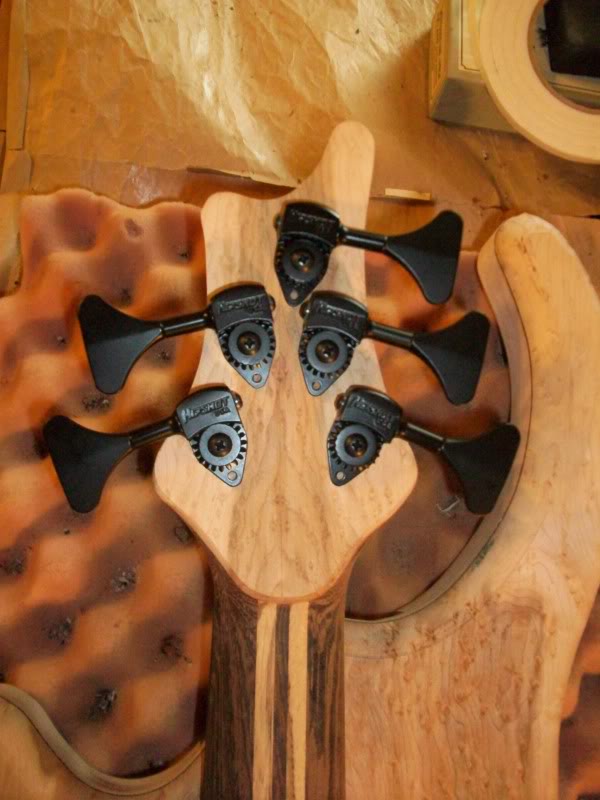
Headstock final shaped and tuner holes drilled.
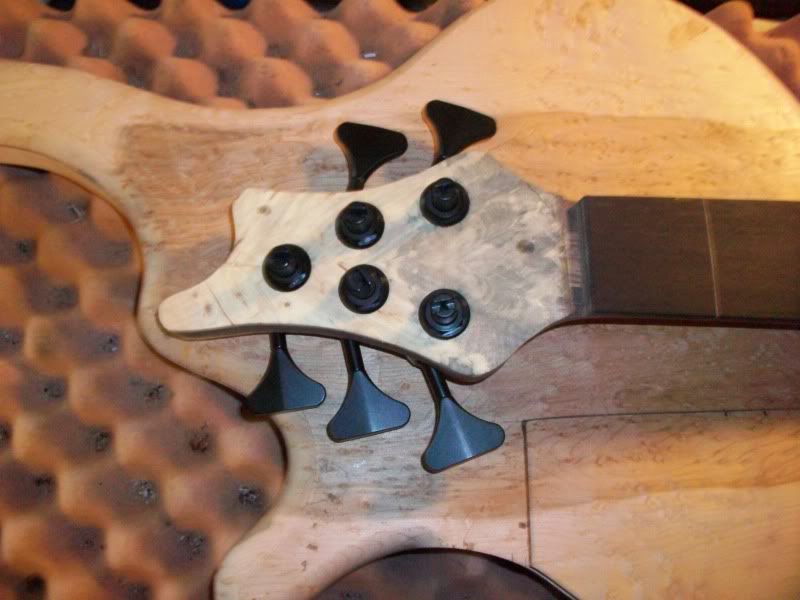
Volute shaped, still needs a little bit of finessing in the area where it meets with the asymmetrical neck.
Side markers installed
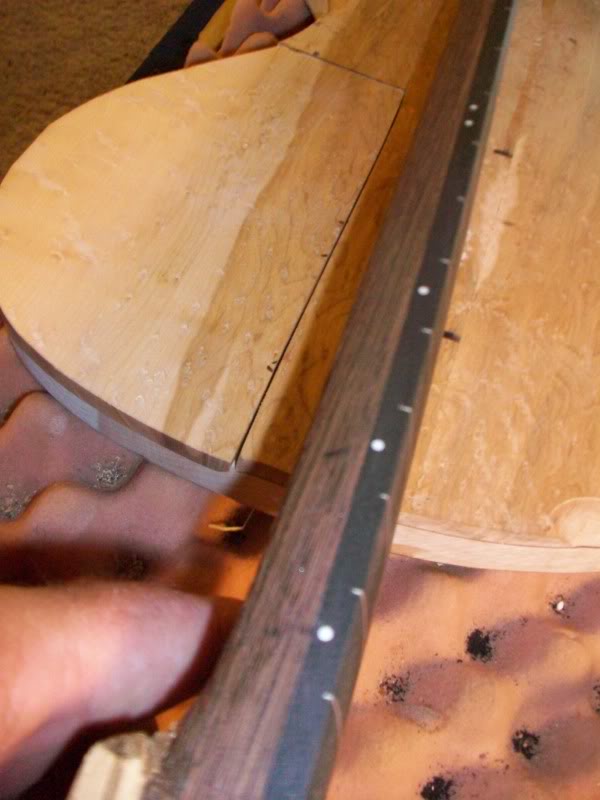
Headstock front veneer soaked in CA, this hardens the wood. Buckeye burl is a soft wood and if this was not done the wood could possibly dent from the stress of the tuners. The CA also shows more or less what the wood will look like with finish applied.
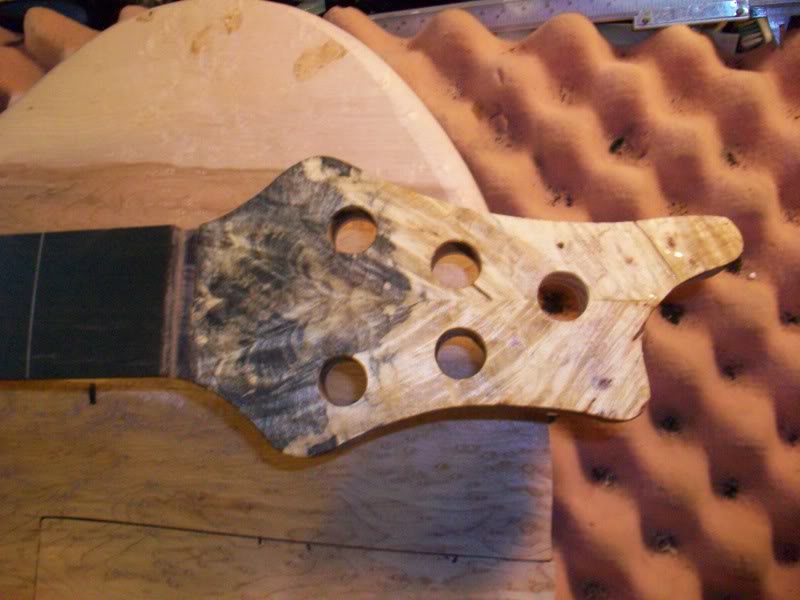
The neck is just about ready to glue in.
Volute shaped, still needs a little bit of finessing in the area where it meets with the asymmetrical neck.
Side markers installed
Headstock front veneer soaked in CA, this hardens the wood. Buckeye burl is a soft wood and if this was not done the wood could possibly dent from the stress of the tuners. The CA also shows more or less what the wood will look like with finish applied.
The neck is just about ready to glue in.
What is your product and method of choice for applying the CA? would it go well over bocote and bloodwood?
What is your product and method of choice for applying the CA? would it go well over bocote and bloodwood?
I've used many different brands of CA, the stuff from LMI is really good. It will work with just about any wood, although I really don't see a need to treat bocote or bloodwood unless maybe it's for fretless fingerboard applications, if you do use it on oily woods (IE bloodwood or Cocobolo) wipe it well with acetone first, this should help keep the oils from reacting with the glue.
I plan to get a lot done to this bass soon thanks to the holiday weekend.
The pickup cavitys are routed and the final sanding has started.
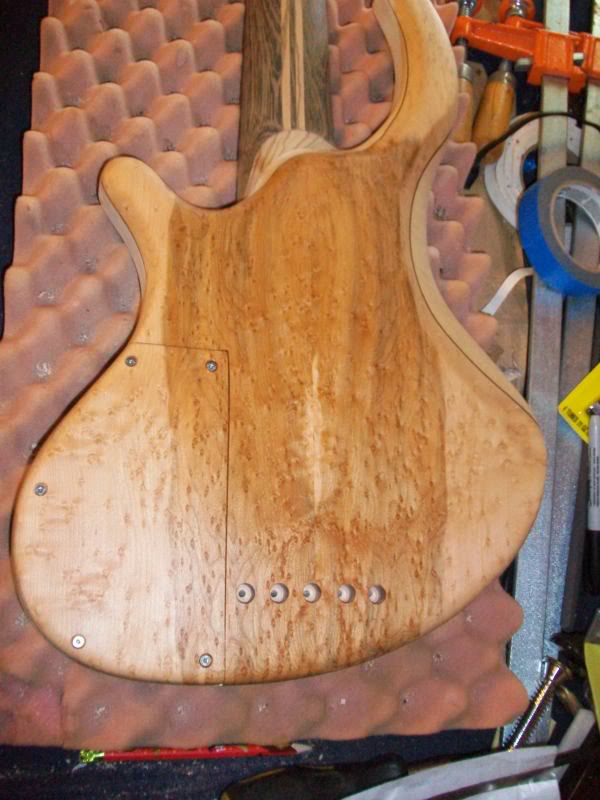
On the back of the bass the control cavity cover is fitted and the string through holes are drilled.(this bass will get black screws for the cover and black string ferrules)
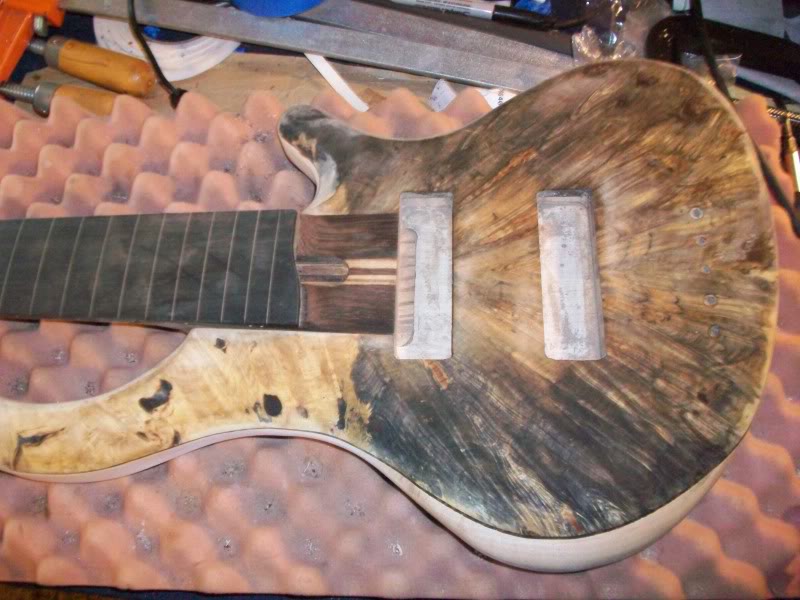
The pickup cavitys are routed and the final sanding has started.
On the back of the bass the control cavity cover is fitted and the string through holes are drilled.(this bass will get black screws for the cover and black string ferrules)

Hey Scottyd,
Any chance you could take/post some more detailed shots of the headstock front, back, and especially sides? I'm right in the middle of a similar glue-up and actually had to cut off a blank headstock after a severe brainfart.
Thank,
Paul
Any chance you could take/post some more detailed shots of the headstock front, back, and especially sides? I'm right in the middle of a similar glue-up and actually had to cut off a blank headstock after a severe brainfart.
Thank,
Paul
I also want to see that. What glue would you recommend for a brass nut seated behind the fb, like how that is?
Hey Scottyd,
Any chance you could take/post some more detailed shots of the headstock front, back, and especially sides? I'm right in the middle of a similar glue-up and actually had to cut off a blank headstock after a severe brainfart.
Thank,
Paul
Here you go Paul, what're you having problems with?
Hey Scott,
On the back of your headstock, the surface curves up to the volute. Did you bend the veneer into that curve when you glued it?
Paul
On the back of your headstock, the surface curves up to the volute. Did you bend the veneer into that curve when you glued it?
Paul
Here you go Paul, what're you having problems with?
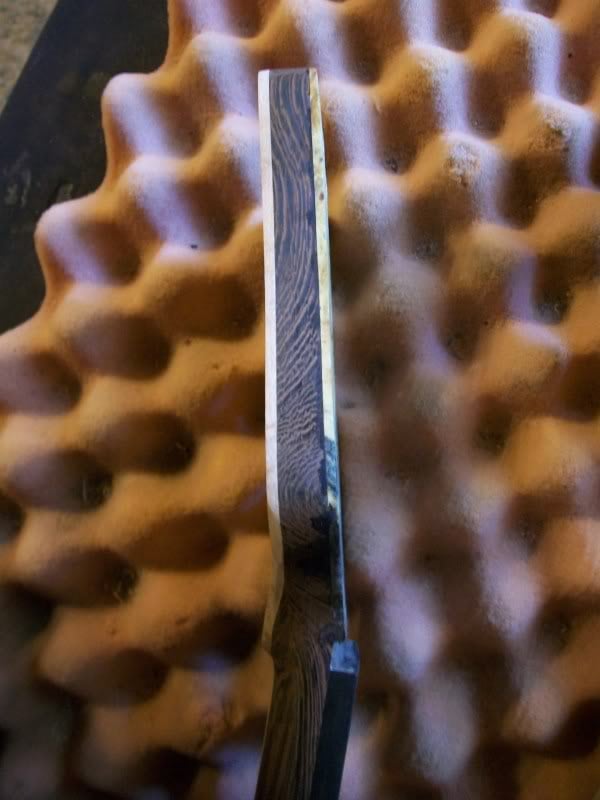
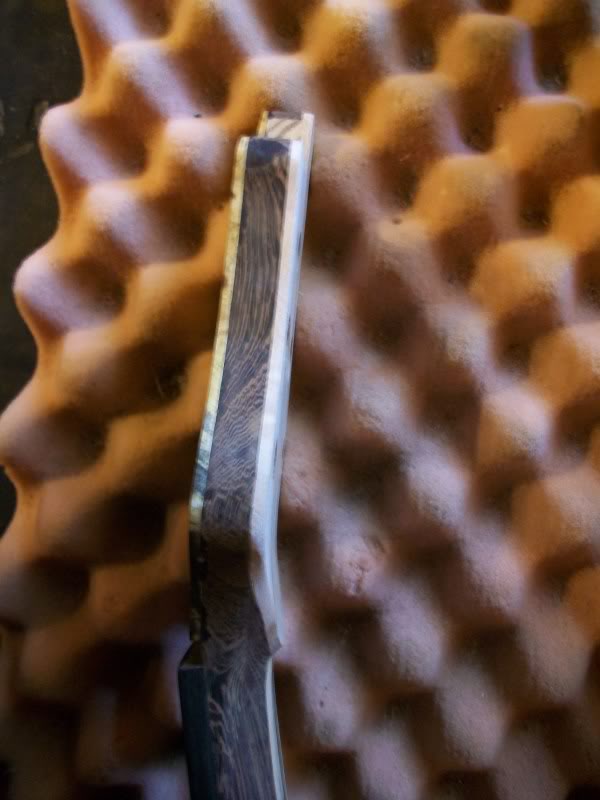
Hey Scott,
On the back of your headstock, the surface curves up to the volute. Did you bend the veneer into that curve when you glued it?
Paul
I form the curve first before clamping and gluing. I use heat to do it, the back veneers are usually 4-5mm thick and once heated bend quite easily. Once I get a rough curve worked into the wood I use a special rounded clamping caul I made to clamp the veneer into the curved area of the neck.


