• TalkBass has been independent since 1998. Add your voice.
    Create a free account to reply to discussions, view embedded media, and browse with fewer display ads.
    Join freeLog in
    Want zero display ads or expanded classifieds tools? Compare plans.

Build #2- 33" 5 String Singlecut

Hey everyone, after building my first bass I'm an addict and am starting up my second build. The specs are-

33" Scale, 24 Frets, 5 string
Walnut body w/ Claro Walnut top
Wenge neck with maple stringers
Macassar ebony Fingerboard
Ramp/pickup cover

Bartolini Dual Coils
Passive Electronics
Hipshot tuner and B bridge, 17mm spacing
All black hardware

I'm going with close pickup spacing (like a Roscoe), but want plenty of ramp area to play on, so after seeing some other basses with this I'm going to put the pickups in one large cover that will serve as a ramp as well. I'll also be able to move the pups around to find what sounds best for me.

On to the pics...

Body Shape
l_23b0dd073bcc407bb3fd73545e6bfb08.png


Top wet down, though my blackberry camera doesn't do it justice :hmm:

l_1190252bdc6e42c097cd0a3939814363.png


And the neck. Not glued up yet, but clamped to see what it will look like
l_3fe7c1ecbb704c6895c64615c2182a5c.png


Really excited to be building again, I learned a lot (most what NOT to do) from my last so I'm hoping it will turn out nice. Bare with me on the pic quality, I still don't have a digital camera of my own :confused::eek:
 
I like the body shape, I really want to see the movable pickup design.

Well that's the thing, you won't. Its nothing special really, they'll just be moved around inside the cover/ramp in the most simple but effective way possible.

Little update I guess- I rough cut the body yesterday. It looks cool, I'm really happy with the shape. It sits on my leg well and the upper "singlecut" area sits nice a comfy against my chest. I can't wait to finish this bass! The only thing I'm not wild about is the weight...its going to be heavy. My first build was a 4 string singlecut with the same woods, and its a 10 pounder. :/
 
Ok, so I thought about the pickup cover/ramp thing and have a few ideas. 1.) In the large pup route, drill several sets of mounting holes for different pup position, and keep the ramp cover in place with tightness of the route (hopefully) along with double sided tape on top of the pups 2.) Drill several mounting holes through the ramp cover.

With the second option I won't have as many options for pup movement, but the ramp cover with be more secure. I've decided to go with narrow soapbar barts instead of dual coils as it will take up less space and I like the single coil tone more. Any thoughts on this would be great!

Also, got the body routed to shape and it looks great. My goal on this build is to make every aspect better than my first and so far I've met my goals :) I'll get some pics up soon. Next on this list is to get the electronics cavity routed, plan and get a start on the ramp/cover, and glue up the neck.
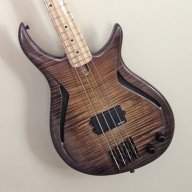
 
Ah, I am also building a ramp/pickup cover with the ability to move the pups and swap out different style pups.

I'll try to explain my design thoughts:

The cover will be a large one piece that covers bridge/neck pickup range. The cover will be two pieces, top will be a normal cover but there will be a bottom piece that encloses the whole area of the open top cover piece. The bottom will also have slots in it that hold the pickups.

pupcover.jpg


The grey area is for the pickups (this one is P/J configuration). then there are spacer blocks (green) that fill the area between the pups. I don't know how necessary the spacer blocks would be because I am thinking that there would be foam under the pups. When the bottom cover is screwed onto the top cover there will be pressure holding the pups in place. The whole cover is then installed on springs with screws for height adjustment.

Make sense?

I figure you can move the pups around until you are happy with the placement then make the spacers, or have different spacers pre-made for different pickups combos.


Nomad98
 
Nomad- Wow man, thanks! I might not like having springs under the cover as I might feel them compress when I play. Some good stuff to think about though.

Here are some pics-

l_496d5e07f0794420888383ab9bf2c4fa.png


Some nice grain that suprised me-
l_68687048cdcf469882d8420e0b48e84f.png


l_8572e063e0274532b100f4bc0af6e4f6.png


Here it's wet down. The angle is a little off, makes the body shape look weird.
l_9c2ae789ced14b3596177f8bc472a858.png
 
Ok, time for a little update.

Here's the neck, all glued up
l_076048ed9e3143e2adcc768c10857e47.png


l_0ea04a53fab44cd5be3eed1b22498c86.png


Rounded over the body, poor sketch of where the knobs and arm countour will be

l_0cf0cdfb287d45c9bcb3c06bfe72ee91.png


l_4cafc27570084f8382cee29e5a4f561f.png


Back with the control cavity routed
l_49939c4225774a27bbc5bc67a9d05052.png


And a mockup minus the ramp/pickup cover
l_eba74c9a8c834fec8a141883aa30d045.png


I'm loving every minute of this build. It's amazing how much better things are coming together than my previous:hyper:

I don't have pics, but I got the scarf joint done on the neck. That was the only aspect of this build that scared me to death. I didn't know exactly how to go about it and didn't want to mess it up, but luckily I got some help! My uncle did some painting at a hospital for about a year and made friends with a lot of people, one being the resident carpenter. So the other day I get a call saying to go to the hospital and bring the neck blank..."ok??" I thought. I show up to one heck of a wood shop and start drooling over the the gear...then I tell him what I need done and he whipped up a jig in no time. The result was a PERFECT scarf joint, whew!! Took a LOAD off my shoulders. He also ran my neck blank through a thickness/drum sander for the heck of it so now it's down to final thickness and nice and flat. The guy was totally cool and I still can't thank him enough...George, you da man! Hopefully I'll be able to make it back there for my next build:D

That's it for now, can't wait to get some more work done. Any comments/criticisms welcomed!
 
Zombbg4, I am very picky when it comes to exotic wood 'boutique'sters and even more-so single cuts; there's a lot more out there that I don't like than I do. But the curves and angles of this are pretty successful in my opinion. Really digging the project so far, and your neck woods look fantastic.

Subscribed.
 
Zombbg4, I am very picky when it comes to exotic wood 'boutique'sters and even more-so single cuts; there's a lot more out there that I don't like than I do. But the curves and angles of this are pretty successful in my opinion. Really digging the project so far, and your neck woods look fantastic.

Subscribed.

Thanks! I'm really happy with the shape. It didn't turn out quite like I had hoped, a little bulky still, but I'm not messing with it. Gotta love wenge and maple, one of my favorite combos.
 
Ah, I am also building a ramp/pickup cover with the ability to move the pups and swap out different style pups.

I'll try to explain my design thoughts:

The cover will be a large one piece that covers bridge/neck pickup range. The cover will be two pieces, top will be a normal cover but there will be a bottom piece that encloses the whole area of the open top cover piece. The bottom will also have slots in it that hold the pickups.

pupcover.jpg


The grey area is for the pickups (this one is P/J configuration). then there are spacer blocks (green) that fill the area between the pups. I don't know how necessary the spacer blocks would be because I am thinking that there would be foam under the pups. When the bottom cover is screwed onto the top cover there will be pressure holding the pups in place. The whole cover is then installed on springs with screws for height adjustment.

Make sense?

I figure you can move the pups around until you are happy with the placement then make the spacers, or have different spacers pre-made for different pickups combos.


Nomad98

This idea is fantastic!
 
Ok, time for some updates. I made a control cavity cover out of some claro walnut. I really need to find a better way to do it next time:rolleyes: I slowly sanded down the cover untill it fit, took about 45 minutes and I'm happy with the result. here it is

l_1f1e66043b824c69a399b2ecb9cccd4e.png


Now onto the pickup cover situation. I made the ramp/cover, and it turned out nice, but I had second thoughts about it. It was pretty big and I didn't want myself or anyone that may use the bass to be stuck with using the ramp. I tossed around quite a few ideas untill I found EXACTLY what I wanted in the classifieds. They're bartolini x4 single coil pickups (which I was planning on getting) in EMG 45 covers. The EMG covers allow me to move the pickups around inside of them, so it works somewhat like I planned but better IMO. I can also angle the pickups which I've been wanting to try, with the treble side towards the nut so the higher strings won't be too thin sounding when using the bridge pickup. Since the fingerboard is flat, the top of the covers will serve as a ramp and I'll be putting a piece of ebony between them, too.Here's what it looks like inside-

l_c8626ba1cc064d9883c4155826769e54.png


The pickups (when not angled) are held into place with double sided tape on the top and foam around them. When angled they stay in place well enough without it.

I finally got a truss rod, the grizzly from guitar parts central, along with some other parts so I could get to work on the neck. I shape the fingerboard first so that I can use it as a guide to route the neck to shape once it's glued on. Worked great!! It was a little scary routing the fingerboad to shape though as it wanted to tear out a lot, I got through it though without issues. Thats a first! I also glued the headstock cap and rough cut the shape. Here's what it all looks like together-

l_8c8ded683b5c4a76a3367a54c01225f0.png


The neck isn't in the proper position there. I'm leaving a good amount of space for upper fret access, but not that much :D

So that's where I'm at now. The arm and tummy contours are also done, but I'll refine them once the neck is set so I can get a better feel for it. Once again, I'm loving this build!!
 
So what, I scrap the pickup cover idea and everyone loses interest?!?!;)

Anywho, got some things done. Yesterday was very pleasant, some volute carving, headstock thicknessing and shaping, as well as the Saints winning. Here's the volute starting to take shape-

l_4c3ead1d34644f74ae1335e102f497ac.png


And complete, not bad for my first....oh, notice the crooked scarf? Thought you might...:scowl: it wasn't noticed untill I thicknessed the headstock. I guess I'll just put a bass clef sticker over it or something.

l_3c10abac1ebd48938cb8335b08542335.png


I got the neck pocket routed, and with excellent results this time. I used a method similar to that of the one in Martin Koch's book. Pickup cavities also routed, that was a little scary. The pickups have very tight corners and the 1/2 bit couldn't follow it, so I went at it freehand with a 1/4 bit. I went very, Very, VERY slow and the results were pretty good, not perfect but nice. Here it is-

l_289257d80b9d40ce9964b68a27b38957.png


Here's the neck in the body, yet to be glued in-

l_47bcbb9f4ef041ada2f85f27f1b05888.png


Mock up!

l_dea8478836184592aa3054c70b1e8703.png


l_fae305efc5a34971872e8a8a865c657e.png


I'll be making a truss/neck cover out of claro walnut which should look nice. Getting closer to the home stretch now, can't wait to string it up and give her a test before the finish is applied.