Good evening, LC.
This build thread will document the creation of a relatively simple 4-string bass guitar. Diving right in, here are the specs:
2-piece White ash body
1-piece Hard maple neck
Indian rosewood fretboard
34" scale
12" radius
Flat neck/head construction
1/2"r body roundover profile
24 frets
Abalone fret markers (1/4")
Aluminum side markers (1/16")
Dual-action truss rod (heel adjustment)
Graphite nut
Carvin tuners
Carvin bridge
Switchcraft panel style output jack
Dunlop Straplok ready strap buttons
All chrome hardware
Single MM-style humbucker
Passive 500K volume and tone pots
0.047uf tone cap
Here's the design:
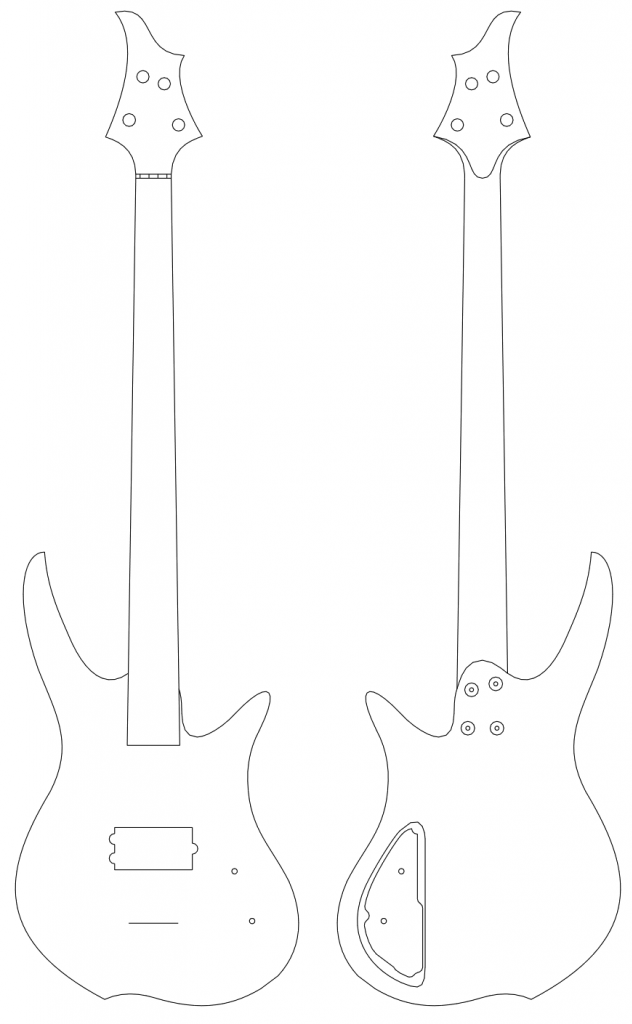
Should be pretty straight-forward, yes?
This weekend, I started on the body. I started with a piece of 7.25" wide and 41" long 8/4 ash. First I chopped it down into a 22" long piece and a 19" long piece. Then I planed them down to 1.55" thick pieces and jointed an edge of each so that they would glue nicely together.
That left me with this:

(view of rear)
I like the grain and fit, so I glued them together:

The smaller clamps on the edge are keeping the pieces from sliding apart in the center, as these things are wont to do. The deep throated (giggty) clamp in the middle is doing the same thing.
After letting the glue harden overnight, I unclamped and traced the top template onto...the top:

I had a system of templates made for this bass by a local sign company. You'll see several of them in this build thread.
After tracing the design, I rough-cut it out on the bandsaw...
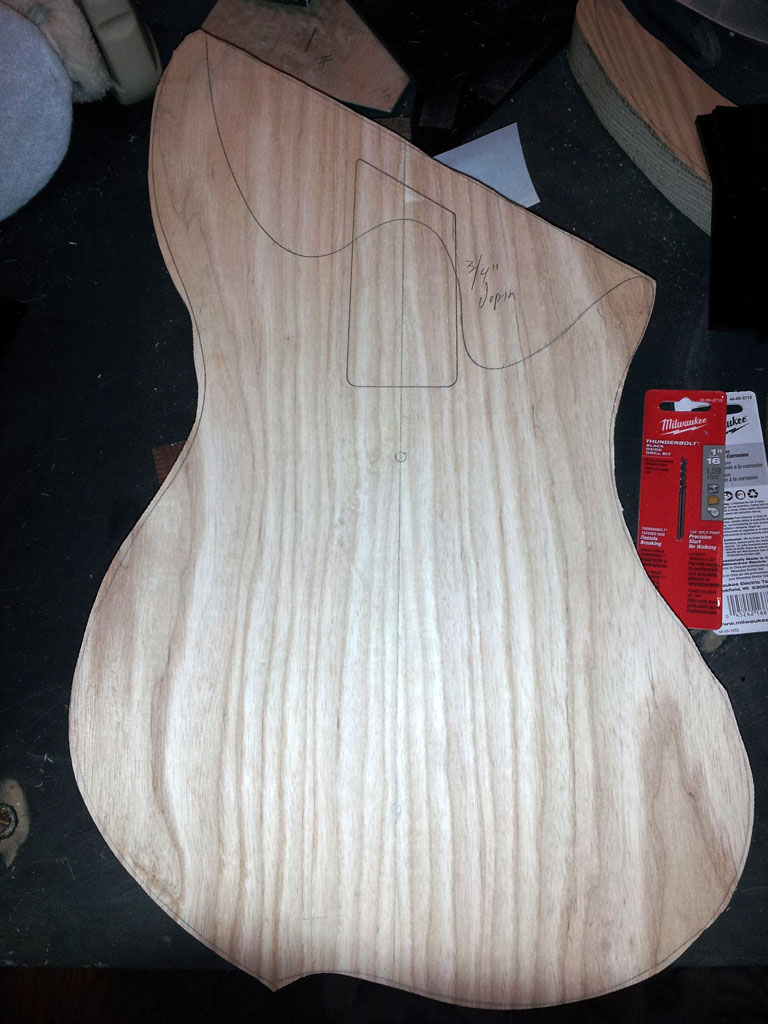
...and hogged out most of the neck pocket with a 3/4" forstner bit.

Then I firmly attached the top body template. The way I do this is by first using masking tape on the template, then attaching the double-sided tape to that:

This is really just to make clean-up easier. It can really suck getting that damn tape off these plastic templates.
After re-attaching the template, I routed the neck pocket and most of the body edge:
 The remainder will be routed with the aid of a second body template...
..which looks like this. I turned the body over and positioned and traced the rest of the body profile and the control cavity...
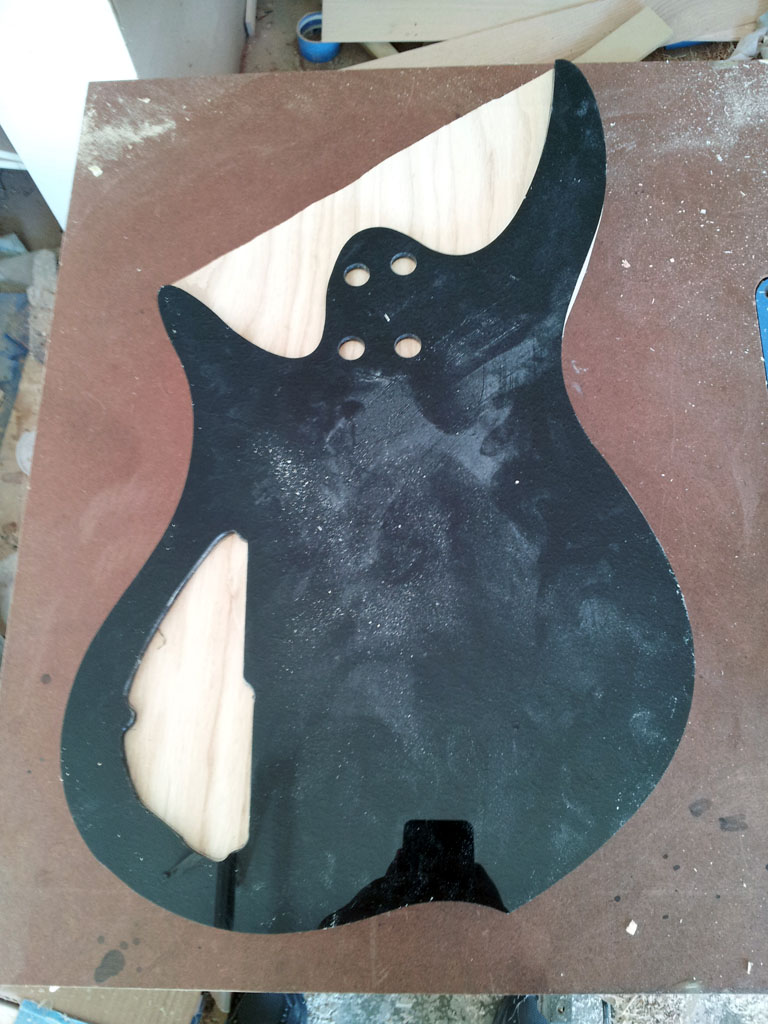
...giving me this:

Then I rough-cut the remainder of the body meat off with the bandsaw, bored out the control cavity with that 3/4" forstner, and stuck the ready body template on with the same masking tape + double-sided tape method as before:

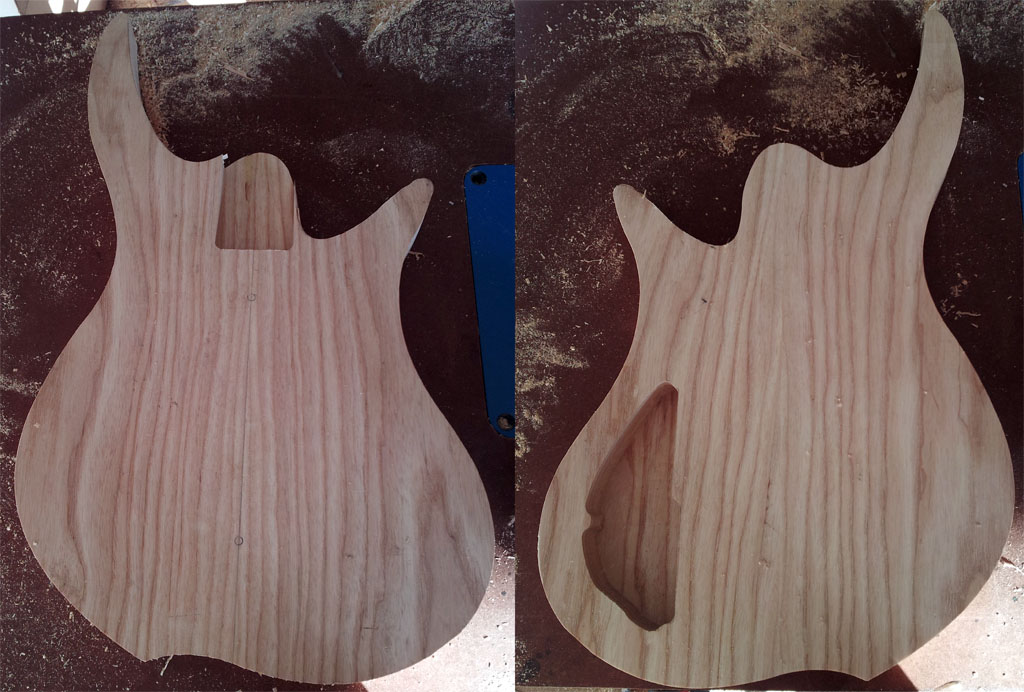
...time passes, and the chronicler forgot to take some photos. Imagine that at this point he routed the control cavity and the body horn edges, leaving him with this:
This build thread will document the creation of a relatively simple 4-string bass guitar. Diving right in, here are the specs:
2-piece White ash body
1-piece Hard maple neck
Indian rosewood fretboard
34" scale
12" radius
Flat neck/head construction
1/2"r body roundover profile
24 frets
Abalone fret markers (1/4")
Aluminum side markers (1/16")
Dual-action truss rod (heel adjustment)
Graphite nut
Carvin tuners
Carvin bridge
Switchcraft panel style output jack
Dunlop Straplok ready strap buttons
All chrome hardware
Single MM-style humbucker
Passive 500K volume and tone pots
0.047uf tone cap
Here's the design:
Should be pretty straight-forward, yes?
This weekend, I started on the body. I started with a piece of 7.25" wide and 41" long 8/4 ash. First I chopped it down into a 22" long piece and a 19" long piece. Then I planed them down to 1.55" thick pieces and jointed an edge of each so that they would glue nicely together.
That left me with this:
(view of rear)
I like the grain and fit, so I glued them together:
The smaller clamps on the edge are keeping the pieces from sliding apart in the center, as these things are wont to do. The deep throated (giggty) clamp in the middle is doing the same thing.
After letting the glue harden overnight, I unclamped and traced the top template onto...the top:
I had a system of templates made for this bass by a local sign company. You'll see several of them in this build thread.
After tracing the design, I rough-cut it out on the bandsaw...
...and hogged out most of the neck pocket with a 3/4" forstner bit.
Then I firmly attached the top body template. The way I do this is by first using masking tape on the template, then attaching the double-sided tape to that:
This is really just to make clean-up easier. It can really suck getting that damn tape off these plastic templates.
After re-attaching the template, I routed the neck pocket and most of the body edge:
..which looks like this. I turned the body over and positioned and traced the rest of the body profile and the control cavity...
...giving me this:
Then I rough-cut the remainder of the body meat off with the bandsaw, bored out the control cavity with that 3/4" forstner, and stuck the ready body template on with the same masking tape + double-sided tape method as before:
...time passes, and the chronicler forgot to take some photos. Imagine that at this point he routed the control cavity and the body horn edges, leaving him with this: