• TalkBass has been independent since 1998. Add your voice.
    Create a free account to reply to discussions, view embedded media, and browse with fewer display ads.
    Join freeLog in
    Want zero display ads or expanded classifieds tools? Compare plans.

Custom P/J for Davey Angelo

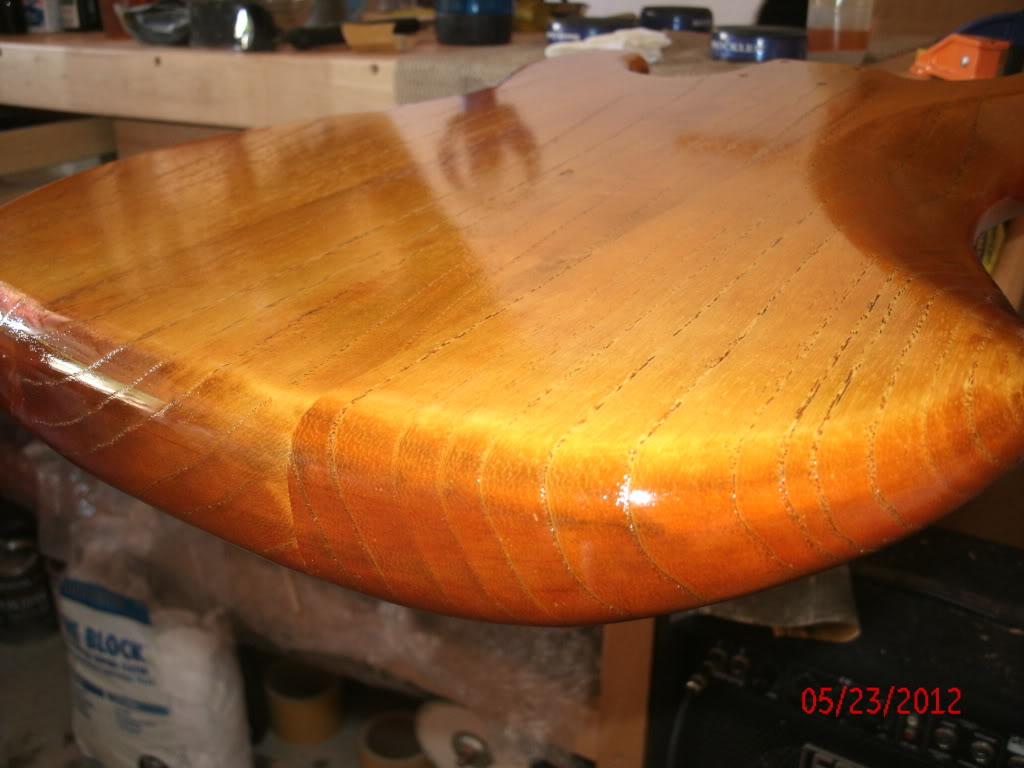
Hey there folks. O.K. so we are on day 3 of laying on the wipe on Poly. I have about 12 coats of the Minwax wipe on Poly with steel wool between coats 4 and 5 and wetsand with 600 grit between coats 8 and 9. Starting to look really nice.

GEDC0136.jpg


I'll shoot some more pics after I wet sand and add 4 more coats.

Thanks for looking.
 
O.K. so all I've been doing is adding more coats of Poly, then wet sanding between every 4 coats.

Here it is so far with 12 coats of Wipe on Poly, Wet sand with 1000 grit and one more coat of Poly for a total of 13 coats.

GEDC0169.jpg


I'll add 3 more coats and wet sand again with 2000 grit.

Here is a shot of the headstock. I am using the same method as the body.

GEDC0171.jpg


GEDC0172.jpg


More this weekend.

Thanks for watching.
 
I have been looking at this body and man, it really is nice. I would hate to cover it up with a pick guard. So after consulting with Davey, we have decided to use a control plate vs. a pick guard. (see attached file)

Also, rather than drill a hole in the body for a side jack, we are going to wire the pickups using G&L's SB-2 (Vol/Vol) wiring scheme. (See attached wiring diagram)

Parts are on order, neck and wiring will be completed this week while waiting on parts.

More posts soon.

TTFN
 

Attachments

Light build day today. I have to work to make a living too. :crying:

Anyway, started on the assembly of the body.

Started with grounding wire and bridge.

GEDC0198.jpg


I like to solder my ground wire to a peice of copper tape. I think it helps with making better contact with the bridge plate.

GEDC0199.jpg


Don't forget to use wax on the screws when installing the screws the first time. :hyper:

GEDC0200.jpg


I always check for continuity when done. It will save you a bunch of head aches later. :rollno:

GEDC0201.jpg


remainder of parts are on order. For the time being I will concentrate on the neck. I should be able to complete this bass in about a week.

TTFN
 
Hey y'all, sorry it's been so long since I've posted, but I have 5 builds going right now plus work and 2 bands I'm playing in and managing. Sheesshhh...... I need a vacation. :hyper:

Anyway, luckily Davey isn't in a hurry and being very cool about the longer wait time. I should be able to deliver this bass late this week or early next week.

Anyway here is the progress I've made since the last post.

Control plate and pots arrived, so I wired it all up.

We decided to go with V/V/Jack vs. drilling a hole in the body.

GEDC0222.jpg


GEDC0223.jpg


Nice Sadowsky style knobs to finish it off.

Next the neck has been curing nicely and I'm ready to install the nut and the tuners.

Here is the front pic of the headstock. I think it came out very nice.

GEDC0252.jpg


And here is a pic of the nut.

GEDC0250.jpg


The nut is a pre-cut model from Allparts. It's a graphtech nut. The grooves are pre-cut but will need to be detailed during the final assembly and setup.

Well, that's it for now. I'll install the tuners and begin the assembly tomorrow.

Thanks for watching.

Cheers.
 
O.K. so the day has finally arrived. I finally finished the headstock, added the tuners and installed the neck onto the body.

Here are some pics.

First I cut a template made out of cardboard to I could locate the two anchor dimples for the "F" tuners.

GEDC0267.jpg


I used cardboard so I could push the dimples into the cardboard which would make them easy to locate.

GEDC0271.jpg


I used a straight edge along one of the flat edges on the tuners to "angle" them. This is a "custom" design based on Fenders famous P/J bass, but Davey and I wanted it to be somewhat original.

GEDC0270.jpg


GEDC0272.jpg


GEDC0275.jpg


GEDC0274.jpg


The Allparts neck has a little "Lip" in the tuner holes so that the vintage style tuners line up better. It's a good design, but if you use the US "F" tuners, this lip needs to be reamed out. I didn't have a drill bit big enough (11/16) so I used a router bit instead.

GEDC0273.jpg


Once I had the tuners installed, I lined up the neck with the pickups and bridge using two pieces of string acting like bass strings and drilled the holes and installed the neck.

GEDC0276.jpg


I'll through a set of "dummy" strings on this today and let the neck settle in for a few days before I do a final setup.

My anticipation is to ship this on Friday.

Thanks for following. I'll post one more time when I'm done.

Cheers. \_/
 
Thanks Lucas. I threw on a set of test strings and man she plays great. I'll have to shim the neck ever so slightly but it will set up really nicely with minimal work. I'm also going to rout a channel for the truss rod at the heal so Davey wont have remove the neck to make adjustments. ; - )
 
Very nice. I might have gone for a stacked knob setup, but I really like the P control plate.

Thanks for commenting and looking at my build thread.

We thought about the stacked knobs, as well as V/Tone stack, but after discussing further with Davey it seemed to be overkill. He's a set it and forget it kind of guy (as am I) so tone knobs are not essential.

The wiring settup I used was from a G&L SB-2.

Thanks again for following.

More info on settup later today.
 
O.K. so here she is ready to rock. Dressed out in Rotosound SS strings.

Final weight 8 lbs.
Action is set med/low
G - 4/64
D - 5/64
A - 5.5/64
E - 6/64

Neck is set nearly flat with less than .010" in relief.
The string nut has been detaled so that Each string is set at .022" high at first fret.

In my opinion this bass captures the modern P bass sound with the J p/up rolled off completely and is very close to the modern Jazz bass tone as well with both p/ups turned up.

All in all, this bass turned out exceptional and is a bass I would keep in my tool box.

Keep an eye out for project P/J 5 in the next few weeks. :hyper:

Enjoy the bass porn:


GEDC0277.jpg


GEDC0278.jpg


GEDC0279.jpg

GEDC0280.jpg


GEDC0281.jpg


Till next time.

Peace.