• TalkBass has been independent since 1998. Add your voice.
    Create a free account to reply to discussions, view embedded media, and browse with fewer display ads.
    Join freeLog in
    Want zero display ads or expanded classifieds tools? Compare plans.

Fiftieth Cataldo Bass build-G8R 41

Dadagoboi

CATALDO BASSES
Commercial User
Jul 1, 2005
4,292
21,942
80
Florida Swamp
cataldobasses.com
Disclosures
CataldoBasses: Designer/Builder ThunderBuckerPickups:Consultant
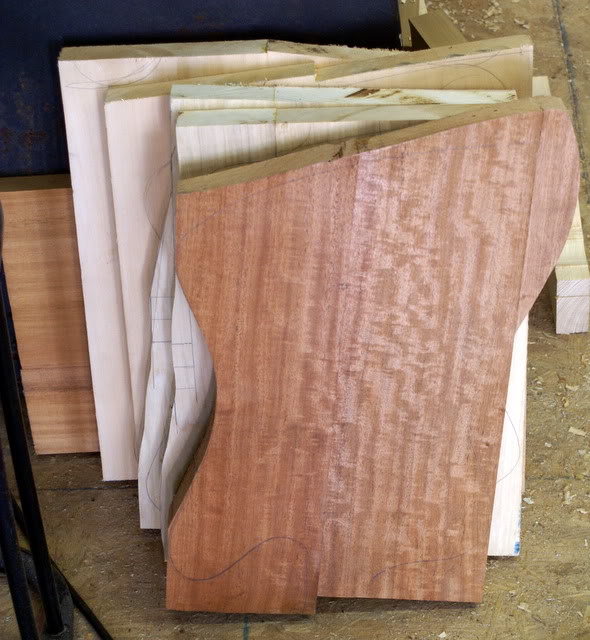
I wanted to do something special for my fiftieth Cataldo build. I lued up this 1.5 inch ribbon mahogany blank about a year and a half ago. It's been waiting for the right project since then. Mike B saw the G8R81 Eight String on my site and after some communication we decided on a trans cherry 4 string version. It will have a Jazz width maple neck with matching headstock and single ThunderBucker "S" pickup.
DSC03217_zpse7651070.jpg


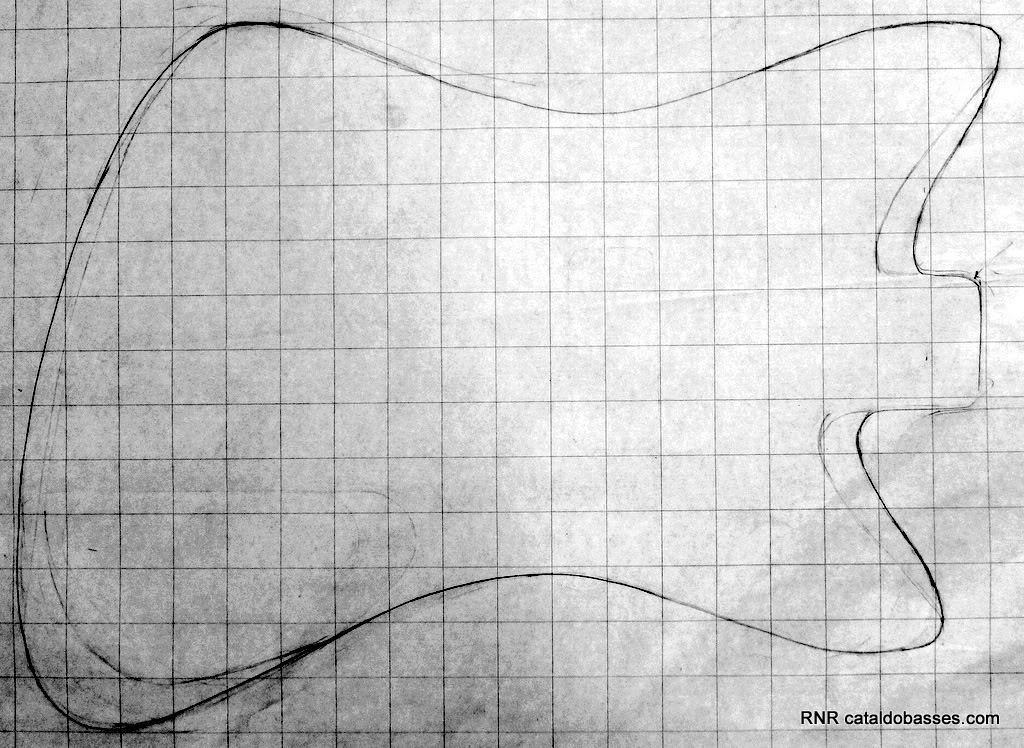
Here's the working drawing which took way longer in development than it should have. It's a combination of Reverse and Non Reverse Thunderbird elements. Grid is 1 inch (25.4mm)
P1010424_zpsbabc212c.jpg


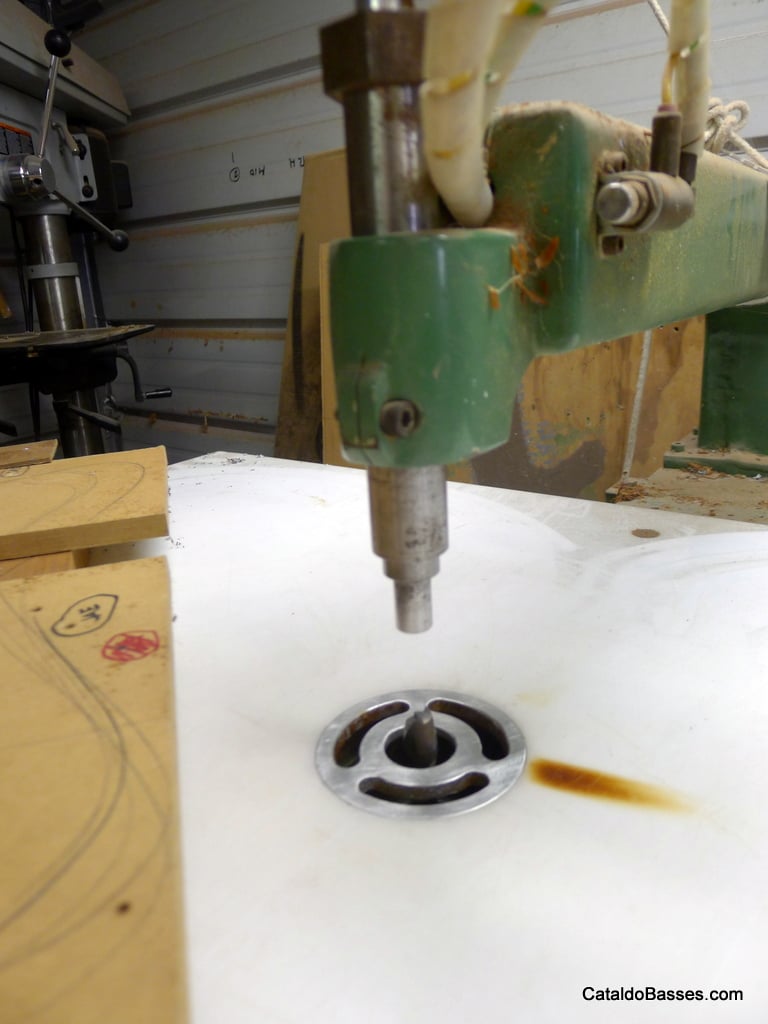
15 amp Onsrud inverted pin router. I use this with mdf or acrylic templates for almost all routing and edge shaping operations.
DSC02486_zpsf8ab5f28.jpg


The pin operates on an air piston and follows the template which is mounted to the opposite side of the body from the route location. The router bit is raised with a foot pedal. It's a fairly safe way to do cuts since the bit is usually covered by the body. I bought the Onsrud for $700 on Ebay.
P1040842_zps42bccfbe.jpg


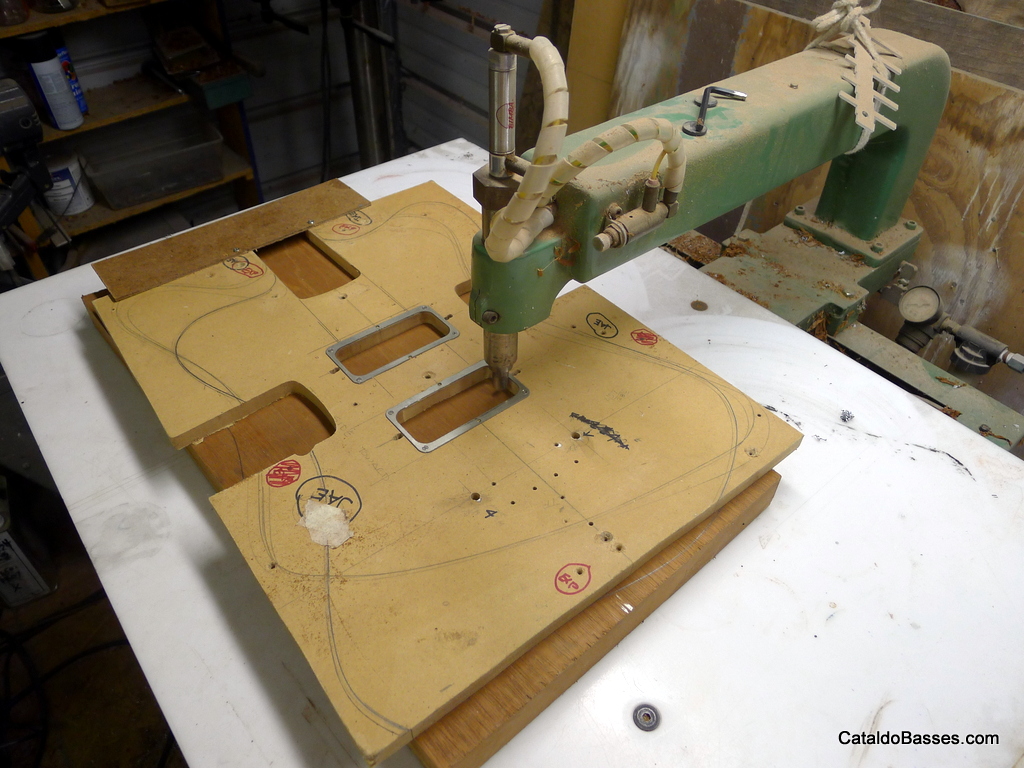
Template for neck pocket and pickup routes. I use a pickup ring for the pup templates, makes a tight pocket.
P1040841_zps4f31d1b1.jpg


Here's my depth gauge, pup route on one side, neck pocket on the other.
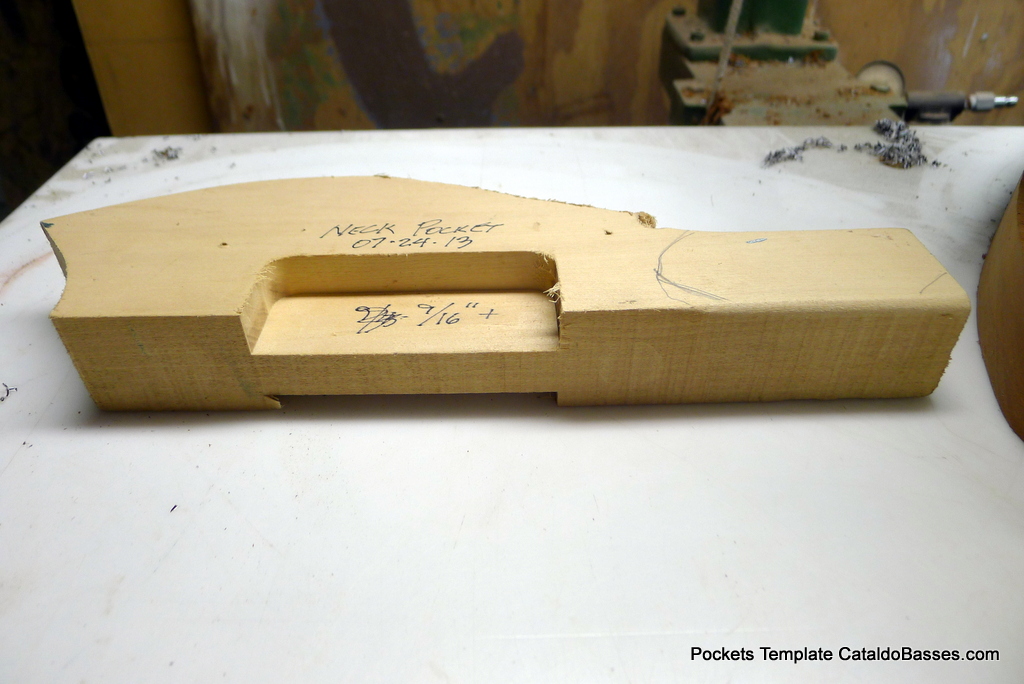
P1040851_zpsdb45383f.jpg


Neck pocket and pup routes done, water applied to show grain. ThunderBucker pickups are the same size and height as vintage 60s TBirds (.5 inch) so the route is the same as those, .25 deep. I use a .563 (9/16"+) neck pocket depth.
P1030004-001_zpsb757888f.jpg


Next is the perimeter and control cavity routes.
 
  • Like
Reactions: Freekmagnet
This looks really cool!
I love the shape of the body, like a Jaguar/Thunderbird/Danelectro Hybrid.
Are those lines on the drawing going to be contours?

Thanks, the design has been through a lot of development to get to something I think is familiar but unique. Yes, contours on the front and back of the horns. Also arm contour and belly cut. Here is the perimeter, controls and bridge locating template. It can be flipped over to vary the design.
P1040845_zps3688e769.jpg
 
Not as dangerous as it looks! Hands guiding the body are on the other side away from the cutter. Body is cut close (less than .125" or 3mm) to the template using a bandsaw with .5" wide 3TPI blade before final trimming with the pin router using one pass. This way the entire cutting length of the bit is used instead of just the tip which would be the case with multiple passes of different depths. Bit lasts longer this way and also puts less strain on the old Bosch router motor.

P1040872_zps8b429485.jpg


I use a paper template and draw an arc on the body before roughing out the belly cut with this out of production Porter Cable 15 amp 4x36 belt sander with 60 grit belt.

P1040877_zps2c3cb2f8.jpg
 
I predrill potentiometer holes before routing control cavity. This eliminates the likely tear out you get when you do it after. Only one hole necessary since I'll be using a single CTS 250/500 stack pot and a Electrosocket side jack holder.

P1040879_zps53730858.jpg


First route approx .1 inch deep is done with full cavity template.

P1040884_zpsf2f6b3c2.jpg


Then cavity is roughed out with 1 inch forstener bit.

P1040885_zpseb4fcfb8.jpg


Insert is added to template and cavity is routed leaving .25 (6.3 mm) thick top.

P1040883_zpsa5fcdd98.jpg


P1040899_zpse9a7d08b.jpg
 
The time it takes to make good templates is definitely worth it. Cutting 2 pickup routes and a neck pocket takes about 5 minutes. Perimeter route of entire body takes 5 minutes of band saw work and 3 minutes on the router.

Harbor Freight oscillating spindle sander finishes the sides.

P1040893_zps3c056e00.jpg
 
Thanks, Beej! Just want to encourage guys who think there might be a business opportunity in building basses to give it a shot.

Neck pocket drilling template. Works for both 4 bolt traditional neck plate and six bolt bushing neck. They share the holes closest to the headstock. This one will be a six bolt with contoured heel.
P1040890_zps74023ceb.jpg


I designed the Cataldo bridge/tailpiece using the original 1960's Thunderbird ones as a starting point. Improvements are individually adjustable saddle height and string spacing. The guts are a modified off the shelf bridge. Steve Soar who builds ThunderBucker pickups makes the bridge channel and tailpiece from nickel silver and machines the donor bridge. Studs and anchors are from Allparts. Final polishing not done yet.
P1040909_zps6d342279.jpg


Initial assembly. Bridge is held in place by string tension which is actually all that's needed, like traditional archtop guitars, cellos, etc.
P1040328_zps83145800.jpg
 
I use Allparts Fender licensed necks, adjustment at the heel. The counterbored holes on the backside of the headstock are too small to fit Hipshot Ultralite tuner collars. I use a Dremel mini drum sander with 60 grit belt. You have to force it thru initially but it's quicker and much cleaner than using a 11/16" drill bit. You can see what it does to the mini drum after a few headstocks. Black mark near "D" hole was left by the rubber drum. Holes are now same diameter front to back.
HdStkTrim_zpsd2d5181e.jpg


Cataldo headstock template made from file folder card stock. Tuner shafts are shorter on Ultralites than they are on Fender type tuners. I trim 1/4" off the top of the headstock so they appear longer.
HdstkTrim1_zps3054aece.jpg


Ready for band saw and spindle sander.
HdStkTrim2_zpsc5e9f3e6.jpg
 
Thanks, Guys!
Love the contours on the top horns, totally makes the bass!

It's a definite improvement from my Eighter body which I did mostly with the beltsander, it's not as well defined.
P1020606_zps8bed3387.jpg


I really like your headstock design, it looks unique for a four in line, not like a Fender variation.
Cutting .25 inch (6+mm) off the top edge helps a lot.
 
I have to admit that I wasn't that thrilled with this project when I first saw it but I'm liking it-->loving it more & more as I see what the finished product is turning out to be. The headstock reshape in particular put me over the top. One of the nicest Fender variations I've seen & perfect for this bass!
 
Thanks, Andy!

Contours smoothed and body finish sanded, 80, 120, 180, 240. White dots are 1/8" plastic dowel. I relocated the bridge. The dowels fill the original holes and will be covered by it. I use plastic dowels. When you redrill just next to another hole the drill bit doesn't wander like it does when the old hole has been filled with wood...the white also reminds me I screwed up.
P1040389_zpse2317c6c.jpg


Finishing supplies: Ultra Penetrating Stain, Industrial Sanding Sealer and Piano Lacquer, all nitro and all by Mohawk. I've used their stuff since the late 80s. Straight "Red" makes a great cherry.
P1040894_zpsca562854.jpg


I highly recommend surgical gloves if you don't want to get caught redhanded.
P1040916_zps161b7b86.jpg


Ultra is pretty forgiving, lap marks are usually not a problem if wood has been properly sanded. Missed spots are easy to fix. There's very little difference in color when you apply it to mahogany and maple.
P1040406_zpsefa4a08a.jpg


P1040408_zpsd5a003da.jpg
 
Porter Cable 330 for 180-320 finish sanding, Harbor Freight model 4001 spraygun with liner, "DrillMaster" cheapo sander for 80-120, 3M Respirator. Not shown: 220V, 5hp, 20 gallon compressor.
P1040918_zpsfa3de1af.jpg


"Spray Booth" on a clean day. I don't have an exhaust fan, that's why respirator is an imperative. My routine is to shut off A/C, shoot for the 10 minutes or so it takes, then get out of the shop for 15 minutes, then open the roll up door. Nitro dries to the touch in less than 5 minutes so dust in the finish is never a problem. Pic is NOT THIS BUILD!
P1020633_zps7a76bec9.jpg


Another stand made from a metal table base. Pin router tucked behind "booth".
P1020222_zps45990cf6.jpg


Two coats of sealer. I do not use grain filler. IMO it's not necessary for genuine mahogany or maple. Gibson didn't use it in the 60s. Partial tape job in the pup route is to limit the amount of scraping to mount the ThunderBucker, it's a tight fit and I won't be using a ring.
P1040409_zpsd84858a7.jpg


P1040413_zps07e297e9.jpg


P1040421_zps7160b804.jpg