• TalkBass has been independent since 1998. Add your voice.
    Create a free account to reply to discussions, view embedded media, and browse with fewer display ads.
    Join freeLog in
    Want zero display ads or expanded classifieds tools? Compare plans.

First build - 5 String Bolt-on

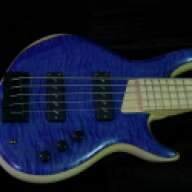
This is my first attempt at a bass build. Having never done this before, I tried to keep the cost to a minimum which meant a lot of hunting for good deals on hardware and electronics, using relatively inexpensive woods, and trying to minimize the amount of "expensive" tooling I would have to buy. I enjoy woodworking, so I already have a fair amount of woodworking tools, so at least I didn't have to buy any large machinery.

About half-way through the build I found the TalkBass forums... wish I would have found it earlier - I've learned a lot from the collective knowledge here!

I was able to get wood relatively inexpensively from a local sawmill, so I decided that I would go ahead and build two essentially identical basses, expecting that I would manage to ruin at least one body or neck along the way. I also figured that a lot of the time it takes to build these things is setting up machinery, making jigs, etc. so building two simultaneously wouldn't take much longer than just doing one.

So here are the specs:
Scale: 34"
Frets: 22
Body: Poplar with a 1/4" curly maple (bubinga accent layer)
Neck: Bolt-on curly maple with cherry stringers, Curly maple board (bubinga accent layer), asymmetrical carve
Bridge: Hipshot B (aluminum), full 19mm spacing
Tuners: Wilkinson (Ultralite clones... NOT ultra-light)
Electronics: 1) Nordstrand Big Singles/Bartolini NTMB 918, 2) Bartolini P2
Finish: KTM-9 water based

I'm already most of the way through this build, but I'll try to chronicle the process. I have a ton of pictures, most of which I won't post here but you can check them out here. Note that Photobucket likes to organize things by reverse-chronological order, so you'll probably want to start from the end and go forward.
 
This project started when a buddy brought some firewood to the office one day. His in-laws had a walnut tree fall in their yard, and just had it cut into firewood. He brought me a few pieces that I machined down to useable planks. I really wanted to use it for bass bodies, but unfortunately the local saw mills wanted too much to make it worth while to have kiln dried, so it's air drying in my basement for a future build. However, that was enough to get me motivated to follow through with the project anyway.

I started by drawing up a desing in AutoCAD. I first traced and measured a couple of basses I had to get proportions and ergonomics nailed down. The resulting design definitely isn't anything novel or unique... perhaps even "vanilla". However, it's based pretty closely on a bass I have that I enjoy playing and enjoy the feel of.

Bass_sm.gif


During the design process I decided on the type of hardware, electronics and woods I wanted to use. These were mostly based on availability but also largely on price.

I got all of the wood from a local sawmill, at very good prices. I think all total I have about $30 in wood for both basses. This of course meant I had a lot of machining to do before the wood was useful (planing, jointing, resawing, etc). I decided on poplar because it was one of the few locally available woods I could get in 8/4 thickness that would be appropriate for an instrument. It's density is somewhere between basswood and alder, and tonally it's at least similar to alder. The curly maple I got isn't very highly figured, but it was cheap... so take what you can get. I wasn't willing to risk an exhibition top on a first attempt.

IMGP6761.jpg
 
So after a bunch of machining I had a stack of usable wood:
IMGP6774.jpg


The advantage of drawing up the design in AutoCAD was that I could easily have routing templates cut. I had a local company make me templates on their CNC. It was a little pricey, but completely worth it in my opinion
user756_pic1663_1255382009.jpg


After rough cutting the bodies to shape with a jig saw (my little Ryobi bandsaw couldn't handle the ~2" thick bodies), a few passes on the router table with the templates attached and the bodies are starting to look like something
IMGP6872.jpg
 
The necks started out by laminating the woods and rough milling to the appropriate dimensions. Then the scarf joints were cut and the headstock glued in place
IMGP6882.jpg


After gluing on the neck's bubinga accent layer, the truss rod channels were cut with a router and a shop-built template
IMGP7021.jpg


I slot the fingerboards the old fashioned way - with lots of elbow grease and ibuprofen
IMGP6907.jpg


Again using the templates the neck and headstock are cut to shape at the router table
IMGP7093.jpg
 
The body edges were rounded at the router table - 1" radius on the front and 1/2" radius on the back
IMGP6885.jpg


The neck pocket, control cavity and pickup routes were cut with the router and templates after the bulk of the material was removed at the drill press
IMGP6899.jpg


IMGP6903.jpg


IMGP7132.jpg


The forearm, belly and neck heel contours were shaped using a Microplane - I highly recommend these little devices. They make pretty quick and easy work of these types of shaping operations
IMGP7133.jpg
 
The neck shaping was the part I was most concerned with on this project. I honestly didn't know what the appropriate tools were nor even exactly where to start. I bought a bunch of crappy tools at Harbor Freight that will end up in a garbage can one of these days. In the end, my little Stanley block plane did the bulk of the work, along with a mildly useful surform... and a lot of sanding. Unfortunately I found the Microplane after I did the first neck. I plan on using it for the second neck which ought to work much better for shaping.

IMGP7099.jpg


I decided to go ahead and do a decent-sized volute on the neck. There's a lot of debate on whether or not there's any structural advantage to have them. I think they look cool, so I put one on.

IMGP7096.jpg


The fretboard was radiused to 12" with a radius block and sandpaper... and more ibuprofen.
IMGP7129.jpg


I hammered the frets in along with a little super glue for good measure. I definitely don't have the proper fretting tools, but made due with what I had on hand.
IMGP7131.jpg


I drilled the tuner holes at the drill press with a spade bit. I wasn't real happy with the roundness of the holes... I'll get a Forsner bit for the next neck. You can't see the holes with the tuners installed, but I know they aren't perfect..
IMGP7143.jpg
 
I figured I better assemble everything as a dry run before putting a finish on the bass, just in case the positioning of anything needed to be adjusted.
IMGP7150.jpg


I decided to go ahead and wire the thing up to see how it sounded.

A few words first about what I was hoping to achieve sonically with this bass. Basically I wanted a more ergonomic Jazz bass... so I wanted to be able to get a decent jazz sound, and I also wanted the active electronics so I could "enhance" beyond the standard jazz sound. My main bass is my GW Basses DC-1, which is a neck through with Barts. It's a cool bass, but has a pretty distinct sound (smooth and "modern" would probably be the best way to describe it). So for this bass I wanted to get as "different" from that as I could - so single coils, bolt neck and completely different woods.

My initial impressions are that the tone is what I was after - definitely has the punchy sound of singles (although these Big Singles are also very fat). I haven't done a lot of playing with it yet, but the first impressions are very favorable. The Bartolini preamp seems to mate reasonably well. I played it briefly during rehearsal and it seemed to sit pretty well in the mix... at least on stage it seemed good. I'm not sure if it's strictly a function of the preamp, but this bass has loads more output compared to my GW (which has the Barts with an Aguilar OBP-3).

So that's the current status. I started the build back in September, so it's already several months in and I still have to do a lot of sanding and all the finish work. So far it's been a pretty rewarding project. Definitely a test of patience (which is kind of a stretch for me). I'm trying to take my time and pay more attention to detail than I normally would. So far it seems to be working well. The pickup routes are the only thing that's given me fits - I've had to enlarge the openings 3 times to finally get the pickups to fit. That's my own fault - I didn't properly size the openings in the templates in the first place.
 
Nice. I have a few large chunks of Poplar in my garage that I've been contemplating using for a body wood on a build. This was good insparation. Let us know how the sound turns out.

Obviously every chunk of wood is going to be different from the next, but here are my thoughts on this particular wood combination...

I know poplar is and has been used by luthiers for a while. Carvin used to make all of their basses and guitars from Poplar for a while (80s/90s) until they switched back to Alder. Mike Tobias uses it in a lot of his basses (although he calls it Tulipwood, which as far as I know is the same thing as poplar...).

My experience with alder is primarily in guitars, where it is normally associated with having a "snappy" tone to it - strong to pronounced upper mids and tight bass. I would say that this poplar/maple combo has a lot of those same qualities. I believe poplar is slightly softer/less dense than alder, so I was hoping that the combination of the hard maple and the softer poplar would get me in the same ballpark as solid alder, and I think it's pretty close. Might just be my particular wood, or the fact that it doesn't have a finish on it, or that it's got fresh strings, but it seems to be much more "lively" played acoustically than any of my other basses. I won't open the can of worms as to whether or not that ought to translate to a better sounding bass played with amplification ;)
 
The woodworking on this bass looks SO clean for a first build! Can't wait to see it finished!

Thanks. I attribute a lot of the cleanliness to the routing templates. Of course I didn't take pictures of the ugly stuff ;) My normal mode of operation is to jump and then check to see if I put on the parachute, but for this project I'm consciously trying hard to think in advance so I don't have too many screwups. I'd also like to say that I found a lot of really good tips here in the Luthier's Corner.
 
This is your first build? And on your own? Outstanding.

And for shaping the neck (since you did express wanting better tools) might I suggest the Shinto Saw Rasp for roughing out the neck and one of the hand made Dragon files for forming the body and headstock joins. Both are available from Japan woodworker.com I consider them the most valuable hand tools in my tool box.

Again, outstanding build. I will watch for the second one.