• TalkBass has been independent since 1998. Add your voice.
    Create a free account to reply to discussions, view embedded media, and browse with fewer display ads.
    Join freeLog in
    Want zero display ads or expanded classifieds tools? Compare plans.

First Defret.

Jun 4, 2012
315
272
34
So, after scanning over defretting threads for a few years now, I finally decided to take the plunge and defret a bass. I had a Peavey Zodiac EX, a cheap bass that comes in a kit with a little practice amp, and this was the instrument I learned to play on, but it has always been incredibly buzzy, and so after I purchased a fretless, it was hardly played.

with out further delay, Step one: Defretting. I began by using a small screwdriver to pry up the frets ( I Know, "BAD BASS PLAYER") and then switched to a small pocket knife and some nippers.i did not use Heat, But soaking the wood with a damp cloth was ABSOLUTELY NECESSARY for me. Here is the carnage that was the first frets :rollno:
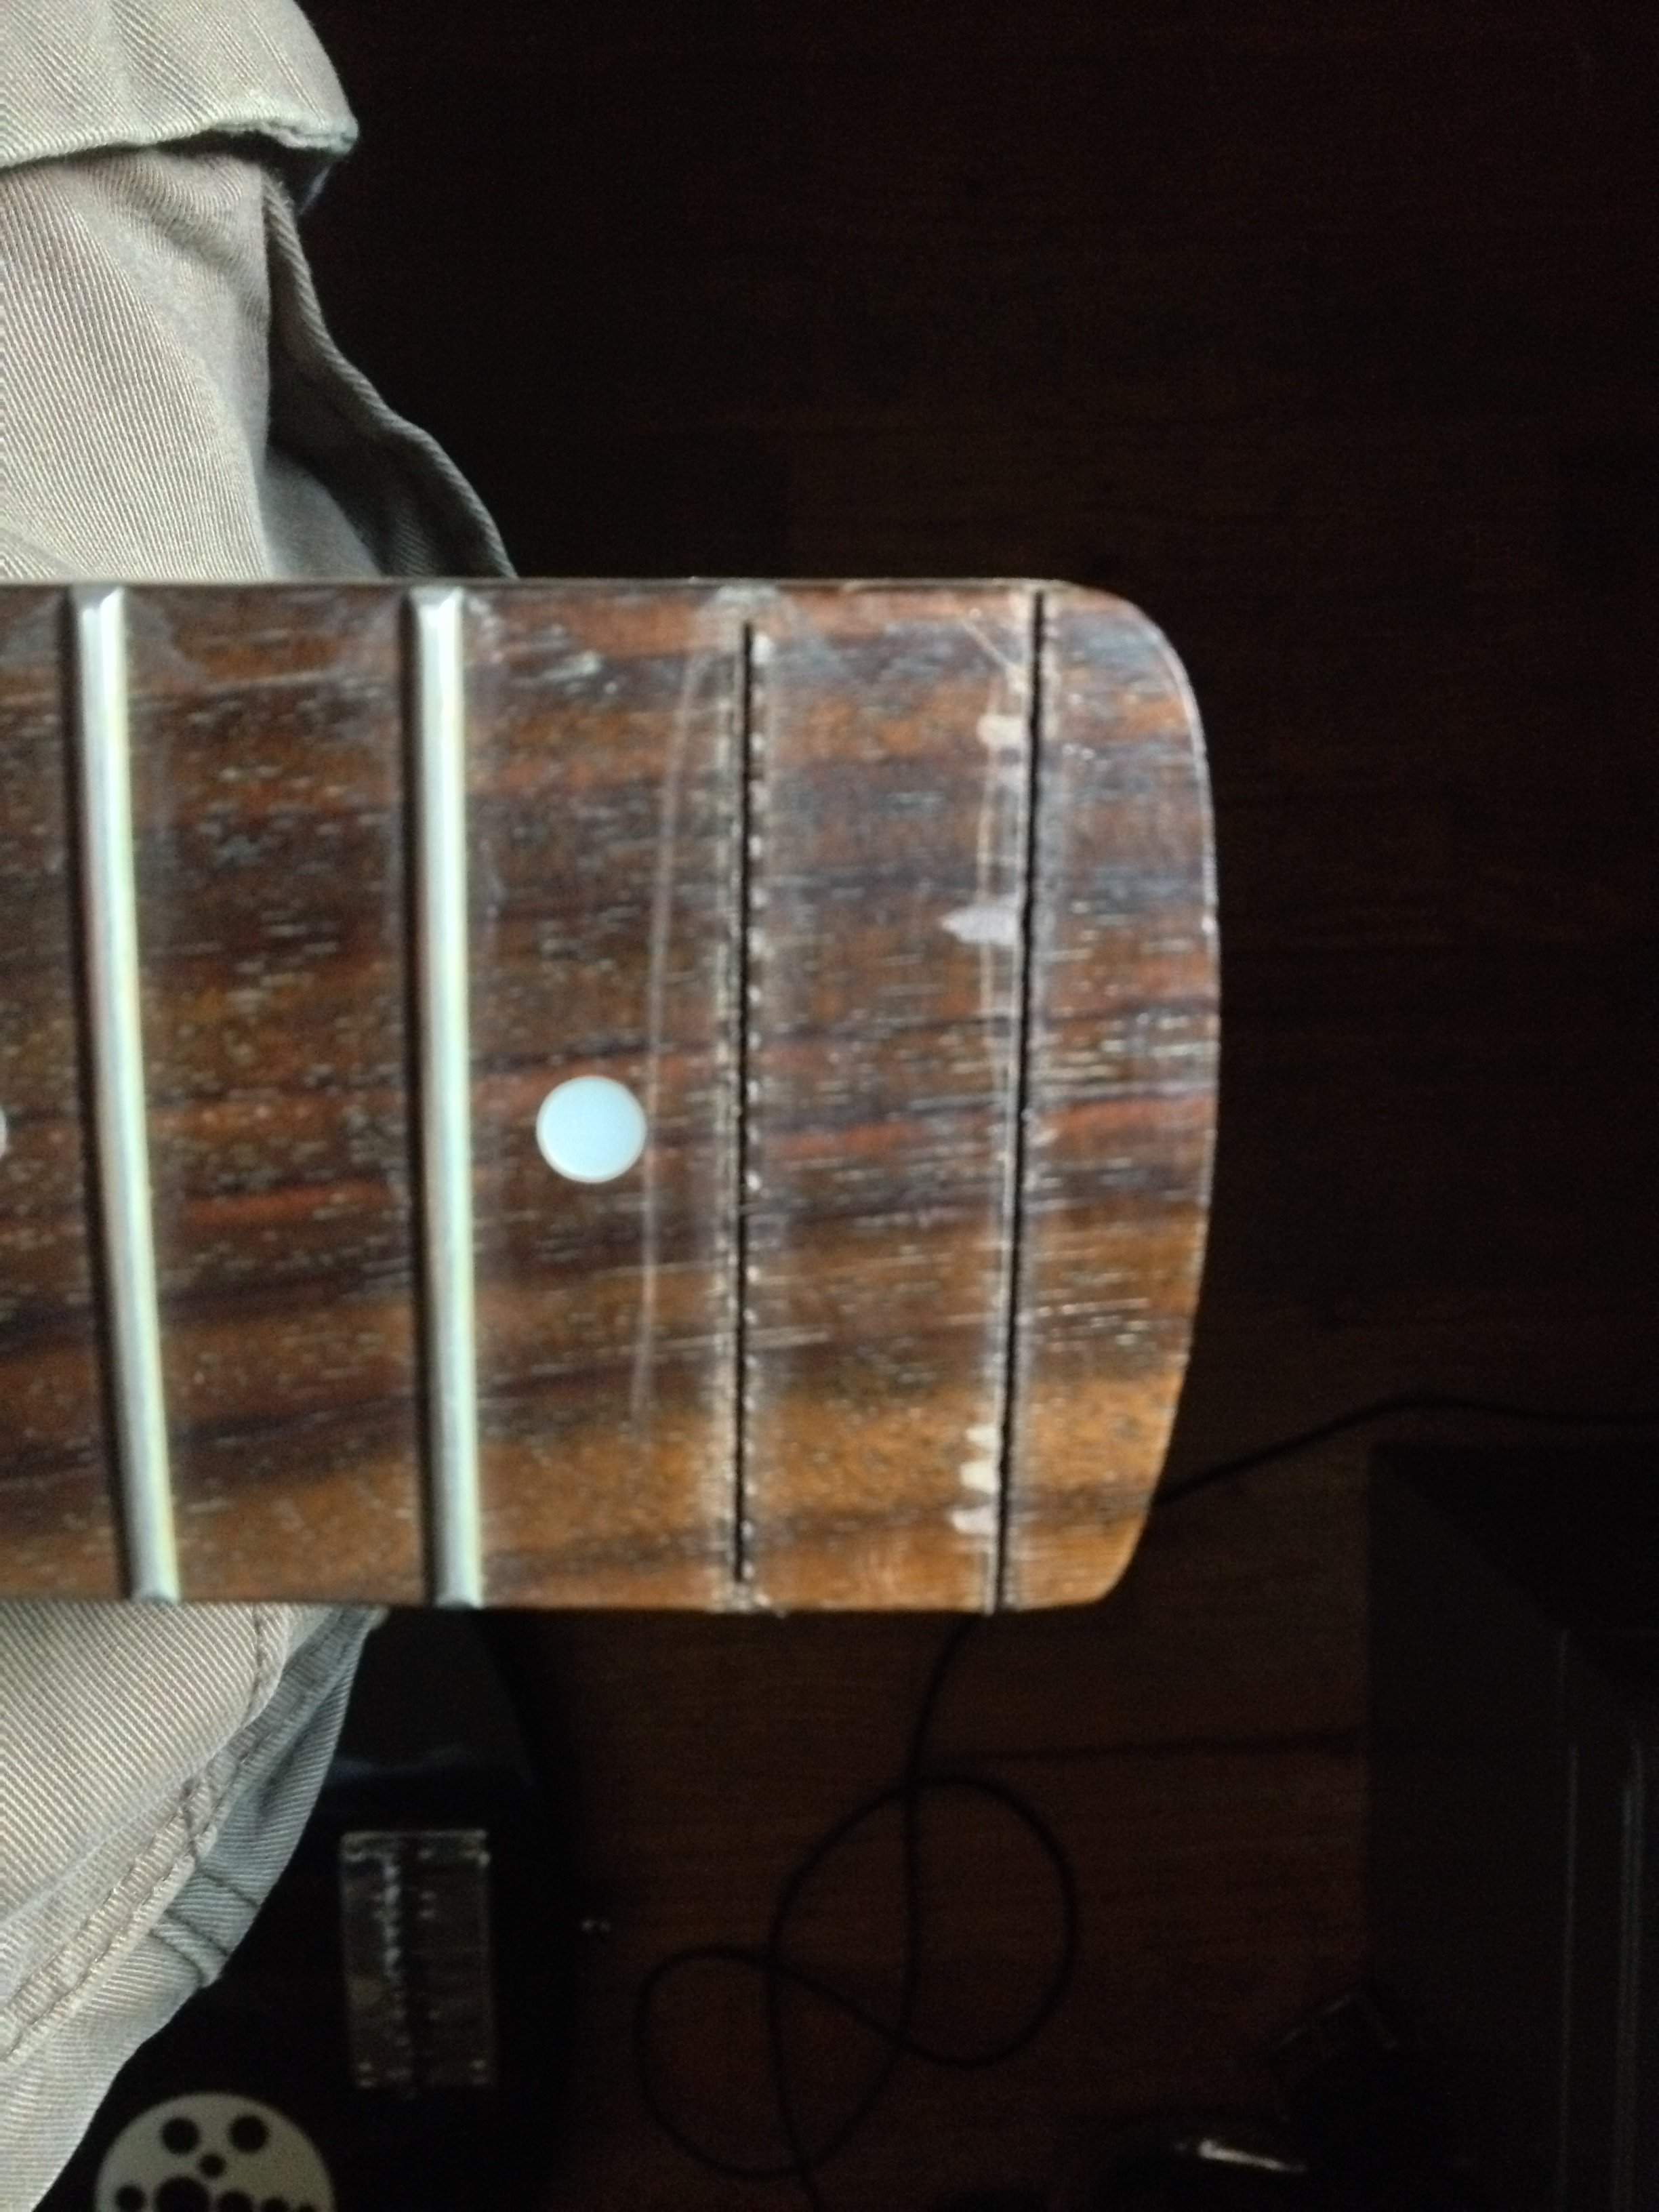
IMG_0501.JPG

the site limits which pics i can post so, here is the neck after de-fretting
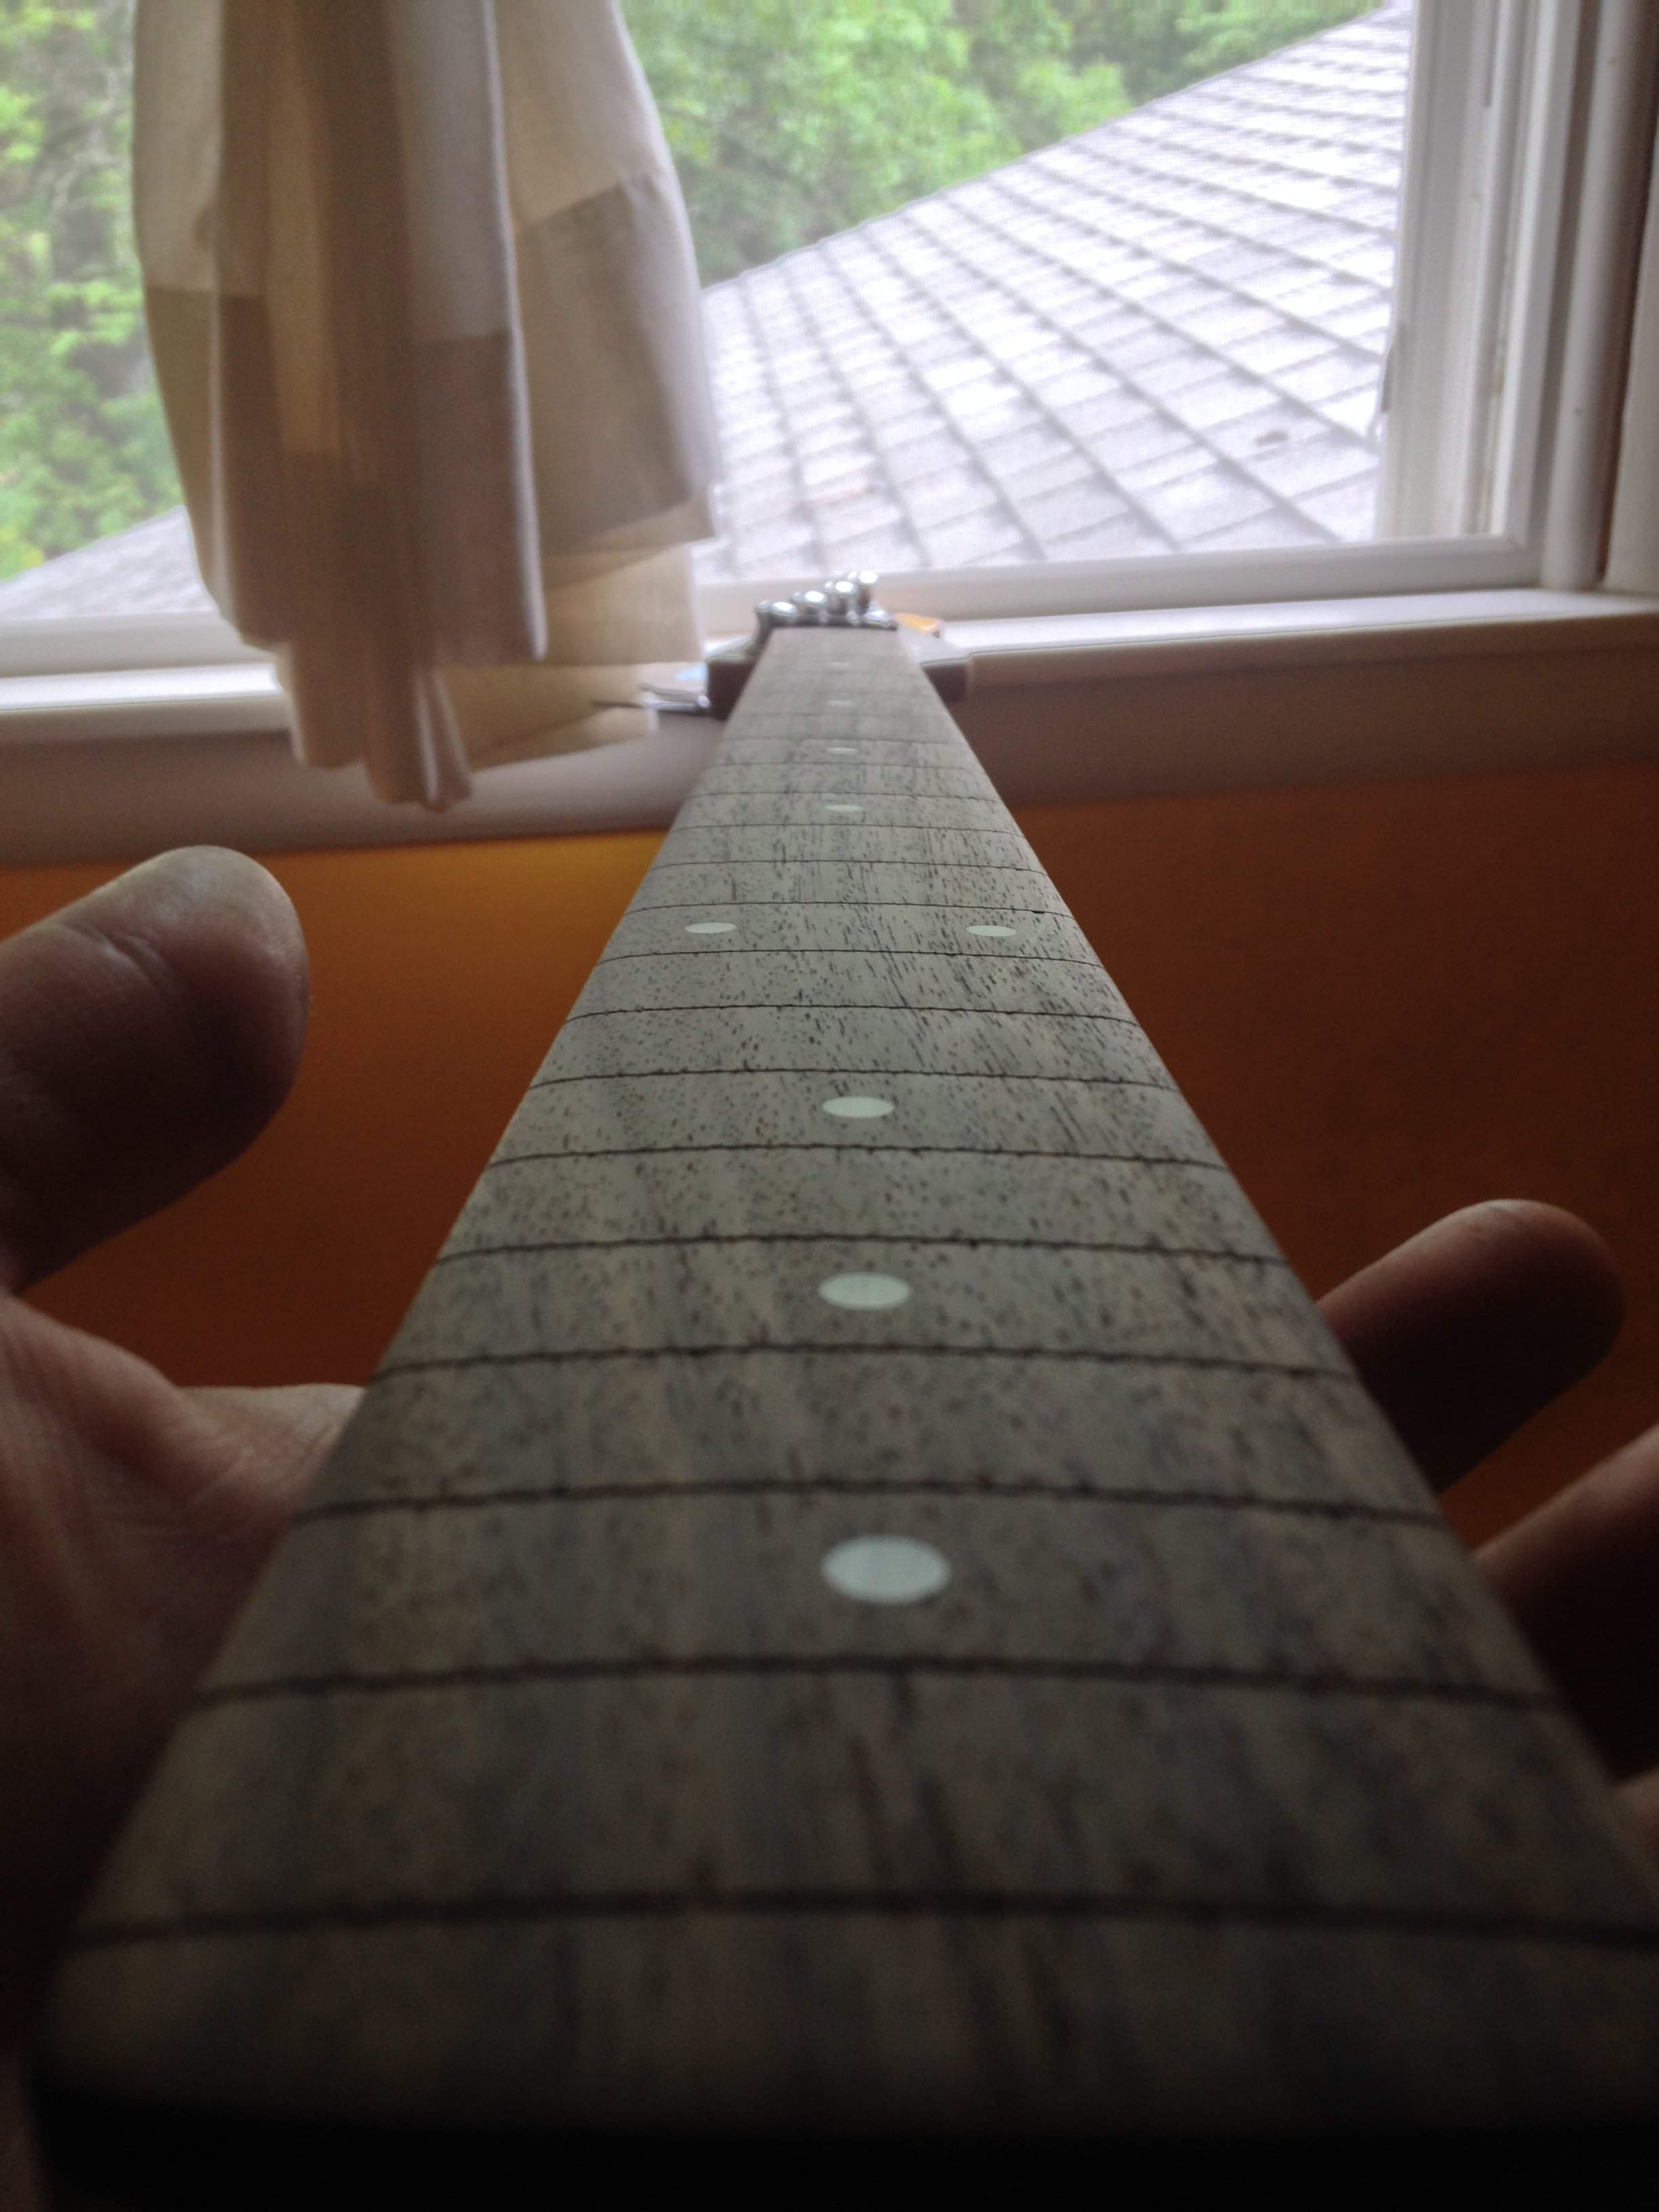
IMG_0508.JPG
IMG_0510.JPG

I am going to continue this post after i figure out how to add the rest of the photo progression.
 
Last edited:
For future reference - get a fret puller from Stew-mac or the likes. Also back the truss off and take the bow out of the neck so that there is less compression on the fret wire from the fingerboard. In some cases I would crank it back a little bit in the other direction to open the gaps a little more that were under the most compression due to the relief.

Soaking the wood also seems counterproductive as it would expand against the fretwire thereby making the removal more difficult.
 
  • Like
Reactions: fretless19
step 2:Taping and adding veneer. Menards (our local hardware store) has no selection, and so i was left to using birch craft veneer, 1/64th thick. i used regular Elmers glue because 1: it's cheap, and 2: it does bond wood. I shaved a small curve into the bottom of each insert to cradle it in the slot better. left to dry 24 hours for firmness. glue in slot and on sides of veneer. The painters tape pulled off oils from the board also.
Invalid Link RemovedInvalid Link Removed
This is the veneer after drying and having excess tape removed:
Invalid Link Removed
Step 3, Sanding! I began with 80 grit and worked up to 150 until the neck felt immaculate. I then wetsanded with 800 and then 1000 grit, using furniture polish as my wedsanding medium. This glossyness below is the result:Invalid Link Removed
I was frightened of the ripple marks when I saw them, and sure enough, once strung up the bass has a sharp buzz on every wave, and so when I get home from work this evening I will be going back to the sanding block. The finish is very strong and clickety-clacky. I have some minwax poly to apply to the board if I so choose, haven't decided yet.Link Removed Link Removed
I have never done any work of this sort before, and I must say, i am very pleased with the results, atleast so far as the inlay integration goes. the only rough spots are at the nasty frets I removed first and hastily. Thank you TB for giving me the gumption to go through with this. I do not regret the conversion at all.
 
  • Like
Reactions: maestrovert
For future reference - get a fret puller from Stew-mac or the likes. Also back the truss off and take the bow out of the neck so that there is less compression on the fret wire from the fingerboard. In some cases I would crank it back a little bit in the other direction to open the gaps a little more that were under the most compression due to the relief.

Soaking the wood also seems counterproductive as it would expand against the fretwire thereby making the removal more difficult.

I felt the same way when reading through Defretting posts, but after the 21st through 13 frets dry, then continuing damp, the difference was very noticeable. I think the moisture may have made the wood a little more flexible?

And +1 for the fret puller! it seems like a specialized, flat ground nipper such as the one i used, and i'm sure it would have made a difference. Also a radius block! But I lack one of those simply because I have no idea how to find a radius.
 
Get a radius block like from stew mac or wd music, or wherever, it makes a big difference in playability. Needs to have a radius and be flat very consistent to play right. I tried to make my own from some styrofoam, didn't work, then I order a real one and it made things much, much easier. Older style Fender basses 7.25 radius new ones 9.5 radius, Sadowsky's are 12 I believe. Peavey Zodiac looks like an 8! http://www.sweetwater.com/store/detail/Zodiac4BXPBK
 
  • Like
Reactions: JIO and fretless19
*Update* I found a large novelty eraser, 1"X 2"x 3" and used it as a radius block. Took off the polish finish, and just sanded up to 1000. This thing sounds soo nice. Next i'm gonna fix the broken volume pot :thumbsup: